How Much Caffeine in Lipton Tea: Uncover the Energizing Truth

Lipton Tea is a popular choice for tea lovers. Many wonder about its caffeine content.

So, how much caffeine is in Lipton Tea? Understanding the caffeine content of your favorite tea is important. Whether you are looking to reduce your caffeine intake or simply curious, knowing how much caffeine is in Lipton Tea can help you make informed choices.

Caffeine levels in tea can vary based on several factors. These include the type of tea, brewing time, and serving size. Lipton offers various tea options, each with different caffeine amounts. In this blog post, we will explore the caffeine content in different Lipton Tea products. By the end, you will have a clear understanding of how much caffeine you are consuming with each cup.

How Much Caffeine in Lipton Tea: Uncover the Energizing Truth

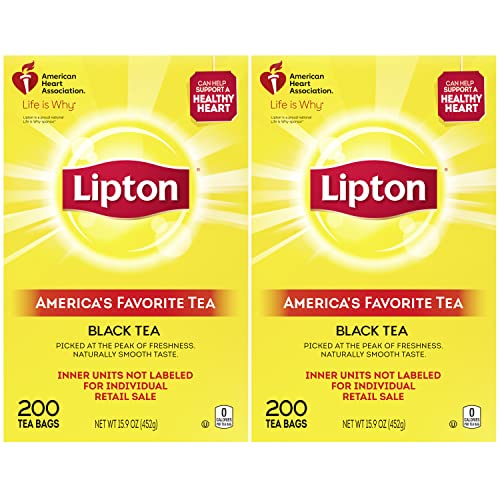
Credit: www.lipton.com

Introduction To Caffeine In Lipton Tea

How Much Caffeine in Lipton Tea

Lipton Tea is a popular choice for tea lovers around the world. But how much caffeine does it contain? Understanding the caffeine content in your tea can help you manage your intake and enjoy your cup of tea responsibly. This section will explore the caffeine content in Lipton Tea, and why it matters.

What Is Caffeine?

Caffeine is a natural stimulant found in various plants. It is commonly found in tea, coffee, and chocolate. Caffeine works by stimulating the central nervous system. This helps to reduce fatigue and increase alertness.

In tea, caffeine content varies by type and brand. Lipton Tea, for instance, has different levels of caffeine depending on the specific product.

Why Caffeine Matters

Understanding caffeine content is important for several reasons. First, caffeine affects sleep patterns. Consuming too much can lead to insomnia or restlessness.

Second, caffeine intake can impact overall health. Moderate consumption can be part of a healthy diet. But excessive intake can cause anxiety, increased heart rate, and digestive issues.

Lastly, knowing the caffeine content helps in making informed choices. Whether you are looking to boost your energy or avoid too much caffeine, this information can guide you.

Types Of Lipton Tea

Lipton Tea offers a wide range of teas, each with its unique flavor and caffeine content. Understanding the types of Lipton Tea can help you choose the right one for your needs. Let’s explore the different types of Lipton Tea: Black Tea, Green Tea, and Herbal Tea.

Black Tea

Black Tea is one of the most popular types of Lipton Tea. It has a bold flavor and higher caffeine content. A typical cup of Lipton Black Tea contains about 55 milligrams of caffeine. This makes it a great option for a morning energy boost.

Green Tea

Green Tea is another favorite from Lipton. It has a lighter taste and lower caffeine content than black tea. A cup of Lipton Green Tea contains approximately 35 milligrams of caffeine. It’s perfect for a gentle pick-me-up during the day.

Herbal Tea

Herbal Tea from Lipton is caffeine-free. It offers a variety of flavors, using natural herbs and fruits. It’s an excellent choice for those who want to avoid caffeine. You can enjoy it any time of the day without worrying about staying awake.

Caffeine Content In Black Lipton Tea

Black Lipton Tea is a popular drink. Many people enjoy its rich flavor. But, some worry about its caffeine content. Knowing how much caffeine is in your tea can help you plan your intake.

Average Caffeine Levels

Black Lipton Tea contains moderate caffeine. A typical 8-ounce cup has about 55 milligrams. This amount can vary. Factors like brewing time and tea type affect caffeine levels.

Comparison With Coffee

Coffee usually has more caffeine than tea. An 8-ounce cup of coffee has about 95 milligrams. So, Black Lipton Tea has roughly half the caffeine of coffee. This makes it a good choice for those who want less caffeine.

How Much Caffeine in Lipton Tea: Uncover the Energizing Truth

Credit: www.caffeineinformer.com

Caffeine Content In Green Lipton Tea

Green Lipton Tea contains about 20-45 mg of caffeine per 8-ounce cup. The exact amount can vary depending on the brewing time. This makes it a lighter caffeine option compared to coffee.

Green Lipton Tea is a popular choice for many tea drinkers. Its mild flavor and potential health benefits make it a favorite. But how much caffeine does it contain? Understanding the caffeine content can help you manage your intake.

Average Caffeine Levels

Green Lipton Tea contains a moderate amount of caffeine. Typically, an 8-ounce cup has about 20-45 milligrams. This amount can vary based on brewing time and method. It’s less than coffee, which contains around 95 milligrams per cup.

Health Benefits

Green Lipton Tea offers several health benefits. It is rich in antioxidants, which help combat free radicals. Antioxidants may lower the risk of chronic diseases. Drinking green tea can also improve brain function. It contains an amino acid called L-theanine. This helps improve mood and focus. Green tea may aid in weight loss too. It can boost metabolism and increase fat burning. Some studies suggest it may lower the risk of heart disease. Regular consumption can improve cholesterol levels. In summary, Green Lipton Tea is a tasty and healthy choice. It provides a moderate caffeine boost and several health benefits. “`

Decaffeinated Lipton Tea Options

Choosing decaffeinated Lipton tea options is a great way to enjoy tea without the caffeine. Decaf teas offer the same flavors and benefits as regular teas but with much less caffeine. Lipton provides a variety of decaffeinated teas for those sensitive to caffeine or who want to avoid it altogether.

What Is Decaffeinated Tea?

Decaffeinated tea is tea that has had most of its caffeine removed. The process keeps the tea’s flavor and health benefits intact. This makes it suitable for those who want to limit their caffeine intake.

Caffeine Content In Decaf

Decaf teas still contain a small amount of caffeine. In general, a cup of decaf tea has about 2-5 milligrams of caffeine. This is much lower than the 20-70 milligrams found in regular tea. Lipton decaf teas follow this standard, making them a great choice for a low-caffeine diet.

Factors Influencing Caffeine Levels

Understanding the factors influencing caffeine levels in Lipton Tea can help you control your caffeine intake. Different elements impact the caffeine content in your cup. Let’s explore the main factors that affect how much caffeine you get from Lipton Tea.

Brewing Time

The brewing time plays a significant role in determining the caffeine levels. Longer brewing times usually mean higher caffeine content. When you steep your tea for a longer period, more caffeine is released into the water.

Here’s a quick guide:

  • 1-2 minutes: Low caffeine
  • 3-5 minutes: Moderate caffeine
  • 6+ minutes: High caffeine

If you prefer a lighter caffeine dose, shorten the brewing time. For a stronger kick, let the tea steep longer.

Tea Leaf Quality

The quality of tea leaves also affects caffeine levels. Higher quality tea leaves generally contain more caffeine. Lipton uses a mix of tea leaf grades, impacting the overall caffeine content.

Tea Leaf Grade Caffeine Level
Whole leaves High
Broken leaves Moderate
Fannings and dust Low

Choosing higher quality leaves can give you more caffeine. If you want less caffeine, opt for teas with broken leaves or fannings.

Health Impacts Of Caffeine

Health Impacts of Caffeine

Understanding the health impacts of caffeine is crucial, especially for tea drinkers. Lipton Tea, a popular choice, contains caffeine. This ingredient can affect your body in various ways. Let’s explore the positive effects and potential risks associated with caffeine in Lipton Tea.

Positive Effects

Many people consume caffeine for its positive effects. These benefits include increased alertness and improved focus.

  • Increased Alertness: Caffeine stimulates the brain, making you feel more awake.
  • Improved Focus: It can help you concentrate better on tasks.
  • Physical Performance: Caffeine can enhance endurance during exercise.

These benefits make caffeine a popular choice for morning routines and busy workdays.

Potential Risks

While caffeine has benefits, there are potential risks as well. These include negative effects on sleep and increased heart rate.

  • Sleep Disruption: Consuming caffeine late in the day can lead to difficulty sleeping.
  • Increased Heart Rate: High doses of caffeine can cause your heart to beat faster.
  • Anxiety: Caffeine can increase feelings of anxiety in some people.

Moderation is key. Too much caffeine can lead to these unwanted side effects.

Choosing The Right Lipton Tea For You

Choosing the right Lipton tea depends on several factors. These include personal preferences and caffeine sensitivity. Each type of Lipton tea has a different caffeine content. Understanding these can help you make an informed choice.

Personal Preferences

Your taste preferences play a big role in choosing the right tea. Lipton offers a variety of flavors. Here are some popular options:

  • Black Tea: Rich and robust in flavor.
  • Green Tea: Fresh and slightly grassy taste.
  • Herbal Tea: Caffeine-free and fruity or floral in taste.
  • Chai Tea: Spicy and aromatic.

Consider what flavors you enjoy. Do you like strong, bold flavors? Or do you prefer something light and refreshing? Your choice of tea should match your personal taste.

Caffeine Sensitivity

Caffeine sensitivity varies from person to person. Some people can handle more caffeine than others. Lipton teas have varying levels of caffeine. Here is a simple table to help you choose:

Type of Tea Caffeine Content (per cup)
Black Tea 40-70 mg
Green Tea 20-45 mg
Herbal Tea 0 mg
Chai Tea 40-50 mg

If you are sensitive to caffeine, consider herbal tea. It has no caffeine. For moderate caffeine intake, green tea is a good option. Black tea and chai tea are suitable if you prefer more caffeine.

Understanding your caffeine sensitivity is important. It helps you choose a tea that fits your needs. Pay attention to how your body reacts to different types of tea. This will guide you in making the best choice.

How Much Caffeine in Lipton Tea: Uncover the Energizing Truth

Credit: www.shoppingbag.pk

Frequently Asked Questions

How Much Caffeine Is In Lipton Tea?

Lipton tea contains about 55 mg of caffeine per 8 oz cup. This can vary slightly based on the brewing time and tea type.

Is Lipton Tea High In Caffeine?

Lipton tea has moderate caffeine levels. It contains less caffeine than coffee but more than most herbal teas.

How Does Lipton Tea Compare To Coffee?

An 8 oz cup of coffee contains about 95 mg of caffeine. Lipton tea has around 55 mg, making it a lighter option.

Does Lipton Green Tea Have Caffeine?

Yes, Lipton green tea has caffeine. It contains about 35 mg per 8 oz cup, which is less than black tea.

Conclusion

Understanding the caffeine content in Lipton Tea helps you make informed choices. Lipton Tea offers a moderate caffeine boost without overwhelming your system. This makes it a great option for daily consumption. Enjoying a cup can fit well into your routine.

Be mindful of your intake if you are caffeine-sensitive. Always consider your personal tolerance levels. So, next time you brew Lipton Tea, you’ll know what to expect. Stay refreshed and enjoy your tea moments responsibly.

Is Nutrament Good for You? Discover the Health Benefits

Yes, Nutrament can be good for you. It provides essential nutrients in a convenient form.

However, it’s important to consider your dietary needs and lifestyle. Nutrament is a popular nutritional drink often marketed as a quick and easy way to get a balanced meal. It’s packed with vitamins, minerals, and protein, making it a handy option for busy people.

But is it the right choice for everyone? While Nutrament can be beneficial, it’s crucial to understand what it offers and how it fits into your diet. This blog post will explore the benefits and potential drawbacks of Nutrament, helping you decide if it’s a good addition to your daily routine. Let’s dive in to see if Nutrament meets your nutritional needs.

Is Nutrament Good for You? Discover the Health Benefits

Credit: africandelightstore.com

Introduction To Nutrament

Are you curious about Nutrament and whether it is good for you? This blog post will dive into the basics of Nutrament, its history, and its origin. By understanding these elements, you can make an informed decision about incorporating Nutrament into your diet.

What Is Nutrament?

Nutrament is a nutritional drink. It is designed to provide essential vitamins and minerals. This drink aims to support overall health. It comes in various flavors, catering to different taste preferences. Each serving packs a punch of nutrients. These include vitamins A, C, and D, along with protein and calcium.

History And Origin

Nutrament has been around for several decades. It was initially developed in the 1960s. The goal was to create a convenient, nutritious beverage. It gained popularity among athletes and busy individuals. Over the years, Nutrament has evolved. Its formula has been updated to meet modern nutritional standards. Today, it remains a popular choice for those seeking a quick and healthy drink option.

Is Nutrament Good for You? Discover the Health Benefits

Credit: www.foodtown.com

Nutritional Profile

Understanding the nutritional profile of Nutrament can help you decide if it’s a good choice for your diet. Nutrament is a popular drink marketed as a complete nutritional supplement. It contains a variety of ingredients that provide both macronutrients and micronutrients. Below, we dive into its key ingredients and the essential vitamins and minerals it offers.

Key Ingredients

Nutrament includes a mix of ingredients designed to provide a balanced nutritional intake. Here are some of the main components:

  • Milk Protein Concentrate: This ingredient is a source of high-quality protein.
  • Partially Hydrogenated Soybean Oil: This provides essential fatty acids.
  • Corn Syrup Solids: These offer a quick source of carbohydrates for energy.
  • Vitamins and Minerals: Nutrament is fortified with a range of essential vitamins and minerals.

The combination of these ingredients aims to provide a well-rounded nutritional boost.

Vitamins And Minerals

Nutrament is rich in a variety of vitamins and minerals that are essential for good health. Here are some of the key micronutrients found in Nutrament:

Vitamin/Mineral Benefits
Vitamin A Supports vision and immune function.
Vitamin D Helps with calcium absorption for bone health.
Vitamin C Boosts immune system and skin health.
Iron Essential for blood production and energy.
Calcium Vital for strong bones and teeth.
Potassium Regulates fluid balance and muscle contractions.

This drink includes a comprehensive range of vitamins and minerals that support various bodily functions. This makes Nutrament a convenient choice for those needing a quick nutritional supplement.

Health Benefits

Nutrament is a popular nutritional drink known for its numerous health benefits. Packed with essential vitamins and minerals, it supports overall well-being. Let’s delve into the specific health benefits Nutrament offers.

Energy Boost

One of the main benefits of Nutrament is its ability to provide an energy boost. This drink contains a balanced mix of carbohydrates, proteins, and fats. This blend ensures sustained energy release throughout the day. For those feeling sluggish, Nutrament can help increase your energy levels.

Many people find it helpful as a quick snack or meal replacement. The presence of B-vitamins also plays a crucial role. These vitamins help in converting food into energy. Thus, making Nutrament a reliable source for an energy boost.

Muscle Recovery

After a workout, muscle recovery is vital. Nutrament contains the essential proteins needed for muscle repair and growth. It is rich in amino acids, the building blocks of protein. This makes it an excellent choice post-exercise.

Here’s a quick overview of the nutrients that aid in muscle recovery:

Nutrient Benefit
Proteins Repair and build muscle tissues
Amino Acids Support muscle recovery
Vitamins Reduce muscle fatigue

Drinking Nutrament after your workout can help reduce muscle fatigue. It provides the nutrients your body needs to recover effectively. This can lead to better performance in future workouts.

Weight Management

Maintaining a healthy weight is important. Nutrament can be a helpful tool. It provides nutrients and can support weight management. This section explores how Nutrament can aid in this process.

Satiety And Appetite Control

Feeling full is key to managing weight. Nutrament contains protein and fiber. These nutrients help control appetite. They make you feel full for a longer time. This can reduce the urge to snack between meals.

Protein in Nutrament supports muscle health. It also plays a role in weight management. Muscle burns more calories than fat. So, having more muscle can help you manage your weight better.

Caloric Content

Understanding the calories in Nutrament is essential. Each serving has a set number of calories. This can be helpful if you are tracking your intake.

Serving Size Calories
8 fl oz 240

Keeping track of calories can help with weight goals. Nutrament offers a balanced mix of calories and nutrients. This balance can support healthy weight management.

Nutrament can be a part of a balanced diet. It provides essential nutrients and controlled calories. This makes it a good option for weight management.

Convenience And Usage

Nutrament is known for its ease of use and convenience. This makes it a popular choice for those with busy lives. It offers a quick and nutritious option when you are short on time. Let’s dive into how Nutrament can fit into your daily routine.

On-the-go Nutrition

One of the best features of Nutrament is its portability. It comes in a ready-to-drink can. This makes it easy to carry. Whether you are heading to work, the gym, or running errands, you can take Nutrament with you.

No need for a fridge or a microwave. You can enjoy it anytime, anywhere. This makes it ideal for those who need a quick boost. It provides essential vitamins and minerals in one convenient package.

Here are some scenarios where Nutrament can be handy:

  • During your morning commute
  • As a post-workout drink
  • For a quick lunch at your desk
  • While traveling

Meal Replacement

Nutrament can also serve as a meal replacement. It provides a balanced mix of nutrients. This includes protein, vitamins, and minerals. If you are in a rush and skip a meal, Nutrament can help.

It ensures you get the necessary nutrients without cooking. This makes it a great option for busy professionals. Or anyone who needs a quick meal solution.

Here is a breakdown of its nutritional content:

Nutrient Amount per Serving
Protein 15g
Calories 240
Vitamins 21 essential vitamins and minerals

It’s important to note that while Nutrament is convenient, it should not replace all your meals. Balance is key. Include whole foods in your diet for optimal health.

In summary, Nutrament offers a convenient option for those with busy lifestyles. It provides on-the-go nutrition and can act as a meal replacement when needed.

Is Nutrament Good for You? Discover the Health Benefits

Credit: nutrament.com

Potential Drawbacks

Nutrament is a popular nutritional drink, but it’s important to know its potential drawbacks. Let’s look at some concerns about its ingredients and their effects on your health.

Sugar Content

Many Nutrament flavors have high sugar content. Each serving can contain up to 20 grams of sugar. That’s about 5 teaspoons of sugar in one drink. High sugar intake can lead to weight gain. It can also increase the risk of type 2 diabetes.

Artificial Additives

Nutrament contains artificial additives like colors and flavors. These additives make the drink more appealing. But, they may cause allergic reactions in some people. Artificial additives can also affect your overall health. Some studies link them to hyperactivity in children.

Comparing Nutrament To Other Drinks

Nutrament is a popular drink that many people enjoy. It’s known for its nutritional benefits. But how does it compare to other drinks? Let’s explore how Nutrament stacks up against sports drinks and protein shakes.

Sports Drinks

Sports drinks are often consumed for quick energy and hydration. They contain electrolytes and sugars. These elements help replenish what the body loses during exercise. Nutrament also provides energy. But it offers more vitamins and minerals. It’s not just about hydration. It’s also about overall nutrition. For those who need a balanced drink, Nutrament can be a better choice.

Protein Shakes

Protein shakes are popular for muscle recovery and building. They are rich in protein. Many athletes use them after workouts. Nutrament also contains protein. But it has a wider range of nutrients. It’s not just for muscle recovery. It supports overall health. For those who want more than just protein, Nutrament can be beneficial.

Expert Opinions

Is Nutrament good for you? Let’s dive into what experts have to say. This section will cover insights from nutritionists and athletes. Their opinions can help you decide if Nutrament fits your lifestyle.

Nutritionists’ Views

Nutritionists often analyze products based on their ingredients and benefits. So, what do they say about Nutrament?

  • High in Protein: Nutritionists praise Nutrament for its high protein content. This helps build and repair muscles.
  • Essential Vitamins and Minerals: Nutrament is rich in essential vitamins and minerals. These include vitamins A, C, D, and calcium.
  • Convenient Meal Replacement: Many nutritionists highlight its convenience. Nutrament can replace a meal or act as a quick snack.

Nutritionists do have some concerns. Some point out the sugar content in Nutrament. They advise moderation if you watch your sugar intake.

Athletes’ Testimonials

Athletes often look for quick, nutritious options. Nutrament has found a place in their routines. Here’s what some athletes say:

  • Energy Boost: Athletes like the energy boost from Nutrament. It keeps them active during long training sessions.
  • Quick Recovery: Many athletes find it helps with quick recovery. The protein and nutrients aid in muscle repair.
  • Portable and Convenient: Athletes also enjoy its portability. They can carry it to training or competitions easily.

Athletes also appreciate the variety of flavors. This makes Nutrament a tasty addition to their diet.

Frequently Asked Questions

What Is Nutrament?

Nutrament is a nutritional supplement drink. It provides essential vitamins and minerals. It is often used for energy and recovery.

Is Nutrament Good For Weight Gain?

Yes, Nutrament is good for weight gain. It contains high calories and proteins. It helps in adding extra calories to your diet.

Does Nutrament Contain Protein?

Yes, Nutrament contains protein. It has around 16 grams per serving. Protein supports muscle growth and repair.

Can Nutrament Replace A Meal?

Nutrament can replace a meal in some cases. It offers balanced nutrition. However, it is best as a supplement.

Conclusion

Nutrament can be a healthy choice for many. It provides essential nutrients. Easy to consume and convenient. Nutrament supports your daily nutritional needs. Always consult your doctor before making changes. Choose what fits your lifestyle best. Balance and moderation are key.

Nutrament is a useful option for those on the go. Your health should always be a priority. Make informed choices for a healthier life.

Hamburger Macaroni Casserole Recipe: Delicious Comfort Food

Who doesn’t love a hearty, comforting meal? Hamburger macaroni casserole is a classic dish.

It’s perfect for family dinners or gatherings. This recipe combines juicy ground beef, tender macaroni, and gooey cheese. It’s easy to make and sure to please everyone at the table. Imagine the smell of a savory casserole baking in the oven.

The flavors blend beautifully, creating a delicious and satisfying meal. Whether you’re a beginner cook or an experienced chef, this recipe is simple to follow. Plus, it’s a great way to use pantry staples you already have. Get ready to impress your family with this mouth-watering hamburger macaroni casserole! Let’s dive into the details and start cooking this delightful dish.

Introduction To Hamburger Macaroni Casserole

Discover the delicious Hamburger Macaroni Casserole recipe. This easy-to-make dish combines ground beef, pasta, and cheese for a hearty meal. Perfect for busy weeknights or family dinners.

Hamburger Macaroni Casserole is a delicious and easy meal. It’s a mix of ground beef, pasta, and cheese. This dish has a rich, savory taste. It’s perfect for any time of the year.

Comfort Food At Its Best

This casserole is comfort food at its best. It’s warm and hearty. The ground beef gives it a robust flavor. The macaroni adds a nice texture. The cheese melts and binds everything together. It feels like a hug in a bowl.

Perfect For Busy Weeknights

Hamburger Macaroni Casserole is great for busy weeknights. It’s quick to make. You can prepare it in under an hour. It uses simple ingredients that you might already have. It’s a lifesaver when time is short. “`
Hamburger Macaroni Casserole Recipe: Delicious Comfort Food

Credit: www.simplyrecipes.com

Ingredients Needed

Creating a delicious Hamburger Macaroni Casserole starts with gathering the right ingredients. This dish is hearty and satisfying, and the ingredients are simple and easy to find. Let’s break down what you need to make this tasty casserole.

Essential Pantry Items

  • Ground beef – The main protein in this dish.
  • Macaroni – The pasta base that gives the casserole its name.
  • Onion – Adds flavor and texture.
  • Garlic – Enhances the overall taste.
  • Canned tomatoes – Provides a rich and tangy flavor.
  • Tomato sauce – Adds moisture and depth.
  • Cheddar cheese – Melts beautifully on top.
  • Salt and pepper – Basic seasonings to taste.

Optional Add-ins

For those who like to customize their dishes, here are some optional add-ins:

  • Bell peppers – Adds a sweet and crunchy element.
  • Mushrooms – Brings an earthy flavor.
  • Jalapeños – For a spicy kick.
  • Frozen peas – Adds a pop of color and sweetness.
  • Worcestershire sauce – Enhances the umami flavor.
  • Basil and oregano – For an Italian twist.

Preparation Steps

Creating a delicious Hamburger Macaroni Casserole requires careful preparation. Follow these steps to ensure your dish turns out perfect. Let’s dive into the details with a focus on prepping the ingredients and cooking the macaroni.

Prepping The Ingredients

Before starting, gather all necessary ingredients. Here is a table for your convenience:

Ingredient Quantity
Ground Beef 1 lb
Macaroni 2 cups
Onion 1 medium, chopped
Garlic 2 cloves, minced
Tomato Sauce 2 cups
Cheddar Cheese 1 cup, shredded
Salt 1 tsp
Black Pepper 1/2 tsp

Once you have all the ingredients, begin prepping:

  • Chop the onion into small pieces.
  • Mince the garlic finely.
  • Shred the cheddar cheese if not pre-shredded.

Cooking The Macaroni

Now, it’s time to cook the macaroni:

  1. Bring a large pot of water to a boil.
  2. Add a pinch of salt to the boiling water.
  3. Add the macaroni and cook for 7-8 minutes.
  4. Stir occasionally to prevent sticking.
  5. Once cooked, drain the macaroni in a colander.
  6. Rinse with cold water to stop the cooking process.

With the ingredients prepped and the macaroni cooked, you are ready to move on to the next steps of making your Hamburger Macaroni Casserole.

Cooking The Beef

Cooking the beef is a crucial step in preparing a delicious Hamburger Macaroni Casserole. This process not only adds flavor but also ensures the meat is safe to eat. Here are some tips to help you cook the beef perfectly.

Seasoning Tips

Start by selecting fresh, high-quality ground beef. Season it with salt and pepper to enhance its natural flavor. You can also add garlic powder, onion powder, or paprika for extra taste. Mix the seasoning into the meat thoroughly.

Browning The Meat

Heat a large skillet over medium-high heat. Add a small amount of oil to prevent sticking. Once the oil is hot, add the ground beef. Break the meat into smaller pieces using a wooden spoon. Stir occasionally to ensure even cooking.

Cook the beef until it turns brown and no pink remains. This usually takes about 7-10 minutes. Make sure to drain any excess fat to keep the casserole from becoming greasy. Proper browning adds a rich, savory flavor to the dish.

Combining Ingredients

Savor the delicious blend of ground beef, macaroni, and cheese in this easy Hamburger Macaroni Casserole recipe. Perfect for a quick family dinner.

Combining Ingredients Creating a delicious Hamburger Macaroni Casserole involves carefully combining the ingredients. This step is vital for ensuring a well-balanced, flavorful dish. Each component must be mixed thoughtfully. This ensures that every bite is packed with taste. Let’s break down this process into simple, easy-to-follow steps.

Mixing The Sauce

Start by preparing the sauce. In a large bowl, combine tomato sauce and diced tomatoes. Add a pinch of salt and pepper. Stir in garlic powder and onion powder. Mix until all the spices are well blended. The sauce should be smooth and aromatic. This is the base that gives the casserole its rich flavor.

Adding The Macaroni And Beef

Now, it’s time to add the macaroni and beef. First, cook the macaroni according to the package instructions. Drain and set aside. In a skillet, brown the ground beef until fully cooked. Drain excess fat. Add the cooked beef to the sauce mixture. Next, gently fold in the cooked macaroni. Ensure all ingredients are evenly distributed. This step is crucial for a uniform taste throughout the casserole. This method guarantees a harmonious blend of flavors in every bite.

Baking The Casserole

Once the casserole is assembled, it’s time to bake it to perfection. This step is crucial for a delicious Hamburger Macaroni Casserole. Baking melds the flavors together, creating a savory and comforting dish.

Oven Temperature And Time

Preheat your oven to 350°F (175°C). This temperature ensures even cooking without burning the top.

Place the casserole dish in the middle rack of the oven. This helps in getting a uniform bake.

Bake for 25 to 30 minutes. Check after 25 minutes to avoid overcooking.

Checking For Doneness

Use a fork to check the pasta. It should be tender but not mushy.

Look for a golden-brown crust on the top. This indicates it is ready.

If using cheese, it should be melted and slightly bubbly.

Insert a knife in the center. It should come out clean without any liquid.

Serving Suggestions

Hamburger Macaroni Casserole is a hearty and delicious meal. To make it even better, serve it with some tasty side dishes and garnishing ideas. Here are some suggestions to elevate your casserole experience.

Best Side Dishes

The right side dish can enhance your meal. Here are some of the best options:

  • Garlic Bread: Crispy on the outside, soft on the inside. Perfect for soaking up the casserole sauce.
  • Green Salad: A fresh, crunchy salad with a light vinaigrette. Balances the richness of the casserole.
  • Steamed Vegetables: Broccoli, carrots, or green beans. Add color and nutrients to your plate.
  • Mashed Potatoes: Creamy and smooth. A classic comfort food pairing.

Garnishing Ideas

Garnishing your Hamburger Macaroni Casserole adds extra flavor and visual appeal. Here are some great ideas:

  • Fresh Herbs: Sprinkle chopped parsley, cilantro, or chives. Adds a fresh, vibrant touch.
  • Grated Cheese: Extra cheddar, parmesan, or mozzarella. Melt on top for added richness.
  • Crushed Red Pepper Flakes: For a hint of spice. Great for those who like a bit of heat.
  • Chopped Green Onions: Adds a mild onion flavor and a pop of color.

Try these serving suggestions to make your Hamburger Macaroni Casserole even more delightful.

Storing Leftovers

Enjoyed your Hamburger Macaroni Casserole but have leftovers? Storing them properly keeps them delicious for the next meal. Follow these tips for the best methods.

Proper Storage Methods

Cool the casserole before storing. Place it in an airtight container. Store in the refrigerator for up to four days. You can also freeze it for longer storage. Use a freezer-safe container or heavy-duty aluminum foil. Label with the date to keep track.

Reheating Tips

Reheat your casserole in the oven for best results. Preheat the oven to 350°F (175°C). Cover the dish with aluminum foil to keep moisture in. Heat for 20-30 minutes or until warm throughout. For a quicker option, use the microwave. Place a portion on a microwave-safe plate. Cover with a damp paper towel. Heat on medium power for 2-3 minutes. Stir halfway through to ensure even heating. Enjoy your casserole just like the first time!

Variations And Tips

Hamburger Macaroni Casserole is a delightful dish loved by many. This recipe is versatile and allows for many delicious variations. Here are some tips and alternatives to make this dish unique and healthier.

Alternative Ingredients

Consider these alternatives to add new flavors to your casserole:

  • Ground turkey or chicken instead of beef for a lighter option.
  • Use whole grain pasta for added fiber.
  • Replace cheddar cheese with mozzarella or a blend for a different taste.
  • Add veggies like bell peppers, mushrooms, or spinach for extra nutrition.
  • Substitute tomato sauce with a pesto or Alfredo sauce for a creamy twist.

Making It Healthier

Follow these tips to make your casserole healthier:

  1. Choose lean meat options to reduce fat content.
  2. Incorporate more vegetables to boost vitamins and minerals.
  3. Use low-fat cheese or reduce the amount of cheese.
  4. Opt for whole grain pasta to increase fiber intake.
  5. Limit added salt; use herbs and spices for flavor instead.

Experimenting with these variations can make your Hamburger Macaroni Casserole both delicious and nutritious. Enjoy creating your own version of this classic comfort food!

Hamburger Macaroni Casserole Recipe: Delicious Comfort Food

Credit: www.thecountrycook.net

Hamburger Macaroni Casserole Recipe: Delicious Comfort Food

Credit: www.thecountrycook.net

Frequently Asked Questions

What Ingredients Are Needed For Hamburger Macaroni Casserole?

You’ll need ground beef, macaroni, tomato sauce, cheese, onions, garlic, and seasonings. These ingredients create a flavorful and comforting dish.

How Long Does It Take To Cook?

The total time is around 45 minutes. This includes 15 minutes for preparation and 30 minutes for baking.

Can I Freeze Hamburger Macaroni Casserole?

Yes, you can freeze it. Just ensure it’s fully cooled before freezing. Thaw and reheat before serving.

What Type Of Cheese Works Best?

Cheddar cheese is ideal. It melts well and adds a rich flavor. You can also mix with mozzarella.

Conclusion

Hamburger macaroni casserole is a delicious, easy-to-make dish. Perfect for busy nights. It combines hearty ingredients with simple preparation. This recipe brings comfort to your table. Everyone in the family will love it. Give it a try tonight. You won’t regret it.

Cooking this meal is quick and fun. Enjoy the wonderful flavors. Happy cooking!

Green Chile Pie Recipe: A Spicy Twist on Comfort Food

Green Chile Pie is a delicious and spicy treat. This dish combines bold flavors in a comforting pie form.

Imagine a pie that brings warmth and zest to your table. Green Chile Pie is perfect for those who enjoy a little kick in their meals. It’s a unique recipe that stands out among traditional pies. The green chiles add a vibrant and tangy taste that pairs wonderfully with cheese and a flaky crust.

This pie is not just for dinner; it can be enjoyed anytime. Whether you’re a seasoned cook or a kitchen newbie, this recipe is easy to follow. Ready to spice up your meal? Let’s dive into the world of Green Chile Pie!

Green Chile Pie Recipe: A Spicy Twist on Comfort Food

Credit: www.newmexicomagazine.org

Introduction To Green Chile Pie

Green Chile Pie Recipe delivers a delightful mix of spicy and savory flavors in every bite. Perfect for a quick and tasty meal, this dish combines green chiles with cheese and a flaky crust. Ideal for those who love a bit of heat in their food.

Green Chile Pie is a delightful dish. It combines savory and spicy flavors in one bite. This pie is a treat for your taste buds. It is both hearty and comforting.

A Fusion Of Flavors

Green Chile Pie blends various ingredients. Each bite offers a mix of tastes. The green chiles add a mild heat. Cheese provides a creamy texture. The pie crust is crispy and buttery. Together, these create a perfect harmony.

Why It Stands Out

This pie is unique. It is different from other savory pies. The green chiles give it a distinct flavor. It’s not too spicy, just right. It’s also versatile. You can serve it for breakfast, lunch, or dinner. Its ingredients are easy to find. The recipe is simple to follow. These features make it a favorite. Green Chile Pie is a must-try. It’s delicious and satisfying. Your family and friends will love it. “`

Essential Ingredients

Creating the perfect Green Chile Pie starts with the right ingredients. Each component adds its unique flavor and texture. Here are the essential ingredients you need for a delicious Green Chile Pie.

Fresh Green Chiles

Fresh green chiles are the star of this recipe. Their mild heat and unique flavor are unmatched. You can use Anaheim or Hatch chiles. Both are perfect. Roast the chiles and remove the skin. This step enhances their flavor. Dice them into small pieces for even distribution in your pie.

Cheese Selection

The choice of cheese is crucial. It provides a creamy texture and rich taste. Use a mix of Monterey Jack and Cheddar. Monterey Jack melts smoothly, while Cheddar adds a sharp flavor. Grate the cheese fresh for the best results.

Perfect Crust

A perfect pie needs a perfect crust. You can make your own or use a store-bought one. For homemade, use all-purpose flour, cold butter, and a bit of salt and water. Roll out the dough until it’s thin and even. Pre-bake the crust to prevent it from getting soggy.

Ingredient Quantity
Fresh green chiles 6-8
Monterey Jack cheese 1 cup, grated
Cheddar cheese 1 cup, grated
Pie crust 1

These ingredients are the foundation of your Green Chile Pie. They ensure every bite is flavorful and satisfying.

Preparation Steps

Creating a Green Chile Pie requires some preparation. Each step builds flavor and texture. Follow these steps to make your pie perfect.

Prepping The Chiles

Start with fresh green chiles. Rinse them under cold water. Dry them with a towel. Roast the chiles over an open flame. Turn them often until the skin blisters. Place the roasted chiles in a bowl. Cover the bowl with plastic wrap. Let them steam for 10 minutes. Peel the skins off once they cool. Remove the seeds for less heat. Chop the chiles into small pieces.

Making The Crust

The crust is the foundation of your pie. Use a food processor to blend the flour and salt. Add cold butter in small cubes. Pulse until the mixture looks like crumbs. Slowly add ice water. Blend until the dough forms. Do not overwork it. Wrap the dough in plastic wrap. Chill it in the fridge for 30 minutes. Roll out the dough on a floured surface. Fit it into a pie dish. Trim the edges. Pre-bake the crust at 375°F for 10 minutes.

Combining Ingredients

Now, combine the prepared ingredients. Mix the chopped chiles with cheese in a bowl. Add eggs, milk, and seasonings. Stir until well combined. Pour this mixture into the pre-baked crust. Spread it evenly. Bake the pie at 350°F for 30-35 minutes. The top should be golden brown. Let the pie cool before serving. Enjoy your delicious Green Chile Pie.

Cooking Instructions

Cooking a delicious Green Chile Pie is an enjoyable experience. Follow these simple and clear instructions to make the perfect pie. This section will guide you through the necessary steps from setting the oven to cooling the pie.

Oven Settings

Preheat your oven to 375°F (190°C). This temperature ensures the pie cooks evenly. Use the middle rack for the best results. This prevents the crust from burning.

Baking Time

Bake the Green Chile Pie for 40-45 minutes. Check the pie at the 30-minute mark. If the crust is browning too quickly, cover it with aluminum foil. This helps avoid over-browning.

Cooling Period

Once baked, remove the pie from the oven. Let it cool on a wire rack for at least 30 minutes. This cooling period allows the filling to set. A well-set filling ensures clean slices when serving.

Step Details
Oven settings Preheat to 375°F (190°C)
Baking time 40-45 minutes, check at 30 minutes
Cooling period Cool for 30 minutes on a wire rack

Enjoy your perfectly baked Green Chile Pie. The right oven settings, baking time, and cooling period make a big difference.

Serving Suggestions

Green Chile Pie is a delightful dish that brings warmth and flavor. But what makes it truly special are the serving suggestions. From side dishes to drink pairings, let’s dive into ways to enhance your Green Chile Pie experience.

Best Side Dishes

Complement your Green Chile Pie with delicious side dishes. Here are some of the best options:

  • Mexican Rice: The fluffy texture and mild flavor balance the spicy pie.
  • Refried Beans: A creamy side that adds protein and richness.
  • Simple Green Salad: Fresh greens with a tangy vinaigrette provide a refreshing contrast.
  • Grilled Vegetables: Bell peppers, zucchini, and onions enhance the meal with a smoky taste.
  • Guacamole and Chips: Creamy avocado and crunchy chips add a fun and tasty element.

Pairing With Drinks

The right drink can elevate your Green Chile Pie experience. Consider these pairings:

Drink Description
Margarita A classic choice. The citrus and tequila balance the spiciness.
Mexican Beer Light and refreshing. Pairs well with the pie’s robust flavors.
Horchata Sweet and creamy. A non-alcoholic option that soothes the palate.
Agua Fresca Fruit-infused water. A fresh and hydrating choice.
Iced Tea Simple and cooling. Perfect for balancing spicy dishes.
Green Chile Pie Recipe: A Spicy Twist on Comfort Food

Credit: www.tasteandtellblog.com

Variations And Additions

Exploring variations and additions can make your Green Chile Pie unique. Whether you prefer meat, vegetarian, or extra spice, there are many ways to make this dish your own.

Meat Options

Adding meat can enhance the flavor of your Green Chile Pie. Ground beef is a popular choice. Cook it with onions and garlic for a savory taste. Chicken is another great option. Shred cooked chicken and mix it with green chiles. Pork can also be used. Try using pulled pork for a rich and hearty pie.

Vegetarian Twists

For a vegetarian version, focus on vegetables and beans. Black beans add protein and texture. Sautéed mushrooms bring an earthy flavor. Corn adds sweetness and color. You can also use tofu for a protein boost. Season it well for the best taste. Spinach or kale can be added for extra nutrients. These greens blend well with green chiles.

Extra Spices

Spices can elevate your Green Chile Pie. Cumin adds a warm, smoky flavor. Paprika gives a mild heat and rich color. Oregano brings a touch of earthiness. For those who love heat, consider adding cayenne pepper. A pinch of cinnamon can add a surprising depth. Experiment with your favorite spices to create a unique flavor.

Tips For Perfect Pie

Crafting the perfect Green Chile Pie can be a delightful experience. Follow these simple tips to ensure your pie turns out just right every time. From avoiding a soggy crust to maintaining even spice and proper storage, these tips will help you make a delicious pie.

Avoiding Soggy Crust

A soggy crust can ruin a pie. To prevent this, blind bake the crust. Blind baking involves pre-baking the crust. This helps set the structure. Line the crust with parchment paper. Fill with pie weights or dried beans. Bake at 375°F (190°C) for 15 minutes. Remove the weights and paper. Bake for another 5-7 minutes until golden.

Ensuring Even Spice

Green Chile Pie should have a balanced spice. To achieve this, use fresh green chiles. Dice them evenly. Mix the chiles well with the filling. This ensures even distribution. Taste the mixture before baking. Adjust the seasoning if needed. Use a mix of mild and hot chiles if you prefer. This adds depth to the flavor.

Storage Tips

Proper storage keeps your pie fresh. Let the pie cool completely before storing. Cover the pie with plastic wrap. Store in the refrigerator for up to 3 days. For longer storage, freeze the pie. Wrap the pie in aluminum foil. Place in a freezer-safe bag. Label with the date. Freeze for up to 2 months. Thaw in the refrigerator before reheating.

Green Chile Pie Recipe: A Spicy Twist on Comfort Food

Credit: cooking.nytimes.com

Nutritional Information

The Green Chile Pie is not only delicious but also packed with nutrients. Understanding its nutritional information helps you make informed dietary choices. This section delves into the caloric content, protein and fats, and vitamins and minerals found in a Green Chile Pie.

Caloric Content

A slice of Green Chile Pie typically has around 250-300 calories. These calories come mainly from the crust and cheese. It’s a moderate calorie count for a meal or a substantial snack.

Protein And Fats

Green Chile Pie provides a good amount of protein. One slice contains about 10-15 grams of protein. This protein mainly comes from the cheese and eggs used in the recipe. Fats are also present in significant amounts. Each slice contains around 15-20 grams of fat. These fats come from cheese, eggs, and the crust.

Vitamins And Minerals

Green Chile Pie is rich in several vitamins and minerals. It contains vitamin A, which is good for vision and the immune system. Vitamin C is also present, boosting your body’s defense mechanisms. The pie also offers calcium, which is crucial for healthy bones and teeth. Iron in the pie helps with carrying oxygen in the blood.

Frequently Asked Questions

What Ingredients Are In Green Chile Pie?

Green chile pie typically includes green chiles, cheese, eggs, and a pie crust. Some recipes also add onions, garlic, and various spices for extra flavor.

How Do You Make Green Chile Pie?

To make green chile pie, combine green chiles, cheese, eggs, and spices. Pour into a pie crust and bake until golden and set.

Can I Use Canned Green Chiles?

Yes, canned green chiles work well for this recipe. They are convenient and save preparation time.

Is Green Chile Pie Spicy?

Green chile pie can be mildly spicy depending on the type of chiles used. Adjust the spice level to your preference.

Conclusion

Enjoy creating this delicious Green Chile Pie. It’s easy and tasty. Share it with your loved ones for a delightful meal. This recipe brings warmth and flavor to any table. Try it today and savor every bite. Happy cooking!

Baked Gala Apple Recipe: Deliciously Easy Dessert Idea

Baked Gala apples are a delightful treat. They are easy to make and delicious.

Imagine a warm, sweet aroma filling your kitchen as you bake Gala apples. This simple yet elegant dessert is perfect for any occasion. Whether you want a healthy snack or a special treat, baked Gala apples are sure to please.

With minimal ingredients and effort, you can create a dish that is both wholesome and indulgent. This recipe highlights the natural sweetness of Gala apples, enhanced by a touch of cinnamon and a hint of honey. Ready to dive into a comforting, homemade dessert? Let’s explore how you can make these mouthwatering baked Gala apples right in your own kitchen.

Baked Gala Apple Recipe: Deliciously Easy Dessert Idea

Credit: www.oliveandmango.com

Introduction To Baked Gala Apples

Baked Gala Apples are a delicious and easy-to-make dessert. They are perfect for any occasion. The natural sweetness of Gala apples makes them ideal for baking. When baked, they become tender and juicy. The spices and sweeteners enhance their flavor, making them irresistible. If you love apples, you will love this recipe.

Why Choose Gala Apples

Gala apples are a popular choice for baking. Here are some reasons why:

  • Sweet Flavor: Gala apples have a natural sweetness that is perfect for desserts.
  • Tender Texture: When baked, they become tender and juicy.
  • Availability: They are widely available in stores year-round.
  • Versatility: They can be used in various recipes, from pies to baked apples.

Perfect Dessert For Any Occasion

Baked Gala Apples are suitable for any event. Whether it’s a family dinner, a holiday gathering, or a simple weeknight treat, they fit the bill. Here are some occasions where baked apples shine:

Occasion Why It’s Perfect
Family Dinner Easy to make and loved by all ages.
Holiday Gathering Festive and can be prepared in advance.
Weeknight Treat Quick and simple, yet satisfying.

These baked apples can be served with a scoop of vanilla ice cream or a dollop of whipped cream. This makes them even more delightful. The aroma of baking apples fills the house, creating a warm and inviting atmosphere. This dessert is sure to impress your guests and leave them wanting more.

Baked Gala Apple Recipe: Deliciously Easy Dessert Idea

Credit: www.allrecipes.com

Ingredients Needed

Baking Gala apples is a delightful and simple dessert. The secret to its deliciousness lies in the ingredients. Let’s explore what you need.

Simple Pantry Staples

These basic ingredients are usually found in your kitchen:

  • 4 medium Gala apples
  • 1/4 cup brown sugar
  • 1 teaspoon ground cinnamon
  • 1/4 cup chopped nuts (walnuts or pecans)
  • 2 tablespoons butter
  • 1/4 cup water

Optional Add-ins For Extra Flavor

Enhance your baked apples with these optional add-ins:

  • 1/4 cup raisins or dried cranberries
  • 1 teaspoon vanilla extract
  • 1/4 cup rolled oats
  • 1 tablespoon honey or maple syrup

Mixing in these ingredients can add a new dimension to your dessert. Feel free to experiment with your favorites!

Preparation Steps

Preparing baked Gala apples is a simple and fun process. Follow these easy steps to make a delicious and healthy dessert. Below, we have broken down the preparation steps into two parts: Cleaning and Coring Apples, and Preparing the Filling.

Cleaning And Coring Apples

First, wash your Gala apples under cold water. This removes any dirt or residue. Use a vegetable brush for a thorough clean. Next, dry the apples with a clean towel. Now, take an apple corer or a sharp knife. Carefully remove the core from each apple. Be sure to leave the bottom intact. This will hold the filling inside.

Preparing The Filling

In a small bowl, mix your filling ingredients. Common choices include brown sugar, cinnamon, and chopped nuts. Add a pinch of salt for extra flavor. Stir until well combined. Spoon the mixture into the hollowed apples. Fill each apple to the top. For an extra touch, add a small piece of butter on top of the filling. This adds richness and moisture.

Following these steps ensures your baked Gala apples turn out perfect. Enjoy this delightful treat with family and friends!

Baked Gala Apple Recipe: Deliciously Easy Dessert Idea

Credit: www.epicurious.com

Baking Instructions

Follow these baking instructions to make delicious Baked Gala Apples. The process is simple and will fill your home with wonderful aromas. Let’s dive into the details!

Oven Temperature And Timing

First, preheat your oven to 350°F (175°C). This temperature ensures the apples bake evenly.

Once the oven is ready, place the apples on a baking sheet. Bake them for 30 to 40 minutes. Keep an eye on them to avoid overcooking.

Checking For Doneness

To check if the apples are done, insert a fork or skewer into the center. The apples should be soft but not mushy. If the fork slides in easily, they are ready.

If the apples are still firm, bake them for another 5 to 10 minutes. Recheck for softness before removing from the oven.

Let the baked apples cool for a few minutes before serving. Enjoy the warm, sweet treat!

Serving Suggestions

Now that you’ve baked your Gala apples to perfection, it’s time to serve them. The right accompaniments can elevate the flavors and make your dessert unforgettable. Below are some delightful ways to serve your baked Gala apples.

Pairing With Ice Cream Or Whipped Cream

A classic way to enjoy baked Gala apples is by pairing them with ice cream or whipped cream. The cool, creamy texture contrasts beautifully with the warm, spiced apples.

  • Vanilla ice cream: The rich, sweet flavor complements the apples’ natural sweetness.
  • Cinnamon ice cream: Enhances the spice in the baked apples for a warm, cozy dessert.
  • Whipped cream: A dollop of freshly whipped cream adds a light, airy touch.

Garnishing Ideas

Garnishes not only make your baked Gala apples look appealing but also add extra flavor and texture. Here are some simple yet delicious garnishing ideas:

Garnish Description
Chopped nuts Sprinkle some chopped walnuts or pecans for a crunchy texture.
Caramel sauce Drizzle a bit of caramel sauce for extra sweetness.
Fresh mint Add a sprig of mint for a pop of color and freshness.

These serving suggestions will make your baked Gala apples a hit at any gathering. Experiment with different combinations to find your favorite.

Health Benefits

Baked Gala apples are not only delicious but also packed with health benefits. They offer a nutritious and tasty option for your dessert. Let’s dive into the health benefits of this delightful recipe.

Nutritional Value Of Gala Apples

Gala apples are rich in essential nutrients. They contain vitamins A, C, and E. These vitamins support your immune system. Gala apples also have dietary fiber. Fiber aids digestion and keeps you full longer. One medium Gala apple has about 80 calories. It is a low-calorie snack that fits any diet.

Healthy Dessert Alternative

Baked Gala apples make a healthy dessert choice. They offer natural sweetness without added sugar. Baking enhances their flavor and makes them tender. This dessert is perfect for those who want to eat healthy. You can enjoy it guilt-free.

Gala apples are also rich in antioxidants. Antioxidants help fight free radicals in your body. They reduce inflammation and support heart health. This makes baked Gala apples a smart and tasty option for dessert. Try them today and enjoy the health benefits.

Tips For Success

Creating the perfect Baked Gala Apple recipe can be an enjoyable task. Follow these tips to ensure your apples turn out delicious and not soggy. Learn how to prepare them ahead of time and reheat them effectively.

Preventing Soggy Apples

To avoid soggy baked apples, follow these steps:

  • Choose fresh Gala apples. Fresh apples retain their texture better.
  • Core the apples properly. Remove the seeds and core, but keep the apple intact.
  • Use a baking rack. This allows the heat to circulate, cooking the apples evenly.
  • Don’t overfill the apples. Leave some space for the filling to expand.

Making Ahead And Reheating

Here are some tips for making your baked apples ahead of time and reheating them:

  1. Prepare the apples as directed in the recipe.
  2. Store them in an airtight container in the fridge.
  3. Reheat in the oven at 350°F for 10-15 minutes. This keeps the texture intact.
  4. Microwave option: Heat on high for 1-2 minutes if you’re short on time.

Follow these simple tips to enjoy your baked Gala apples, whether fresh or reheated.

Variations To Try

Exploring variations in your baked Gala apple recipe can be fun. Experimenting with different ingredients can bring new flavors and textures. Let’s dive into some exciting variations you can try.

Adding Nuts And Dried Fruits

Adding nuts and dried fruits can enhance the flavor of your baked apples. Consider using walnuts, pecans, or almonds for a crunchy texture. These nuts add a rich, nutty flavor that pairs well with the sweetness of the apples.

For a sweeter twist, add dried fruits like raisins, cranberries, or apricots. These fruits bring a chewy texture and a burst of sweetness. Mix them into the stuffing for a delicious surprise in every bite.

Using Different Types Of Apples

Gala apples are great, but other apples can also work well. Try using Granny Smith apples for a tart flavor. They hold their shape well when baked and provide a nice contrast to the sweet filling.

Honeycrisp apples are another excellent choice. They are sweet and juicy, with a crisp texture. These apples create a delightful balance of flavors and a satisfying bite.

Feel adventurous? Combine different types of apples in one dish. This mix can create a complex and delightful flavor profile.

Frequently Asked Questions

How Do You Make Baked Gala Apples?

To make baked Gala apples, core them and fill with butter, brown sugar, and cinnamon. Bake at 350°F for 30-40 minutes until tender.

Are Gala Apples Good For Baking?

Yes, Gala apples are excellent for baking. They hold their shape and offer a sweet, mild flavor that complements many recipes.

Can I Use Other Apples For This Recipe?

Yes, you can use other apples like Granny Smith or Honeycrisp. Each variety will add a unique flavor and texture to the dish.

What Spices Go Well With Baked Apples?

Cinnamon, nutmeg, and cloves are traditional spices that pair well with baked apples. They enhance the natural sweetness and add warmth.

Conclusion

This Baked Gala Apple recipe is perfect for a simple, tasty dessert. With just a few ingredients, you can create a delicious treat. Your kitchen will smell amazing, and your taste buds will thank you. Try this recipe today and enjoy a warm, comforting dessert.

It’s easy to make and sure to please everyone. Share this delightful dish with family and friends. They will love the sweet, baked goodness. Happy baking!

13 15 Shrimp Recipes: Delicious and Easy-to-Make Dishes

Shrimp is a versatile and delicious seafood loved by many. It’s quick to cook and blends well with various flavors.

If you enjoy shrimp and are searching for new recipes, you’re in the right place. This blog post will showcase 13 to 15 shrimp recipes that are easy to prepare and packed with flavor. Whether you prefer spicy, sweet, or savory dishes, there’s a shrimp recipe here for everyone.

From quick weeknight dinners to impressive dishes for special occasions, these recipes will inspire you to make the most of this delightful seafood. Get ready to explore a world of culinary possibilities with shrimp!

Garlic Butter Shrimp

If you love shrimp, you will adore Garlic Butter Shrimp. This dish is simple yet flavorful. The garlic butter sauce makes it irresistible. Perfect for a quick dinner or a fancy meal. Let’s dive into this delicious recipe.

Ingredients

  • 1 lb shrimp, peeled and deveined
  • 4 cloves garlic, minced
  • 1/4 cup butter
  • 1 tablespoon olive oil
  • 1/4 teaspoon red pepper flakes
  • Salt and pepper to taste
  • 2 tablespoons fresh parsley, chopped
  • Juice of half a lemon

Instructions

  1. Heat olive oil in a large skillet over medium-high heat.
  2. Add the shrimp to the skillet. Season with salt and pepper.
  3. Cook the shrimp for 2-3 minutes on each side. Remove from skillet and set aside.
  4. In the same skillet, add butter and let it melt.
  5. Add minced garlic and red pepper flakes. Cook for 1-2 minutes until fragrant.
  6. Return the shrimp to the skillet. Toss to coat in the garlic butter sauce.
  7. Add lemon juice and chopped parsley. Stir well.
  8. Serve immediately. Enjoy your Garlic Butter Shrimp!

Shrimp Scampi

Shrimp Scampi is a classic dish that brings together the delicate flavors of shrimp, garlic, and butter. This dish is both simple to prepare and incredibly delicious, making it a favorite among seafood lovers. Below, we share an easy-to-follow recipe for making mouth-watering Shrimp Scampi at home.

Ingredients

  • 1 lb large shrimp, peeled and deveined
  • 4 cloves garlic, minced
  • 1/4 cup butter
  • 1/4 cup olive oil
  • 1/4 cup dry white wine
  • 1/4 cup fresh lemon juice
  • 1/4 cup chopped fresh parsley
  • 1/2 tsp red pepper flakes
  • Salt and black pepper to taste
  • 1 lb linguine or spaghetti
  • Grated Parmesan cheese (optional)

Instructions

  1. Cook the pasta: Bring a large pot of salted water to a boil. Add the linguine or spaghetti and cook until al dente. Drain and set aside.
  2. Prepare the shrimp: Pat the shrimp dry with paper towels. Season with salt and black pepper.
  3. Sauté the garlic: In a large skillet, melt the butter with the olive oil over medium-high heat. Add the minced garlic and red pepper flakes. Cook until the garlic is fragrant, about 1 minute.
  4. Cook the shrimp: Add the seasoned shrimp to the skillet. Cook for 2-3 minutes on each side, until the shrimp turn pink and opaque.
  5. Add the liquids: Pour in the white wine and lemon juice. Stir to combine, and let the mixture simmer for 2 minutes.
  6. Combine: Add the cooked pasta to the skillet. Toss to coat the pasta with the sauce. Stir in the chopped parsley.
  7. Serve: Divide the Shrimp Scampi among plates. Garnish with additional parsley and grated Parmesan cheese, if desired. Serve immediately.

This Shrimp Scampi recipe is sure to impress with its rich flavors and simplicity. Enjoy this delightful dish for any occasion!

Shrimp Tacos

Shrimp Tacos are a delightful and flavorful dish that everyone loves. They bring together the freshness of shrimp with the zest of tacos. Perfect for a quick dinner or a weekend treat. These tacos are easy to make and full of taste. Let’s dive into the ingredients and steps to prepare this delicious dish.

Ingredients

  • 1 lb shrimp, peeled and deveined
  • 2 tbsp olive oil
  • 1 tbsp chili powder
  • 1 tsp cumin
  • 1 tsp garlic powder
  • Salt and pepper to taste
  • 8 small tortillas
  • 1 cup shredded cabbage
  • 1/2 cup chopped cilantro
  • 1 lime, cut into wedges
  • Sour cream or your favorite sauce

Instructions

  1. In a bowl, mix olive oil, chili powder, cumin, and garlic powder.
  2. Add shrimp to the bowl. Toss until shrimp are well coated.
  3. Heat a large skillet over medium heat.
  4. Cook shrimp for 2-3 minutes per side until pink and cooked through.
  5. Warm tortillas in a dry skillet or microwave.
  6. Assemble tacos by placing shrimp in each tortilla.
  7. Top with shredded cabbage and chopped cilantro.
  8. Serve with lime wedges and your favorite sauce.

Enjoy your homemade Shrimp Tacos! They are sure to be a hit.

Cajun Shrimp Pasta

Craving a mix of flavors and spices? Cajun Shrimp Pasta is a perfect choice. This dish brings together the rich taste of shrimp with the bold flavors of Cajun seasoning. It’s quick to make and perfect for a weeknight dinner.

Ingredients

  • 1 pound shrimp, peeled and deveined
  • 2 tablespoons Cajun seasoning
  • 2 tablespoons olive oil
  • 1 bell pepper, sliced
  • 1 onion, chopped
  • 3 cloves garlic, minced
  • 1 cup heavy cream
  • 1/2 cup chicken broth
  • 1/2 cup grated Parmesan cheese
  • 8 ounces pasta
  • Salt and pepper to taste
  • Fresh parsley, chopped (optional)

Instructions

  1. Cook the pasta according to package instructions. Drain and set aside.
  2. In a large pan, heat olive oil over medium-high heat.
  3. Add shrimp and sprinkle with Cajun seasoning. Cook until pink, about 2-3 minutes per side. Remove shrimp and set aside.
  4. In the same pan, add bell pepper, onion, and garlic. Sauté until vegetables are soft, about 5 minutes.
  5. Pour in heavy cream and chicken broth. Stir well.
  6. Let the mixture simmer for 5 minutes, then add Parmesan cheese. Stir until the cheese melts.
  7. Add the cooked pasta and shrimp to the pan. Mix until everything is well combined.
  8. Season with salt and pepper to taste.
  9. Garnish with fresh parsley if desired. Serve immediately.

Shrimp Fried Rice

Shrimp Fried Rice is a delightful dish that combines succulent shrimp with flavorful rice. It’s a quick and satisfying meal perfect for busy weeknights. This recipe brings together simple ingredients to create a delicious, restaurant-quality dish right at home.

Ingredients

  • 1 cup of shrimp, peeled and deveined
  • 3 cups of cooked rice (preferably day-old)
  • 2 tablespoons of vegetable oil
  • 1 onion, finely chopped
  • 2 garlic cloves, minced
  • 1 cup of frozen peas and carrots
  • 2 eggs, beaten
  • 3 tablespoons of soy sauce
  • Salt and pepper to taste
  • 1 green onion, chopped (optional)

Instructions

  1. Heat oil in a large pan over medium heat.
  2. Add shrimp and cook until pink, about 3 minutes.
  3. Remove shrimp from the pan and set aside.
  4. In the same pan, sauté onion and garlic until fragrant.
  5. Add peas and carrots, cooking until tender.
  6. Push the vegetables to one side of the pan.
  7. Pour beaten eggs into the empty side of the pan.
  8. Scramble the eggs until fully cooked.
  9. Mix eggs with the vegetables.
  10. Add the cooked rice and shrimp back to the pan.
  11. Pour in soy sauce and stir well to combine.
  12. Season with salt and pepper to taste.
  13. Garnish with chopped green onions, if desired.
  14. Serve hot and enjoy your Shrimp Fried Rice.

Lemon Garlic Shrimp

One of the best ways to enjoy shrimp is through a simple yet flavorful Lemon Garlic Shrimp recipe. This dish combines the zesty tang of lemon with the rich, savory taste of garlic. It’s perfect for a quick weeknight dinner or a special occasion. The best part? It only takes a few minutes to prepare and cook.

Ingredients

  • 1 pound of shrimp, peeled and deveined
  • 2 tablespoons of olive oil
  • 3 cloves of garlic, minced
  • Juice of 1 lemon
  • 1/4 teaspoon of red pepper flakes
  • Salt and pepper to taste
  • 2 tablespoons of fresh parsley, chopped

Instructions

  1. Heat olive oil in a large skillet over medium heat.
  2. Add minced garlic and sauté until fragrant, about 1 minute.
  3. Add shrimp to the skillet, cooking until they turn pink, about 3 minutes.
  4. Stir in lemon juice and red pepper flakes.
  5. Season with salt and pepper to taste.
  6. Cook for another 1-2 minutes, stirring occasionally.
  7. Remove from heat and sprinkle with fresh parsley.
  8. Serve immediately, optionally with a side of rice or pasta.

Shrimp And Grits

Shrimp and Grits is a classic Southern dish. It combines tender shrimp with creamy, flavorful grits. This dish is perfect for breakfast, lunch, or dinner. Let’s explore how to make this delicious recipe.

Ingredients

  • 1 cup grits
  • 4 cups water
  • 1 pound shrimp, peeled and deveined
  • 1/2 cup cheddar cheese, shredded
  • 4 slices bacon, chopped
  • 1 small onion, finely chopped
  • 1 clove garlic, minced
  • 2 tablespoons butter
  • 1 tablespoon lemon juice
  • Salt and pepper to taste
  • Chopped parsley for garnish

Instructions

  1. Bring water to a boil in a large pot.
  2. Slowly stir in the grits and reduce heat to low.
  3. Cover and cook for about 20 minutes, stirring occasionally.
  4. Stir in the cheddar cheese and season with salt.
  5. In a skillet, cook bacon until crispy. Remove and set aside.
  6. Add onion to the skillet and cook until soft.
  7. Add garlic and cook for another minute.
  8. Add shrimp to the skillet and cook until pink.
  9. Stir in lemon juice and butter. Season with salt and pepper.
  10. Serve shrimp over the grits. Top with bacon and parsley.

Shrimp Ceviche

Shrimp Ceviche is a delightful dish that combines fresh shrimp with zesty citrus flavors. It’s light, refreshing, and perfect for any gathering. This dish is not only tasty but also easy to prepare. Let’s dive into the ingredients and steps to make this fantastic dish.

Ingredients

  • 1 pound of fresh shrimp, peeled and deveined
  • 1 cup of fresh lime juice
  • 1 cup of fresh lemon juice
  • 1/2 cup of chopped red onion
  • 1 cup of diced tomatoes
  • 1/2 cup of chopped cilantro
  • 1 diced jalapeño pepper
  • 1 avocado, diced
  • Salt and pepper to taste

Instructions

  1. Prepare the shrimp: Boil the shrimp until pink and opaque. This takes about 2-3 minutes. Immediately transfer to an ice bath to cool. Drain and chop into bite-sized pieces.
  2. Marinate the shrimp: Place the chopped shrimp in a bowl. Pour lime and lemon juice over the shrimp. Cover and refrigerate for 30 minutes. This allows the citrus to “cook” the shrimp.
  3. Mix the ingredients: In a large bowl, combine red onion, tomatoes, cilantro, and jalapeño. Add the marinated shrimp and mix well.
  4. Add avocado: Gently fold in the diced avocado to avoid mashing.
  5. Season: Add salt and pepper to taste. Mix everything gently.
  6. Serve: Chill in the refrigerator for at least 30 minutes before serving. Serve with tortilla chips or on its own.

Shrimp Alfredo

Shrimp Alfredo is a classic Italian-American dish that combines tender shrimp with creamy, garlic-infused Alfredo sauce. This recipe is perfect for a comforting dinner that feels gourmet but is simple to make. With just a few ingredients, you can create a restaurant-quality meal at home.

Ingredients

  • 1 pound of shrimp, peeled and deveined
  • 2 tablespoons of olive oil
  • 4 cloves of garlic, minced
  • 1 cup of heavy cream
  • 1/2 cup of grated Parmesan cheese
  • 1 tablespoon of butter
  • Salt and pepper to taste
  • 8 ounces of fettuccine pasta
  • Chopped parsley for garnish

Instructions

  1. Cook the fettuccine pasta according to the package instructions. Drain and set aside.
  2. In a large skillet, heat the olive oil over medium heat.
  3. Add the garlic and sauté for 1-2 minutes until fragrant.
  4. Add the shrimp to the skillet. Cook until pink and opaque, about 2-3 minutes per side. Remove the shrimp from the skillet and set aside.
  5. In the same skillet, add the butter and heavy cream. Stir well.
  6. Reduce the heat to low and let the sauce simmer for 2-3 minutes.
  7. Add the Parmesan cheese to the sauce. Stir until melted and well combined.
  8. Season with salt and pepper to taste.
  9. Return the shrimp to the skillet. Stir to coat with the sauce.
  10. Add the cooked fettuccine to the skillet. Toss to combine.
  11. Garnish with chopped parsley before serving.

Shrimp Cocktail

Nothing beats the classic taste of a Shrimp Cocktail. It’s a timeless appetizer that is both elegant and simple to prepare. With its chilled, succulent shrimp and tangy cocktail sauce, this dish is perfect for any gathering. Whether you are hosting a party or having a quiet night at home, Shrimp Cocktail is sure to impress.

Ingredients

  • 1 pound large shrimp, peeled and deveined
  • 4 cups water
  • 1 lemon, halved
  • 1 tablespoon Old Bay seasoning
  • 1 cup cocktail sauce
  • Fresh parsley for garnish

Instructions

  1. Fill a large pot with water. Add the lemon halves and Old Bay seasoning.
  2. Bring the water to a boil. Add the shrimp.
  3. Cook the shrimp for 2-3 minutes, until pink and opaque.
  4. Drain the shrimp and place them in an ice bath to cool.
  5. Once cooled, arrange the shrimp on a platter.
  6. Serve with cocktail sauce and garnish with fresh parsley.

Shrimp Po’boy

The Shrimp Po’Boy is a classic sandwich from New Orleans. This delicious meal combines crispy fried shrimp, fresh veggies, and a tangy sauce. It’s perfect for lunch or dinner. Let’s dive into the ingredients and steps to make this flavorful sandwich.

Ingredients

  • 1 pound of large shrimp, peeled and deveined
  • 1 cup of buttermilk
  • 1 cup of flour
  • 1 cup of cornmeal
  • 1 teaspoon of salt
  • 1 teaspoon of black pepper
  • 1 teaspoon of paprika
  • 1 teaspoon of garlic powder
  • 1 teaspoon of onion powder
  • Vegetable oil for frying
  • 4 French bread rolls
  • Shredded lettuce
  • Sliced tomatoes
  • Dill pickles
  • 1 cup of mayonnaise
  • 2 tablespoons of hot sauce

Instructions

  1. In a bowl, soak the shrimp in buttermilk for 30 minutes.
  2. In another bowl, mix flour, cornmeal, salt, pepper, paprika, garlic powder, and onion powder.
  3. Heat the vegetable oil in a large skillet over medium-high heat.
  4. Remove shrimp from buttermilk and dredge in the flour mixture.
  5. Fry shrimp in the hot oil until golden brown, about 2-3 minutes per side.
  6. Drain the fried shrimp on paper towels.
  7. In a small bowl, mix mayonnaise and hot sauce to create the sauce.
  8. Slice the French bread rolls and spread the sauce on both sides.
  9. Layer the sandwich with shredded lettuce, sliced tomatoes, and dill pickles.
  10. Place the fried shrimp on top of the veggies.
  11. Close the sandwich and serve immediately.

Enjoy your homemade Shrimp Po’Boy with a side of fries or coleslaw. It’s a simple yet tasty dish that captures the essence of New Orleans cuisine.

Honey Garlic Shrimp

13-15 Shrimp Recipes: Honey Garlic Shrimp

Honey Garlic Shrimp is a delicious and easy-to-make dish. The sweet and savory flavors blend perfectly, creating a mouth-watering meal. This recipe is perfect for busy weeknights or casual dinners. Let’s dive into the ingredients and instructions to make this delightful dish.

Ingredients

  • 1 lb shrimp, peeled and deveined
  • 1/4 cup honey
  • 1/4 cup soy sauce
  • 3 cloves garlic, minced
  • 1 tablespoon olive oil
  • 1 teaspoon cornstarch
  • 2 tablespoons water
  • Salt and pepper to taste
  • Chopped green onions for garnish

Instructions

  1. In a bowl, mix honey, soy sauce, and minced garlic.
  2. Add shrimp to the bowl and coat evenly with the mixture.
  3. Marinate for at least 15 minutes.
  4. Heat olive oil in a pan over medium heat.
  5. Add the shrimp and cook for 2-3 minutes on each side.
  6. Remove shrimp from the pan and set aside.
  7. In a small bowl, mix cornstarch and water.
  8. Add the cornstarch mixture to the pan and cook until thickened.
  9. Return shrimp to the pan and toss to coat with the sauce.
  10. Season with salt and pepper as needed.
  11. Garnish with chopped green onions before serving.

Bang Bang Shrimp

Bang Bang Shrimp is a popular appetizer known for its crispy texture and spicy, tangy sauce. This dish features tender shrimp coated in a light batter and fried to perfection. The highlight of this recipe is the signature sauce, which combines creamy and spicy flavors. It’s a crowd-pleaser that can be served at any gathering or enjoyed as a quick snack.

Ingredients

  • 1 lb shrimp, peeled and deveined
  • 1/2 cup mayonnaise
  • 1/4 cup Thai sweet chili sauce
  • 1 tbsp Sriracha sauce
  • 1 cup cornstarch
  • 1/2 tsp salt
  • 1/2 tsp pepper
  • Vegetable oil for frying
  • Chopped green onions for garnish

Instructions

  1. In a bowl, mix mayonnaise, Thai sweet chili sauce, and Sriracha sauce.
  2. Combine cornstarch, salt, and pepper in another bowl.
  3. Coat shrimp with the cornstarch mixture.
  4. Heat vegetable oil in a deep pan over medium-high heat.
  5. Fry the shrimp in batches until golden and crispy, about 2-3 minutes.
  6. Place fried shrimp on a paper towel to drain excess oil.
  7. Toss the shrimp in the prepared sauce until well coated.
  8. Garnish with chopped green onions before serving.
13 15 Shrimp Recipes: Delicious and Easy-to-Make Dishes

Credit: www.tiktok.com

Shrimp Stir Fry

Shrimp stir fry is a quick, healthy, and flavorful meal. Perfect for busy weeknights, it brings together fresh vegetables and succulent shrimp. The vibrant colors and aromatic spices make it a feast for the senses. Plus, it’s easy to customize with your favorite veggies and sauces.

Let’s dive into how to make this delicious dish. Below, you’ll find the ingredients and step-by-step instructions to create a tasty shrimp stir fry.

Ingredients

  • 1 lb shrimp, peeled and deveined
  • 2 tablespoons olive oil
  • 1 bell pepper, sliced
  • 1 cup broccoli florets
  • 1 carrot, sliced
  • 3 cloves garlic, minced
  • 1 tablespoon ginger, minced
  • 1/4 cup soy sauce
  • 2 tablespoons honey
  • 1 tablespoon cornstarch
  • 1/2 cup chicken broth
  • Salt and pepper to taste
  • Cooked rice for serving

Instructions

  1. Heat 1 tablespoon of olive oil in a large pan over medium-high heat.
  2. Add the shrimp and cook for 2-3 minutes per side. Remove and set aside.
  3. In the same pan, add the remaining olive oil.
  4. Saute the bell pepper, broccoli, and carrot for 5 minutes.
  5. Add garlic and ginger. Cook for another 2 minutes.
  6. In a bowl, mix soy sauce, honey, cornstarch, and chicken broth.
  7. Pour the sauce into the pan and stir well.
  8. Return the shrimp to the pan and toss to coat.
  9. Season with salt and pepper to taste.
  10. Cook until the sauce thickens and everything is heated through.
  11. Serve the shrimp stir fry over cooked rice.

Shrimp Salad

Discover 13 15 shrimp recipes including a delicious shrimp salad. Fresh ingredients and simple steps make it a must-try. Perfect for a light, tasty meal.

Shrimp salad is a refreshing and light dish perfect for any meal. This recipe combines fresh shrimp with crisp vegetables and a tangy dressing. It is easy to make and full of flavor. Whether for lunch or dinner, shrimp salad is always a hit.

Ingredients

  • 1 pound shrimp, peeled and deveined
  • 1 cup cherry tomatoes, halved
  • 1 cucumber, diced
  • 1 red onion, finely chopped
  • 2 tablespoons olive oil
  • Juice of 1 lemon
  • Salt and pepper to taste
  • 1 tablespoon fresh dill, chopped
  • Mixed greens or lettuce

Instructions

  1. Boil a pot of water and cook the shrimp for 3 minutes.
  2. Drain and let the shrimp cool.
  3. In a large bowl, combine the tomatoes, cucumber, and red onion.
  4. Add the cooled shrimp to the bowl.
  5. In a small bowl, mix the olive oil, lemon juice, salt, and pepper.
  6. Pour the dressing over the shrimp and vegetables.
  7. Toss everything together until well coated.
  8. Sprinkle with fresh dill.
  9. Serve on a bed of mixed greens or lettuce.
13 15 Shrimp Recipes: Delicious and Easy-to-Make Dishes

Credit: www.thehungrymouse.com

13 15 Shrimp Recipes: Delicious and Easy-to-Make Dishes

Credit: www.yummly.com

Frequently Asked Questions

What Are The Best Shrimp Recipes?

The best shrimp recipes include grilled shrimp, shrimp scampi, and shrimp pasta. Each recipe is easy and delicious. You can find more detailed instructions in our blog post.

How To Cook Shrimp Perfectly?

To cook shrimp perfectly, ensure they turn pink and opaque. Avoid overcooking as they become rubbery. Cook for 2-3 minutes per side.

Are Shrimp Recipes Healthy?

Yes, shrimp recipes can be healthy. Shrimp is low in calories and high in protein. Choose recipes with minimal added fats and sugars.

Can You Cook Shrimp From Frozen?

Yes, you can cook shrimp from frozen. Simply thaw them under cold water first. Then, follow your desired cooking method.

Conclusion

Enjoy trying these 15 shrimp recipes at home. Each dish offers unique flavors. Easy to follow and perfect for any meal. Impress your family with delicious shrimp dishes. Experiment and find your favorite recipe. Cooking with shrimp can be fun and rewarding.

Dive into these recipes today. Happy cooking!

Sugar Free Fluff Recipe: Delicious Guilt-Free Dessert

Craving a sweet treat without the guilt? Discover the magic of sugar-free fluff.

This delightful dessert is perfect for those watching their sugar intake. With the rising awareness of sugar’s effects on health, many seek alternatives. Sugar-free fluff offers a solution. It’s light, creamy, and satisfies sweet cravings without the extra calories. Perfect for diabetics, weight watchers, or anyone wanting a healthier dessert option.

This recipe is easy to make and uses simple ingredients found in most kitchens. Get ready to enjoy a delicious, guilt-free dessert that everyone will love. Dive into the world of sugar-free fluff and treat yourself to something special.

Sugar Free Fluff Recipe: Delicious Guilt-Free Dessert

Credit: www.tiktok.com

Ingredients Needed

Creating a delightful sugar-free fluff recipe starts with the right ingredients. Using the best ingredients ensures your fluff is light, tasty, and healthy. Below, we will explore the essential ingredients and some optional add-ins you might consider.

Essential Ingredients

These are the must-have ingredients for your sugar-free fluff recipe:

  • Sugar-Free Gelatin Mix: This is the base of the fluff. It provides structure and flavor.
  • Heavy Whipping Cream: Makes the fluff creamy and rich. Choose a sugar-free option.
  • Cold Water: Helps dissolve the gelatin mix. It also aids in achieving the right consistency.

Optional Add-ins

Want to add some extra flavor or texture? Try these optional add-ins:

  • Vanilla Extract: Adds a warm and sweet aroma.
  • Sugar-Free Sweetener: For those who like a touch of extra sweetness.
  • Fresh Berries: Adds a burst of natural flavor and a bit of color.
  • Chopped Nuts: Gives the fluff a nice crunch.

Experiment with these ingredients to make the perfect sugar-free fluff that suits your taste.

Preparation Steps

Creating a sugar-free fluff recipe is easy and fun. Follow these steps to ensure your fluff is light, delicious, and perfect for any occasion. Below, we break down the process into two main parts: Mixing the Base and Incorporating Flavors.

Mixing The Base

First, gather all the necessary ingredients. You will need sugar-free gelatin, whipped topping, and cream cheese. Make sure the cream cheese is at room temperature for easy mixing.

  1. In a large bowl, dissolve the sugar-free gelatin in hot water. Stir until fully dissolved.
  2. Allow the gelatin to cool slightly, but not set. This usually takes about 10 minutes.
  3. In a separate bowl, beat the cream cheese until smooth and creamy.
  4. Gradually add the cooled gelatin to the cream cheese. Mix until well combined.

By now, you should have a smooth base ready for the next step.

Incorporating Flavors

Next, it’s time to add flavors and make your fluff even more delicious. You can use a variety of sugar-free flavorings and extracts.

  • Add a few drops of vanilla extract for a classic flavor.
  • For a fruity twist, use sugar-free fruit extracts like strawberry or lemon.
  • If you prefer a richer taste, try adding a bit of sugar-free chocolate syrup.

Once you have your desired flavor, fold in the whipped topping. Be gentle to keep the mixture light and airy.

  1. Slowly add the whipped topping to the gelatin-cream cheese mixture.
  2. Use a spatula to fold the topping in, ensuring even distribution.
  3. Continue folding until the mixture is fluffy and well combined.

Your sugar-free fluff is now ready to be chilled. Transfer it to a serving dish and refrigerate for at least 2 hours. Enjoy your tasty, guilt-free treat!

Tips For Perfect Texture

Creating the perfect sugar-free fluff can be tricky. But with the right tips, you can achieve a creamy and smooth texture every time. Follow these guidelines to ensure your fluff is perfect.

Achieving Creaminess

To get a creamy texture, use full-fat ingredients. Low-fat options may not blend well. Whipping the ingredients at high speed also helps. This incorporates more air, making the fluff light and airy.

Use a chilled bowl and whisk. Cold tools help in maintaining the fluffiness. Also, add a stabilizer like gelatin. It helps hold the structure, keeping the fluff from collapsing.

Avoiding Common Mistakes

Avoid over-whipping the mixture. Over-whipping can lead to a grainy texture. Instead, stop whipping as soon as soft peaks form. Also, ensure all ingredients are at room temperature before starting. Cold ingredients can cause lumps.

Do not rush the process. Take your time to blend everything smoothly. Lastly, avoid using artificial sweeteners that leave a bitter aftertaste. Choose a high-quality sugar substitute for the best flavor.

Flavor Variations

Creating a sugar-free fluff recipe opens up a world of flavor possibilities. You can easily adjust the base recipe to suit your taste. Below, discover two delightful variations to enjoy: Classic Vanilla and Rich Chocolate.

Classic Vanilla

The Classic Vanilla variation is timeless. It brings a sweet, comforting taste. To make it, use vanilla extract in your sugar-free fluff base. High-quality vanilla enhances the flavor. You can also add a pinch of sea salt. This balances the sweetness and adds depth. The result is a smooth, creamy dessert.

Rich Chocolate

For chocolate lovers, the Rich Chocolate variation is perfect. Use cocoa powder or sugar-free chocolate syrup in your base. Ensure you mix well to get a consistent flavor. The rich, chocolatey taste is satisfying. It’s a great option for a guilt-free treat. Add a sprinkle of dark chocolate shavings on top. This adds texture and a touch of elegance.

Serving Suggestions

One of the joys of creating a Sugar Free Fluff Recipe is its versatility. You can serve it in various ways to delight your taste buds. From pairing it with fresh fruits to adding decorative toppings, the options are endless. Let’s explore some serving suggestions to make your dessert even more enjoyable.

Pairing With Fruits

Fresh fruits add a natural sweetness that complements the Sugar Free Fluff perfectly. Here are some fruit pairing ideas:

  • Strawberries: Slice them thin and layer them with the fluff.
  • Blueberries: Sprinkle them on top for a burst of flavor.
  • Mango: Dice and mix in for a tropical twist.

You can also create a fruit salad and serve the fluff on the side. This way, everyone can add as much or as little as they like.

Decorative Toppings

Toppings not only add flavor but also make your dessert visually appealing. Consider these decorative toppings:

  • Chopped Nuts: Almonds, walnuts, or pecans add a crunchy texture.
  • Unsweetened Coconut Flakes: Sprinkle them for a tropical feel.
  • Cocoa Powder: Dust a little on top for a hint of chocolate.

For a more festive look, you can also use sugar-free sprinkles. These add color and fun to your dessert.

Use these serving suggestions to elevate your Sugar Free Fluff Recipe. Enjoy experimenting with different combinations to find your favorite!

Sugar Free Fluff Recipe: Delicious Guilt-Free Dessert

Credit: stepawayfromthecarbs.com

Storage Instructions

Proper storage of your sugar-free fluff ensures it stays fresh and delicious. Follow these simple storage instructions to keep your fluff at its best.

Refrigeration Tips

Store your sugar-free fluff in an airtight container. This keeps it from absorbing other fridge odors. Place the container in the main section of the fridge. Avoid the door, as temperature changes can affect texture. Your fluff can stay fresh for up to five days in the fridge.

Freezing For Later

Freezing sugar-free fluff is easy. Use a freezer-safe container or a heavy-duty freezer bag. Remove as much air as possible to prevent freezer burn. Label the container with the date. Your fluff can be frozen for up to three months. Thaw it in the fridge overnight before serving. Give it a gentle stir to restore its creamy texture.

Health Benefits

Enjoying a sweet treat without the added sugar is possible with the sugar-free fluff recipe. This delicious dessert offers several health benefits, making it a great choice for those mindful of their health.

Low-calorie Advantage

Sugar-free fluff is low in calories. This makes it perfect for weight management. You can indulge without the guilt. Traditional desserts are often high in calories. But this recipe keeps it light. It satisfies your sweet tooth without adding extra pounds.

Suitable For Diabetics

Diabetics need to watch their sugar intake. Sugar-free fluff is a safe option. It won’t spike blood sugar levels. This makes it an excellent dessert choice. You get to enjoy a sweet treat without worry. Managing diabetes becomes easier with smart food choices.

Sugar Free Fluff Recipe: Delicious Guilt-Free Dessert

Credit: thesugarfreediva.com

Frequently Asked Questions

What Ingredients Are In Sugar-free Fluff?

Sugar-free fluff typically includes sugar-free gelatin, cream cheese, and whipped topping. Optional ingredients are vanilla extract and fresh fruits.

How Do You Make Sugar-free Fluff?

Mix sugar-free gelatin with hot water. Add cream cheese and whipped topping. Blend until smooth. Refrigerate until set.

Can I Use Fresh Fruits In Sugar-free Fluff?

Yes, you can add fresh fruits like strawberries or blueberries. Ensure they are sugar-free and cut into small pieces.

Is Sugar-free Fluff Keto-friendly?

Yes, sugar-free fluff can be keto-friendly. Ensure you use keto-approved ingredients like sugar-free gelatin and cream cheese.

Conclusion

Enjoy making this sugar-free fluff recipe at home. It’s easy and healthy. Perfect for those craving a sweet treat without added sugar. Share it with friends and family. They’ll love it too. This recipe fits well into any diet. Simple ingredients, big flavor.

Give it a try today. Your taste buds will thank you.

Teriyaki Beef Burger Recipe: Ultimate Guide to Deliciousness

Love burgers? Try a Teriyaki Beef Burger.

It’s a flavorful twist. This Teriyaki Beef Burger Recipe brings together the best of East and West. Imagine a juicy beef patty, drenched in sweet and savory teriyaki sauce. Topped with fresh veggies, it’s a delightful mix of flavors and textures.

Perfect for a backyard BBQ or a quick weeknight dinner, this burger is sure to impress. With simple ingredients and easy steps, anyone can make it at home. Get ready to enjoy a delicious, homemade burger that stands out from the usual fare. Let’s dive into the world of Teriyaki Beef Burgers and discover how to make this mouth-watering treat.

Ingredients

Creating the perfect Teriyaki Beef Burger begins with selecting the right ingredients. Fresh, quality ingredients make a massive difference in flavor and texture. Below, you’ll find a detailed list of essential ingredients and some optional add-ons to elevate your burger experience.

Essential Ingredients

Ingredient Quantity
Ground Beef 1 lb
Teriyaki Sauce 1/2 cup
Garlic Powder 1 tsp
Onion Powder 1 tsp
Salt 1/2 tsp
Pepper 1/2 tsp
Burger Buns 4 pieces
Cheese Slices 4 slices
Lettuce 4 leaves
Tomato Slices 4 slices

Optional Add-ons

  • Pineapple Slices: Grilled for extra sweetness
  • Sautéed Onions: Add a rich flavor
  • Avocado Slices: For a creamy texture
  • Pickles: Add a tangy crunch
  • Mayonnaise: Spread on the buns
  • Jalapeños: For a spicy kick
Teriyaki Beef Burger Recipe: Ultimate Guide to Deliciousness

Credit: www.youtube.com

Preparing The Beef Patties

Creating a delicious Teriyaki Beef Burger starts with perfect beef patties. The key elements include choosing the right beef, and seasoning the patties. This ensures a juicy and flavorful bite every time.

Choosing The Right Beef

For juicy burgers, always go for fresh, high-quality beef. A blend of 80% lean meat and 20% fat works best. This ratio provides enough fat to keep the patties moist without making them greasy.

Ground chuck is an excellent choice. It has the right balance of meat and fat. Avoid using beef that is too lean, as it can result in dry patties.

Seasoning The Patties

Seasoning is crucial for tasty patties. Start with simple ingredients like salt and pepper. These enhance the natural flavor of the beef.

  • 1 pound ground beef
  • 1 teaspoon salt
  • 1/2 teaspoon black pepper
  • 1 tablespoon soy sauce
  • 1 teaspoon garlic powder
  • 1 teaspoon onion powder

Mix these seasonings into the beef gently. Over-mixing can make the patties tough.

Form the beef into equal-sized patties. Use your thumb to create a small indentation in the center of each patty. This helps them cook evenly and prevents them from puffing up.

Place the patties on a tray lined with parchment paper. Cover them and refrigerate for at least 30 minutes. This helps them hold their shape during cooking.

With your beef patties prepared, you’re one step closer to enjoying a mouth-watering Teriyaki Beef Burger.

Making The Teriyaki Sauce

Creating the perfect Teriyaki Beef Burger begins with making an amazing teriyaki sauce. This sauce blends sweet and savory flavors. It adds a unique taste to the burger. Follow the steps below to make this delicious sauce.

Key Ingredients For Sauce

To make the teriyaki sauce, you need a few key ingredients. Here is a table listing them:

Ingredient Quantity
Soy Sauce 1/2 cup
Brown Sugar 1/4 cup
Honey 2 tablespoons
Garlic (minced) 2 cloves
Ginger (grated) 1 teaspoon
Sesame Oil 1 teaspoon
Water 1/4 cup
Cornstarch 1 tablespoon

Steps To Prepare

  1. Combine soy sauce, brown sugar, honey, garlic, ginger, and sesame oil in a saucepan.
  2. Mix water and cornstarch in a small bowl until smooth.
  3. Add the cornstarch mixture to the saucepan.
  4. Heat the saucepan over medium heat.
  5. Stir constantly until the sauce thickens, about 5 minutes.
  6. Remove from heat and let it cool before using.

Now your teriyaki sauce is ready to give your Teriyaki Beef Burger that signature flavor. Enjoy!

Assembling The Burger

After preparing your juicy teriyaki beef patties, it’s time to assemble the burger. This step brings all the flavors together. Follow these steps to create a delicious Teriyaki Beef Burger.

Toasting The Buns

Start by toasting the buns. Heat a skillet over medium heat. Place the buns cut side down on the skillet. Toast until golden brown. This adds a nice crunch and prevents sogginess.

Layering Ingredients

Place the bottom bun on a plate. Spread a thin layer of mayonnaise. Add a fresh lettuce leaf on top. Place the juicy teriyaki beef patty on the lettuce. Add a slice of ripe tomato. Top with thinly sliced red onions. Drizzle some extra teriyaki sauce for more flavor. Finally, place the top bun to complete the burger.

Your Teriyaki Beef Burger is ready to enjoy. Serve with fries or a side salad for a complete meal.

Cooking Techniques

Cooking the perfect Teriyaki Beef Burger requires some essential techniques. These methods ensure that each bite is juicy and flavorful. Let’s explore the best ways to cook your patties.

Grilling The Patties

Grilling adds a smoky flavor to your Teriyaki Beef Burger. Heat your grill to medium-high. Shape your beef patties and place them on the grill. Cook each side for 4-5 minutes. This creates a nice char on the outside. Use a meat thermometer to check the internal temperature. It should reach 160°F for safety. Brush the patties with Teriyaki sauce in the last minute. This gives them a glossy finish and extra flavor.

Alternative Cooking Methods

Don’t have a grill? You can still enjoy a delicious Teriyaki Beef Burger. Try using a skillet on the stove. Heat the skillet over medium heat. Add a bit of oil to prevent sticking. Cook the patties for 4-5 minutes on each side. Use the same Teriyaki sauce technique to finish.

Another option is to use an oven. Preheat to 375°F. Place the patties on a baking sheet. Cook for 20 minutes, flipping halfway through. Again, brush with Teriyaki sauce near the end. This method keeps the patties juicy and flavorful.

Teriyaki Beef Burger Recipe: Ultimate Guide to Deliciousness

Credit: www.thekitchn.com

Side Dishes And Pairings

Finding the right side dishes and beverages to pair with your Teriyaki Beef Burger can elevate your meal. Let’s explore some perfect side dishes and ideal beverages to complement your delicious burger.

Perfect Side Dishes

Fries are a classic choice. Sweet potato fries bring a touch of sweetness that pairs well with the savory teriyaki flavor. Coleslaw provides a crunchy texture and a refreshing taste. It’s a nice contrast to the juicy burger.

For a healthier option, a simple green salad works well. Dress it with a light vinaigrette to keep it fresh and tangy. Grilled vegetables are another great choice. They add a smoky flavor that complements the teriyaki sauce.

Ideal Beverages

An ice-cold beer is a top pick. It balances the flavors of the burger nicely. If you prefer non-alcoholic options, iced tea is a refreshing choice. A lightly sweetened green tea pairs well with the teriyaki sauce.

Soda is another popular choice. A classic cola can cut through the richness of the burger. For a unique twist, try a ginger ale. Its spicy notes complement the teriyaki flavor perfectly.

Tips And Tricks

Creating the perfect Teriyaki Beef Burger at home can be a rewarding experience. To help you achieve the best results, we’ve gathered some essential tips and tricks. These will guide you through the process, ensuring a delicious and mouthwatering burger every time.

Burger Perfection Tips

Use high-quality beef for the juiciest burgers. Opt for ground chuck with a fat content of 80/20. This ratio ensures a good balance of flavor and moisture.

Season the beef generously with salt and pepper before forming patties. This simple step enhances the natural taste of the meat.

Shape the patties gently and avoid overworking the meat. Overworking can lead to tough burgers. Make a small indentation in the center of each patty. This helps the burgers cook evenly and prevents them from puffing up.

Grill or cook the patties over medium-high heat. This provides a nice sear while keeping the inside juicy. Always let the burgers rest for a few minutes before serving. This allows the juices to redistribute, ensuring every bite is flavorful.

Common Mistakes To Avoid

Do not press down on the patties while cooking. This squeezes out the juices and leads to dry burgers.

Avoid using lean beef. Lean beef lacks the necessary fat content for a juicy burger.

Do not skip the seasoning. Unseasoned patties can taste bland and unappetizing.

Do not overcook the patties. Overcooked burgers can become dry and tough. Aim for a medium-rare to medium doneness for the best texture and flavor.

Avoid using stale or old buns. Fresh buns make a significant difference in the overall taste and texture of the burger.

Teriyaki Beef Burger Recipe: Ultimate Guide to Deliciousness

Credit: community.kewpieshop.com

Frequently Asked Questions

What Ingredients Are Needed For Teriyaki Beef Burger?

You need ground beef, teriyaki sauce, garlic, ginger, soy sauce, and burger buns. Toppings can include lettuce, tomato, and onion.

How Do You Make Teriyaki Sauce For Burgers?

Combine soy sauce, mirin, sugar, ginger, and garlic. Simmer until thickened. Adjust sweetness and saltiness to taste.

Can I Use Store-bought Teriyaki Sauce?

Yes, you can use store-bought teriyaki sauce. It saves time and ensures consistent flavor.

What Is The Cooking Time For Teriyaki Beef Burgers?

Cook each patty for about 4-5 minutes per side. Ensure the internal temperature reaches 160°F.

Conclusion

Crafting a Teriyaki Beef Burger at home is easy and fun. The sweet and savory flavors blend perfectly. This recipe promises a tasty and satisfying meal. Impress your family and friends with your cooking skills. Remember, fresh ingredients make a big difference.

Experiment with toppings and sauces for variety. Enjoy your homemade Teriyaki Beef Burger and happy cooking!

Top Round Oven Recipe: Delicious and Easy Cooking Guide

Top Round Oven Recipe Top round roast is a lean and flavorful cut of beef. It’s perfect for a hearty meal.

This blog post will introduce you to the best ways to prepare it. Cooking a top round roast can seem daunting, but it’s quite simple. All you need are the right ingredients and a good oven. This cut of beef is not only delicious but also versatile.

Whether you want a savory dinner for the family or a special dish for guests, a top round roast fits the bill. In this post, you’ll discover how to bring out the best flavors and make a memorable meal. From seasoning tips to cooking times, we cover everything. Let’s dive into the world of top round oven recipes!

Introduction To Top Round Oven Recipes

Cooking a delicious top round roast can be a rewarding experience. Top round is a lean cut of beef, known for its rich flavor and versatility. It’s perfect for a variety of oven recipes. In this blog post, we will explore what top round is, and the benefits of cooking it in the oven.

What Is Top Round?

Top round is a cut from the upper part of the cow’s hind leg. It’s known for being lean and flavorful. Unlike fattier cuts, top round has less marbling. This makes it a healthier choice for those watching their fat intake.

Here are some key points about top round:

  • Lean cut of beef
  • From the upper hind leg
  • Rich in flavor
  • Less marbling

Benefits Of Cooking Top Round

Cooking top round in the oven offers several advantages. These benefits make it a favorite among home cooks.

Below are some benefits of cooking top round:

  1. Healthier Option: Top round is low in fat, making it a healthy choice.
  2. Rich Flavor: Despite being lean, it has a robust beefy taste.
  3. Versatility: Suitable for various recipes, from roasts to stir-fries.
  4. Cost-Effective: Often more affordable than other cuts of beef.

In summary, top round is a great choice for oven recipes. Its lean nature, flavor, and versatility make it a kitchen staple.

Essential Ingredients

Top Round Oven Recipe: Essential Ingredients

Cooking a delicious Top Round Oven recipe starts with gathering the right ingredients. Using the best and freshest ingredients can make all the difference in flavor. Here, we will outline the essential components you need to make this dish a success.

Key Ingredients For Flavor

  • Top Round Roast: The main star. Choose a high-quality cut.
  • Olive Oil: Adds richness and helps with browning.
  • Garlic: Infuses the meat with a robust taste.
  • Rosemary: Provides a fragrant, earthy flavor.
  • Salt and Pepper: Essential for seasoning.

Optional Add-ins

  • Carrots: Add sweetness and color.
  • Onions: Enhance the depth of flavor.
  • Potatoes: Make the dish heartier.
  • Thyme: Another herb that pairs well with roast.
  • Red Wine: Adds a rich, deep flavor to the sauce.
Ingredient Quantity
Top Round Roast 1 (3-4 pounds)
Olive Oil 2 tbsp
Garlic 4 cloves, minced
Rosemary 2 sprigs, chopped
Salt and Pepper To taste
Carrots (optional) 3, sliced
Onions (optional) 2, quartered
Potatoes (optional) 4, cubed
Thyme (optional) 1 sprig
Red Wine (optional) 1 cup

Preparation Tips

Preparing the perfect Top Round Oven Recipe requires attention to detail. From selecting the right cut of meat to marinating it perfectly, every step matters. Here are some essential tips to help you achieve the best results.

Choosing The Best Cut

Start with a high-quality top round cut. Look for meat with a bright red color. Avoid cuts with too much fat or gristle. A fresh cut ensures a tender and juicy result. Check the packaging date to ensure freshness. Fresh meat cooks better and tastes great.

Marinating Techniques

Marinating adds flavor and tenderness to the top round. Use a simple marinade with oil, vinegar, and spices. Let the meat soak for at least four hours. Overnight marination gives the best results. Place the meat in a sealed bag to ensure even marination.

Turn the bag occasionally to distribute the marinade evenly. Avoid using too much salt in the marinade. Salt can draw out moisture and make the meat dry. Use herbs and garlic for added flavor without overpowering the meat’s natural taste.

Top Round Oven Recipe: Delicious and Easy Cooking Guide

Credit: www.simplejoy.com

Cooking Methods

Cooking top round in the oven can yield delicious, tender results. The method you choose can affect the flavor and texture of the meat. Below are two popular ways to cook top round in the oven.

Oven Roasting Basics

Oven roasting is a straightforward method. It lets the meat cook evenly and develop a savory crust.

Ingredients:

  • Top round roast
  • Salt and pepper
  • Olive oil
  • Garlic
  • Herbs (rosemary or thyme)

Instructions:

  1. Preheat your oven to 350°F (175°C).
  2. Season the roast with salt, pepper, and herbs.
  3. Heat olive oil in a pan and sear the roast on all sides.
  4. Place the seared roast in a baking dish with garlic cloves.
  5. Bake in the oven for 1 to 1.5 hours.
  6. Use a meat thermometer to ensure an internal temperature of 135°F (57°C) for medium-rare.
  7. Let the roast rest for 10 minutes before slicing.

Slow Cooking Alternative

Slow cooking offers a different approach. It allows the meat to become incredibly tender.

Ingredients:

  • Top round roast
  • Salt and pepper
  • Onions
  • Carrots
  • Beef broth
  • Bay leaves

Instructions:

  1. Preheat your oven to 275°F (135°C).
  2. Season the roast with salt and pepper.
  3. Place onions and carrots at the bottom of a roasting pan.
  4. Lay the roast on top of the vegetables.
  5. Add beef broth and bay leaves to the pan.
  6. Cover the pan tightly with foil.
  7. Bake in the oven for 3 to 4 hours.
  8. Check for doneness; the meat should be very tender.
  9. Let the roast rest before slicing and serving.

Step-by-step Recipe Guide

Creating the perfect top round roast requires patience and attention to detail. This step-by-step guide will walk you through each part of the process. Follow these instructions to ensure your top round roast turns out tender and flavorful.

Prepping The Meat

Begin by choosing a fresh top round roast. Look for meat with a bright red color and minimal fat. Follow these steps to prepare your roast:

  • Rinse the meat under cold water.
  • Pat dry with paper towels.
  • Trim excess fat to leave a thin layer.

Once the meat is clean, it’s time to season. A simple seasoning mix enhances the meat’s natural flavor. Use this basic seasoning blend:

Ingredient Amount
Salt 1 teaspoon
Black Pepper 1 teaspoon
Garlic Powder 1 teaspoon
Onion Powder 1 teaspoon

Rub the seasoning mix all over the meat. Ensure every side is covered. Let the meat rest at room temperature for 30 minutes. This step allows the seasoning to penetrate the meat.

Cooking Instructions

Now that the meat is prepped, it’s time to cook. Follow these simple cooking instructions for a perfect roast:

  1. Preheat oven to 325°F (163°C).
  2. Place the roast on a rack in a roasting pan.
  3. Insert a meat thermometer into the thickest part.
  4. Roast in the oven for 20 minutes per pound.
  5. Check the temperature for doneness:

For medium-rare, the internal temperature should be 135°F (57°C). For medium, aim for 145°F (63°C). Once the roast reaches your desired doneness, remove it from the oven.

Rest the meat for 15 minutes before slicing. This step is crucial. It allows the juices to redistribute, making the meat more tender.

Slice the roast thinly against the grain. Serve with your favorite sides and enjoy a delicious, home-cooked meal.

Top Round Oven Recipe: Delicious and Easy Cooking Guide

Credit: www.simplejoy.com

Serving Suggestions

The Top Round Oven Recipe is a delicious and hearty dish. But the experience is incomplete without the right accompaniments. Below, you’ll find ideas for Side Dishes to Complement your meal and some Presentation Tips to make it look as good as it tastes.

Side Dishes To Complement

Pairing your Top Round Oven Recipe with the right side dishes enhances the meal. Here are some suggestions:

  • Garlic Mashed Potatoes: Creamy and flavorful, they balance the richness of the meat.
  • Roasted Vegetables: Carrots, Brussels sprouts, and bell peppers add color and nutrition.
  • Fresh Green Salad: A light option with a tangy vinaigrette to cleanse the palate.
  • Steamed Asparagus: Simple, elegant, and a perfect match for the hearty main dish.
  • Buttered Dinner Rolls: Soft and warm, ideal for soaking up any extra gravy.

Presentation Tips

Presentation is key to a memorable meal. Here are some tips to make your Top Round Oven Recipe look appealing:

  1. Use a Platter: Serve the meat on a large, elegant platter. It makes the dish look more inviting.
  2. Garnish with Fresh Herbs: Fresh parsley or rosemary adds a pop of color.
  3. Slice the Meat Thinly: Thin, even slices showcase the tenderness of the meat.
  4. Arrange Sides Neatly: Place side dishes around the meat in an organized manner.
  5. Drizzle with Sauce: A light drizzle of gravy or sauce adds a glossy finish.

Creating a visually appealing plate enhances the dining experience. It shows care and attention to detail.

Common Mistakes To Avoid

Preparing a top round oven recipe can be straightforward. Yet, many people make common mistakes that can ruin the dish. Knowing what to avoid can help you cook a perfect meal every time.

Overcooking Issues

Overcooking a top round roast can make it tough and dry. To avoid this, use a meat thermometer. Check the internal temperature regularly. The ideal temperature for a medium-rare roast is 135°F. Remove the roast from the oven when it is 5-10 degrees below the desired temperature. Meat continues to cook after being removed from the heat.

Do not rely on cooking times alone. Ovens vary, and cooking times can differ. Always check the meat’s internal temperature for the best results.

Seasoning Errors

Not seasoning the meat properly is another common mistake. A top round roast needs a good amount of seasoning. Use salt, pepper, and your favorite herbs. Rub the seasoning evenly over the entire roast. This ensures every bite is flavorful.

Marinate the meat if you have time. A marinade can add extra flavor and make the meat more tender. Allow the roast to marinate for at least a few hours, or overnight if possible.

Avoid adding too much salt if you are marinating the meat. The marinade may already contain salty ingredients.

Top Round Oven Recipe: Delicious and Easy Cooking Guide

Credit: thebigmansworld.com

Storing And Reheating

Once you’ve cooked your top round roast to perfection, knowing how to store and reheat it properly is crucial. This ensures your leftovers remain delicious and safe to eat. Follow these guidelines for the best results.

Proper Storage Techniques

First, allow the roast to cool to room temperature. Refrigerate it within two hours of cooking to prevent bacteria growth.

  • Wrap the roast tightly in plastic wrap or aluminum foil.
  • Place it in an airtight container or a resealable plastic bag.
  • Store in the refrigerator for up to four days.

For longer storage, you can freeze the roast. Follow these steps:

  1. Wrap the cooled roast in plastic wrap.
  2. Place it in a freezer-safe container or bag.
  3. Label with the date and freeze for up to three months.

Reheating Methods

Reheating your top round roast correctly keeps it tender and flavorful. Here are some effective methods:

Method Instructions
Oven
  • Preheat oven to 250°F (120°C).
  • Place the roast in a baking dish with a bit of broth.
  • Cover with foil and heat for 20-30 minutes.
Stovetop
  • Slice the roast thinly.
  • Heat a pan over medium heat.
  • Add a bit of broth or water and simmer the slices until warm.
Microwave
  • Place slices on a microwave-safe plate.
  • Cover with a damp paper towel to retain moisture.
  • Heat on medium power for 1-2 minutes, checking often.

Remember, reheating too quickly or at high temperatures can dry out the meat. Use these methods to keep your top round roast moist and tasty.

Conclusion And Final Thoughts

Top Round Oven Recipe: Conclusion and Final Thoughts

Cooking a top round roast in the oven can be a rewarding experience. It is simple, delicious, and perfect for any occasion. With the right seasoning and cooking time, you can create a mouth-watering dish that everyone will enjoy.

In this section, we will recap the key points and encourage you to experiment with your own variations. Let’s dive in and wrap up our top round oven recipe journey.

Recap Of Key Points

First, choose a high-quality cut of top round beef. This ensures tenderness and flavor. Second, season the meat generously with your favorite spices. Salt, pepper, and garlic powder work well.

Preheat your oven to the right temperature. 350°F is ideal. Use a meat thermometer to check for doneness. An internal temperature of 135°F gives you a perfect medium-rare roast.

Finally, let the roast rest for at least 15 minutes before slicing. This allows the juices to redistribute, making the meat juicier and more flavorful.

Encouragement To Experiment

Don’t be afraid to try new seasonings and marinades. Different herbs and spices can give your roast unique flavors. Consider adding rosemary, thyme, or even a splash of soy sauce for a twist.

You can also experiment with cooking times and temperatures. A lower temperature for a longer time can make the meat even more tender. Or, try a quick sear on high heat before roasting for a nice crust.

Remember, cooking is an art. Have fun and make it your own. Your top round roast can become a family favorite with a little creativity.

Frequently Asked Questions

What Is A Round Oven Recipe?

A round oven recipe utilizes a round-shaped oven for baking. It often includes dishes like bread, pizza, and cakes.

How To Cook Meat In A Round Oven?

Preheat the round oven to 350°F. Season the meat, place it in the oven, and cook as per recipe instructions.

Can I Bake Bread In A Round Oven?

Yes, you can bake bread in a round oven. Use a round baking dish or Dutch oven for best results.

What Dishes Are Best For Round Ovens?

Round ovens are great for baking pizzas, casseroles, and cakes. They provide even heat distribution.

Conclusion

Enjoy making this top round oven recipe at home. It’s simple, tasty, and perfect for any meal. Your family will love it. The flavors blend well, creating a delightful dish. Cooking this recipe saves time and effort. Give it a try and share your experience.

Perfect for busy weeknights or special occasions. Happy cooking!

Best Lemon Drop Cookie Recipe: Zesty & Irresistible Treats

Who doesn’t love a delicious cookie? Lemon drop cookies are a delightful treat.

They combine the zesty flavor of lemon with a sweet, soft cookie base. Baking these cookies is easier than you think. The best lemon drop cookie recipe will guide you through each step. You’ll enjoy the perfect balance of tart and sweet in every bite.

These cookies are perfect for any occasion. Whether you’re planning a party or just want a tasty snack, lemon drop cookies will impress. They are light, refreshing, and simply irresistible. Get ready to discover the secrets to making the best lemon drop cookies ever!

Introduction To Lemon Drop Cookies

Welcome to the delightful world of Lemon Drop Cookies. These cookies are a perfect blend of sweet and tangy flavors. They offer a refreshing twist compared to traditional cookie recipes. The zesty lemon flavor combined with a soft, chewy texture makes them a favorite for many. Whether you are a seasoned baker or a beginner, this recipe is easy to follow and delivers delicious results every time.

Why Lemon Drop Cookies?

Lemon Drop Cookies stand out for several reasons. Firstly, their unique lemony flavor is a refreshing change from the usual chocolate or vanilla cookies. Secondly, they are versatile and can be enjoyed any time of the year. Thirdly, they are relatively easy to make with ingredients that are often already in your pantry. Here are some key points why these cookies are a must-try:

  • Unique Flavor: The tangy lemon zest adds a burst of flavor.
  • Easy to Make: Simple ingredients and quick preparation.
  • Perfect Texture: Soft and chewy with a slight crunch.

Perfect Occasions For Lemon Drop Cookies

Lemon Drop Cookies are perfect for various occasions. Their bright flavor and cheerful appearance make them a hit in many settings. Here are some occasions where these cookies shine:

Occasion Why They Are Perfect
Spring and Summer Parties Refreshing flavor complements warm weather.
Tea Time Ideal for pairing with a cup of tea.
Holidays A unique treat among holiday cookie assortments.
Gifts Pack nicely and make thoughtful presents.

So, why not give these delightful cookies a try? Your taste buds will thank you!

Best Lemon Drop Cookie Recipe: Zesty & Irresistible Treats

Credit: breadboozebacon.com

Ingredients Needed

Creating the perfect Lemon Drop Cookie begins with gathering the right ingredients. These tangy, sweet cookies need fresh lemons and basic baking items. Let’s dive into what you need.

Fresh Lemons

Fresh lemons are the star of this recipe. Their zest and juice give the cookies their bright, citrus flavor. Use organic lemons for the best taste. Ensure they are firm and bright yellow. You will need both the zest and the juice for maximum flavor.

Key Baking Ingredients

For the dough, you need all-purpose flour, sugar, and butter. Use unsalted butter at room temperature. This helps in making a smooth, creamy dough. Granulated sugar adds sweetness and structure to the cookies.

Baking powder and baking soda are essential. They ensure the cookies rise properly and have a light texture. Add a pinch of salt to balance the flavors.

Eggs act as a binding agent. They also add richness to the dough. Use large eggs at room temperature for best results. Vanilla extract enhances the overall flavor.

For extra lemony goodness, consider adding lemon extract. It gives an intense lemon flavor without extra acidity.

With these ingredients, you can make the best Lemon Drop Cookies ever. Happy baking!

Essential Baking Tools

The right tools make baking lemon drop cookies a breeze. They ensure your cookies come out perfect every time. Let’s look at the essential baking tools you need.

Mixing Equipment

Proper mixing equipment is key for the best lemon drop cookies. Here are some must-haves:

  • Mixing Bowls: Use different sizes for various tasks.
  • Electric Mixer: It makes blending ingredients easier.
  • Spatula: Helps in scraping the bowl clean.
  • Whisk: Ideal for mixing dry ingredients.

Baking Sheets And Parchment Paper

These tools are essential for even baking. They help in achieving the perfect texture.

  • Baking Sheets: Ensure they are non-stick and of good quality.
  • Parchment Paper: Prevents cookies from sticking to the sheets.

Using these essential baking tools will elevate your lemon drop cookies. Enjoy baking!

Best Lemon Drop Cookie Recipe: Zesty & Irresistible Treats

Credit: hopewellheightsblog.com

Preparing The Dough

Preparing the dough for lemon drop cookies is a crucial step. This stage sets the foundation for the cookies’ texture and flavor. Follow these steps to ensure your dough is perfect for baking.

Mixing The Dry Ingredients

Start by gathering your dry ingredients. You’ll need flour, baking soda, and salt. Measure each ingredient accurately. Place them in a large mixing bowl. Use a whisk to combine them. Ensure the mixture is even and free of lumps.

Incorporating The Wet Ingredients

Next, gather your wet ingredients. You will need butter, sugar, and eggs. Soften the butter to room temperature. Cream the butter and sugar together. Use a hand mixer for this step. Add the eggs one at a time. Beat well after each addition. Finally, add lemon juice and zest for a zesty kick.

Forming The Cookies

Forming the perfect lemon drop cookies is a joyful process. This part of the recipe is where you shape the dough and add a touch of citrus magic. Let’s dive into the details of shaping the dough and enhancing the flavor with lemon zest and sugar.

Shaping The Dough

Start with your prepared dough. Use a tablespoon to scoop out equal portions. Roll each portion into a ball using your hands. This step ensures your cookies bake evenly.

Place the dough balls on a baking sheet lined with parchment paper. Make sure to leave enough space between each ball. This prevents the cookies from sticking together as they bake.

Adding Lemon Zest And Sugar

Mix lemon zest and sugar in a small bowl. This step is crucial for adding that delightful lemon flavor. Roll each dough ball in the lemon-sugar mix. This coats the dough evenly and adds a citrusy crunch.

Once coated, place the dough balls back on the baking sheet. Lightly press down on each ball with the bottom of a glass. This flattens the cookies slightly and helps them bake evenly.

The lemon-sugar coating gives the cookies a beautiful, sparkling finish. It also enhances the lemon flavor, making each bite a burst of citrus delight.

Best Lemon Drop Cookie Recipe: Zesty & Irresistible Treats

Credit: barefeetinthekitchen.com

Baking Instructions

Follow these simple baking instructions to create the perfect lemon drop cookies. Each step is crucial to ensure your cookies come out crispy on the edges and chewy in the center. Pay close attention to the details for the best results.

Preheating The Oven

Start by preheating your oven to 350°F (175°C). This ensures a consistent baking temperature. A properly preheated oven helps your cookies bake evenly. Use an oven thermometer for accuracy. Some ovens may run hot or cold.

Baking Time And Temperature

Once the oven is preheated, place the cookie sheets on the middle rack. Bake the cookies for 10-12 minutes or until the edges are golden brown. Rotate the cookie sheets halfway through baking. This promotes even baking.

Do not overbake the cookies. They will continue to cook slightly on the hot baking sheet after removal from the oven. Allow the cookies to cool on the baking sheet for 5 minutes before transferring them to a wire rack. This helps them set and prevents them from breaking apart.

Follow these steps closely for the best lemon drop cookies. Happy baking!

Cooling And Storing

Cooling and storing your lemon drop cookies properly is essential. This ensures they stay fresh and delicious. Let’s dive into the best practices for cooling and storing.

Cooling On Racks

Once your lemon drop cookies are out of the oven, transfer them to cooling racks. This prevents them from becoming soggy. Let them cool completely on the racks. This might take about 10-15 minutes. Cooling on racks allows air to circulate around the cookies. This helps maintain their texture and flavor. Be patient. It’s worth the wait.

Proper Storage Methods

To store your lemon drop cookies, use an airtight container. This keeps them fresh. Line the container with parchment paper. This prevents the cookies from sticking together. If you have many cookies, layer them with parchment paper between each layer. Store the container in a cool, dry place. Your cookies will stay fresh for up to a week. For longer storage, you can freeze them. Use a freezer-safe bag or container. Label it with the date. Frozen cookies can last up to three months. Thaw them at room temperature before eating. They will taste just as good as fresh.

Serving Suggestions

Lemon drop cookies are a delightful treat. They are perfect for many occasions. Knowing how to serve them can make your experience even better. Let’s explore some serving suggestions that will enhance your enjoyment.

Pairing With Beverages

Lemon drop cookies pair well with many beverages. Serve them with hot tea for a comforting snack. Green tea or chamomile works wonderfully. If you prefer coffee, a mild blend complements the cookies’ tangy flavor.

For a refreshing twist, try lemonade or iced tea. The citrus in both drinks enhances the lemon flavor in the cookies. Milk is another great option. It balances the tartness and adds a creamy touch.

Ideal For Gifting

Lemon drop cookies make excellent gifts. They are unique and show thoughtfulness. Package them in a decorative tin or box. Add a personal note for a special touch.

These cookies stay fresh for several days. This makes them perfect for shipping. They are also a hit at holiday gatherings. Share them at parties or give them as hostess gifts.

Troubleshooting Tips

Even the best lemon drop cookie recipe can face challenges. Don’t worry! We have compiled some troubleshooting tips to help you. Whether your cookies are too flat, too dry, or lacking flavor, these tips will save the day.

Common Issues

  • Cookies spread too much
  • Cookies are too dry
  • Cookies lack lemon flavor

Solutions And Adjustments

Issue Solution
Cookies spread too much
  • Chill the dough before baking
  • Use less butter
  • Add a bit more flour
Cookies are too dry
  • Check your baking time
  • Add an extra egg yolk
  • Use less flour
Cookies lack lemon flavor
  • Add more lemon zest
  • Increase the lemon juice
  • Consider lemon extract

Variations And Enhancements

Exploring different variations and enhancements can elevate your lemon drop cookies to a new level. These simple additions make the cookies more interesting and delicious. Let’s dive into some creative ideas!

Adding White Chocolate

White chocolate pairs wonderfully with the tangy flavor of lemon. Chop up white chocolate chunks or use white chocolate chips. Mix them into your dough before baking. The creamy texture and sweet taste balance the zesty lemon. Your cookies will be richer and more flavorful.

Incorporating Nuts

Nuts add a delightful crunch to your lemon drop cookies. Consider using chopped almonds, walnuts, or pecans. Stir them into your cookie dough. The nuts provide a nice contrast to the soft texture of the cookies. They also enhance the overall flavor profile. Your cookies will have a satisfying crunch in every bite.

Frequently Asked Questions

What Ingredients Do You Need For Lemon Drop Cookies?

To make lemon drop cookies, you need flour, sugar, butter, eggs, lemon zest, lemon juice, and baking powder.

How Long Does It Take To Bake Lemon Drop Cookies?

Lemon drop cookies typically take about 10-12 minutes to bake at 350°F (175°C).

Can I Freeze Lemon Drop Cookie Dough?

Yes, you can freeze lemon drop cookie dough. Wrap it tightly in plastic wrap and store for up to 3 months.

How Do You Store Lemon Drop Cookies?

Store lemon drop cookies in an airtight container at room temperature. They stay fresh for up to a week.

Conclusion

Enjoy making these lemon drop cookies with your family. They are simple, tasty, and fun. Everyone loves a sweet treat now and then. Try this recipe today and share the joy. Happy baking!