Baked Gala Apple Recipe: Deliciously Easy Dessert Idea

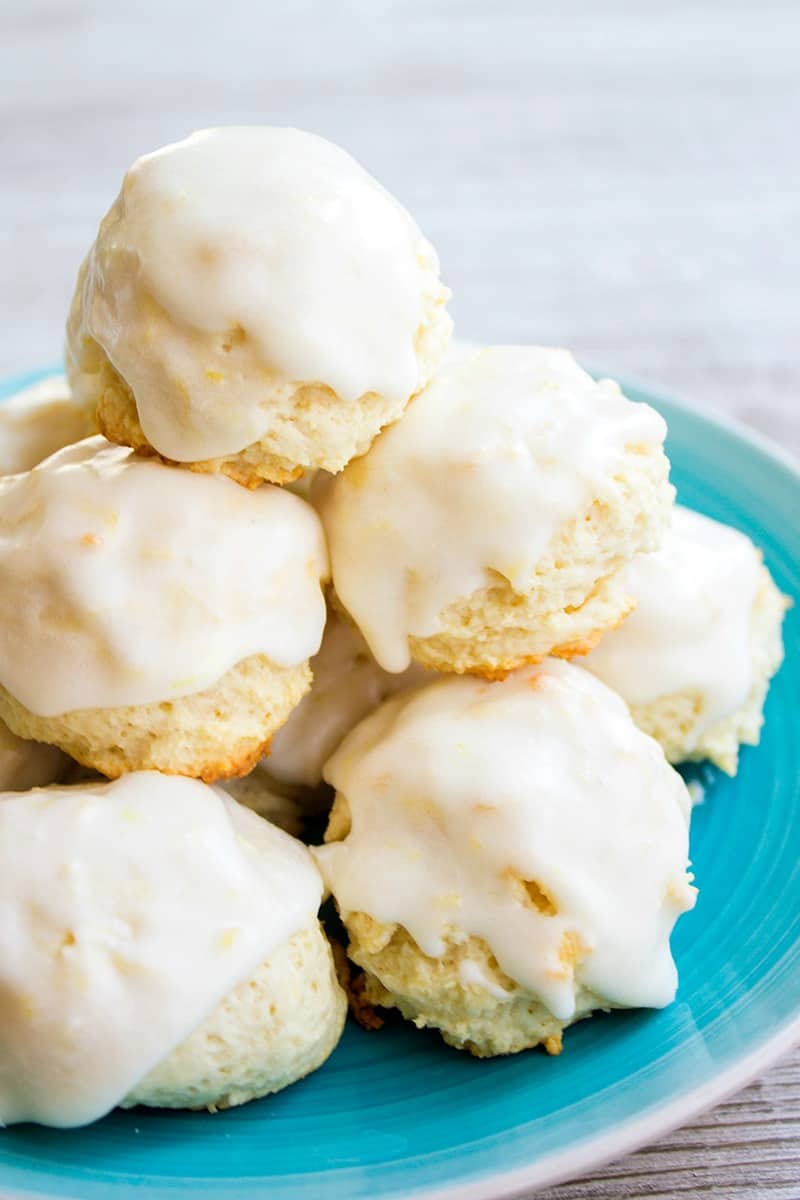
Baked Gala apples are a delightful treat. They are easy to make and delicious.

Imagine a warm, sweet aroma filling your kitchen as you bake Gala apples. This simple yet elegant dessert is perfect for any occasion. Whether you want a healthy snack or a special treat, baked Gala apples are sure to please.

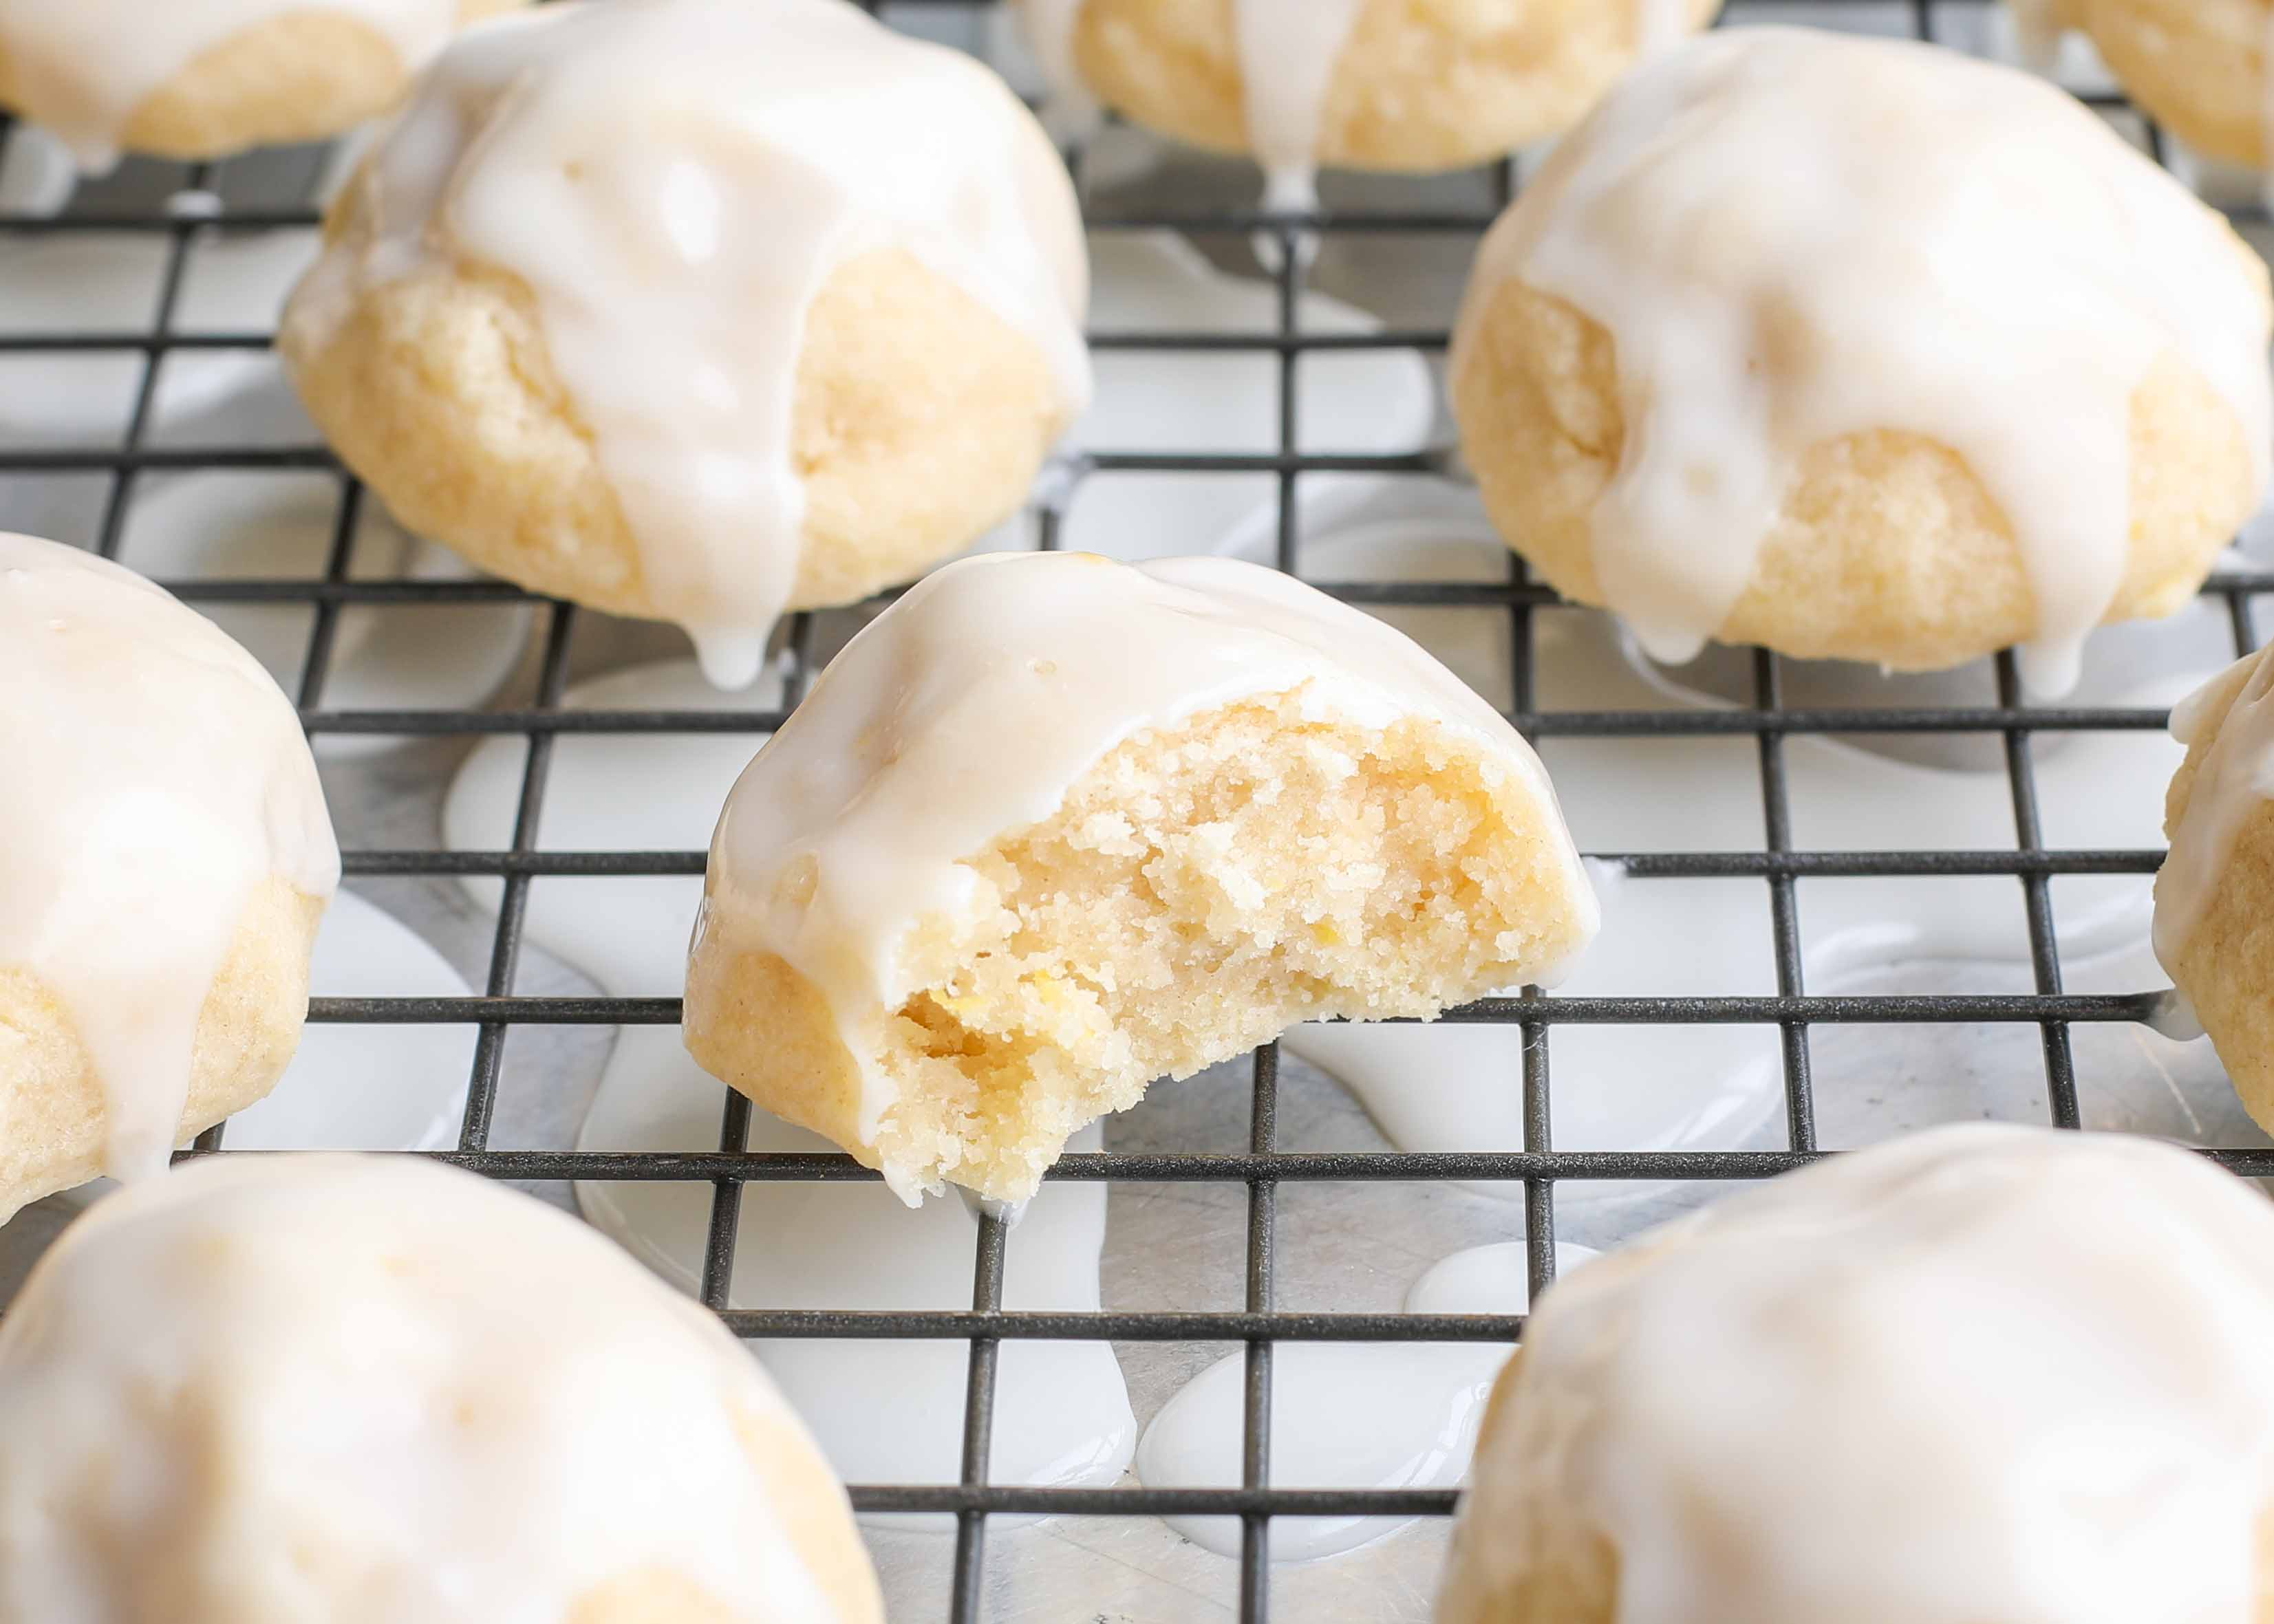
With minimal ingredients and effort, you can create a dish that is both wholesome and indulgent. This recipe highlights the natural sweetness of Gala apples, enhanced by a touch of cinnamon and a hint of honey. Ready to dive into a comforting, homemade dessert? Let’s explore how you can make these mouthwatering baked Gala apples right in your own kitchen.

Baked Gala Apple Recipe: Deliciously Easy Dessert Idea

Credit: www.oliveandmango.com

Introduction To Baked Gala Apples

Baked Gala Apples are a delicious and easy-to-make dessert. They are perfect for any occasion. The natural sweetness of Gala apples makes them ideal for baking. When baked, they become tender and juicy. The spices and sweeteners enhance their flavor, making them irresistible. If you love apples, you will love this recipe.

Why Choose Gala Apples

Gala apples are a popular choice for baking. Here are some reasons why:

  • Sweet Flavor: Gala apples have a natural sweetness that is perfect for desserts.
  • Tender Texture: When baked, they become tender and juicy.
  • Availability: They are widely available in stores year-round.
  • Versatility: They can be used in various recipes, from pies to baked apples.

Perfect Dessert For Any Occasion

Baked Gala Apples are suitable for any event. Whether it’s a family dinner, a holiday gathering, or a simple weeknight treat, they fit the bill. Here are some occasions where baked apples shine:

Occasion Why It’s Perfect
Family Dinner Easy to make and loved by all ages.
Holiday Gathering Festive and can be prepared in advance.
Weeknight Treat Quick and simple, yet satisfying.

These baked apples can be served with a scoop of vanilla ice cream or a dollop of whipped cream. This makes them even more delightful. The aroma of baking apples fills the house, creating a warm and inviting atmosphere. This dessert is sure to impress your guests and leave them wanting more.

Baked Gala Apple Recipe: Deliciously Easy Dessert Idea

Credit: www.allrecipes.com

Ingredients Needed

Baking Gala apples is a delightful and simple dessert. The secret to its deliciousness lies in the ingredients. Let’s explore what you need.

Simple Pantry Staples

These basic ingredients are usually found in your kitchen:

  • 4 medium Gala apples
  • 1/4 cup brown sugar
  • 1 teaspoon ground cinnamon
  • 1/4 cup chopped nuts (walnuts or pecans)
  • 2 tablespoons butter
  • 1/4 cup water

Optional Add-ins For Extra Flavor

Enhance your baked apples with these optional add-ins:

  • 1/4 cup raisins or dried cranberries
  • 1 teaspoon vanilla extract
  • 1/4 cup rolled oats
  • 1 tablespoon honey or maple syrup

Mixing in these ingredients can add a new dimension to your dessert. Feel free to experiment with your favorites!

Preparation Steps

Preparing baked Gala apples is a simple and fun process. Follow these easy steps to make a delicious and healthy dessert. Below, we have broken down the preparation steps into two parts: Cleaning and Coring Apples, and Preparing the Filling.

Cleaning And Coring Apples

First, wash your Gala apples under cold water. This removes any dirt or residue. Use a vegetable brush for a thorough clean. Next, dry the apples with a clean towel. Now, take an apple corer or a sharp knife. Carefully remove the core from each apple. Be sure to leave the bottom intact. This will hold the filling inside.

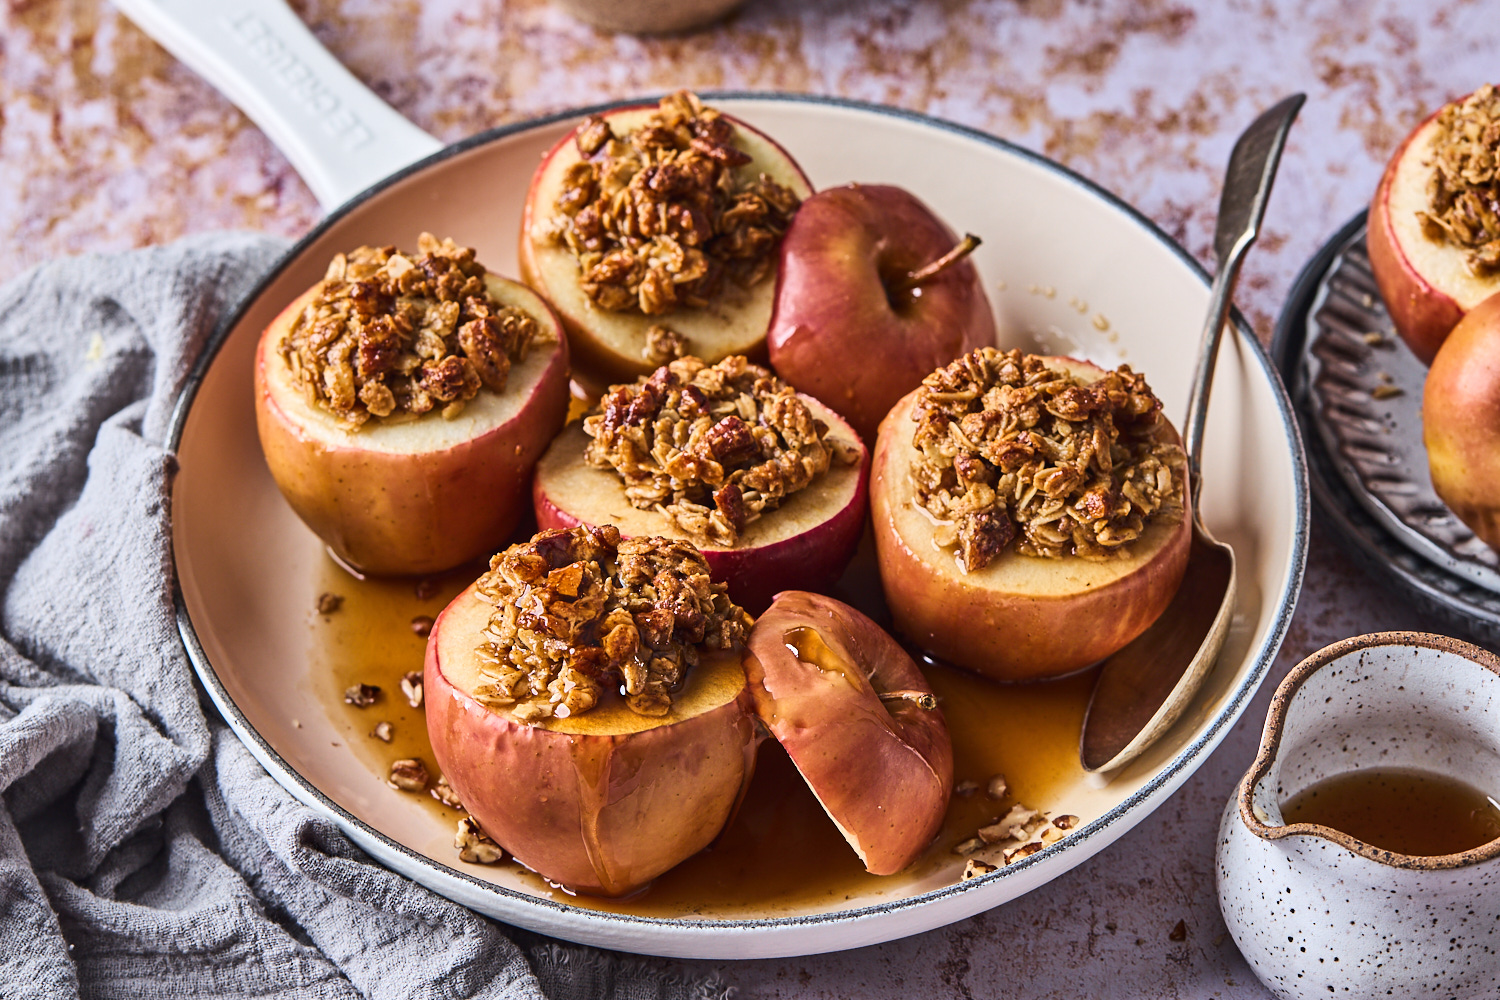
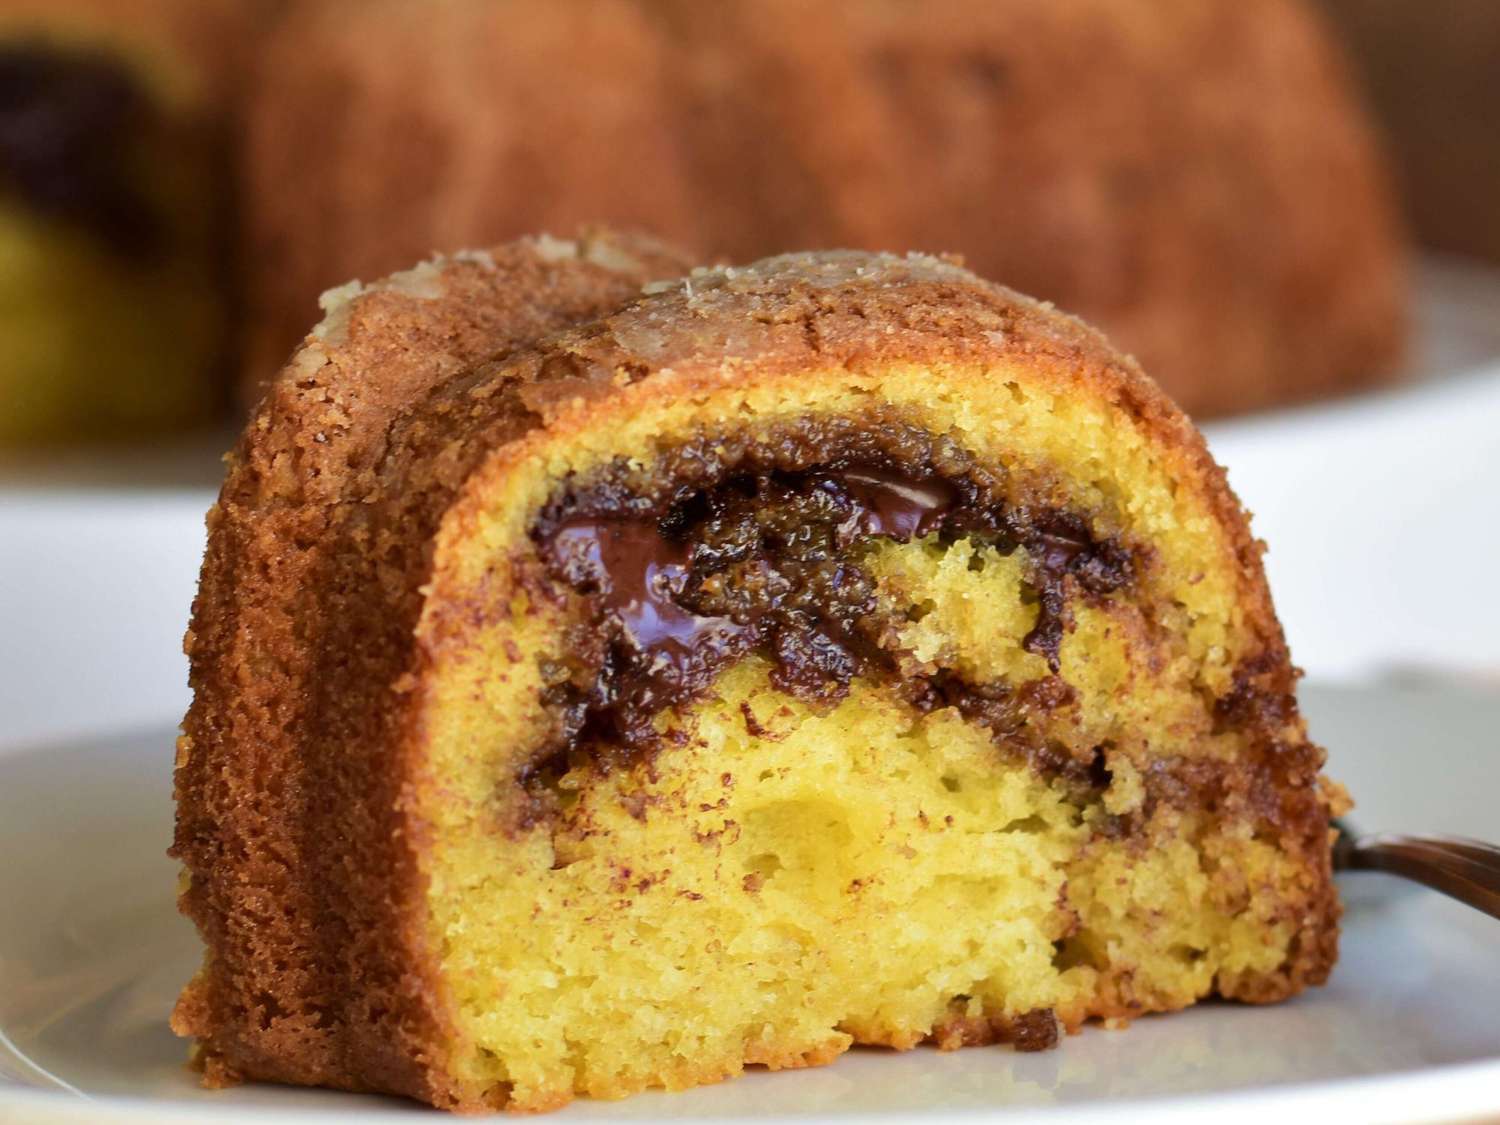
Preparing The Filling

In a small bowl, mix your filling ingredients. Common choices include brown sugar, cinnamon, and chopped nuts. Add a pinch of salt for extra flavor. Stir until well combined. Spoon the mixture into the hollowed apples. Fill each apple to the top. For an extra touch, add a small piece of butter on top of the filling. This adds richness and moisture.

Following these steps ensures your baked Gala apples turn out perfect. Enjoy this delightful treat with family and friends!

Baked Gala Apple Recipe: Deliciously Easy Dessert Idea

Credit: www.epicurious.com

Baking Instructions

Follow these baking instructions to make delicious Baked Gala Apples. The process is simple and will fill your home with wonderful aromas. Let’s dive into the details!

Oven Temperature And Timing

First, preheat your oven to 350°F (175°C). This temperature ensures the apples bake evenly.

Once the oven is ready, place the apples on a baking sheet. Bake them for 30 to 40 minutes. Keep an eye on them to avoid overcooking.

Checking For Doneness

To check if the apples are done, insert a fork or skewer into the center. The apples should be soft but not mushy. If the fork slides in easily, they are ready.

If the apples are still firm, bake them for another 5 to 10 minutes. Recheck for softness before removing from the oven.

Let the baked apples cool for a few minutes before serving. Enjoy the warm, sweet treat!

Serving Suggestions

Now that you’ve baked your Gala apples to perfection, it’s time to serve them. The right accompaniments can elevate the flavors and make your dessert unforgettable. Below are some delightful ways to serve your baked Gala apples.

Pairing With Ice Cream Or Whipped Cream

A classic way to enjoy baked Gala apples is by pairing them with ice cream or whipped cream. The cool, creamy texture contrasts beautifully with the warm, spiced apples.

  • Vanilla ice cream: The rich, sweet flavor complements the apples’ natural sweetness.
  • Cinnamon ice cream: Enhances the spice in the baked apples for a warm, cozy dessert.
  • Whipped cream: A dollop of freshly whipped cream adds a light, airy touch.

Garnishing Ideas

Garnishes not only make your baked Gala apples look appealing but also add extra flavor and texture. Here are some simple yet delicious garnishing ideas:

Garnish Description
Chopped nuts Sprinkle some chopped walnuts or pecans for a crunchy texture.
Caramel sauce Drizzle a bit of caramel sauce for extra sweetness.
Fresh mint Add a sprig of mint for a pop of color and freshness.

These serving suggestions will make your baked Gala apples a hit at any gathering. Experiment with different combinations to find your favorite.

Health Benefits

Baked Gala apples are not only delicious but also packed with health benefits. They offer a nutritious and tasty option for your dessert. Let’s dive into the health benefits of this delightful recipe.

Nutritional Value Of Gala Apples

Gala apples are rich in essential nutrients. They contain vitamins A, C, and E. These vitamins support your immune system. Gala apples also have dietary fiber. Fiber aids digestion and keeps you full longer. One medium Gala apple has about 80 calories. It is a low-calorie snack that fits any diet.

Healthy Dessert Alternative

Baked Gala apples make a healthy dessert choice. They offer natural sweetness without added sugar. Baking enhances their flavor and makes them tender. This dessert is perfect for those who want to eat healthy. You can enjoy it guilt-free.

Gala apples are also rich in antioxidants. Antioxidants help fight free radicals in your body. They reduce inflammation and support heart health. This makes baked Gala apples a smart and tasty option for dessert. Try them today and enjoy the health benefits.

Tips For Success

Creating the perfect Baked Gala Apple recipe can be an enjoyable task. Follow these tips to ensure your apples turn out delicious and not soggy. Learn how to prepare them ahead of time and reheat them effectively.

Preventing Soggy Apples

To avoid soggy baked apples, follow these steps:

  • Choose fresh Gala apples. Fresh apples retain their texture better.
  • Core the apples properly. Remove the seeds and core, but keep the apple intact.
  • Use a baking rack. This allows the heat to circulate, cooking the apples evenly.
  • Don’t overfill the apples. Leave some space for the filling to expand.

Making Ahead And Reheating

Here are some tips for making your baked apples ahead of time and reheating them:

  1. Prepare the apples as directed in the recipe.
  2. Store them in an airtight container in the fridge.
  3. Reheat in the oven at 350°F for 10-15 minutes. This keeps the texture intact.
  4. Microwave option: Heat on high for 1-2 minutes if you’re short on time.

Follow these simple tips to enjoy your baked Gala apples, whether fresh or reheated.

Variations To Try

Exploring variations in your baked Gala apple recipe can be fun. Experimenting with different ingredients can bring new flavors and textures. Let’s dive into some exciting variations you can try.

Adding Nuts And Dried Fruits

Adding nuts and dried fruits can enhance the flavor of your baked apples. Consider using walnuts, pecans, or almonds for a crunchy texture. These nuts add a rich, nutty flavor that pairs well with the sweetness of the apples.

For a sweeter twist, add dried fruits like raisins, cranberries, or apricots. These fruits bring a chewy texture and a burst of sweetness. Mix them into the stuffing for a delicious surprise in every bite.

Using Different Types Of Apples

Gala apples are great, but other apples can also work well. Try using Granny Smith apples for a tart flavor. They hold their shape well when baked and provide a nice contrast to the sweet filling.

Honeycrisp apples are another excellent choice. They are sweet and juicy, with a crisp texture. These apples create a delightful balance of flavors and a satisfying bite.

Feel adventurous? Combine different types of apples in one dish. This mix can create a complex and delightful flavor profile.

Frequently Asked Questions

How Do You Make Baked Gala Apples?

To make baked Gala apples, core them and fill with butter, brown sugar, and cinnamon. Bake at 350°F for 30-40 minutes until tender.

Are Gala Apples Good For Baking?

Yes, Gala apples are excellent for baking. They hold their shape and offer a sweet, mild flavor that complements many recipes.

Can I Use Other Apples For This Recipe?

Yes, you can use other apples like Granny Smith or Honeycrisp. Each variety will add a unique flavor and texture to the dish.

What Spices Go Well With Baked Apples?

Cinnamon, nutmeg, and cloves are traditional spices that pair well with baked apples. They enhance the natural sweetness and add warmth.

Conclusion

This Baked Gala Apple recipe is perfect for a simple, tasty dessert. With just a few ingredients, you can create a delicious treat. Your kitchen will smell amazing, and your taste buds will thank you. Try this recipe today and enjoy a warm, comforting dessert.

It’s easy to make and sure to please everyone. Share this delightful dish with family and friends. They will love the sweet, baked goodness. Happy baking!

13 15 Shrimp Recipes: Delicious and Easy-to-Make Dishes

Shrimp is a versatile and delicious seafood loved by many. It’s quick to cook and blends well with various flavors.

If you enjoy shrimp and are searching for new recipes, you’re in the right place. This blog post will showcase 13 to 15 shrimp recipes that are easy to prepare and packed with flavor. Whether you prefer spicy, sweet, or savory dishes, there’s a shrimp recipe here for everyone.

From quick weeknight dinners to impressive dishes for special occasions, these recipes will inspire you to make the most of this delightful seafood. Get ready to explore a world of culinary possibilities with shrimp!

Garlic Butter Shrimp

If you love shrimp, you will adore Garlic Butter Shrimp. This dish is simple yet flavorful. The garlic butter sauce makes it irresistible. Perfect for a quick dinner or a fancy meal. Let’s dive into this delicious recipe.

Ingredients

  • 1 lb shrimp, peeled and deveined
  • 4 cloves garlic, minced
  • 1/4 cup butter
  • 1 tablespoon olive oil
  • 1/4 teaspoon red pepper flakes
  • Salt and pepper to taste
  • 2 tablespoons fresh parsley, chopped
  • Juice of half a lemon

Instructions

  1. Heat olive oil in a large skillet over medium-high heat.
  2. Add the shrimp to the skillet. Season with salt and pepper.
  3. Cook the shrimp for 2-3 minutes on each side. Remove from skillet and set aside.
  4. In the same skillet, add butter and let it melt.
  5. Add minced garlic and red pepper flakes. Cook for 1-2 minutes until fragrant.
  6. Return the shrimp to the skillet. Toss to coat in the garlic butter sauce.
  7. Add lemon juice and chopped parsley. Stir well.
  8. Serve immediately. Enjoy your Garlic Butter Shrimp!

Shrimp Scampi

Shrimp Scampi is a classic dish that brings together the delicate flavors of shrimp, garlic, and butter. This dish is both simple to prepare and incredibly delicious, making it a favorite among seafood lovers. Below, we share an easy-to-follow recipe for making mouth-watering Shrimp Scampi at home.

Ingredients

  • 1 lb large shrimp, peeled and deveined
  • 4 cloves garlic, minced
  • 1/4 cup butter
  • 1/4 cup olive oil
  • 1/4 cup dry white wine
  • 1/4 cup fresh lemon juice
  • 1/4 cup chopped fresh parsley
  • 1/2 tsp red pepper flakes
  • Salt and black pepper to taste
  • 1 lb linguine or spaghetti
  • Grated Parmesan cheese (optional)

Instructions

  1. Cook the pasta: Bring a large pot of salted water to a boil. Add the linguine or spaghetti and cook until al dente. Drain and set aside.
  2. Prepare the shrimp: Pat the shrimp dry with paper towels. Season with salt and black pepper.
  3. Sauté the garlic: In a large skillet, melt the butter with the olive oil over medium-high heat. Add the minced garlic and red pepper flakes. Cook until the garlic is fragrant, about 1 minute.
  4. Cook the shrimp: Add the seasoned shrimp to the skillet. Cook for 2-3 minutes on each side, until the shrimp turn pink and opaque.
  5. Add the liquids: Pour in the white wine and lemon juice. Stir to combine, and let the mixture simmer for 2 minutes.
  6. Combine: Add the cooked pasta to the skillet. Toss to coat the pasta with the sauce. Stir in the chopped parsley.
  7. Serve: Divide the Shrimp Scampi among plates. Garnish with additional parsley and grated Parmesan cheese, if desired. Serve immediately.

This Shrimp Scampi recipe is sure to impress with its rich flavors and simplicity. Enjoy this delightful dish for any occasion!

Shrimp Tacos

Shrimp Tacos are a delightful and flavorful dish that everyone loves. They bring together the freshness of shrimp with the zest of tacos. Perfect for a quick dinner or a weekend treat. These tacos are easy to make and full of taste. Let’s dive into the ingredients and steps to prepare this delicious dish.

Ingredients

  • 1 lb shrimp, peeled and deveined
  • 2 tbsp olive oil
  • 1 tbsp chili powder
  • 1 tsp cumin
  • 1 tsp garlic powder
  • Salt and pepper to taste
  • 8 small tortillas
  • 1 cup shredded cabbage
  • 1/2 cup chopped cilantro
  • 1 lime, cut into wedges
  • Sour cream or your favorite sauce

Instructions

  1. In a bowl, mix olive oil, chili powder, cumin, and garlic powder.
  2. Add shrimp to the bowl. Toss until shrimp are well coated.
  3. Heat a large skillet over medium heat.
  4. Cook shrimp for 2-3 minutes per side until pink and cooked through.
  5. Warm tortillas in a dry skillet or microwave.
  6. Assemble tacos by placing shrimp in each tortilla.
  7. Top with shredded cabbage and chopped cilantro.
  8. Serve with lime wedges and your favorite sauce.

Enjoy your homemade Shrimp Tacos! They are sure to be a hit.

Cajun Shrimp Pasta

Craving a mix of flavors and spices? Cajun Shrimp Pasta is a perfect choice. This dish brings together the rich taste of shrimp with the bold flavors of Cajun seasoning. It’s quick to make and perfect for a weeknight dinner.

Ingredients

  • 1 pound shrimp, peeled and deveined
  • 2 tablespoons Cajun seasoning
  • 2 tablespoons olive oil
  • 1 bell pepper, sliced
  • 1 onion, chopped
  • 3 cloves garlic, minced
  • 1 cup heavy cream
  • 1/2 cup chicken broth
  • 1/2 cup grated Parmesan cheese
  • 8 ounces pasta
  • Salt and pepper to taste
  • Fresh parsley, chopped (optional)

Instructions

  1. Cook the pasta according to package instructions. Drain and set aside.
  2. In a large pan, heat olive oil over medium-high heat.
  3. Add shrimp and sprinkle with Cajun seasoning. Cook until pink, about 2-3 minutes per side. Remove shrimp and set aside.
  4. In the same pan, add bell pepper, onion, and garlic. Sauté until vegetables are soft, about 5 minutes.
  5. Pour in heavy cream and chicken broth. Stir well.
  6. Let the mixture simmer for 5 minutes, then add Parmesan cheese. Stir until the cheese melts.
  7. Add the cooked pasta and shrimp to the pan. Mix until everything is well combined.
  8. Season with salt and pepper to taste.
  9. Garnish with fresh parsley if desired. Serve immediately.

Shrimp Fried Rice

Shrimp Fried Rice is a delightful dish that combines succulent shrimp with flavorful rice. It’s a quick and satisfying meal perfect for busy weeknights. This recipe brings together simple ingredients to create a delicious, restaurant-quality dish right at home.

Ingredients

  • 1 cup of shrimp, peeled and deveined
  • 3 cups of cooked rice (preferably day-old)
  • 2 tablespoons of vegetable oil
  • 1 onion, finely chopped
  • 2 garlic cloves, minced
  • 1 cup of frozen peas and carrots
  • 2 eggs, beaten
  • 3 tablespoons of soy sauce
  • Salt and pepper to taste
  • 1 green onion, chopped (optional)

Instructions

  1. Heat oil in a large pan over medium heat.
  2. Add shrimp and cook until pink, about 3 minutes.
  3. Remove shrimp from the pan and set aside.
  4. In the same pan, sauté onion and garlic until fragrant.
  5. Add peas and carrots, cooking until tender.
  6. Push the vegetables to one side of the pan.
  7. Pour beaten eggs into the empty side of the pan.
  8. Scramble the eggs until fully cooked.
  9. Mix eggs with the vegetables.
  10. Add the cooked rice and shrimp back to the pan.
  11. Pour in soy sauce and stir well to combine.
  12. Season with salt and pepper to taste.
  13. Garnish with chopped green onions, if desired.
  14. Serve hot and enjoy your Shrimp Fried Rice.

Lemon Garlic Shrimp

One of the best ways to enjoy shrimp is through a simple yet flavorful Lemon Garlic Shrimp recipe. This dish combines the zesty tang of lemon with the rich, savory taste of garlic. It’s perfect for a quick weeknight dinner or a special occasion. The best part? It only takes a few minutes to prepare and cook.

Ingredients

  • 1 pound of shrimp, peeled and deveined
  • 2 tablespoons of olive oil
  • 3 cloves of garlic, minced
  • Juice of 1 lemon
  • 1/4 teaspoon of red pepper flakes
  • Salt and pepper to taste
  • 2 tablespoons of fresh parsley, chopped

Instructions

  1. Heat olive oil in a large skillet over medium heat.
  2. Add minced garlic and sauté until fragrant, about 1 minute.
  3. Add shrimp to the skillet, cooking until they turn pink, about 3 minutes.
  4. Stir in lemon juice and red pepper flakes.
  5. Season with salt and pepper to taste.
  6. Cook for another 1-2 minutes, stirring occasionally.
  7. Remove from heat and sprinkle with fresh parsley.
  8. Serve immediately, optionally with a side of rice or pasta.

Shrimp And Grits

Shrimp and Grits is a classic Southern dish. It combines tender shrimp with creamy, flavorful grits. This dish is perfect for breakfast, lunch, or dinner. Let’s explore how to make this delicious recipe.

Ingredients

  • 1 cup grits
  • 4 cups water
  • 1 pound shrimp, peeled and deveined
  • 1/2 cup cheddar cheese, shredded
  • 4 slices bacon, chopped
  • 1 small onion, finely chopped
  • 1 clove garlic, minced
  • 2 tablespoons butter
  • 1 tablespoon lemon juice
  • Salt and pepper to taste
  • Chopped parsley for garnish

Instructions

  1. Bring water to a boil in a large pot.
  2. Slowly stir in the grits and reduce heat to low.
  3. Cover and cook for about 20 minutes, stirring occasionally.
  4. Stir in the cheddar cheese and season with salt.
  5. In a skillet, cook bacon until crispy. Remove and set aside.
  6. Add onion to the skillet and cook until soft.
  7. Add garlic and cook for another minute.
  8. Add shrimp to the skillet and cook until pink.
  9. Stir in lemon juice and butter. Season with salt and pepper.
  10. Serve shrimp over the grits. Top with bacon and parsley.

Shrimp Ceviche

Shrimp Ceviche is a delightful dish that combines fresh shrimp with zesty citrus flavors. It’s light, refreshing, and perfect for any gathering. This dish is not only tasty but also easy to prepare. Let’s dive into the ingredients and steps to make this fantastic dish.

Ingredients

  • 1 pound of fresh shrimp, peeled and deveined
  • 1 cup of fresh lime juice
  • 1 cup of fresh lemon juice
  • 1/2 cup of chopped red onion
  • 1 cup of diced tomatoes
  • 1/2 cup of chopped cilantro
  • 1 diced jalapeño pepper
  • 1 avocado, diced
  • Salt and pepper to taste

Instructions

  1. Prepare the shrimp: Boil the shrimp until pink and opaque. This takes about 2-3 minutes. Immediately transfer to an ice bath to cool. Drain and chop into bite-sized pieces.
  2. Marinate the shrimp: Place the chopped shrimp in a bowl. Pour lime and lemon juice over the shrimp. Cover and refrigerate for 30 minutes. This allows the citrus to “cook” the shrimp.
  3. Mix the ingredients: In a large bowl, combine red onion, tomatoes, cilantro, and jalapeño. Add the marinated shrimp and mix well.
  4. Add avocado: Gently fold in the diced avocado to avoid mashing.
  5. Season: Add salt and pepper to taste. Mix everything gently.
  6. Serve: Chill in the refrigerator for at least 30 minutes before serving. Serve with tortilla chips or on its own.

Shrimp Alfredo

Shrimp Alfredo is a classic Italian-American dish that combines tender shrimp with creamy, garlic-infused Alfredo sauce. This recipe is perfect for a comforting dinner that feels gourmet but is simple to make. With just a few ingredients, you can create a restaurant-quality meal at home.

Ingredients

  • 1 pound of shrimp, peeled and deveined
  • 2 tablespoons of olive oil
  • 4 cloves of garlic, minced
  • 1 cup of heavy cream
  • 1/2 cup of grated Parmesan cheese
  • 1 tablespoon of butter
  • Salt and pepper to taste
  • 8 ounces of fettuccine pasta
  • Chopped parsley for garnish

Instructions

  1. Cook the fettuccine pasta according to the package instructions. Drain and set aside.
  2. In a large skillet, heat the olive oil over medium heat.
  3. Add the garlic and sauté for 1-2 minutes until fragrant.
  4. Add the shrimp to the skillet. Cook until pink and opaque, about 2-3 minutes per side. Remove the shrimp from the skillet and set aside.
  5. In the same skillet, add the butter and heavy cream. Stir well.
  6. Reduce the heat to low and let the sauce simmer for 2-3 minutes.
  7. Add the Parmesan cheese to the sauce. Stir until melted and well combined.
  8. Season with salt and pepper to taste.
  9. Return the shrimp to the skillet. Stir to coat with the sauce.
  10. Add the cooked fettuccine to the skillet. Toss to combine.
  11. Garnish with chopped parsley before serving.

Shrimp Cocktail

Nothing beats the classic taste of a Shrimp Cocktail. It’s a timeless appetizer that is both elegant and simple to prepare. With its chilled, succulent shrimp and tangy cocktail sauce, this dish is perfect for any gathering. Whether you are hosting a party or having a quiet night at home, Shrimp Cocktail is sure to impress.

Ingredients

  • 1 pound large shrimp, peeled and deveined
  • 4 cups water
  • 1 lemon, halved
  • 1 tablespoon Old Bay seasoning
  • 1 cup cocktail sauce
  • Fresh parsley for garnish

Instructions

  1. Fill a large pot with water. Add the lemon halves and Old Bay seasoning.
  2. Bring the water to a boil. Add the shrimp.
  3. Cook the shrimp for 2-3 minutes, until pink and opaque.
  4. Drain the shrimp and place them in an ice bath to cool.
  5. Once cooled, arrange the shrimp on a platter.
  6. Serve with cocktail sauce and garnish with fresh parsley.

Shrimp Po’boy

The Shrimp Po’Boy is a classic sandwich from New Orleans. This delicious meal combines crispy fried shrimp, fresh veggies, and a tangy sauce. It’s perfect for lunch or dinner. Let’s dive into the ingredients and steps to make this flavorful sandwich.

Ingredients

  • 1 pound of large shrimp, peeled and deveined
  • 1 cup of buttermilk
  • 1 cup of flour
  • 1 cup of cornmeal
  • 1 teaspoon of salt
  • 1 teaspoon of black pepper
  • 1 teaspoon of paprika
  • 1 teaspoon of garlic powder
  • 1 teaspoon of onion powder
  • Vegetable oil for frying
  • 4 French bread rolls
  • Shredded lettuce
  • Sliced tomatoes
  • Dill pickles
  • 1 cup of mayonnaise
  • 2 tablespoons of hot sauce

Instructions

  1. In a bowl, soak the shrimp in buttermilk for 30 minutes.
  2. In another bowl, mix flour, cornmeal, salt, pepper, paprika, garlic powder, and onion powder.
  3. Heat the vegetable oil in a large skillet over medium-high heat.
  4. Remove shrimp from buttermilk and dredge in the flour mixture.
  5. Fry shrimp in the hot oil until golden brown, about 2-3 minutes per side.
  6. Drain the fried shrimp on paper towels.
  7. In a small bowl, mix mayonnaise and hot sauce to create the sauce.
  8. Slice the French bread rolls and spread the sauce on both sides.
  9. Layer the sandwich with shredded lettuce, sliced tomatoes, and dill pickles.
  10. Place the fried shrimp on top of the veggies.
  11. Close the sandwich and serve immediately.

Enjoy your homemade Shrimp Po’Boy with a side of fries or coleslaw. It’s a simple yet tasty dish that captures the essence of New Orleans cuisine.

Honey Garlic Shrimp

13-15 Shrimp Recipes: Honey Garlic Shrimp

Honey Garlic Shrimp is a delicious and easy-to-make dish. The sweet and savory flavors blend perfectly, creating a mouth-watering meal. This recipe is perfect for busy weeknights or casual dinners. Let’s dive into the ingredients and instructions to make this delightful dish.

Ingredients

  • 1 lb shrimp, peeled and deveined
  • 1/4 cup honey
  • 1/4 cup soy sauce
  • 3 cloves garlic, minced
  • 1 tablespoon olive oil
  • 1 teaspoon cornstarch
  • 2 tablespoons water
  • Salt and pepper to taste
  • Chopped green onions for garnish

Instructions

  1. In a bowl, mix honey, soy sauce, and minced garlic.
  2. Add shrimp to the bowl and coat evenly with the mixture.
  3. Marinate for at least 15 minutes.
  4. Heat olive oil in a pan over medium heat.
  5. Add the shrimp and cook for 2-3 minutes on each side.
  6. Remove shrimp from the pan and set aside.
  7. In a small bowl, mix cornstarch and water.
  8. Add the cornstarch mixture to the pan and cook until thickened.
  9. Return shrimp to the pan and toss to coat with the sauce.
  10. Season with salt and pepper as needed.
  11. Garnish with chopped green onions before serving.

Bang Bang Shrimp

Bang Bang Shrimp is a popular appetizer known for its crispy texture and spicy, tangy sauce. This dish features tender shrimp coated in a light batter and fried to perfection. The highlight of this recipe is the signature sauce, which combines creamy and spicy flavors. It’s a crowd-pleaser that can be served at any gathering or enjoyed as a quick snack.

Ingredients

  • 1 lb shrimp, peeled and deveined
  • 1/2 cup mayonnaise
  • 1/4 cup Thai sweet chili sauce
  • 1 tbsp Sriracha sauce
  • 1 cup cornstarch
  • 1/2 tsp salt
  • 1/2 tsp pepper
  • Vegetable oil for frying
  • Chopped green onions for garnish

Instructions

  1. In a bowl, mix mayonnaise, Thai sweet chili sauce, and Sriracha sauce.
  2. Combine cornstarch, salt, and pepper in another bowl.
  3. Coat shrimp with the cornstarch mixture.
  4. Heat vegetable oil in a deep pan over medium-high heat.
  5. Fry the shrimp in batches until golden and crispy, about 2-3 minutes.
  6. Place fried shrimp on a paper towel to drain excess oil.
  7. Toss the shrimp in the prepared sauce until well coated.
  8. Garnish with chopped green onions before serving.
13 15 Shrimp Recipes: Delicious and Easy-to-Make Dishes

Credit: www.tiktok.com

Shrimp Stir Fry

Shrimp stir fry is a quick, healthy, and flavorful meal. Perfect for busy weeknights, it brings together fresh vegetables and succulent shrimp. The vibrant colors and aromatic spices make it a feast for the senses. Plus, it’s easy to customize with your favorite veggies and sauces.

Let’s dive into how to make this delicious dish. Below, you’ll find the ingredients and step-by-step instructions to create a tasty shrimp stir fry.

Ingredients

  • 1 lb shrimp, peeled and deveined
  • 2 tablespoons olive oil
  • 1 bell pepper, sliced
  • 1 cup broccoli florets
  • 1 carrot, sliced
  • 3 cloves garlic, minced
  • 1 tablespoon ginger, minced
  • 1/4 cup soy sauce
  • 2 tablespoons honey
  • 1 tablespoon cornstarch
  • 1/2 cup chicken broth
  • Salt and pepper to taste
  • Cooked rice for serving

Instructions

  1. Heat 1 tablespoon of olive oil in a large pan over medium-high heat.
  2. Add the shrimp and cook for 2-3 minutes per side. Remove and set aside.
  3. In the same pan, add the remaining olive oil.
  4. Saute the bell pepper, broccoli, and carrot for 5 minutes.
  5. Add garlic and ginger. Cook for another 2 minutes.
  6. In a bowl, mix soy sauce, honey, cornstarch, and chicken broth.
  7. Pour the sauce into the pan and stir well.
  8. Return the shrimp to the pan and toss to coat.
  9. Season with salt and pepper to taste.
  10. Cook until the sauce thickens and everything is heated through.
  11. Serve the shrimp stir fry over cooked rice.

Shrimp Salad

Discover 13 15 shrimp recipes including a delicious shrimp salad. Fresh ingredients and simple steps make it a must-try. Perfect for a light, tasty meal.

Shrimp salad is a refreshing and light dish perfect for any meal. This recipe combines fresh shrimp with crisp vegetables and a tangy dressing. It is easy to make and full of flavor. Whether for lunch or dinner, shrimp salad is always a hit.

Ingredients

  • 1 pound shrimp, peeled and deveined
  • 1 cup cherry tomatoes, halved
  • 1 cucumber, diced
  • 1 red onion, finely chopped
  • 2 tablespoons olive oil
  • Juice of 1 lemon
  • Salt and pepper to taste
  • 1 tablespoon fresh dill, chopped
  • Mixed greens or lettuce

Instructions

  1. Boil a pot of water and cook the shrimp for 3 minutes.
  2. Drain and let the shrimp cool.
  3. In a large bowl, combine the tomatoes, cucumber, and red onion.
  4. Add the cooled shrimp to the bowl.
  5. In a small bowl, mix the olive oil, lemon juice, salt, and pepper.
  6. Pour the dressing over the shrimp and vegetables.
  7. Toss everything together until well coated.
  8. Sprinkle with fresh dill.
  9. Serve on a bed of mixed greens or lettuce.
13 15 Shrimp Recipes: Delicious and Easy-to-Make Dishes

Credit: www.thehungrymouse.com

13 15 Shrimp Recipes: Delicious and Easy-to-Make Dishes

Credit: www.yummly.com

Frequently Asked Questions

What Are The Best Shrimp Recipes?

The best shrimp recipes include grilled shrimp, shrimp scampi, and shrimp pasta. Each recipe is easy and delicious. You can find more detailed instructions in our blog post.

How To Cook Shrimp Perfectly?

To cook shrimp perfectly, ensure they turn pink and opaque. Avoid overcooking as they become rubbery. Cook for 2-3 minutes per side.

Are Shrimp Recipes Healthy?

Yes, shrimp recipes can be healthy. Shrimp is low in calories and high in protein. Choose recipes with minimal added fats and sugars.

Can You Cook Shrimp From Frozen?

Yes, you can cook shrimp from frozen. Simply thaw them under cold water first. Then, follow your desired cooking method.

Conclusion

Enjoy trying these 15 shrimp recipes at home. Each dish offers unique flavors. Easy to follow and perfect for any meal. Impress your family with delicious shrimp dishes. Experiment and find your favorite recipe. Cooking with shrimp can be fun and rewarding.

Dive into these recipes today. Happy cooking!

Sugar Free Fluff Recipe: Delicious Guilt-Free Dessert

Craving a sweet treat without the guilt? Discover the magic of sugar-free fluff.

This delightful dessert is perfect for those watching their sugar intake. With the rising awareness of sugar’s effects on health, many seek alternatives. Sugar-free fluff offers a solution. It’s light, creamy, and satisfies sweet cravings without the extra calories. Perfect for diabetics, weight watchers, or anyone wanting a healthier dessert option.

This recipe is easy to make and uses simple ingredients found in most kitchens. Get ready to enjoy a delicious, guilt-free dessert that everyone will love. Dive into the world of sugar-free fluff and treat yourself to something special.

Sugar Free Fluff Recipe: Delicious Guilt-Free Dessert

Credit: www.tiktok.com

Ingredients Needed

Creating a delightful sugar-free fluff recipe starts with the right ingredients. Using the best ingredients ensures your fluff is light, tasty, and healthy. Below, we will explore the essential ingredients and some optional add-ins you might consider.

Essential Ingredients

These are the must-have ingredients for your sugar-free fluff recipe:

  • Sugar-Free Gelatin Mix: This is the base of the fluff. It provides structure and flavor.
  • Heavy Whipping Cream: Makes the fluff creamy and rich. Choose a sugar-free option.
  • Cold Water: Helps dissolve the gelatin mix. It also aids in achieving the right consistency.

Optional Add-ins

Want to add some extra flavor or texture? Try these optional add-ins:

  • Vanilla Extract: Adds a warm and sweet aroma.
  • Sugar-Free Sweetener: For those who like a touch of extra sweetness.
  • Fresh Berries: Adds a burst of natural flavor and a bit of color.
  • Chopped Nuts: Gives the fluff a nice crunch.

Experiment with these ingredients to make the perfect sugar-free fluff that suits your taste.

Preparation Steps

Creating a sugar-free fluff recipe is easy and fun. Follow these steps to ensure your fluff is light, delicious, and perfect for any occasion. Below, we break down the process into two main parts: Mixing the Base and Incorporating Flavors.

Mixing The Base

First, gather all the necessary ingredients. You will need sugar-free gelatin, whipped topping, and cream cheese. Make sure the cream cheese is at room temperature for easy mixing.

  1. In a large bowl, dissolve the sugar-free gelatin in hot water. Stir until fully dissolved.
  2. Allow the gelatin to cool slightly, but not set. This usually takes about 10 minutes.
  3. In a separate bowl, beat the cream cheese until smooth and creamy.
  4. Gradually add the cooled gelatin to the cream cheese. Mix until well combined.

By now, you should have a smooth base ready for the next step.

Incorporating Flavors

Next, it’s time to add flavors and make your fluff even more delicious. You can use a variety of sugar-free flavorings and extracts.

  • Add a few drops of vanilla extract for a classic flavor.
  • For a fruity twist, use sugar-free fruit extracts like strawberry or lemon.
  • If you prefer a richer taste, try adding a bit of sugar-free chocolate syrup.

Once you have your desired flavor, fold in the whipped topping. Be gentle to keep the mixture light and airy.

  1. Slowly add the whipped topping to the gelatin-cream cheese mixture.
  2. Use a spatula to fold the topping in, ensuring even distribution.
  3. Continue folding until the mixture is fluffy and well combined.

Your sugar-free fluff is now ready to be chilled. Transfer it to a serving dish and refrigerate for at least 2 hours. Enjoy your tasty, guilt-free treat!

Tips For Perfect Texture

Creating the perfect sugar-free fluff can be tricky. But with the right tips, you can achieve a creamy and smooth texture every time. Follow these guidelines to ensure your fluff is perfect.

Achieving Creaminess

To get a creamy texture, use full-fat ingredients. Low-fat options may not blend well. Whipping the ingredients at high speed also helps. This incorporates more air, making the fluff light and airy.

Use a chilled bowl and whisk. Cold tools help in maintaining the fluffiness. Also, add a stabilizer like gelatin. It helps hold the structure, keeping the fluff from collapsing.

Avoiding Common Mistakes

Avoid over-whipping the mixture. Over-whipping can lead to a grainy texture. Instead, stop whipping as soon as soft peaks form. Also, ensure all ingredients are at room temperature before starting. Cold ingredients can cause lumps.

Do not rush the process. Take your time to blend everything smoothly. Lastly, avoid using artificial sweeteners that leave a bitter aftertaste. Choose a high-quality sugar substitute for the best flavor.

Flavor Variations

Creating a sugar-free fluff recipe opens up a world of flavor possibilities. You can easily adjust the base recipe to suit your taste. Below, discover two delightful variations to enjoy: Classic Vanilla and Rich Chocolate.

Classic Vanilla

The Classic Vanilla variation is timeless. It brings a sweet, comforting taste. To make it, use vanilla extract in your sugar-free fluff base. High-quality vanilla enhances the flavor. You can also add a pinch of sea salt. This balances the sweetness and adds depth. The result is a smooth, creamy dessert.

Rich Chocolate

For chocolate lovers, the Rich Chocolate variation is perfect. Use cocoa powder or sugar-free chocolate syrup in your base. Ensure you mix well to get a consistent flavor. The rich, chocolatey taste is satisfying. It’s a great option for a guilt-free treat. Add a sprinkle of dark chocolate shavings on top. This adds texture and a touch of elegance.

Serving Suggestions

One of the joys of creating a Sugar Free Fluff Recipe is its versatility. You can serve it in various ways to delight your taste buds. From pairing it with fresh fruits to adding decorative toppings, the options are endless. Let’s explore some serving suggestions to make your dessert even more enjoyable.

Pairing With Fruits

Fresh fruits add a natural sweetness that complements the Sugar Free Fluff perfectly. Here are some fruit pairing ideas:

  • Strawberries: Slice them thin and layer them with the fluff.
  • Blueberries: Sprinkle them on top for a burst of flavor.
  • Mango: Dice and mix in for a tropical twist.

You can also create a fruit salad and serve the fluff on the side. This way, everyone can add as much or as little as they like.

Decorative Toppings

Toppings not only add flavor but also make your dessert visually appealing. Consider these decorative toppings:

  • Chopped Nuts: Almonds, walnuts, or pecans add a crunchy texture.
  • Unsweetened Coconut Flakes: Sprinkle them for a tropical feel.
  • Cocoa Powder: Dust a little on top for a hint of chocolate.

For a more festive look, you can also use sugar-free sprinkles. These add color and fun to your dessert.

Use these serving suggestions to elevate your Sugar Free Fluff Recipe. Enjoy experimenting with different combinations to find your favorite!

Sugar Free Fluff Recipe: Delicious Guilt-Free Dessert

Credit: stepawayfromthecarbs.com

Storage Instructions

Proper storage of your sugar-free fluff ensures it stays fresh and delicious. Follow these simple storage instructions to keep your fluff at its best.

Refrigeration Tips

Store your sugar-free fluff in an airtight container. This keeps it from absorbing other fridge odors. Place the container in the main section of the fridge. Avoid the door, as temperature changes can affect texture. Your fluff can stay fresh for up to five days in the fridge.

Freezing For Later

Freezing sugar-free fluff is easy. Use a freezer-safe container or a heavy-duty freezer bag. Remove as much air as possible to prevent freezer burn. Label the container with the date. Your fluff can be frozen for up to three months. Thaw it in the fridge overnight before serving. Give it a gentle stir to restore its creamy texture.

Health Benefits

Enjoying a sweet treat without the added sugar is possible with the sugar-free fluff recipe. This delicious dessert offers several health benefits, making it a great choice for those mindful of their health.

Low-calorie Advantage

Sugar-free fluff is low in calories. This makes it perfect for weight management. You can indulge without the guilt. Traditional desserts are often high in calories. But this recipe keeps it light. It satisfies your sweet tooth without adding extra pounds.

Suitable For Diabetics

Diabetics need to watch their sugar intake. Sugar-free fluff is a safe option. It won’t spike blood sugar levels. This makes it an excellent dessert choice. You get to enjoy a sweet treat without worry. Managing diabetes becomes easier with smart food choices.

Sugar Free Fluff Recipe: Delicious Guilt-Free Dessert

Credit: thesugarfreediva.com

Frequently Asked Questions

What Ingredients Are In Sugar-free Fluff?

Sugar-free fluff typically includes sugar-free gelatin, cream cheese, and whipped topping. Optional ingredients are vanilla extract and fresh fruits.

How Do You Make Sugar-free Fluff?

Mix sugar-free gelatin with hot water. Add cream cheese and whipped topping. Blend until smooth. Refrigerate until set.

Can I Use Fresh Fruits In Sugar-free Fluff?

Yes, you can add fresh fruits like strawberries or blueberries. Ensure they are sugar-free and cut into small pieces.

Is Sugar-free Fluff Keto-friendly?

Yes, sugar-free fluff can be keto-friendly. Ensure you use keto-approved ingredients like sugar-free gelatin and cream cheese.

Conclusion

Enjoy making this sugar-free fluff recipe at home. It’s easy and healthy. Perfect for those craving a sweet treat without added sugar. Share it with friends and family. They’ll love it too. This recipe fits well into any diet. Simple ingredients, big flavor.

Give it a try today. Your taste buds will thank you.

Teriyaki Beef Burger Recipe: Ultimate Guide to Deliciousness

Love burgers? Try a Teriyaki Beef Burger.

It’s a flavorful twist. This Teriyaki Beef Burger Recipe brings together the best of East and West. Imagine a juicy beef patty, drenched in sweet and savory teriyaki sauce. Topped with fresh veggies, it’s a delightful mix of flavors and textures.

Perfect for a backyard BBQ or a quick weeknight dinner, this burger is sure to impress. With simple ingredients and easy steps, anyone can make it at home. Get ready to enjoy a delicious, homemade burger that stands out from the usual fare. Let’s dive into the world of Teriyaki Beef Burgers and discover how to make this mouth-watering treat.

Ingredients

Creating the perfect Teriyaki Beef Burger begins with selecting the right ingredients. Fresh, quality ingredients make a massive difference in flavor and texture. Below, you’ll find a detailed list of essential ingredients and some optional add-ons to elevate your burger experience.

Essential Ingredients

Ingredient Quantity
Ground Beef 1 lb
Teriyaki Sauce 1/2 cup
Garlic Powder 1 tsp
Onion Powder 1 tsp
Salt 1/2 tsp
Pepper 1/2 tsp
Burger Buns 4 pieces
Cheese Slices 4 slices
Lettuce 4 leaves
Tomato Slices 4 slices

Optional Add-ons

  • Pineapple Slices: Grilled for extra sweetness
  • Sautéed Onions: Add a rich flavor
  • Avocado Slices: For a creamy texture
  • Pickles: Add a tangy crunch
  • Mayonnaise: Spread on the buns
  • Jalapeños: For a spicy kick
Teriyaki Beef Burger Recipe: Ultimate Guide to Deliciousness

Credit: www.youtube.com

Preparing The Beef Patties

Creating a delicious Teriyaki Beef Burger starts with perfect beef patties. The key elements include choosing the right beef, and seasoning the patties. This ensures a juicy and flavorful bite every time.

Choosing The Right Beef

For juicy burgers, always go for fresh, high-quality beef. A blend of 80% lean meat and 20% fat works best. This ratio provides enough fat to keep the patties moist without making them greasy.

Ground chuck is an excellent choice. It has the right balance of meat and fat. Avoid using beef that is too lean, as it can result in dry patties.

Seasoning The Patties

Seasoning is crucial for tasty patties. Start with simple ingredients like salt and pepper. These enhance the natural flavor of the beef.

  • 1 pound ground beef
  • 1 teaspoon salt
  • 1/2 teaspoon black pepper
  • 1 tablespoon soy sauce
  • 1 teaspoon garlic powder
  • 1 teaspoon onion powder

Mix these seasonings into the beef gently. Over-mixing can make the patties tough.

Form the beef into equal-sized patties. Use your thumb to create a small indentation in the center of each patty. This helps them cook evenly and prevents them from puffing up.

Place the patties on a tray lined with parchment paper. Cover them and refrigerate for at least 30 minutes. This helps them hold their shape during cooking.

With your beef patties prepared, you’re one step closer to enjoying a mouth-watering Teriyaki Beef Burger.

Making The Teriyaki Sauce

Creating the perfect Teriyaki Beef Burger begins with making an amazing teriyaki sauce. This sauce blends sweet and savory flavors. It adds a unique taste to the burger. Follow the steps below to make this delicious sauce.

Key Ingredients For Sauce

To make the teriyaki sauce, you need a few key ingredients. Here is a table listing them:

Ingredient Quantity
Soy Sauce 1/2 cup
Brown Sugar 1/4 cup
Honey 2 tablespoons
Garlic (minced) 2 cloves
Ginger (grated) 1 teaspoon
Sesame Oil 1 teaspoon
Water 1/4 cup
Cornstarch 1 tablespoon

Steps To Prepare

  1. Combine soy sauce, brown sugar, honey, garlic, ginger, and sesame oil in a saucepan.
  2. Mix water and cornstarch in a small bowl until smooth.
  3. Add the cornstarch mixture to the saucepan.
  4. Heat the saucepan over medium heat.
  5. Stir constantly until the sauce thickens, about 5 minutes.
  6. Remove from heat and let it cool before using.

Now your teriyaki sauce is ready to give your Teriyaki Beef Burger that signature flavor. Enjoy!

Assembling The Burger

After preparing your juicy teriyaki beef patties, it’s time to assemble the burger. This step brings all the flavors together. Follow these steps to create a delicious Teriyaki Beef Burger.

Toasting The Buns

Start by toasting the buns. Heat a skillet over medium heat. Place the buns cut side down on the skillet. Toast until golden brown. This adds a nice crunch and prevents sogginess.

Layering Ingredients

Place the bottom bun on a plate. Spread a thin layer of mayonnaise. Add a fresh lettuce leaf on top. Place the juicy teriyaki beef patty on the lettuce. Add a slice of ripe tomato. Top with thinly sliced red onions. Drizzle some extra teriyaki sauce for more flavor. Finally, place the top bun to complete the burger.

Your Teriyaki Beef Burger is ready to enjoy. Serve with fries or a side salad for a complete meal.

Cooking Techniques

Cooking the perfect Teriyaki Beef Burger requires some essential techniques. These methods ensure that each bite is juicy and flavorful. Let’s explore the best ways to cook your patties.

Grilling The Patties

Grilling adds a smoky flavor to your Teriyaki Beef Burger. Heat your grill to medium-high. Shape your beef patties and place them on the grill. Cook each side for 4-5 minutes. This creates a nice char on the outside. Use a meat thermometer to check the internal temperature. It should reach 160°F for safety. Brush the patties with Teriyaki sauce in the last minute. This gives them a glossy finish and extra flavor.

Alternative Cooking Methods

Don’t have a grill? You can still enjoy a delicious Teriyaki Beef Burger. Try using a skillet on the stove. Heat the skillet over medium heat. Add a bit of oil to prevent sticking. Cook the patties for 4-5 minutes on each side. Use the same Teriyaki sauce technique to finish.

Another option is to use an oven. Preheat to 375°F. Place the patties on a baking sheet. Cook for 20 minutes, flipping halfway through. Again, brush with Teriyaki sauce near the end. This method keeps the patties juicy and flavorful.

Teriyaki Beef Burger Recipe: Ultimate Guide to Deliciousness

Credit: www.thekitchn.com

Side Dishes And Pairings

Finding the right side dishes and beverages to pair with your Teriyaki Beef Burger can elevate your meal. Let’s explore some perfect side dishes and ideal beverages to complement your delicious burger.

Perfect Side Dishes

Fries are a classic choice. Sweet potato fries bring a touch of sweetness that pairs well with the savory teriyaki flavor. Coleslaw provides a crunchy texture and a refreshing taste. It’s a nice contrast to the juicy burger.

For a healthier option, a simple green salad works well. Dress it with a light vinaigrette to keep it fresh and tangy. Grilled vegetables are another great choice. They add a smoky flavor that complements the teriyaki sauce.

Ideal Beverages

An ice-cold beer is a top pick. It balances the flavors of the burger nicely. If you prefer non-alcoholic options, iced tea is a refreshing choice. A lightly sweetened green tea pairs well with the teriyaki sauce.

Soda is another popular choice. A classic cola can cut through the richness of the burger. For a unique twist, try a ginger ale. Its spicy notes complement the teriyaki flavor perfectly.

Tips And Tricks

Creating the perfect Teriyaki Beef Burger at home can be a rewarding experience. To help you achieve the best results, we’ve gathered some essential tips and tricks. These will guide you through the process, ensuring a delicious and mouthwatering burger every time.

Burger Perfection Tips

Use high-quality beef for the juiciest burgers. Opt for ground chuck with a fat content of 80/20. This ratio ensures a good balance of flavor and moisture.

Season the beef generously with salt and pepper before forming patties. This simple step enhances the natural taste of the meat.

Shape the patties gently and avoid overworking the meat. Overworking can lead to tough burgers. Make a small indentation in the center of each patty. This helps the burgers cook evenly and prevents them from puffing up.

Grill or cook the patties over medium-high heat. This provides a nice sear while keeping the inside juicy. Always let the burgers rest for a few minutes before serving. This allows the juices to redistribute, ensuring every bite is flavorful.

Common Mistakes To Avoid

Do not press down on the patties while cooking. This squeezes out the juices and leads to dry burgers.

Avoid using lean beef. Lean beef lacks the necessary fat content for a juicy burger.

Do not skip the seasoning. Unseasoned patties can taste bland and unappetizing.

Do not overcook the patties. Overcooked burgers can become dry and tough. Aim for a medium-rare to medium doneness for the best texture and flavor.

Avoid using stale or old buns. Fresh buns make a significant difference in the overall taste and texture of the burger.

Teriyaki Beef Burger Recipe: Ultimate Guide to Deliciousness

Credit: community.kewpieshop.com

Frequently Asked Questions

What Ingredients Are Needed For Teriyaki Beef Burger?

You need ground beef, teriyaki sauce, garlic, ginger, soy sauce, and burger buns. Toppings can include lettuce, tomato, and onion.

How Do You Make Teriyaki Sauce For Burgers?

Combine soy sauce, mirin, sugar, ginger, and garlic. Simmer until thickened. Adjust sweetness and saltiness to taste.

Can I Use Store-bought Teriyaki Sauce?

Yes, you can use store-bought teriyaki sauce. It saves time and ensures consistent flavor.

What Is The Cooking Time For Teriyaki Beef Burgers?

Cook each patty for about 4-5 minutes per side. Ensure the internal temperature reaches 160°F.

Conclusion

Crafting a Teriyaki Beef Burger at home is easy and fun. The sweet and savory flavors blend perfectly. This recipe promises a tasty and satisfying meal. Impress your family and friends with your cooking skills. Remember, fresh ingredients make a big difference.

Experiment with toppings and sauces for variety. Enjoy your homemade Teriyaki Beef Burger and happy cooking!

Top Round Oven Recipe: Delicious and Easy Cooking Guide

Top Round Oven Recipe Top round roast is a lean and flavorful cut of beef. It’s perfect for a hearty meal.

This blog post will introduce you to the best ways to prepare it. Cooking a top round roast can seem daunting, but it’s quite simple. All you need are the right ingredients and a good oven. This cut of beef is not only delicious but also versatile.

Whether you want a savory dinner for the family or a special dish for guests, a top round roast fits the bill. In this post, you’ll discover how to bring out the best flavors and make a memorable meal. From seasoning tips to cooking times, we cover everything. Let’s dive into the world of top round oven recipes!

Introduction To Top Round Oven Recipes

Cooking a delicious top round roast can be a rewarding experience. Top round is a lean cut of beef, known for its rich flavor and versatility. It’s perfect for a variety of oven recipes. In this blog post, we will explore what top round is, and the benefits of cooking it in the oven.

What Is Top Round?

Top round is a cut from the upper part of the cow’s hind leg. It’s known for being lean and flavorful. Unlike fattier cuts, top round has less marbling. This makes it a healthier choice for those watching their fat intake.

Here are some key points about top round:

  • Lean cut of beef
  • From the upper hind leg
  • Rich in flavor
  • Less marbling

Benefits Of Cooking Top Round

Cooking top round in the oven offers several advantages. These benefits make it a favorite among home cooks.

Below are some benefits of cooking top round:

  1. Healthier Option: Top round is low in fat, making it a healthy choice.
  2. Rich Flavor: Despite being lean, it has a robust beefy taste.
  3. Versatility: Suitable for various recipes, from roasts to stir-fries.
  4. Cost-Effective: Often more affordable than other cuts of beef.

In summary, top round is a great choice for oven recipes. Its lean nature, flavor, and versatility make it a kitchen staple.

Essential Ingredients

Top Round Oven Recipe: Essential Ingredients

Cooking a delicious Top Round Oven recipe starts with gathering the right ingredients. Using the best and freshest ingredients can make all the difference in flavor. Here, we will outline the essential components you need to make this dish a success.

Key Ingredients For Flavor

  • Top Round Roast: The main star. Choose a high-quality cut.
  • Olive Oil: Adds richness and helps with browning.
  • Garlic: Infuses the meat with a robust taste.
  • Rosemary: Provides a fragrant, earthy flavor.
  • Salt and Pepper: Essential for seasoning.

Optional Add-ins

  • Carrots: Add sweetness and color.
  • Onions: Enhance the depth of flavor.
  • Potatoes: Make the dish heartier.
  • Thyme: Another herb that pairs well with roast.
  • Red Wine: Adds a rich, deep flavor to the sauce.
Ingredient Quantity
Top Round Roast 1 (3-4 pounds)
Olive Oil 2 tbsp
Garlic 4 cloves, minced
Rosemary 2 sprigs, chopped
Salt and Pepper To taste
Carrots (optional) 3, sliced
Onions (optional) 2, quartered
Potatoes (optional) 4, cubed
Thyme (optional) 1 sprig
Red Wine (optional) 1 cup

Preparation Tips

Preparing the perfect Top Round Oven Recipe requires attention to detail. From selecting the right cut of meat to marinating it perfectly, every step matters. Here are some essential tips to help you achieve the best results.

Choosing The Best Cut

Start with a high-quality top round cut. Look for meat with a bright red color. Avoid cuts with too much fat or gristle. A fresh cut ensures a tender and juicy result. Check the packaging date to ensure freshness. Fresh meat cooks better and tastes great.

Marinating Techniques

Marinating adds flavor and tenderness to the top round. Use a simple marinade with oil, vinegar, and spices. Let the meat soak for at least four hours. Overnight marination gives the best results. Place the meat in a sealed bag to ensure even marination.

Turn the bag occasionally to distribute the marinade evenly. Avoid using too much salt in the marinade. Salt can draw out moisture and make the meat dry. Use herbs and garlic for added flavor without overpowering the meat’s natural taste.

Top Round Oven Recipe: Delicious and Easy Cooking Guide

Credit: www.simplejoy.com

Cooking Methods

Cooking top round in the oven can yield delicious, tender results. The method you choose can affect the flavor and texture of the meat. Below are two popular ways to cook top round in the oven.

Oven Roasting Basics

Oven roasting is a straightforward method. It lets the meat cook evenly and develop a savory crust.

Ingredients:

  • Top round roast
  • Salt and pepper
  • Olive oil
  • Garlic
  • Herbs (rosemary or thyme)

Instructions:

  1. Preheat your oven to 350°F (175°C).
  2. Season the roast with salt, pepper, and herbs.
  3. Heat olive oil in a pan and sear the roast on all sides.
  4. Place the seared roast in a baking dish with garlic cloves.
  5. Bake in the oven for 1 to 1.5 hours.
  6. Use a meat thermometer to ensure an internal temperature of 135°F (57°C) for medium-rare.
  7. Let the roast rest for 10 minutes before slicing.

Slow Cooking Alternative

Slow cooking offers a different approach. It allows the meat to become incredibly tender.

Ingredients:

  • Top round roast
  • Salt and pepper
  • Onions
  • Carrots
  • Beef broth
  • Bay leaves

Instructions:

  1. Preheat your oven to 275°F (135°C).
  2. Season the roast with salt and pepper.
  3. Place onions and carrots at the bottom of a roasting pan.
  4. Lay the roast on top of the vegetables.
  5. Add beef broth and bay leaves to the pan.
  6. Cover the pan tightly with foil.
  7. Bake in the oven for 3 to 4 hours.
  8. Check for doneness; the meat should be very tender.
  9. Let the roast rest before slicing and serving.

Step-by-step Recipe Guide

Creating the perfect top round roast requires patience and attention to detail. This step-by-step guide will walk you through each part of the process. Follow these instructions to ensure your top round roast turns out tender and flavorful.

Prepping The Meat

Begin by choosing a fresh top round roast. Look for meat with a bright red color and minimal fat. Follow these steps to prepare your roast:

  • Rinse the meat under cold water.
  • Pat dry with paper towels.
  • Trim excess fat to leave a thin layer.

Once the meat is clean, it’s time to season. A simple seasoning mix enhances the meat’s natural flavor. Use this basic seasoning blend:

Ingredient Amount
Salt 1 teaspoon
Black Pepper 1 teaspoon
Garlic Powder 1 teaspoon
Onion Powder 1 teaspoon

Rub the seasoning mix all over the meat. Ensure every side is covered. Let the meat rest at room temperature for 30 minutes. This step allows the seasoning to penetrate the meat.

Cooking Instructions

Now that the meat is prepped, it’s time to cook. Follow these simple cooking instructions for a perfect roast:

  1. Preheat oven to 325°F (163°C).
  2. Place the roast on a rack in a roasting pan.
  3. Insert a meat thermometer into the thickest part.
  4. Roast in the oven for 20 minutes per pound.
  5. Check the temperature for doneness:

For medium-rare, the internal temperature should be 135°F (57°C). For medium, aim for 145°F (63°C). Once the roast reaches your desired doneness, remove it from the oven.

Rest the meat for 15 minutes before slicing. This step is crucial. It allows the juices to redistribute, making the meat more tender.

Slice the roast thinly against the grain. Serve with your favorite sides and enjoy a delicious, home-cooked meal.

Top Round Oven Recipe: Delicious and Easy Cooking Guide

Credit: www.simplejoy.com

Serving Suggestions

The Top Round Oven Recipe is a delicious and hearty dish. But the experience is incomplete without the right accompaniments. Below, you’ll find ideas for Side Dishes to Complement your meal and some Presentation Tips to make it look as good as it tastes.

Side Dishes To Complement

Pairing your Top Round Oven Recipe with the right side dishes enhances the meal. Here are some suggestions:

  • Garlic Mashed Potatoes: Creamy and flavorful, they balance the richness of the meat.
  • Roasted Vegetables: Carrots, Brussels sprouts, and bell peppers add color and nutrition.
  • Fresh Green Salad: A light option with a tangy vinaigrette to cleanse the palate.
  • Steamed Asparagus: Simple, elegant, and a perfect match for the hearty main dish.
  • Buttered Dinner Rolls: Soft and warm, ideal for soaking up any extra gravy.

Presentation Tips

Presentation is key to a memorable meal. Here are some tips to make your Top Round Oven Recipe look appealing:

  1. Use a Platter: Serve the meat on a large, elegant platter. It makes the dish look more inviting.
  2. Garnish with Fresh Herbs: Fresh parsley or rosemary adds a pop of color.
  3. Slice the Meat Thinly: Thin, even slices showcase the tenderness of the meat.
  4. Arrange Sides Neatly: Place side dishes around the meat in an organized manner.
  5. Drizzle with Sauce: A light drizzle of gravy or sauce adds a glossy finish.

Creating a visually appealing plate enhances the dining experience. It shows care and attention to detail.

Common Mistakes To Avoid

Preparing a top round oven recipe can be straightforward. Yet, many people make common mistakes that can ruin the dish. Knowing what to avoid can help you cook a perfect meal every time.

Overcooking Issues

Overcooking a top round roast can make it tough and dry. To avoid this, use a meat thermometer. Check the internal temperature regularly. The ideal temperature for a medium-rare roast is 135°F. Remove the roast from the oven when it is 5-10 degrees below the desired temperature. Meat continues to cook after being removed from the heat.

Do not rely on cooking times alone. Ovens vary, and cooking times can differ. Always check the meat’s internal temperature for the best results.

Seasoning Errors

Not seasoning the meat properly is another common mistake. A top round roast needs a good amount of seasoning. Use salt, pepper, and your favorite herbs. Rub the seasoning evenly over the entire roast. This ensures every bite is flavorful.

Marinate the meat if you have time. A marinade can add extra flavor and make the meat more tender. Allow the roast to marinate for at least a few hours, or overnight if possible.

Avoid adding too much salt if you are marinating the meat. The marinade may already contain salty ingredients.

Top Round Oven Recipe: Delicious and Easy Cooking Guide

Credit: thebigmansworld.com

Storing And Reheating

Once you’ve cooked your top round roast to perfection, knowing how to store and reheat it properly is crucial. This ensures your leftovers remain delicious and safe to eat. Follow these guidelines for the best results.

Proper Storage Techniques

First, allow the roast to cool to room temperature. Refrigerate it within two hours of cooking to prevent bacteria growth.

  • Wrap the roast tightly in plastic wrap or aluminum foil.
  • Place it in an airtight container or a resealable plastic bag.
  • Store in the refrigerator for up to four days.

For longer storage, you can freeze the roast. Follow these steps:

  1. Wrap the cooled roast in plastic wrap.
  2. Place it in a freezer-safe container or bag.
  3. Label with the date and freeze for up to three months.

Reheating Methods

Reheating your top round roast correctly keeps it tender and flavorful. Here are some effective methods:

Method Instructions
Oven
  • Preheat oven to 250°F (120°C).
  • Place the roast in a baking dish with a bit of broth.
  • Cover with foil and heat for 20-30 minutes.
Stovetop
  • Slice the roast thinly.
  • Heat a pan over medium heat.
  • Add a bit of broth or water and simmer the slices until warm.
Microwave
  • Place slices on a microwave-safe plate.
  • Cover with a damp paper towel to retain moisture.
  • Heat on medium power for 1-2 minutes, checking often.

Remember, reheating too quickly or at high temperatures can dry out the meat. Use these methods to keep your top round roast moist and tasty.

Conclusion And Final Thoughts

Top Round Oven Recipe: Conclusion and Final Thoughts

Cooking a top round roast in the oven can be a rewarding experience. It is simple, delicious, and perfect for any occasion. With the right seasoning and cooking time, you can create a mouth-watering dish that everyone will enjoy.

In this section, we will recap the key points and encourage you to experiment with your own variations. Let’s dive in and wrap up our top round oven recipe journey.

Recap Of Key Points

First, choose a high-quality cut of top round beef. This ensures tenderness and flavor. Second, season the meat generously with your favorite spices. Salt, pepper, and garlic powder work well.

Preheat your oven to the right temperature. 350°F is ideal. Use a meat thermometer to check for doneness. An internal temperature of 135°F gives you a perfect medium-rare roast.

Finally, let the roast rest for at least 15 minutes before slicing. This allows the juices to redistribute, making the meat juicier and more flavorful.

Encouragement To Experiment

Don’t be afraid to try new seasonings and marinades. Different herbs and spices can give your roast unique flavors. Consider adding rosemary, thyme, or even a splash of soy sauce for a twist.

You can also experiment with cooking times and temperatures. A lower temperature for a longer time can make the meat even more tender. Or, try a quick sear on high heat before roasting for a nice crust.

Remember, cooking is an art. Have fun and make it your own. Your top round roast can become a family favorite with a little creativity.

Frequently Asked Questions

What Is A Round Oven Recipe?

A round oven recipe utilizes a round-shaped oven for baking. It often includes dishes like bread, pizza, and cakes.

How To Cook Meat In A Round Oven?

Preheat the round oven to 350°F. Season the meat, place it in the oven, and cook as per recipe instructions.

Can I Bake Bread In A Round Oven?

Yes, you can bake bread in a round oven. Use a round baking dish or Dutch oven for best results.

What Dishes Are Best For Round Ovens?

Round ovens are great for baking pizzas, casseroles, and cakes. They provide even heat distribution.

Conclusion

Enjoy making this top round oven recipe at home. It’s simple, tasty, and perfect for any meal. Your family will love it. The flavors blend well, creating a delightful dish. Cooking this recipe saves time and effort. Give it a try and share your experience.

Perfect for busy weeknights or special occasions. Happy cooking!

Best Lemon Drop Cookie Recipe: Zesty & Irresistible Treats

Who doesn’t love a delicious cookie? Lemon drop cookies are a delightful treat.

They combine the zesty flavor of lemon with a sweet, soft cookie base. Baking these cookies is easier than you think. The best lemon drop cookie recipe will guide you through each step. You’ll enjoy the perfect balance of tart and sweet in every bite.

These cookies are perfect for any occasion. Whether you’re planning a party or just want a tasty snack, lemon drop cookies will impress. They are light, refreshing, and simply irresistible. Get ready to discover the secrets to making the best lemon drop cookies ever!

Introduction To Lemon Drop Cookies

Welcome to the delightful world of Lemon Drop Cookies. These cookies are a perfect blend of sweet and tangy flavors. They offer a refreshing twist compared to traditional cookie recipes. The zesty lemon flavor combined with a soft, chewy texture makes them a favorite for many. Whether you are a seasoned baker or a beginner, this recipe is easy to follow and delivers delicious results every time.

Why Lemon Drop Cookies?

Lemon Drop Cookies stand out for several reasons. Firstly, their unique lemony flavor is a refreshing change from the usual chocolate or vanilla cookies. Secondly, they are versatile and can be enjoyed any time of the year. Thirdly, they are relatively easy to make with ingredients that are often already in your pantry. Here are some key points why these cookies are a must-try:

  • Unique Flavor: The tangy lemon zest adds a burst of flavor.
  • Easy to Make: Simple ingredients and quick preparation.
  • Perfect Texture: Soft and chewy with a slight crunch.

Perfect Occasions For Lemon Drop Cookies

Lemon Drop Cookies are perfect for various occasions. Their bright flavor and cheerful appearance make them a hit in many settings. Here are some occasions where these cookies shine:

Occasion Why They Are Perfect
Spring and Summer Parties Refreshing flavor complements warm weather.
Tea Time Ideal for pairing with a cup of tea.
Holidays A unique treat among holiday cookie assortments.
Gifts Pack nicely and make thoughtful presents.

So, why not give these delightful cookies a try? Your taste buds will thank you!

Best Lemon Drop Cookie Recipe: Zesty & Irresistible Treats

Credit: breadboozebacon.com

Ingredients Needed

Creating the perfect Lemon Drop Cookie begins with gathering the right ingredients. These tangy, sweet cookies need fresh lemons and basic baking items. Let’s dive into what you need.

Fresh Lemons

Fresh lemons are the star of this recipe. Their zest and juice give the cookies their bright, citrus flavor. Use organic lemons for the best taste. Ensure they are firm and bright yellow. You will need both the zest and the juice for maximum flavor.

Key Baking Ingredients

For the dough, you need all-purpose flour, sugar, and butter. Use unsalted butter at room temperature. This helps in making a smooth, creamy dough. Granulated sugar adds sweetness and structure to the cookies.

Baking powder and baking soda are essential. They ensure the cookies rise properly and have a light texture. Add a pinch of salt to balance the flavors.

Eggs act as a binding agent. They also add richness to the dough. Use large eggs at room temperature for best results. Vanilla extract enhances the overall flavor.

For extra lemony goodness, consider adding lemon extract. It gives an intense lemon flavor without extra acidity.

With these ingredients, you can make the best Lemon Drop Cookies ever. Happy baking!

Essential Baking Tools

The right tools make baking lemon drop cookies a breeze. They ensure your cookies come out perfect every time. Let’s look at the essential baking tools you need.

Mixing Equipment

Proper mixing equipment is key for the best lemon drop cookies. Here are some must-haves:

  • Mixing Bowls: Use different sizes for various tasks.
  • Electric Mixer: It makes blending ingredients easier.
  • Spatula: Helps in scraping the bowl clean.
  • Whisk: Ideal for mixing dry ingredients.

Baking Sheets And Parchment Paper

These tools are essential for even baking. They help in achieving the perfect texture.

  • Baking Sheets: Ensure they are non-stick and of good quality.
  • Parchment Paper: Prevents cookies from sticking to the sheets.

Using these essential baking tools will elevate your lemon drop cookies. Enjoy baking!

Best Lemon Drop Cookie Recipe: Zesty & Irresistible Treats

Credit: hopewellheightsblog.com

Preparing The Dough

Preparing the dough for lemon drop cookies is a crucial step. This stage sets the foundation for the cookies’ texture and flavor. Follow these steps to ensure your dough is perfect for baking.

Mixing The Dry Ingredients

Start by gathering your dry ingredients. You’ll need flour, baking soda, and salt. Measure each ingredient accurately. Place them in a large mixing bowl. Use a whisk to combine them. Ensure the mixture is even and free of lumps.

Incorporating The Wet Ingredients

Next, gather your wet ingredients. You will need butter, sugar, and eggs. Soften the butter to room temperature. Cream the butter and sugar together. Use a hand mixer for this step. Add the eggs one at a time. Beat well after each addition. Finally, add lemon juice and zest for a zesty kick.

Forming The Cookies

Forming the perfect lemon drop cookies is a joyful process. This part of the recipe is where you shape the dough and add a touch of citrus magic. Let’s dive into the details of shaping the dough and enhancing the flavor with lemon zest and sugar.

Shaping The Dough

Start with your prepared dough. Use a tablespoon to scoop out equal portions. Roll each portion into a ball using your hands. This step ensures your cookies bake evenly.

Place the dough balls on a baking sheet lined with parchment paper. Make sure to leave enough space between each ball. This prevents the cookies from sticking together as they bake.

Adding Lemon Zest And Sugar

Mix lemon zest and sugar in a small bowl. This step is crucial for adding that delightful lemon flavor. Roll each dough ball in the lemon-sugar mix. This coats the dough evenly and adds a citrusy crunch.

Once coated, place the dough balls back on the baking sheet. Lightly press down on each ball with the bottom of a glass. This flattens the cookies slightly and helps them bake evenly.

The lemon-sugar coating gives the cookies a beautiful, sparkling finish. It also enhances the lemon flavor, making each bite a burst of citrus delight.

Best Lemon Drop Cookie Recipe: Zesty & Irresistible Treats

Credit: barefeetinthekitchen.com

Baking Instructions

Follow these simple baking instructions to create the perfect lemon drop cookies. Each step is crucial to ensure your cookies come out crispy on the edges and chewy in the center. Pay close attention to the details for the best results.

Preheating The Oven

Start by preheating your oven to 350°F (175°C). This ensures a consistent baking temperature. A properly preheated oven helps your cookies bake evenly. Use an oven thermometer for accuracy. Some ovens may run hot or cold.

Baking Time And Temperature

Once the oven is preheated, place the cookie sheets on the middle rack. Bake the cookies for 10-12 minutes or until the edges are golden brown. Rotate the cookie sheets halfway through baking. This promotes even baking.

Do not overbake the cookies. They will continue to cook slightly on the hot baking sheet after removal from the oven. Allow the cookies to cool on the baking sheet for 5 minutes before transferring them to a wire rack. This helps them set and prevents them from breaking apart.

Follow these steps closely for the best lemon drop cookies. Happy baking!

Cooling And Storing

Cooling and storing your lemon drop cookies properly is essential. This ensures they stay fresh and delicious. Let’s dive into the best practices for cooling and storing.

Cooling On Racks

Once your lemon drop cookies are out of the oven, transfer them to cooling racks. This prevents them from becoming soggy. Let them cool completely on the racks. This might take about 10-15 minutes. Cooling on racks allows air to circulate around the cookies. This helps maintain their texture and flavor. Be patient. It’s worth the wait.

Proper Storage Methods

To store your lemon drop cookies, use an airtight container. This keeps them fresh. Line the container with parchment paper. This prevents the cookies from sticking together. If you have many cookies, layer them with parchment paper between each layer. Store the container in a cool, dry place. Your cookies will stay fresh for up to a week. For longer storage, you can freeze them. Use a freezer-safe bag or container. Label it with the date. Frozen cookies can last up to three months. Thaw them at room temperature before eating. They will taste just as good as fresh.

Serving Suggestions

Lemon drop cookies are a delightful treat. They are perfect for many occasions. Knowing how to serve them can make your experience even better. Let’s explore some serving suggestions that will enhance your enjoyment.

Pairing With Beverages

Lemon drop cookies pair well with many beverages. Serve them with hot tea for a comforting snack. Green tea or chamomile works wonderfully. If you prefer coffee, a mild blend complements the cookies’ tangy flavor.

For a refreshing twist, try lemonade or iced tea. The citrus in both drinks enhances the lemon flavor in the cookies. Milk is another great option. It balances the tartness and adds a creamy touch.

Ideal For Gifting

Lemon drop cookies make excellent gifts. They are unique and show thoughtfulness. Package them in a decorative tin or box. Add a personal note for a special touch.

These cookies stay fresh for several days. This makes them perfect for shipping. They are also a hit at holiday gatherings. Share them at parties or give them as hostess gifts.

Troubleshooting Tips

Even the best lemon drop cookie recipe can face challenges. Don’t worry! We have compiled some troubleshooting tips to help you. Whether your cookies are too flat, too dry, or lacking flavor, these tips will save the day.

Common Issues

  • Cookies spread too much
  • Cookies are too dry
  • Cookies lack lemon flavor

Solutions And Adjustments

Issue Solution
Cookies spread too much
  • Chill the dough before baking
  • Use less butter
  • Add a bit more flour
Cookies are too dry
  • Check your baking time
  • Add an extra egg yolk
  • Use less flour
Cookies lack lemon flavor
  • Add more lemon zest
  • Increase the lemon juice
  • Consider lemon extract

Variations And Enhancements

Exploring different variations and enhancements can elevate your lemon drop cookies to a new level. These simple additions make the cookies more interesting and delicious. Let’s dive into some creative ideas!

Adding White Chocolate

White chocolate pairs wonderfully with the tangy flavor of lemon. Chop up white chocolate chunks or use white chocolate chips. Mix them into your dough before baking. The creamy texture and sweet taste balance the zesty lemon. Your cookies will be richer and more flavorful.

Incorporating Nuts

Nuts add a delightful crunch to your lemon drop cookies. Consider using chopped almonds, walnuts, or pecans. Stir them into your cookie dough. The nuts provide a nice contrast to the soft texture of the cookies. They also enhance the overall flavor profile. Your cookies will have a satisfying crunch in every bite.

Frequently Asked Questions

What Ingredients Do You Need For Lemon Drop Cookies?

To make lemon drop cookies, you need flour, sugar, butter, eggs, lemon zest, lemon juice, and baking powder.

How Long Does It Take To Bake Lemon Drop Cookies?

Lemon drop cookies typically take about 10-12 minutes to bake at 350°F (175°C).

Can I Freeze Lemon Drop Cookie Dough?

Yes, you can freeze lemon drop cookie dough. Wrap it tightly in plastic wrap and store for up to 3 months.

How Do You Store Lemon Drop Cookies?

Store lemon drop cookies in an airtight container at room temperature. They stay fresh for up to a week.

Conclusion

Enjoy making these lemon drop cookies with your family. They are simple, tasty, and fun. Everyone loves a sweet treat now and then. Try this recipe today and share the joy. Happy baking!

Sour Cream Bundt Coffee Cake Recipe: Moist, Delicious & Easy

Sour Cream Bundt Coffee Cake is a delightful treat. It combines rich flavors with a moist texture.

Imagine a cake that melts in your mouth with each bite. Sour Cream Bundt Coffee Cake offers that experience and more. This cake is perfect for breakfast, brunch, or an afternoon snack. The sour cream adds a unique tanginess, making it stand out from other cakes.

Its moist texture ensures every slice is soft and tender. Whether you are hosting a gathering or enjoying a quiet moment with coffee, this cake will impress. Get ready to bake a cake that everyone will love. Let’s dive into the details of this delicious recipe.

Sour Cream Bundt Coffee Cake Recipe: Moist, Delicious & Easy

Credit: www.garnishwithlemon.com

Ingredients

Creating a delicious Sour Cream Bundt Coffee Cake starts with the right ingredients. Using fresh and high-quality ingredients will make your cake moist and flavorful. Below, you’ll find the essential components and some optional additions that can elevate your cake.

Essential Components

  • Flour: Use all-purpose flour for the best texture.
  • Sugar: Granulated sugar to sweeten the cake.
  • Baking Soda: Helps the cake rise and become fluffy.
  • Baking Powder: Another leavening agent for extra lift.
  • Salt: Enhances the flavors.
  • Butter: Unsalted butter for richness and moisture.
  • Sour Cream: Adds tanginess and keeps the cake moist.
  • Eggs: Bind the ingredients together and provide structure.
  • Vanilla Extract: Adds a warm, sweet flavor.
  • Cinnamon: Gives the cake a cozy, comforting taste.

Optional Additions

  • Walnuts: Add a crunchy texture.
  • Chocolate Chips: For a sweet, melty surprise.
  • Brown Sugar: A deeper, caramel-like sweetness.
  • Nutmeg: Another spice for extra warmth.
  • Powdered Sugar: Dust on top for a beautiful finish.
  • Fresh Berries: Add a fruity twist.

Combining these essential components and optional additions ensures a tasty and customizable cake. Use the ingredients you love to make it your own!

Equipment Needed

Creating a delicious Sour Cream Bundt Coffee Cake requires the right equipment. Having the correct tools ensures your cake turns out perfect every time. Below, we’ll discuss the essential equipment needed for this recipe.

Baking Tools

A Bundt pan is essential for this coffee cake. Its unique shape helps the cake bake evenly and makes it look beautiful. A 10-cup Bundt pan works best for this recipe.

You will also need a cooling rack. After baking, place the cake on the rack to cool. This prevents the bottom from becoming soggy.

Don’t forget a good oven mitt. Handling hot pans can be dangerous, so protect your hands.

Mixing Essentials

A stand mixer makes mixing the batter easy. If you don’t have one, a hand mixer works too.

Measuring cups and spoons are crucial. Accurate measurements ensure your cake turns out right.

A large mixing bowl is needed to combine your ingredients. Choose one that’s big enough to avoid spills.

Lastly, a rubber spatula helps scrape the bowl clean. It ensures you use all the batter without waste.

Preparation Steps

Let’s dive into the preparation steps for our delightful Sour Cream Bundt Coffee Cake. Ensuring each step is followed will result in a perfectly moist and delicious cake. Below are the detailed steps you need to follow:

Prepping The Bundt Pan

First, you’ll need to prepare your Bundt pan to ensure the cake doesn’t stick.

  • Grease the pan thoroughly using butter or non-stick spray.
  • Ensure every nook and cranny is covered.
  • Lightly dust the inside with flour.
  • Tap out any excess flour.

Properly prepping the pan is crucial for easy cake removal.

Mixing The Batter

Next, we will prepare the cake batter. Follow these simple steps:

  1. In a large bowl, cream the butter and sugar together until light and fluffy.
  2. Add eggs one at a time, beating well after each addition.
  3. Stir in the vanilla extract.
  4. In a separate bowl, combine the dry ingredients: flour, baking powder, and salt.
  5. Gradually add the dry ingredients to the butter mixture, alternating with the sour cream.
  6. Mix until just combined. Do not overmix.

Once the batter is ready, it’s time to pour it into the prepared Bundt pan.

Baking Instructions

Ready to bake a delightful Sour Cream Bundt Coffee Cake? The right baking instructions ensure your cake turns out perfect. Follow these steps for a moist, flavorful cake that everyone will love.

Ideal Oven Temperature

First, preheat your oven to 350°F (175°C). This temperature is ideal for baking the cake evenly. Ensure your oven is fully heated before placing the cake inside.

Baking Time

Bake the cake for 50-60 minutes. Check for doneness by inserting a toothpick into the cake. If it comes out clean, the cake is ready. Let the cake cool in the pan for 10 minutes. Then transfer it to a wire rack to cool completely.

Adding The Toppings

Adding toppings to your Sour Cream Bundt Coffee Cake can elevate its flavor and texture. The right toppings can transform a simple cake into a delicious treat. Here are some ideas for enhancing your coffee cake.

Classic Streusel

The classic streusel is a must for coffee cake lovers. This crumbly topping adds a delightful crunch and sweetness. To make streusel, you need:

  • 1/2 cup sugar
  • 1/3 cup flour
  • 1/4 cup butter, softened
  • 1 teaspoon cinnamon

Mix the ingredients until they form coarse crumbs. Sprinkle the streusel over the batter before baking. The result is a cake with a crunchy, sweet topping.

Optional Glaze

An optional glaze can add extra sweetness and a beautiful finish to your coffee cake. A simple glaze can be made with:

  • 1 cup powdered sugar
  • 2-3 tablespoons milk
  • 1/2 teaspoon vanilla extract

Combine the ingredients until smooth. Drizzle the glaze over the cooled cake. This adds a sweet, glossy finish that makes the cake even more delicious.

Sour Cream Bundt Coffee Cake Recipe: Moist, Delicious & Easy

Credit: www.tasteofhome.com

Serving Suggestions

Serve the Sour Cream Bundt Coffee Cake with a dusting of powdered sugar. Pair it with fresh berries and a hot cup of coffee. Enjoy a slice for breakfast or as a delightful afternoon treat.

Savoring a slice of Sour Cream Bundt Coffee Cake can be a delightful experience. Elevate this treat with thoughtful serving suggestions. Enhance the flavors and create a memorable experience for your guests.

Best Pairings

Pair the cake with a cup of freshly brewed coffee. The rich flavors of the coffee complement the cake perfectly. For a non-caffeine option, try a glass of cold milk. It balances the cake’s sweetness nicely. Tea lovers can opt for a light black tea. Its subtle taste won’t overpower the cake. Fresh fruits also make a great pairing. Strawberries or blueberries can add a refreshing touch. Add a dollop of whipped cream on the side. It makes each bite more indulgent.

Presentation Tips

Presentation matters. Place the cake on a pretty cake stand. It adds a touch of elegance. Dust the top with powdered sugar for a simple, yet beautiful look. You can also drizzle a light glaze over the cake. It adds shine and extra sweetness. Slice the cake into even pieces. Arrange them neatly on a platter. Garnish with fresh mint leaves for a pop of color. If serving with fruit, place the berries around the cake. This makes the dish look more inviting. Remember, the right presentation can make your cake even more appealing. Enjoy the process of making it look as good as it tastes. “`

Storage Tips

After baking your delicious Sour Cream Bundt Coffee Cake, you want to keep it fresh. Proper storage ensures that every bite remains moist and flavorful. Here are some tips to help you store your cake effectively.

Keeping It Fresh

To keep your coffee cake fresh, allow it to cool completely. Place it on a wire rack for even cooling. Once cooled, wrap the cake in plastic wrap or aluminum foil. This keeps the moisture in and prevents the cake from drying out.

For added protection, store the wrapped cake in an airtight container. Place the container in a cool, dry place. Your cake will stay fresh for up to four days.

Freezing Instructions

If you need to store the cake for longer, freezing is a great option. Follow these steps to freeze your Sour Cream Bundt Coffee Cake:

  1. Cool the cake completely on a wire rack.
  2. Wrap the cake tightly in plastic wrap.
  3. Wrap a second layer of aluminum foil over the plastic wrap.
  4. Label the package with the date of freezing.
  5. Place the wrapped cake in the freezer.

The cake can be frozen for up to three months. To thaw, remove the cake from the freezer and place it in the fridge overnight. Bring it to room temperature before serving for the best texture and taste.

Common Questions

When making a Sour Cream Bundt Coffee Cake, you might have a few questions. Don’t worry, you’re not alone. This section will help you with common queries. Let’s dive into some of the most frequently asked questions.

Substitutions

Can you use Greek yogurt instead of sour cream? Yes, you can. Greek yogurt works well as a replacement. It adds a similar texture and tanginess. Use the same amount as the recipe calls for sour cream.

What if you don’t have a Bundt pan? A tube pan can work. Ensure it’s well-greased. The shape will be different, but the taste remains the same. A regular cake pan is a last resort. Baking times may change.

Troubleshooting

Why is the cake dry? Overbaking can cause dryness. Check your oven temperature with a thermometer. Also, make sure to measure ingredients accurately. Too much flour can lead to a dry cake.

What if the cake sticks to the pan? Grease the pan well. Use butter or oil and dust with flour. Ensure the cake cools for 10 minutes before removing. Loosen the edges with a knife if needed.

Why did the cake sink in the middle? This can happen if the batter was overmixed. Mix until just combined. Also, avoid opening the oven door too early. Sudden temperature changes can cause sinking.

Sour Cream Bundt Coffee Cake Recipe: Moist, Delicious & Easy

Credit: www.allrecipes.com

Frequently Asked Questions

What Is A Bundt Coffee Cake?

A Bundt coffee cake is a moist, sweet cake. It’s baked in a Bundt pan. The cake has a distinctive ring shape.

How To Make Sour Cream Bundt Cake?

To make sour cream Bundt cake, mix butter, sugar, eggs, and sour cream. Add dry ingredients and bake in a Bundt pan.

Can You Freeze Sour Cream Bundt Coffee Cake?

Yes, you can freeze sour cream Bundt coffee cake. Wrap it tightly in plastic wrap. Store it in an airtight container.

What Does Sour Cream Do In Cake?

Sour cream adds moisture and richness to the cake. It helps create a tender crumb.

Conclusion

This Sour Cream Bundt Coffee Cake is perfect for any occasion. Its moist texture and rich flavor make it a crowd-pleaser. Simple ingredients create a delightful treat. Enjoy it with coffee or tea. Share it with friends and family. Baking this cake will bring joy to your kitchen.

Try it today and experience the deliciousness. Your taste buds will thank you. This recipe is a must-have for your baking collection. Enjoy every bite!

Hibachi Rice And Chicken Recipe: Delicious Homemade Guide

Hibachi rice and chicken make a delicious and satisfying meal. This dish brings the flavors of a Japanese steakhouse into your home.

Imagine the sizzle of tender chicken and vegetables on a hot grill. The aroma of soy sauce, garlic, and sesame oil fills the air. Hibachi rice and chicken are not just a meal but an experience. It’s perfect for a family dinner or a special occasion.

Cooking this at home is easier than you think. You can control the ingredients, making it healthier and customized to your taste. Whether you’re a seasoned cook or a beginner, this recipe is a great way to enjoy a restaurant-quality dish at home. Let’s dive into the details and start cooking!

Introduction To Hibachi Cuisine

Hibachi cuisine is a delightful Japanese cooking style. It is known for its unique flavors and vibrant presentation. The word “hibachi” means “fire bowl” in Japanese. This method uses a special grill for cooking. Hibachi rice and chicken is a popular dish in this cuisine.

Origins Of Hibachi

The origins of hibachi date back centuries in Japan. It started as a small, portable heating device. Over time, it evolved into a cooking grill. People used it to cook simple meals during gatherings. The grill became popular for its ability to cook food quickly. It also added a smoky flavor to the dishes.

Popularity In Modern Cooking

Hibachi cuisine has gained popularity worldwide. Many enjoy it for its interactive dining experience. Chefs cook the food in front of guests, making it entertaining. Restaurants often feature hibachi as a main attraction. The combination of fresh ingredients and skilled cooking draws many fans.

Hibachi rice and chicken is a favorite among many. It is a simple yet flavorful dish. The rice is cooked with vegetables and soy sauce. The chicken is marinated and grilled to perfection. Together, they create a delicious and satisfying meal.

Ingredient Quantity
Chicken Breast 2 pieces
Cooked Rice 2 cups
Soy Sauce 2 tablespoons
Vegetables (carrots, peas) 1 cup
Garlic 2 cloves

Try making hibachi rice and chicken at home. It is easy and fun. Enjoy the rich flavors and the joy of cooking hibachi-style.

Essential Ingredients

Creating a delicious Hibachi Rice and Chicken dish at home requires the right ingredients. Each component plays a vital role in bringing out the authentic flavors. Let’s dive into the essential ingredients that make this recipe truly special.

Key Components

For this recipe, you’ll need rice, chicken, vegetables, and seasonings. These are the main elements. Each one contributes to the taste and texture of the dish.

Start with high-quality rice. Jasmine or long-grain rice works best. It should be cooked and chilled before stir-frying.

Chicken is the protein of choice. Boneless, skinless chicken breasts or thighs are ideal. They are easy to cook and absorb flavors well.

Include fresh vegetables. Common choices are onions, carrots, peas, and zucchini. These add color and nutrition.

Don’t forget the seasonings. Soy sauce, garlic, and ginger are essential. They provide depth and richness to the flavor profile.

Selecting Fresh Ingredients

Choosing fresh ingredients is crucial. Fresh chicken ensures tenderness and juiciness. Look for firm, pinkish flesh without any odor.

For vegetables, pick those that are vibrant and crisp. Avoid any that are wilted or discolored. Fresh vegetables retain their crunch and sweetness when cooked.

Check the labels on your seasonings. Opt for low-sodium soy sauce for a healthier option. Fresh garlic and ginger are preferable to dried or powdered versions.

By selecting the freshest ingredients, you’ll ensure your Hibachi Rice and Chicken is flavorful and satisfying.

Necessary Equipment

Preparing Hibachi Rice and Chicken at home requires the right equipment. The right tools make the process easier and more enjoyable. Let’s look at what you need.

Grills And Stovetops

A flat-top grill is ideal for authentic Hibachi cooking. It provides even heat distribution. If you don’t have a flat-top grill, use a large skillet. A non-stick skillet works best to prevent sticking. A gas stove with a high flame is another good option. It gives you better control over the cooking temperature.

Utensils And Tools

Use a good quality spatula for flipping and stirring. A metal spatula is preferred for its durability. Tongs are handy for turning chicken pieces. They give you a firm grip without damaging the food. A sharp knife is essential for cutting vegetables and chicken. Sharp knives make clean cuts and reduce prep time. A rice cooker is helpful for cooking perfect rice every time. It ensures the rice is fluffy and evenly cooked. Measuring cups and spoons are also important. They help you follow the recipe accurately.

Preparing The Chicken

Creating the perfect Hibachi Rice and Chicken starts with preparing the chicken just right. This step ensures that each bite is flavorful and tender. Below, we explore two key aspects: Marinating Techniques and Cooking the Chicken.

Marinating Techniques

Marinating the chicken is crucial for deep, rich flavors. Here are some simple techniques:

  • Basic Marinade: Mix soy sauce, ginger, and garlic. Let the chicken soak for 30 minutes.
  • Yogurt Marinade: Combine yogurt, lemon juice, and spices. Marinate for at least an hour.
  • Teriyaki Marinade: Use a blend of teriyaki sauce, brown sugar, and sesame oil. Marinate overnight for best results.

Cooking The Chicken

Cooking the marinated chicken properly is essential for the perfect dish. Follow these steps:

  1. Heat the Grill: Preheat your grill to medium-high heat.
  2. Oil the Grill: Brush a thin layer of oil on the grill grates to prevent sticking.
  3. Cook the Chicken: Place the chicken on the grill. Cook each side for 5-7 minutes.
  4. Check for Doneness: Use a meat thermometer. The internal temperature should be 165°F (74°C).
  5. Rest the Chicken: Let the chicken rest for 5 minutes before slicing. This keeps it juicy.

These steps ensure your Hibachi Chicken is flavorful and succulent, making your dish a hit every time.

Cooking The Rice

Cooking the rice for your Hibachi Rice and Chicken recipe is a crucial step. It sets the foundation for the entire dish. Get it right, and you’ll have delicious, fluffy rice. Let’s dive into the details.

Rice Selection

Choosing the right type of rice is important. For Hibachi, medium-grain rice works best. It balances stickiness and fluffiness. Jasmine rice is a good option too. Avoid using long-grain rice. It tends to be too dry for this dish.

Perfecting The Texture

Perfect texture starts with rinsing the rice. Rinse until the water runs clear. This removes excess starch. Too much starch makes the rice sticky. Cook the rice with a 1:1.5 rice-to-water ratio. This ensures the rice is not too mushy.

Use a rice cooker for consistency. If you don’t have one, a pot works fine. Bring the water to a boil, then reduce to a simmer. Cover and cook for 18-20 minutes. Let it sit for 10 minutes before fluffing. This resting time allows the rice to absorb any remaining moisture.

Now, you have perfectly cooked rice. It’s ready to be transformed into delicious Hibachi Rice and Chicken.

Combining Chicken And Rice

Combining chicken and rice creates a delicious and satisfying meal. This combination is a staple in many cuisines. Hibachi rice and chicken bring together flavors that are both rich and savory. The dish is perfect for any occasion, offering a delightful experience for your taste buds. Let’s explore how to make this dish even more enjoyable.

Mixing Flavors

Mixing flavors is key in hibachi rice and chicken. Soy sauce, garlic, and ginger add depth. These ingredients blend well with tender chicken. Vegetables like carrots and peas add color and crunch. Each bite becomes a burst of taste and texture. Don’t forget the sesame oil. It adds a nutty aroma that enhances the dish.

Achieving The Right Balance

Balance is crucial in hibachi rice and chicken. Too much soy sauce can make it salty. Too little can make it bland. Start with small amounts and taste as you go. The chicken should be cooked until juicy and tender. Not dry. Rice should be fluffy, not mushy. Stir-fry the rice with vegetables and chicken for an even mix. This ensures every bite has a bit of everything. Finally, garnish with green onions for a fresh finish.

Adding Vegetables And Sauces

Adding vegetables and sauces to your Hibachi Rice and Chicken recipe can elevate the dish. It infuses vibrant colors and enhances flavors. This section will guide you on choosing the right vegetables and creating signature sauces that complement your meal.

Choosing The Right Vegetables

Selecting the best vegetables is crucial for a delicious Hibachi dish. Opt for fresh and crisp vegetables to add texture and nutrition.

  • Carrots: Thinly sliced for a touch of sweetness.
  • Bell Peppers: Choose red, yellow, or green for color and crunch.
  • Zucchini: Adds a mild flavor and soft texture.
  • Onions: Sliced onions provide a savory depth.
  • Peas: A handful of peas for a pop of color.

You can also use broccoli, mushrooms, or snap peas. Customize the vegetable mix to your taste and availability.

Creating Signature Sauces

Signature sauces are what make Hibachi Rice and Chicken truly special. These sauces should balance sweet, salty, and umami flavors.

Here are two easy-to-make sauces:

Sauce Ingredients Instructions
Yum Yum Sauce
  • 1 cup mayonnaise
  • 1 tbsp tomato paste
  • 1 tbsp rice vinegar
  • 1 tbsp melted butter
  • 1 tsp garlic powder
  • 1 tsp paprika
  • 2 tbsp water
Mix all ingredients until smooth. Chill before serving.
Ginger Sauce
  • 1/4 cup soy sauce
  • 2 tbsp rice vinegar
  • 1 tbsp grated fresh ginger
  • 1 tbsp minced garlic
  • 1 tsp sugar
  • 1/4 cup water
Combine ingredients in a blender. Blend until smooth.

These sauces can be drizzled over the dish or used as dips. Adjust the seasoning to suit your preference. Experiment and find the perfect balance that delights your taste buds.

Hibachi Rice And Chicken Recipe: Delicious Homemade Guide

Credit: 40aprons.com

Serving Suggestions

Serving Hibachi Rice and Chicken in an appealing way can enhance the dining experience. Simple techniques can transform your meal from ordinary to extraordinary. Let’s explore some serving suggestions.

Plating Techniques

Use a wide, flat plate to showcase the dish. Place the rice in the center. Arrange the chicken pieces around the rice. Create a neat and balanced look. Use contrasting colors to make the plate visually appealing.

Garnishing Tips

Fresh herbs add color and flavor. Sprinkle chopped green onions on top. Sesame seeds add a touch of elegance. A lemon wedge on the side adds a pop of color and zest. Use a drizzle of soy sauce for a glossy finish.

Tips And Tricks

Creating the perfect Hibachi Rice and Chicken can be a delightful experience. With a few tips and tricks, you can elevate your dish to restaurant-quality at home. Let’s dive into some essential guidelines.

Common Mistakes

  • Overcooking the Chicken: This results in dry and tough meat. Cook chicken until it’s just done.
  • Using Fresh Rice: Freshly cooked rice is too sticky. Use day-old rice for the best texture.
  • Skipping the Seasoning: Always season your rice and chicken well. It enhances the flavor.
  • High Heat Cooking: Cook on high heat but avoid burning. Keep an eye on your ingredients.

Advanced Techniques

  1. Marinate the Chicken: Marinating adds extra flavor and tenderness. Use soy sauce, garlic, and ginger.
  2. Use a Wok: A wok distributes heat evenly. It helps in cooking everything perfectly.
  3. Add Vegetables: Incorporate veggies like carrots, peas, and onions. They add color and nutrition.
  4. Butter and Soy Sauce: Finish your dish with a bit of butter and soy sauce. It adds a rich flavor.

By following these tips and advanced techniques, you can create a delicious Hibachi Rice and Chicken dish. Enjoy cooking and savor the taste of your homemade masterpiece!

Hibachi Rice And Chicken Recipe: Delicious Homemade Guide

Credit: www.closetcooking.com

Hibachi Rice And Chicken Recipe: Delicious Homemade Guide

Credit: thecookingjar.com

Frequently Asked Questions

What Is Hibachi Rice?

Hibachi rice is a Japanese fried rice dish. It typically includes vegetables, soy sauce, and sometimes meat.

How To Make Hibachi Chicken?

To make hibachi chicken, cook diced chicken with soy sauce, garlic, and butter. Serve with hibachi rice.

Can I Use Leftover Rice?

Yes, leftover rice works perfectly for hibachi rice. It helps achieve a better texture.

What Vegetables Are In Hibachi Rice?

Common vegetables in hibachi rice are onions, carrots, and peas. Feel free to add your favorites.

Conclusion

Enjoy making hibachi rice and chicken at home. It’s simple and tasty. This recipe brings the restaurant to your kitchen. Share it with family and friends. They’ll love the flavors and textures. Cooking at home can be fun and rewarding.

Try this recipe today. Feel the joy of creating a delicious meal. Happy cooking!

Korean Spicy Chicken Bulgogi Recipe: Ultimate Flavor Explosion

Korean Spicy Chicken Bulgogi is a dish that packs a punch. This delicious meal combines tender chicken with a spicy, savory marinade.

Do you love bold, flavorful dishes? Korean Spicy Chicken Bulgogi is perfect for you. This dish is a favorite in Korean cuisine, known for its rich taste and easy preparation. The marinade, made with soy sauce, garlic, and chili paste, soaks into the chicken, creating a burst of flavors in every bite.

Whether you’re a seasoned cook or a kitchen newbie, this recipe is simple to follow and will impress your taste buds. Ready to explore a new culinary adventure? Dive into the world of Korean cooking with this spicy, mouth-watering chicken bulgogi recipe.

Ingredients

Creating the perfect Korean Spicy Chicken Bulgogi begins with selecting the right ingredients. This delicious and fiery dish relies on a few essential items. For those who want to add a personal touch, there are also optional additions to consider. Let’s dive into the ingredients needed to make this mouth-watering recipe.

Essential Ingredients

The core ingredients for Korean Spicy Chicken Bulgogi include chicken thighs, soy sauce, and gochujang. Chicken thighs are juicy and absorb flavors well. Soy sauce provides a salty base. Gochujang adds the signature spice. Garlic and ginger bring depth to the dish. Brown sugar balances the heat with sweetness. Sesame oil gives a nutty aroma. Green onions add freshness and color.

Optional Additions

For extra flavor, consider adding mushrooms or bell peppers. Mushrooms add a meaty texture. Bell peppers bring a hint of sweetness. For a crunch, include some sesame seeds. If you like a bit more spice, sprinkle in red pepper flakes. Want a citrus note? Add a splash of lime juice. Carrots can add both color and a slight sweetness. Feel free to experiment with these optional additions to suit your taste.

Korean Spicy Chicken Bulgogi Recipe: Ultimate Flavor Explosion

Credit: www.chopsticksandflour.com

Preparation

Preparing Korean Spicy Chicken Bulgogi is simple and fun. Start by gathering all your ingredients. This step will ensure a smooth cooking process. Let’s break down the preparation into two main parts: marinating the chicken and preparing the sauce.

Marinating The Chicken

First, choose fresh chicken thighs or breasts. Cut the chicken into bite-sized pieces. Place the chicken in a large bowl. Add soy sauce, sugar, and sesame oil. Mix well to coat the chicken evenly. Then, add garlic and ginger. These ingredients add a rich flavor. Let the chicken marinate for at least 30 minutes. This step ensures the chicken absorbs all the flavors.

Preparing The Sauce

The sauce is the heart of this dish. Combine gochujang, soy sauce, and sugar in a bowl. Stir until the sugar dissolves. Add sesame oil for a nutty aroma. Mix in garlic and ginger. These add depth to the sauce. For extra heat, add red pepper flakes. Adjust the amount to your taste. Stir the sauce well. Make sure all ingredients are well blended. This sauce will give your chicken its signature spicy kick.

Cooking Instructions

Cooking Korean Spicy Chicken Bulgogi is easy and fun. Whether you prefer the stovetop or grilling method, you’ll get delicious results. Follow these simple instructions to create a mouthwatering meal.

Stovetop Method

First, heat a large pan over medium-high heat. Add a bit of oil to prevent sticking. Once the oil is hot, add the marinated chicken. Spread it evenly in the pan. Cook the chicken, stirring occasionally, for about 10-15 minutes. Ensure the chicken is cooked through and has a nice, caramelized color. Serve hot with rice or lettuce wraps.

Grilling Method

Preheat your grill to medium-high heat. Lightly oil the grill grates to prevent sticking. Place the marinated chicken pieces on the grill. Cook for about 5-7 minutes on each side. Make sure the chicken is cooked through and has grill marks. Remove from the grill and serve hot. Enjoy with rice or as a wrap.

Serving Suggestions

Spicy Chicken Bulgogi is a beloved Korean dish. It offers a blend of flavors. Knowing how to serve it can elevate your dining experience. Here are some serving suggestions to make the most of this delicious recipe.

Traditional Accompaniments

In Korea, Spicy Chicken Bulgogi is often served with traditional sides. These sides balance the heat and enhance the flavor.

  • Steamed Rice: Plain rice is perfect. It absorbs the spicy sauce.
  • Kimchi: This fermented cabbage adds a tangy crunch.
  • Samjang: A thick, savory paste. Made from soybeans and chili.
  • Pickled Radish: Sweet and sour radish slices. They cool your palate.

These sides are not just tasty. They are also traditional. They make your meal more authentic.

Modern Twists

Want to try something new? There are modern ways to enjoy Spicy Chicken Bulgogi. These ideas are fun and unique.

  1. Tacos: Use small tortillas. Add chicken, lettuce, and sriracha mayo.
  2. Wraps: Use lettuce leaves. Fill them with chicken, rice, and sauce.
  3. Burgers: Grill the chicken. Serve on a bun with slaw.
  4. Pizza: Spread sauce on dough. Add chicken, cheese, and green onions.

These modern twists are simple. They add variety to your meals. Try them out and enjoy!

Tips And Tricks

Creating the perfect Korean Spicy Chicken Bulgogi requires attention to detail. These tips will help you achieve a delicious dish. Follow these insights to enhance your cooking experience.

Achieving The Perfect Spice Level

Balancing the spice level can make or break your dish. Start with a small amount of gochujang. Gradually add more to reach your desired heat. Taste as you go. This will prevent the dish from becoming too spicy.

Use gochugaru for a deeper flavor. It adds a smoky taste. Combine it with gochujang for a well-rounded spice profile. Remember, every palate is different. Adjust the spice to your preference.

Avoiding Common Mistakes

Marinating the chicken properly is crucial. Ensure the chicken absorbs all the flavors. Marinate for at least 30 minutes. Overnight is even better. This step ensures the chicken is flavorful inside and out.

Do not overcrowd the pan. Cook in batches if needed. This allows the chicken to cook evenly. Overcrowding leads to steaming instead of browning. A well-browned chicken adds to the overall taste.

Avoid using too much oil. Chicken thighs have natural fat. Excess oil makes the dish greasy. Use a non-stick pan to minimize the need for oil.

Watch the cooking time. Overcooked chicken becomes dry. Keep an eye on the chicken to ensure it’s tender and juicy. Proper timing is key to a delicious meal.

Korean Spicy Chicken Bulgogi Recipe: Ultimate Flavor Explosion

Credit: www.beyondkimchee.com

Health Benefits

Korean Spicy Chicken Bulgogi is not just a tasty dish; it has many health benefits. This savory delight can be a nutritious addition to your diet. Let’s explore the health benefits of this flavorful meal.

Nutritional Information

This dish is rich in essential nutrients. Here’s a quick look at its nutritional value:

Nutrient Amount per Serving
Calories 250
Protein 27g
Fat 10g
Carbohydrates 15g
Fiber 3g
Sodium 500mg

Protein is crucial for muscle repair and growth. Chicken provides a lean source of protein. Fiber aids digestion and promotes gut health. Including veggies in the dish boosts fiber content.

Healthier Alternatives

Making a dish healthier can be simple. Here are some tips:

  • Use skinless chicken: Reduces fat content.
  • Reduce sugar: Lessens the calorie count.
  • Opt for low-sodium soy sauce: Keeps sodium levels in check.
  • Add more vegetables: Enhances fiber and nutrient intake.

These small changes can make a big difference. Enjoy a healthier version of your favorite Korean Spicy Chicken Bulgogi.

Korean Spicy Chicken Bulgogi Recipe: Ultimate Flavor Explosion

Credit: www.wandercooks.com

Frequently Asked Questions

What Is Korean Spicy Chicken Bulgogi?

Korean Spicy Chicken Bulgogi is a popular Korean dish. It features marinated chicken cooked with spicy sauce. The sauce typically includes gochujang, soy sauce, garlic, and ginger.

How Do You Marinate Chicken For Bulgogi?

To marinate chicken for Bulgogi, mix gochujang, soy sauce, garlic, ginger, and sugar. Add chicken pieces and coat well. Let it sit for at least 30 minutes.

What Goes Well With Spicy Chicken Bulgogi?

Spicy Chicken Bulgogi pairs well with steamed rice, lettuce wraps, or kimchi. It also complements side dishes like pickled radishes and Korean potato salad.

Can I Make Bulgogi Less Spicy?

Yes, you can make Bulgogi less spicy by reducing gochujang. Substitute with more soy sauce or add a bit of honey to balance the spice.

Conclusion

Enjoy making and eating this Korean Spicy Chicken Bulgogi. It’s a simple dish. Perfect for any meal. The sweet and spicy flavors blend well. Your taste buds will thank you. Serve with rice or noodles. Share with family and friends.

They will love it too. Cooking at home is fun. Try this recipe today. You won’t regret it. Happy cooking!

Keto Mocha Ice Cream Recipe: Guilt-Free Indulgence

Love ice cream but watching your carbs? Try this keto mocha ice cream recipe.

It’s creamy, delicious, and guilt-free. Who says you have to give up dessert on a keto diet? This keto mocha ice cream is the perfect treat for anyone looking to satisfy their sweet tooth without breaking their diet. Packed with rich coffee flavor and a hint of chocolate, this recipe is both indulgent and healthy.

It’s easy to make at home, using simple ingredients you probably already have. Plus, it’s a great way to cool off on a hot day. Ready to enjoy a sweet, keto-friendly delight? Let’s dive into this easy and tasty recipe!

Keto Mocha Ice Cream Recipe: Guilt-Free Indulgence

Credit: www.ketofocus.com

Introduction To Keto Mocha Ice Cream

Craving a delightful treat while staying on a keto diet? Keto Mocha Ice Cream offers a creamy, coffee-chocolate flavor that’s low in carbs. Perfect for satisfying your sweet tooth without breaking your diet.

Imagine enjoying a delicious bowl of ice cream without guilt. Keto Mocha Ice Cream offers just that. This dessert blends rich flavors of coffee and chocolate. It’s creamy, smooth, and perfect for keto followers. You won’t miss regular ice cream ever again. Many ice creams are full of sugar. But this keto version is different. It uses low-carb ingredients. It’s great for those watching their carbs. Plus, it’s easy to make at home. Ready to learn more? Let’s dive into the benefits of keto desserts.

Why Choose Keto?

The keto diet focuses on low carbs and high fats. This helps the body burn fat for energy. Many find it effective for weight loss. It also supports better blood sugar levels. Choosing keto means fewer cravings too. This can lead to healthier eating habits. Another reason is the variety of foods. You don’t have to give up your favorites. Keto versions of popular foods are available. This includes desserts like Keto Mocha Ice Cream. You can enjoy sweet treats without breaking your diet.

Benefits Of Keto Desserts

Keto desserts use ingredients that are low in carbs. This helps keep your blood sugar steady. They also contain healthy fats. These fats keep you full longer. This can help with weight management. Another benefit is the taste. Keto desserts are delicious. They often taste like regular sweets. You won’t feel like you’re missing out. Plus, you can make them at home. This allows you to control what goes into your food. In short, keto desserts are a win-win. They satisfy your sweet tooth. They also support your health goals. So, next time you crave ice cream, try Keto Mocha Ice Cream. It’s a tasty, healthy choice. “`

Ingredients Needed

Creating delicious Keto Mocha Ice Cream at home is easier than you think. Knowing the right ingredients is key. Let’s dive into what you need to make this creamy, low-carb treat.

Essential Ingredients

Ingredient Amount
Heavy Cream 2 cups
Unsweetened Cocoa Powder 1/2 cup
Powdered Erythritol 3/4 cup
Strong Brewed Coffee 1/2 cup
Vanilla Extract 1 tsp
Sea Salt 1/4 tsp

These are the base ingredients for your Keto Mocha Ice Cream. They ensure the ice cream is rich, creamy, and flavorful while keeping it keto-friendly.

Optional Add-ins

To enhance the flavor and texture, consider these optional add-ins:

  • Chopped Nuts – Adds a crunchy texture. Try almonds or walnuts.
  • Dark Chocolate Chips – Use sugar-free for a guilt-free treat.
  • Mint Extract – For a refreshing twist, add a few drops.
  • Coconut Flakes – Toasted coconut flakes add a tropical flavor.

These add-ins are not necessary but can make your ice cream more exciting. Customize it to your taste!

Preparing The Base

Preparing the base for your Keto Mocha Ice Cream is a crucial step. This step ensures the final product has the right texture and flavor. The base combines dry and wet ingredients to create a rich, creamy mixture.

Mixing Dry Ingredients

Start by gathering all your dry ingredients. This includes cocoa powder, sweetener, and instant coffee. Measure each ingredient accurately. Place them into a large mixing bowl. Stir well to combine. Ensure there are no lumps. A smooth mixture is key for a creamy texture.

Combining Wet Ingredients

Next, focus on your wet ingredients. These include heavy cream, unsweetened almond milk, and vanilla extract. Pour the heavy cream into a separate bowl. Add the unsweetened almond milk. Lastly, mix in the vanilla extract. Whisk until the ingredients are well-blended.

Now, combine the dry and wet ingredients. Pour the wet mixture into the bowl with dry ingredients. Stir slowly and thoroughly. Ensure all ingredients are fully mixed. The base should be smooth and creamy. This forms the foundation of your Keto Mocha Ice Cream.

Keto Mocha Ice Cream Recipe: Guilt-Free Indulgence

Credit: ketodietapp.com

Creating The Mocha Flavor

Crafting the perfect mocha flavor is key to making delicious keto mocha ice cream. This involves choosing the right coffee and adding cocoa powder. Both ingredients create that rich, deep flavor we all love.

Choosing The Right Coffee

The coffee you choose matters. For a bold taste, use strong brewed coffee. Espresso works best. It gives a rich and intense flavor. If you like it mild, try decaf. Instant coffee can also work in a pinch. Just make sure it’s high quality. The better the coffee, the better the flavor.

Adding Cocoa Powder

Cocoa powder is another key ingredient. Use unsweetened cocoa powder. It keeps the recipe keto-friendly. Add it gradually. This helps you control the taste. Mix well to avoid lumps. The cocoa enhances the coffee, giving a rich mocha taste. Always check for a smooth mixture. You want a creamy texture.

Churning The Ice Cream

Churning the ice cream is a crucial step in making Keto Mocha Ice Cream. This process helps to incorporate air, giving the ice cream a smooth and creamy texture. There are two main methods for churning ice cream: using an ice cream maker or manual churning methods. Each method has its own set of advantages.

Using An Ice Cream Maker

An ice cream maker simplifies the churning process. It keeps the mixture cold while churning, ensuring a consistent texture. Start by pouring the Keto Mocha Ice Cream mixture into the machine. Turn on the machine and let it churn for about 20-30 minutes. Check the consistency periodically. Once it reaches the desired texture, transfer the ice cream to a container. Freeze for at least two hours before serving.

Manual Churning Methods

Don’t have an ice cream maker? No problem. You can still achieve great results with manual churning methods. Pour the ice cream mixture into a shallow dish or pan. Place it in the freezer for about 30 minutes. Stir the mixture vigorously to break up ice crystals. Repeat this process every 30 minutes for about 2-3 hours. This method requires patience but delivers a creamy texture.

Freezing And Storing

Freezing and storing your Keto Mocha Ice Cream correctly ensures it stays fresh and delicious. Proper techniques can help maintain its creamy texture and rich flavor. Whether you plan to enjoy it immediately or save it for later, these tips will guide you.

Optimal Freezing Time

After churning your Keto Mocha Ice Cream, transfer it to an airtight container. Place it in the coldest part of your freezer. Let it freeze for at least 4 hours. This time allows the ice cream to firm up properly. For the best texture, freeze overnight. Avoid frequently opening the freezer during this period. It helps maintain a consistent temperature.

Storage Tips

Store your ice cream in shallow, flat containers. This helps it freeze evenly. Use containers that are airtight to prevent ice crystals. Label your containers with the date of preparation. Consume the ice cream within 1-2 weeks for the best taste. If you need to soften the ice cream, let it sit at room temperature for 5-10 minutes before serving. Avoid refreezing melted ice cream to maintain its texture.

Serving Suggestions

Enjoying your homemade Keto Mocha Ice Cream can be a delightful experience. To make it even more special, explore various serving suggestions that can enhance its flavor and presentation. Here are some ideas to get you started.

Garnishing Ideas

Garnishes can add texture and flavor to your ice cream. Here are some simple yet effective garnishing ideas:

  • Shaved Dark Chocolate: Sprinkle some sugar-free dark chocolate shavings on top.
  • Chopped Nuts: Add a handful of chopped almonds or pecans.
  • Whipped Cream: Top with a dollop of keto-friendly whipped cream.
  • Cocoa Powder: Dust a bit of unsweetened cocoa powder for an extra mocha kick.
  • Fresh Mint Leaves: Add a sprig of fresh mint for a refreshing touch.

Pairing With Other Keto Treats

Pairing your Keto Mocha Ice Cream with other keto treats can create a more satisfying dessert experience. Here are some pairing ideas:

Keto Treat Pairing Description
Keto Brownies Warm keto brownies with a scoop of mocha ice cream.
Keto Cookies Serve ice cream sandwiched between two keto cookies.
Keto Cheesecake Enjoy a slice of keto cheesecake with a scoop.
Keto Chocolate Cake Top a slice of keto chocolate cake with ice cream.

These serving suggestions can make your Keto Mocha Ice Cream more enjoyable. Experiment with different combinations to find your favorite way to enjoy this delightful treat.

Keto Mocha Ice Cream Recipe: Guilt-Free Indulgence

Credit: m.youtube.com

Health Benefits

Keto Mocha Ice Cream is not only delicious but also beneficial to health. This low-carb treat offers several health benefits, making it a guilt-free indulgence. Let’s explore these benefits through its low carb advantages and nutritional information.

Low Carb Advantages

Low-carb diets help reduce blood sugar levels. This is crucial for those with diabetes or insulin resistance. A low-carb intake also aids in weight loss. It reduces hunger levels, making you feel full longer. This ice cream is perfect for those on a keto diet.

Eating fewer carbs can also lower the risk of heart disease. It does this by reducing bad cholesterol levels. Keto Mocha Ice Cream supports these health goals while satisfying your sweet tooth.

Nutritional Information

Nutrient Amount per serving
Calories 150
Total Fat 12g
Net Carbs 4g
Protein 3g

Each serving of Keto Mocha Ice Cream has only 150 calories. It provides 12 grams of healthy fats that promote satiety. The low net carb count of 4 grams ensures it fits within your daily carb limit. The 3 grams of protein help maintain muscle mass.

This balanced nutritional profile makes Keto Mocha Ice Cream an excellent choice. It’s a tasty treat that aligns with your health goals.

Frequently Asked Questions

Is Keto Mocha Ice Cream Low-carb?

Yes, keto mocha ice cream is low-carb. It is made with ingredients that have minimal carbs, perfect for a keto diet.

Can I Make Keto Mocha Ice Cream At Home?

Absolutely, you can make keto mocha ice cream at home. It requires simple ingredients and basic kitchen equipment.

What Sweetener Is Used In Keto Mocha Ice Cream?

Keto mocha ice cream typically uses erythritol or stevia. These sweeteners are low in carbs and keto-friendly.

How Long Does It Take To Make Keto Mocha Ice Cream?

Making keto mocha ice cream takes around 30 minutes of preparation. The freezing process takes a few hours.

Conclusion

Creating your own keto mocha ice cream can be fun and rewarding. The recipe is simple and delicious. Enjoy the rich flavors without the guilt. Perfect for a hot day or dessert. Share it with friends or family. They will love it too.

Keep experimenting with different ingredients. Each batch can be a new experience. Happy cooking and enjoy your homemade treat!