Hot Pepper Chicken Chinese Recipe: Spicy Delight in 30 Minutes

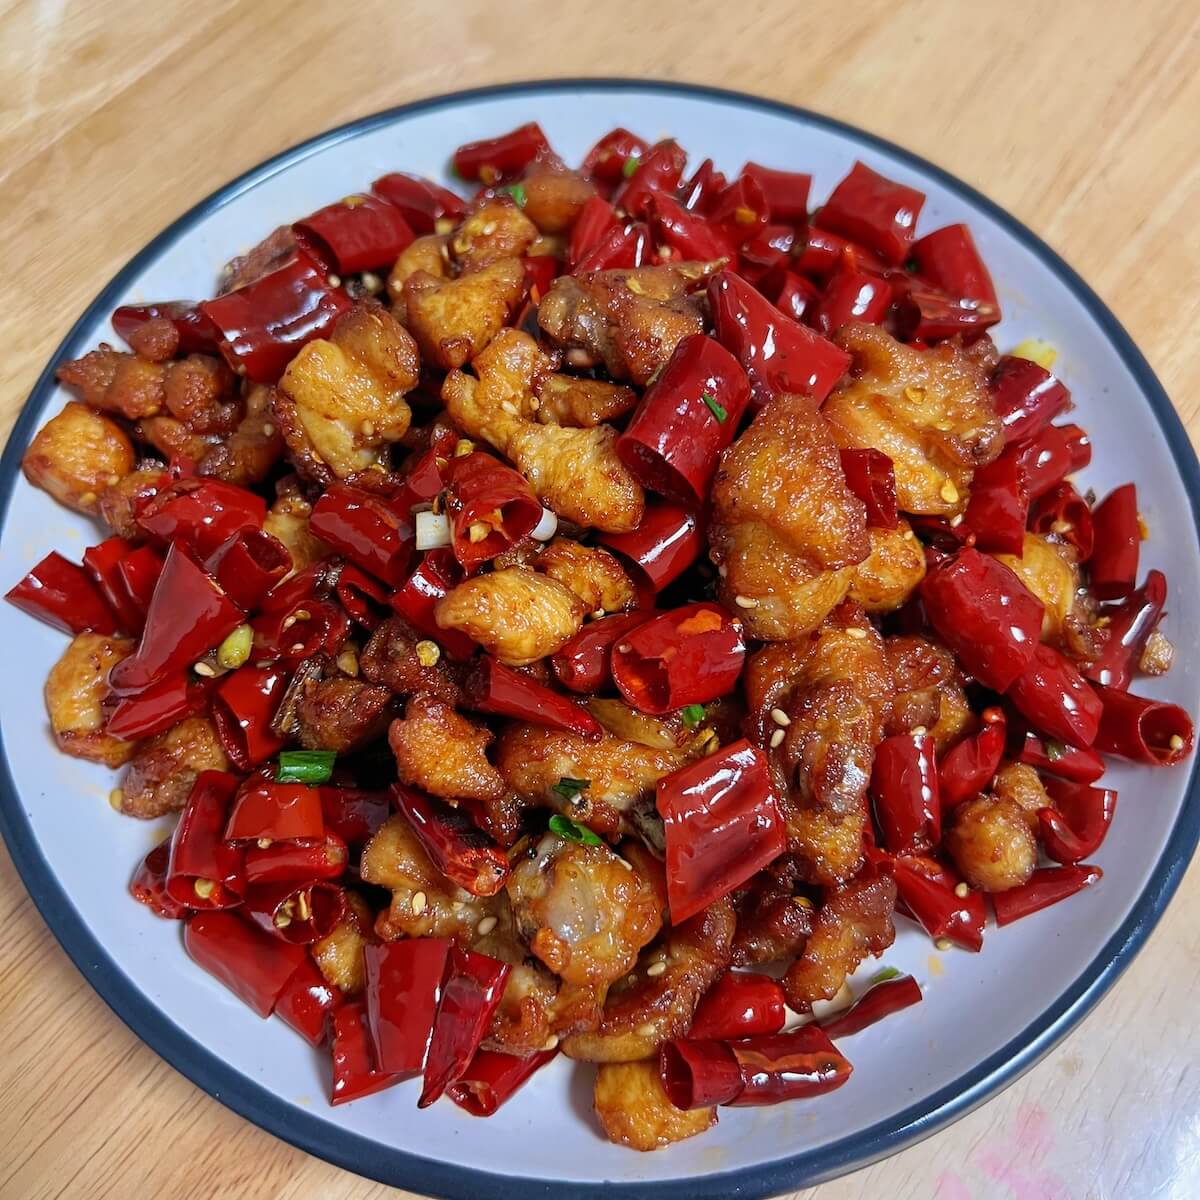
Craving a spicy, flavorful dish? Hot Pepper Chicken is perfect.

This Chinese recipe brings together bold spices and tender chicken, creating a mouthwatering meal. Hot Pepper Chicken is a favorite in Chinese cuisine. It combines juicy chicken with hot peppers, garlic, and soy sauce. The result is a dish bursting with flavors and heat.

It’s easy to make at home, even for beginners. You don’t need any fancy ingredients or special skills. Just follow the recipe, and you’ll have a delicious meal in no time. Whether you’re cooking for family or friends, this dish will impress. Ready to spice up your dinner? Let’s get cooking!

Hot Pepper Chicken Chinese Recipe: Spicy Delight in 30 Minutes

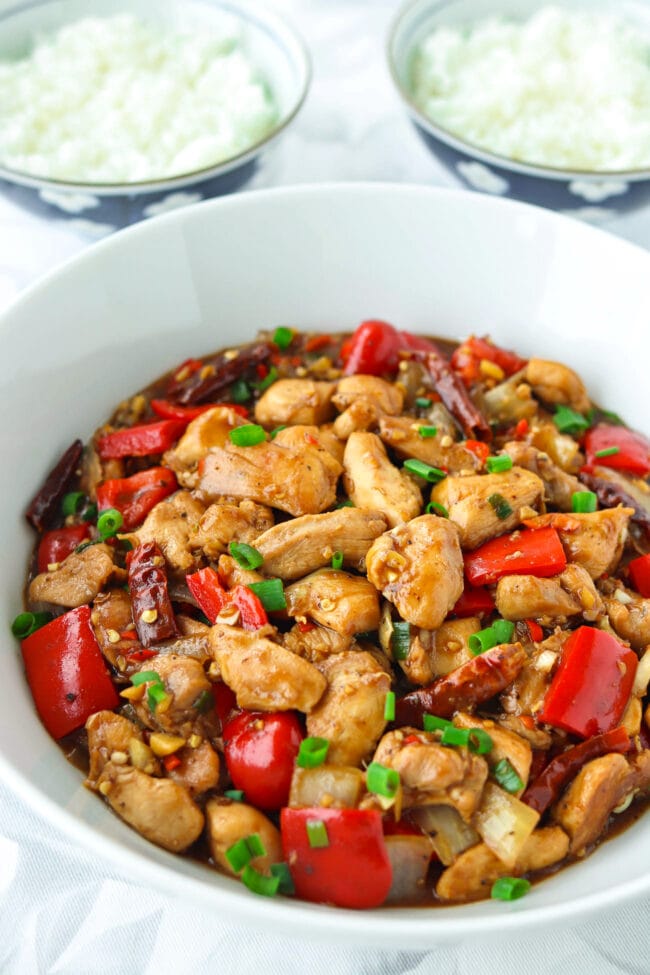
Credit: thatspicychick.com

Ingredients

Creating Hot Pepper Chicken at home is simpler than you think. The key lies in selecting the right ingredients. Each component plays a vital role in bringing out the dish’s unique flavor. Let’s explore the ingredients you need to prepare this mouth-watering recipe.

Chicken

Choose boneless, skinless chicken breasts or thighs. Thighs are juicier, but breasts work well too. Cut the chicken into bite-sized pieces. This ensures even cooking and better flavor absorption. Fresh chicken is always best. If using frozen chicken, thaw it completely before cooking.

Peppers

Use a mix of bell peppers and hot chili peppers. Bell peppers add color and sweetness. Red, yellow, and green varieties work best. For heat, add fresh or dried chili peppers. Adjust the quantity based on your heat preference. Remember, the hot peppers are what give this dish its kick.

Spices And Sauces

Garlic and ginger are essential. They add depth and aroma. Use fresh minced garlic and ginger for the best flavor. Soy sauce provides umami and saltiness. Dark soy sauce adds a rich color. Sesame oil gives a nutty fragrance. Rice vinegar or white vinegar adds a tangy touch. Cornstarch helps thicken the sauce. Sugar balances the heat and acidity. Lastly, a sprinkle of green onions or cilantro adds freshness.

Hot Pepper Chicken Chinese Recipe: Spicy Delight in 30 Minutes

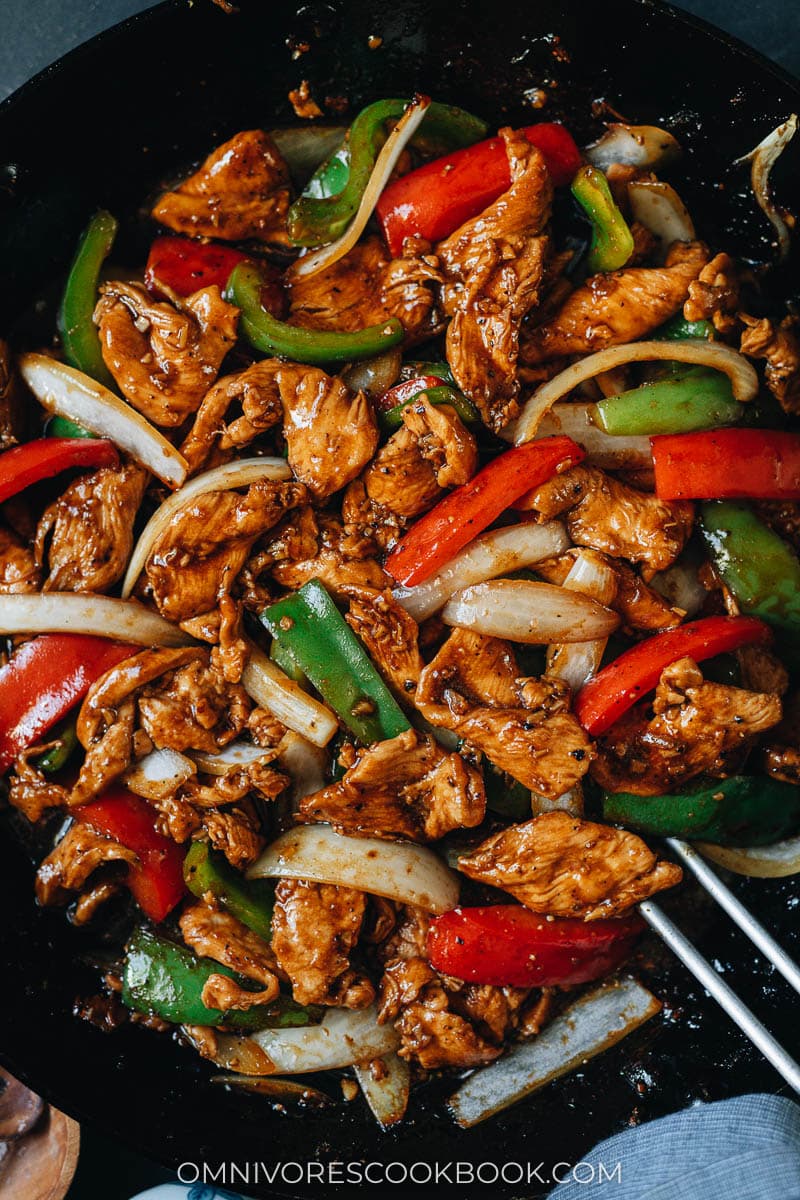
Credit: omnivorescookbook.com

Preparation

Preparing Hot Pepper Chicken is an enjoyable and straightforward process. This section walks you through the essential steps to ensure your dish is flavorful and perfectly cooked. Let’s dive into the key preparation steps, including marinating the chicken and chopping the vegetables.

Marinating The Chicken

Marinating the chicken is a crucial step to enhance its flavor and tenderness. Follow these steps to prepare your chicken:

  1. Take 500 grams of boneless chicken and cut it into bite-sized pieces.
  2. In a bowl, mix:
    • 2 tablespoons of soy sauce
    • 1 tablespoon of rice vinegar
    • 1 tablespoon of cornstarch
    • 1 teaspoon of ginger-garlic paste
    • 1 teaspoon of red chili powder
    • Salt to taste
  3. Add the chicken pieces to the mixture and coat well.
  4. Cover the bowl and refrigerate for at least 30 minutes.

Chopping The Vegetables

Fresh vegetables add color and crunch to your dish. Here’s how to prepare them:

Vegetable Quantity Preparation
Bell peppers (red, green, yellow) 1 each Cut into thin strips
Onions 2 medium Slice into rings
Spring onions 4 stalks Chop finely
Garlic 4 cloves Minced

Ensure all vegetables are washed and dried before chopping. This helps keep them crisp during cooking.

Cooking Tools

Cooking a delicious Hot Pepper Chicken Chinese recipe requires the right tools. Using the proper equipment ensures your dish is both flavorful and authentic. Below, we explore the essential tools you’ll need for this recipe.

Wok Or Skillet

A wok is the traditional tool for Chinese cooking. It has a rounded bottom and high sides, perfect for stir-frying. The high sides keep food from spilling out, and the rounded bottom ensures even cooking.

If you don’t have a wok, a large skillet will work. Choose a skillet with high sides to keep the ingredients in place. A good skillet should be heavy-bottomed for even heat distribution.

Cutting Board And Knife

A sturdy cutting board is essential. It provides a stable surface for chopping vegetables and meat. Choose a board made of wood or plastic to avoid dulling your knives.

A sharp knife is your best friend in the kitchen. Use a chef’s knife for most of the prep work. It handles well for slicing, dicing, and chopping. Keep your knife sharp for best results and safety.

Having the right tools makes cooking easier and more enjoyable. Invest in quality tools to create amazing dishes.

Cooking Steps

Hot Pepper Chicken Chinese Recipe – Cooking Steps

Cooking Hot Pepper Chicken can be an exciting adventure. Follow these steps to create a delicious meal. Make sure you have all the ingredients ready before you start.

Sautéing The Chicken

Begin by heating a large pan over medium-high heat. Add two tablespoons of oil to the pan. Once the oil is hot, add the chicken pieces. Ensure the chicken is cut into bite-sized pieces.

Cook the chicken until it turns golden brown. Stir occasionally to avoid sticking. This usually takes about 5-7 minutes. The chicken should be cooked through but still tender.

Adding The Vegetables

Once the chicken is cooked, remove it from the pan. Set it aside on a plate. In the same pan, add one more tablespoon of oil. Add chopped bell peppers, onions, and carrots.

Stir-fry the vegetables for about 3-4 minutes. They should be tender but still crisp. Add minced garlic and ginger. Sauté for an additional minute until fragrant.

Finally, return the chicken to the pan. Mix everything well. Add soy sauce, hot pepper sauce, and a pinch of sugar. Stir to combine all the flavors. Cook for another 2-3 minutes. Serve hot with steamed rice.

Creating The Sauce

Creating the perfect sauce is crucial for the delicious Hot Pepper Chicken Chinese Recipe. This section will guide you through the process step-by-step. The sauce combines bold flavors that bring the dish to life. Follow these simple steps to craft a sauce that will impress everyone at the dinner table.

Mixing Ingredients

Start by gathering all the necessary ingredients:

  • 2 tablespoons soy sauce
  • 1 tablespoon rice vinegar
  • 1 tablespoon hoisin sauce
  • 1 tablespoon chili paste
  • 1 teaspoon sesame oil
  • 2 teaspoons sugar
  • 1/4 cup chicken broth

In a medium bowl, combine these ingredients. Use a whisk to mix until everything is well-blended. The soy sauce adds a salty flavor, while the rice vinegar provides a tangy kick. The hoisin sauce gives sweetness, and the chili paste brings heat. Sesame oil adds a nutty aroma, and the sugar balances the flavors. Finally, the chicken broth makes the sauce smooth and rich.

Simmering To Perfection

Pour the mixed sauce into a small saucepan. Place the pan over medium heat. Bring the sauce to a gentle simmer. Stir occasionally to prevent sticking and ensure even cooking.

Allow the sauce to simmer for about 5-7 minutes. This thickens the sauce and deepens the flavors. If the sauce thickens too much, add a bit more chicken broth to achieve the desired consistency. Remove from heat once done, and your sauce is ready to use.

By following these steps, you will create a flavorful sauce that enhances your Hot Pepper Chicken. Enjoy your cooking!

Combining Ingredients

Creating the perfect Hot Pepper Chicken Chinese Recipe involves a careful balance of flavors. Combining ingredients correctly ensures a delicious, spicy dish that everyone will love. Let’s explore how to mix the chicken, vegetables, and sauce seamlessly.

Mixing Chicken And Vegetables

Start by preparing the chicken. Cut it into bite-sized pieces for even cooking. Season the chicken with salt, pepper, and a bit of soy sauce. Let it marinate for about 15 minutes.

While the chicken marinates, chop your vegetables. Common choices include:

  • Bell peppers (red, green, and yellow)
  • Onions
  • Garlic
  • Ginger
  • Green beans

Heat a wok or large pan over medium-high heat. Add a tablespoon of oil. Stir-fry the chicken until it turns golden brown. Remove the chicken and set it aside.

In the same pan, add another tablespoon of oil. Stir-fry the garlic and ginger until fragrant. Add the onions and bell peppers. Cook for 3-4 minutes, until they start to soften. Finally, add the green beans and cook for another 2 minutes. Return the chicken to the pan and mix well with the vegetables.

Coating With Sauce

The sauce is the heart of the Hot Pepper Chicken Chinese Recipe. To make it, you’ll need:

Ingredient Quantity
Soy sauce 2 tablespoons
Oyster sauce 1 tablespoon
Hot chili sauce 1 tablespoon
Brown sugar 1 teaspoon
Cornstarch 1 teaspoon (mixed with 2 tablespoons of water)

Mix the soy sauce, oyster sauce, hot chili sauce, and brown sugar in a small bowl. Pour this mixture over the chicken and vegetables in the pan. Stir well to coat everything evenly.

Add the cornstarch mixture to the pan. Stir constantly until the sauce thickens and becomes glossy. This should take about 2-3 minutes. Serve hot with steamed rice or noodles, and enjoy your spicy, flavorful Hot Pepper Chicken!

Serving Suggestions

Hot Pepper Chicken is a spicy, flavorful dish loved by many. Its bold flavors can be complemented with the right serving suggestions. Here are some tips to enhance your dining experience.

Garnishing Ideas

Garnishing makes your dish look and taste better. Fresh cilantro adds a burst of color and freshness. Sprinkle chopped green onions for a mild, tangy flavor. Sesame seeds provide a crunchy texture. Add thin slices of red chili for extra heat and a pop of color.

Best Side Dishes

Choosing the right side dishes can elevate your meal. Steamed jasmine rice is a classic choice. It balances the spiciness of the chicken. Fried rice with vegetables adds more flavor and color. Stir-fried broccoli or snow peas add a healthy crunch. For a comforting option, serve with egg drop soup.

Tips And Tricks

Hot Pepper Chicken is a delicious Chinese dish that many love. Understanding some tips and tricks can help you make this dish even better. Below are some useful tips to enhance your cooking experience.

Adjusting Spice Level

Not everyone enjoys the same level of heat. Adjust the spice level to suit your taste. You can do this by varying the amount of hot peppers you use.

  • For mild heat, use fewer peppers or remove the seeds.
  • For medium heat, use a moderate amount of peppers with seeds.
  • For extra heat, add more peppers or include hotter varieties like Serrano or Habanero.

Remember, you can always add more spice later, but you can’t take it out once it’s in!

Making Ahead

Planning to make Hot Pepper Chicken for a big event? You can prepare parts of the dish ahead of time. This saves you stress on the day of cooking.

  1. Marinate the Chicken: Marinate the chicken overnight. This infuses the flavors and makes the meat tender.
  2. Prep the Veggies: Cut and store the vegetables in the fridge. This makes the cooking process quicker.
  3. Sauce: Mix the sauce ingredients and store them in a sealed container. This keeps the sauce fresh and flavorful.

By preparing these elements in advance, you can focus on cooking the chicken perfectly.

Task Time to Prepare
Marinate Chicken 8-24 hours
Chop Vegetables 15-20 minutes
Mix Sauce 5 minutes

Following these tips will help you create a delicious Hot Pepper Chicken dish with ease. Happy cooking!

Hot Pepper Chicken Chinese Recipe: Spicy Delight in 30 Minutes

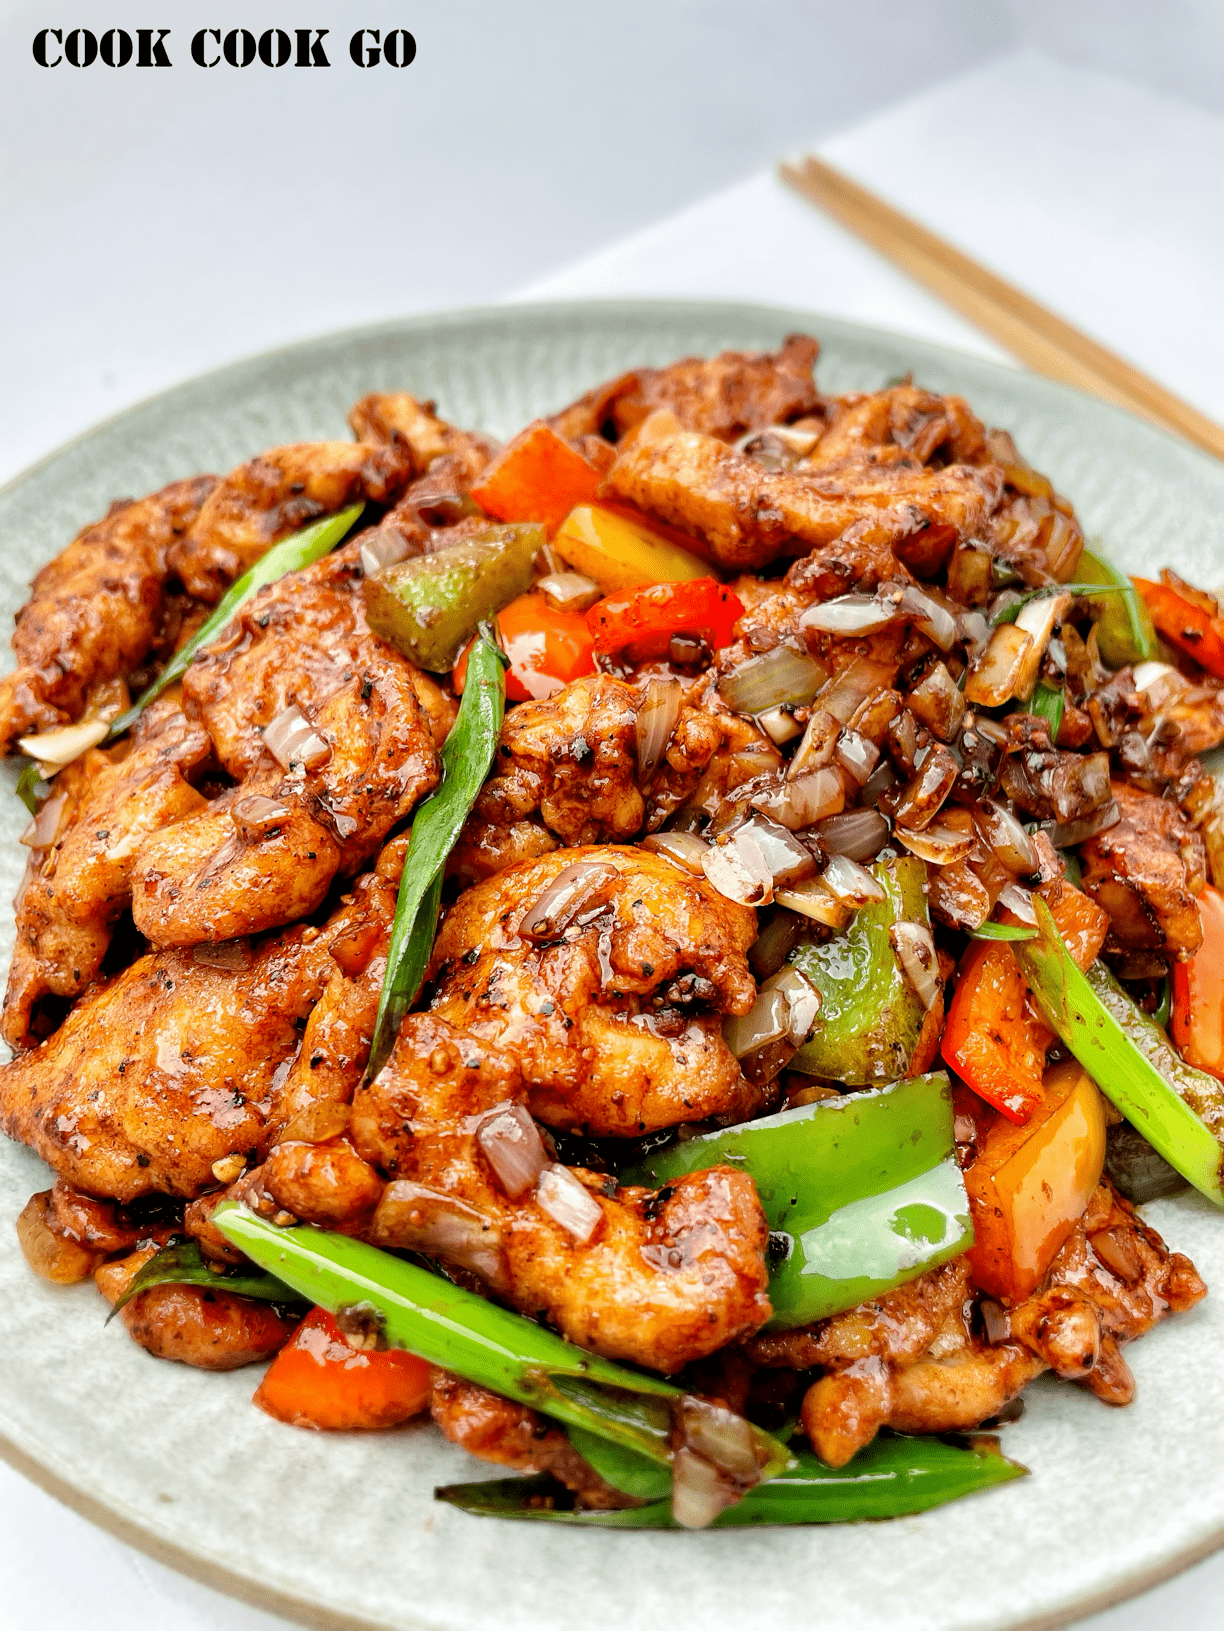
Credit: cookcookgo.com

Frequently Asked Questions

What Ingredients Are Needed For Hot Pepper Chicken?

To make Hot Pepper Chicken, you’ll need chicken, bell peppers, garlic, ginger, soy sauce, and hot peppers. Additionally, you’ll need oil, salt, and pepper for seasoning.

How Do You Cook Hot Pepper Chicken?

Start by marinating the chicken in soy sauce. Stir-fry the garlic, ginger, and hot peppers. Add the chicken and bell peppers, then cook until done.

Can I Make Hot Pepper Chicken Less Spicy?

Yes, you can reduce the amount of hot peppers. You can also use milder peppers or omit them entirely.

What Side Dishes Go Well With Hot Pepper Chicken?

Hot Pepper Chicken pairs well with steamed rice, fried rice, or noodles. You can also serve it with stir-fried vegetables or a simple salad.

Conclusion

Hot Pepper Chicken Chinese Recipe brings bold flavors to your kitchen. It’s spicy, tangy, and perfect for a quick meal. Cooking this dish is fun and rewarding. Serve it with rice or noodles for a complete meal. Enjoy the rich taste and impress your family.

Try this recipe today and enjoy a delicious homemade dish. Happy cooking!

Mediterranean Cod Fish Recipe: A Flavorful and Healthy Delight

Mediterranean Cod Fish Recipe Looking for a fresh, healthy seafood dish? Try this Mediterranean cod fish recipe.

It’s packed with flavors and easy to make. Cod fish is a mild, white fish that absorbs flavors well. Mediterranean cuisine, known for its heart-healthy ingredients, enhances the cod with herbs, tomatoes, olives, and more. This recipe blends simple ingredients into a delicious, nutritious meal.

Whether you’re an experienced cook or a beginner, you’ll find this dish easy to prepare. It’s perfect for a weeknight dinner or a special occasion. You’ll love the bright, zesty flavors and the tender, flaky fish. Ready to bring a taste of the Mediterranean to your kitchen? Let’s dive into this delightful recipe!

Mediterranean Cod Fish Recipe: A Flavorful and Healthy Delight

Credit: www.oliveandmango.com

Ingredients

When preparing a delightful Mediterranean Cod Fish Recipe, the right ingredients are key. This dish boasts fresh flavors from the Mediterranean region. Understanding the essential and optional ingredients will help you create a memorable meal.

Essential Ingredients

These are the must-have components for an authentic Mediterranean Cod Fish Recipe:

  • Cod Fillets: Fresh or frozen, about 4 pieces.
  • Olive Oil: Extra virgin for the best flavor.
  • Garlic: Minced, about 4 cloves.
  • Tomatoes: Diced, 2 medium-sized.
  • Kalamata Olives: Pitted and sliced, 1/2 cup.
  • Lemon Juice: Freshly squeezed, from 1 lemon.
  • Fresh Basil: Chopped, 1/4 cup.
  • Salt: To taste.
  • Pepper: To taste.

Optional Add-ons

Enhance your dish with these optional ingredients:

  • Capers: Adds a tangy flavor, 2 tablespoons.
  • Red Onion: Thinly sliced, 1 small.
  • Red Pepper Flakes: For a spicy kick, 1/2 teaspoon.
  • White Wine: Adds depth, 1/4 cup.
  • Spinach: Fresh leaves, 1 cup.
  • Parsley: Chopped, 1/4 cup.

With these ingredients, you can create a delicious and healthy Mediterranean Cod Fish Recipe. Enjoy the fresh, vibrant flavors!

Mediterranean Cod Fish Recipe: A Flavorful and Healthy Delight

Credit: boldappetite.com

Preparation

Preparing a Mediterranean cod fish dish is simple and rewarding. With a few easy steps, you’ll have a delicious meal ready in no time. Follow these instructions to ensure your cod fish and vegetables are prepped perfectly.

Cleaning And Prepping Cod

Start by rinsing the cod fish under cold water. Pat it dry with paper towels. Check for any bones and remove them with tweezers. Cut the cod into even portions for uniform cooking. Season the fish with salt and pepper to taste. Set the seasoned cod aside while you prepare the vegetables.

Chopping Vegetables

Choose fresh Mediterranean vegetables like tomatoes, bell peppers, and zucchini. Wash all vegetables thoroughly under cold water. Chop the tomatoes into small chunks. Slice the bell peppers into thin strips. Cut the zucchini into half-moon shapes. Ensure all vegetables are cut to similar sizes for even cooking. Place the chopped vegetables in a bowl, ready for the next step in your recipe.

Cooking Instructions

Cooking Mediterranean Cod Fish is a delightful experience. The recipe is straightforward and the flavors are amazing. Follow these instructions to create a tasty dish.

Marinating The Cod

First, prepare your marinade. Mix olive oil, lemon juice, and garlic. Add salt, pepper, and your favorite herbs. Fresh parsley and dill work well. Coat the cod fillets with the marinade. Ensure each piece is well covered. Let the cod marinate for at least 30 minutes. This allows the flavors to infuse the fish. While marinating, you can prepare the vegetables.

Sautéing Vegetables

Choose fresh vegetables like bell peppers, zucchini, and cherry tomatoes. Chop them into bite-sized pieces. Heat olive oil in a large pan over medium heat. Add minced garlic and cook until fragrant. Add the vegetables to the pan. Sauté for about 10 minutes, stirring occasionally. The vegetables should be tender but not mushy. Season with salt, pepper, and a pinch of oregano. Once done, set the vegetables aside. They will complement the cod beautifully.

Baking The Cod

Baking the cod is a crucial step in preparing a delicious Mediterranean cod fish recipe. The baking process ensures the cod is cooked evenly and absorbs all the rich flavors of the Mediterranean ingredients. Follow these steps to achieve a perfectly baked cod that is tender and flavorful.

Setting The Oven

Start by preheating your oven. Set the temperature to 400°F (200°C). This temperature allows the cod to cook evenly without drying out. While the oven is heating, you can prepare the cod and other ingredients.

Baking Time And Temperature

Once the oven is preheated, place the cod fillets on a baking sheet lined with parchment paper. Arrange the fillets in a single layer. This prevents them from sticking to the pan and ensures even cooking.

Bake the cod for 15-20 minutes. The exact time depends on the thickness of the fillets. Thicker fillets may require a few additional minutes. Use a fork to check if the cod flakes easily. If it does, it’s done. If not, bake for a few more minutes and check again.

Here’s a quick reference table for baking times based on the thickness of the fillets:

Fillet Thickness Baking Time
1 inch 15 minutes
1.5 inches 18 minutes
2 inches 20 minutes

Remember to keep an eye on the cod during the last few minutes of baking. You want to ensure it is cooked through without becoming dry. Enjoy your perfectly baked Mediterranean cod!

Serving Suggestions

The Mediterranean Cod Fish Recipe is a delightful dish that needs thoughtful presentation. Serving suggestions can enhance the dining experience. Below, find ideas for plating, accompaniments, and sides to create a complete meal.

Plating The Dish

Plating is essential to make your Mediterranean Cod Fish Recipe look as good as it tastes. Start by placing the cooked cod fillet at the center of a clean, white plate. This provides a neutral backdrop, allowing the vibrant colors of the dish to stand out.

Next, spoon the sauce generously over the fish, letting it cascade around the fillet. For visual appeal, add a sprig of fresh herbs, like parsley or dill, on top. A drizzle of high-quality olive oil can add an extra touch of elegance.

Accompaniments And Sides

Pairing the Mediterranean Cod Fish Recipe with the right sides can elevate the meal. Here are some ideas:

  • Roasted Vegetables: A medley of roasted vegetables, such as bell peppers, zucchini, and cherry tomatoes, complements the flavors. Drizzle with olive oil and sprinkle with sea salt.
  • Garlic Bread: Serve slices of toasted garlic bread to soak up the delicious sauce. This adds texture and a delightful crunch.
  • Green Salad: A fresh green salad with mixed greens, cucumber, and a light vinaigrette provides a refreshing contrast.

For a more substantial meal, consider these options:

  1. Quinoa: Light and fluffy quinoa works well with the cod. It is nutritious and easy to prepare.
  2. Mashed Potatoes: Creamy mashed potatoes are a comforting side that pairs well with the rich sauce of the cod.

By thoughtfully plating the dish and choosing the right accompaniments, you can turn a simple meal into a memorable dining experience.

Mediterranean Cod Fish Recipe: A Flavorful and Healthy Delight

Credit: www.themediterraneandish.com

Nutritional Information

The Mediterranean Cod Fish Recipe is not only delicious but also highly nutritious. This dish is perfect for those who want to eat healthily without compromising on taste. Let’s explore the nutritional benefits of this amazing recipe.

Calorie Count

One serving of the Mediterranean Cod Fish Recipe contains around 250 calories. This makes it an excellent choice for a low-calorie meal. It’s perfect for those watching their weight.

Nutrient Breakdown

The Mediterranean Cod Fish is rich in essential nutrients that are beneficial for your health. Here is a breakdown of the key nutrients found in one serving:

Nutrient Amount
Protein 25 grams
Fat 10 grams
Carbohydrates 15 grams
Fiber 5 grams
Sodium 200 milligrams
Vitamin C 30% of the Daily Value
Omega-3 Fatty Acids 1,000 milligrams

Let’s look at these nutrients in more detail:

  • Protein: Essential for muscle repair and growth.
  • Fat: Includes healthy fats that are good for heart health.
  • Carbohydrates: Provides energy for your daily activities.
  • Fiber: Aids in digestion and keeps you full longer.
  • Sodium: Keeps a balance of fluids in your body.
  • Vitamin C: Boosts your immune system and skin health.
  • Omega-3 Fatty Acids: Great for brain health and reducing inflammation.

This nutrient-rich dish is a great addition to a balanced diet. Enjoy the taste while nourishing your body.

Tips And Variations

Mediterranean Cod Fish Recipe is a delightful dish that brings the flavors of the Mediterranean to your kitchen. To make your dish even more exciting, here are some tips and variations. These will help you customize the recipe to your taste and make it even more delicious.

Flavor Enhancements

To enhance the flavor of your Mediterranean Cod Fish, consider using fresh herbs. Fresh parsley, thyme, or oregano can add a fragrant touch to your dish. Simply chop the herbs finely and sprinkle them over the fish before baking.

Another way to boost flavor is by adding lemon zest. Grate a lemon and sprinkle the zest over the cod. This will give your fish a bright and zesty flavor that pairs well with the Mediterranean ingredients.

For a spicier kick, add a pinch of red pepper flakes. This will give your dish a subtle heat without overpowering the other flavors. Be sure to adjust the amount to your liking.

Alternative Ingredients

If cod is not available, you can use other types of fish. Tilapia and halibut are great alternatives. They have a mild flavor and firm texture, making them perfect substitutes for cod.

Vegetables can also be swapped out. If you don’t have zucchini, try using bell peppers or eggplant. These vegetables will still provide the dish with a Mediterranean feel and taste.

For a different twist, replace the tomatoes with sundried tomatoes. They offer a more intense and concentrated flavor that can add depth to your dish.

Ingredient Alternative
Cod Tilapia, Halibut
Zucchini Bell Peppers, Eggplant
Tomatoes Sundried Tomatoes

Experimenting with these tips and variations can help you make the perfect Mediterranean Cod Fish Recipe. Enjoy the process of making it your own and savor the delicious results.

Frequently Asked Questions

What Ingredients Are Needed For Mediterranean Cod Fish?

To make Mediterranean cod fish, you need fresh cod fillets, olive oil, garlic, tomatoes, olives, lemon juice, and fresh herbs like parsley.

How Do You Cook Mediterranean Cod Fish?

To cook, sauté garlic in olive oil, add tomatoes, olives, and lemon juice. Simmer, then add cod fillets and cook until tender.

Is Mediterranean Cod Fish Healthy?

Yes, Mediterranean cod fish is healthy. It’s rich in lean protein, omega-3 fatty acids, vitamins, and minerals. It promotes heart health.

Can I Use Frozen Cod For This Recipe?

Yes, you can use frozen cod. Make sure to thaw it thoroughly before cooking to ensure even cooking and best texture.

Conclusion

This Mediterranean Cod Fish Recipe is easy and tasty. Fresh ingredients make it healthy. The dish pairs well with rice or salad. Perfect for family dinners or special occasions. Cooking it is simple, even for beginners. Enjoy this flavorful meal with loved ones.

It brings a taste of the Mediterranean to your table. Try it today and savor every bite.

Chambord French Martini Recipe: Elevate Your Cocktail Game

A Chambord French Martini is a delightful cocktail. It combines raspberry liqueur, vodka, and pineapple juice.

This elegant drink is perfect for any occasion. It is both fruity and sophisticated, making it a favorite for many. The Chambord French Martini stands out with its unique flavor. The rich taste of Chambord, a raspberry liqueur, blends seamlessly with smooth vodka and the tropical hint of pineapple juice.

This cocktail offers a refreshing yet refined experience. Whether you are hosting a party or enjoying a quiet evening, this martini can elevate the moment. Making it is simple and quick, yet it feels luxurious. Ready to impress your guests or treat yourself? Let’s dive into the easy steps to create this classic cocktail.

Chambord French Martini Recipe: Elevate Your Cocktail Game

Credit: stevethebartender.com.au

Introduction To Chambord French Martini

The Chambord French Martini is a delightful and elegant cocktail. It combines the rich flavors of Chambord, a raspberry liqueur, with the smoothness of vodka and the tang of pineapple juice. This drink is a favorite at many gatherings and special occasions. Its vibrant color and tantalizing taste make it stand out.

Origins Of The French Martini

The French Martini first appeared in the 1980s. It was created in New York City. The cocktail became popular during the cocktail renaissance. The name “French” comes from the Chambord liqueur. Chambord is made in France. The drink quickly became a hit in bars and restaurants.

What Makes It Special

Several factors make the French Martini special. First, the use of Chambord gives it a unique taste. The raspberry and blackberry flavors are rich and smooth. Second, the combination of vodka and pineapple juice adds a refreshing twist. This blend of flavors is both sweet and tangy.

Another special aspect is its presentation. The French Martini is often served in a chilled martini glass. The vibrant pink color is eye-catching. It makes the drink look as good as it tastes. Finally, the French Martini is simple to make. With just a few ingredients, you can create a sophisticated cocktail.

Chambord French Martini Recipe: Elevate Your Cocktail Game

Credit: coupleinthekitchen.com

Ingredients Needed

To make a delicious Chambord French Martini, you need a few key ingredients. Each one plays a crucial role in creating the perfect cocktail. Let’s look at what you need to get started.

Chambord Liqueur

First, you need Chambord Liqueur. This is a sweet raspberry liqueur with a touch of vanilla and honey. It adds a rich, fruity flavor to your martini.

Vodka

Next, you will need vodka. Choose a high-quality vodka for the best taste. Vodka provides the strong base for your cocktail and balances the sweetness of the Chambord.

Pineapple Juice

Pineapple juice is another essential ingredient. It brings a fresh and tangy taste to the martini. The juice also gives the drink a lovely tropical flavor.

Optional Garnishes

Lastly, consider adding some optional garnishes to enhance the look and flavor of your martini:

  • Fresh raspberries
  • Pineapple wedge
  • Lemon twist

These garnishes add a special touch to your cocktail. They make it more appealing and tasty.

Choosing The Right Vodka

Chambord French Martini Recipe

The Chambord French Martini is a delightful cocktail. Selecting the right vodka can elevate its flavors. With many options available, understanding the differences is crucial. This section will guide you in choosing the best vodka for your martini.

Premium Vs. Standard Vodkas

Vodkas come in two main categories: premium and standard. Premium vodkas are distilled multiple times. This process removes impurities, resulting in a smoother taste. Popular premium brands include Grey Goose, Belvedere, and Ketel One.

Standard vodkas are more affordable. They may have a harsher taste due to fewer distillations. Brands like Smirnoff and Absolut fall into this category. While they are budget-friendly, they may not provide the best flavor for a Chambord French Martini.

Flavor Infusions To Consider

Infused vodkas add a unique twist to your martini. These vodkas are flavored with natural ingredients. Common infusions include citrus, berries, and vanilla. For a Chambord French Martini, berry or vanilla-infused vodkas complement the raspberry liqueur well.

Here’s a table of popular vodka infusions and their potential benefits:

Flavor Infusion Benefits
Citrus Adds a refreshing zest
Berry Enhances fruity notes
Vanilla Introduces a smooth, sweet profile

Consider these infusions to personalize your Chambord French Martini. Experiment to find the perfect match for your taste.

Mixing Techniques

Creating the perfect Chambord French Martini is an art. The way you mix the ingredients can affect the flavor and texture of your drink. This section will explore different mixing techniques to help you achieve the best results.

Shaking Vs. Stirring

Shaking is ideal for drinks that need to be well mixed and chilled. Use a shaker to combine Chambord, vodka, and pineapple juice. Shake the ingredients with ice for about 10-15 seconds. This method creates a frothy texture and ensures the drink is cold.

Stirring is gentler and works well for drinks that should remain clear and smooth. Use a mixing glass to combine the ingredients with ice. Stir gently for 20-30 seconds. This technique is less likely to dilute the drink, preserving its rich flavors.

Tools Of The Trade

Having the right tools can make a big difference in your cocktail-making experience. Here are some essential tools for mixing a Chambord French Martini:

  • Cocktail Shaker: Essential for shaking and chilling your drink.
  • Mixing Glass: Perfect for stirring ingredients without over-diluting them.
  • Bar Spoon: Ideal for stirring cocktails smoothly and efficiently.
  • Strainer: Helps remove ice and other solid ingredients from your drink.
  • Jigger: Ensures precise measurements for perfect balance.

Using these tools will help you achieve the best results, whether you prefer shaking or stirring your Chambord French Martini.

Step-by-step Recipe Guide

Creating a delicious Chambord French Martini at home can be simple and fun. This guide will help you measure, mix, and serve your drink perfectly.

Measuring Ingredients

Start by gathering all the necessary ingredients. You will need:

  • 1 1/2 oz vodka
  • 1/2 oz Chambord
  • 2 oz pineapple juice
  • Ice cubes

Use a jigger to measure the liquids. This ensures the perfect balance of flavors.

Proper Mixing Method

Follow these steps to mix your Chambord French Martini:

  1. Fill a cocktail shaker with ice cubes.
  2. Pour in the measured vodka, Chambord, and pineapple juice.
  3. Secure the lid on the shaker and shake well for 15 seconds.

Shaking the mix well ensures a smooth and chilled cocktail.

Serving Tips

Once your martini is mixed, it is time to serve:

  1. Strain the drink into a chilled martini glass.
  2. Garnish with a raspberry or a twist of lemon peel.
  3. Serve immediately to enjoy the fresh flavors.

A well-presented drink enhances the experience. Always use clean, elegant glassware.

Garnishing Ideas

Garnishing your Chambord French Martini adds the perfect finishing touch. It enhances both the look and taste of your cocktail. Below are some garnishing ideas to make your martini stand out.

Classic Garnishes

The traditional garnishes for a Chambord French Martini are simple yet elegant. Here are a few options:

  • Lemon Twist: A spiral of lemon peel adds a pop of color. It also gives a subtle citrus aroma.
  • Raspberries: Fresh raspberries complement the Chambord’s berry flavor. They also look beautiful floating on top.
  • Maraschino Cherry: A classic choice that adds a sweet touch. It also enhances the drink’s visual appeal.

Creative Twists

If you want to get more creative, try these unique garnishing ideas:

  • Edible Flowers: Flowers like violets or pansies add elegance. They also bring a delicate flavor.
  • Gold Leaf: For a luxurious touch, add a small piece of gold leaf. It makes your drink look special.
  • Mint Sprig: Fresh mint adds a burst of green. It also gives a refreshing aroma.

These garnishing ideas will elevate your Chambord French Martini. Choose a classic garnish or get creative with a unique twist. Either way, your cocktail will be a delight to the senses.

Pairing With Food

The Chambord French Martini is a delightful cocktail. Its rich flavors make it versatile for food pairings. The sweet and tart notes of the Chambord liqueur complement many dishes. Whether you are hosting a party or enjoying a quiet evening, pairing this drink with the right food can enhance your experience.

Appetizers And Snacks

Start with light appetizers. The fruity and sweet notes of the Chambord French Martini pair well with savory snacks. Consider these options:

  • Cheese platter with brie, goat cheese, and gouda
  • Prosciutto-wrapped melon
  • Mini quiches with spinach and mushrooms
  • Olives and marinated artichokes

These snacks balance the sweetness of the martini. The savory flavors create a delightful contrast. Enjoy each bite with a sip of your cocktail for the perfect start to your evening.

Dessert Pairings

The Chambord French Martini is also a great match for desserts. Its raspberry and vanilla notes complement many sweet treats. Try these pairings:

Dessert Why It Works
Chocolate Fondue The rich chocolate enhances the berry flavors.
Raspberry Cheesecake The raspberry in the martini echoes the cheesecake’s flavor.
Lemon Tart The tartness of the lemon balances the sweetness of the drink.
Vanilla Ice Cream The creamy vanilla pairs perfectly with the martini’s notes.

These desserts bring out the best in your Chambord French Martini. They create a harmonious flavor experience. Enjoy them for a sweet end to your meal.

Hosting A Martini Night

Hosting a Martini Night can be a delightful way to bring friends together for a sophisticated evening. The Chambord French Martini adds a touch of elegance with its rich, fruity flavor. To make your Martini Night unforgettable, focus on setting the mood and creating a stylish martini bar. Here’s how you can do it:

Setting The Mood

First, choose the right ambiance. Dim the lights to create a cozy atmosphere. Add candles for a warm glow. Soft jazz or classic French music can set the perfect tone for the evening.

Decorate your space with elegant touches. Think about using white tablecloths, fresh flowers, and stylish glassware. Ensure there is enough seating for everyone. Arrange chairs and sofas in a way that encourages conversation.

Creating A Martini Bar

Setting up a martini bar is key. Start with a variety of glassware. Martini glasses are a must. Use a table or bar cart to display your ingredients. Here’s a simple list to get you started:

  • Chambord Liqueur
  • Vodka
  • Pineapple Juice
  • Ice
  • Garnishes: Pineapple slices, Raspberries

Arrange the ingredients in a pleasing manner. Use small bowls for garnishes. Place cocktail shakers, stirrers, and napkins within easy reach. A printed recipe card for the Chambord French Martini can be a great addition. This way, guests can try making their own drinks.

Keep the bar area clean and organized. Make sure there are enough napkins and coasters. A small trash bin nearby can help keep things tidy.

Item Description
Chambord Liqueur For a rich, fruity flavor
Vodka The base spirit for the martini
Pineapple Juice Adds sweetness and balance
Ice To chill the drink
Garnishes Pineapple slices, Raspberries

Hosting a Martini Night with the Chambord French Martini can be a delightful experience. By setting the mood and creating a well-organized martini bar, you’ll ensure your guests have a memorable evening.

Chambord French Martini Recipe: Elevate Your Cocktail Game

Credit: www.realsimple.com

Frequently Asked Questions

What Ingredients Are In A Chambord French Martini?

A Chambord French Martini includes vodka, Chambord liqueur, and pineapple juice. Garnish with a lemon twist or raspberries.

How Do You Make A French Martini?

Shake vodka, Chambord, and pineapple juice with ice. Strain into a chilled martini glass. Garnish.

What Does A Chambord French Martini Taste Like?

It tastes fruity, sweet, and slightly tart with notes of raspberry and pineapple. It’s refreshing and delicious.

Can I Use Other Fruit Juices In A French Martini?

Yes, you can experiment with different fruit juices like cranberry or orange. However, pineapple juice is traditional.

Conclusion

Savor the elegance of a Chambord French Martini at home. This delightful cocktail is easy to make and impresses guests. The blend of Chambord, vodka, and pineapple juice creates a perfect balance. Enjoy this drink for any occasion. Cheers to a taste of France in every sip!

Thai Coconut Smoothie Recipe: Creamy, Refreshing, and Delicious

Are you craving a refreshing and exotic drink? A Thai Coconut Smoothie might be just what you need.

This delicious beverage combines the creamy goodness of coconut milk with tropical fruits for a perfect treat. Thai cuisine is known for its vibrant flavors and unique ingredients. One such ingredient is coconut milk, which adds a rich, creamy texture to many dishes and drinks.

A Thai Coconut Smoothie is not only delicious but also easy to make at home. With a blend of coconut milk, fresh fruits, and a touch of sweetness, this smoothie is a perfect way to cool down on a hot day. Whether you’re looking for a quick breakfast, a post-workout snack, or a tasty treat, this smoothie is sure to satisfy your taste buds and transport you to the tropics. Ready to blend up some tropical delight? Read on for the full recipe!

Ingredients

Creating a delicious Thai Coconut Smoothie starts with gathering the right ingredients. Fresh and high-quality ingredients will make your smoothie rich and flavorful. Let’s dive into the essential components needed for this refreshing drink.

Fresh Coconut

Fresh coconut is the star ingredient in this smoothie. It adds a natural sweetness and creamy texture. Ensure you use both the coconut water and the tender coconut flesh for the best flavor.

  • Fresh Coconut Water: Hydrating and packed with electrolytes.
  • Tender Coconut Flesh: Adds creaminess and a subtle, sweet taste.

Other Essential Ingredients

Besides fresh coconut, there are a few other key ingredients to make your Thai Coconut Smoothie perfect.

Ingredient Quantity
Banana 1 ripe
Pineapple 1/2 cup, chopped
Greek Yogurt 1/2 cup
Honey 1 tablespoon
Ice Cubes 1 cup

These ingredients complement the coconut, adding layers of flavor and texture. The banana adds sweetness and creaminess. Pineapple gives a tangy twist. Greek yogurt makes the smoothie rich and thick. Honey adds a touch of natural sweetness. Ice cubes make the drink refreshing and cool.

With these fresh and essential ingredients, your Thai Coconut Smoothie will be a tropical delight. Enjoy!

Thai Coconut Smoothie Recipe: Creamy, Refreshing, and Delicious

Credit: www.youtube.com

Equipment Needed

Creating a delicious Thai Coconut Smoothie at home is simple. Using the right equipment makes the process smooth and enjoyable. Below, we outline the essential tools you need.

Blender

A high-quality blender is crucial for a smooth texture. It helps mix the ingredients evenly. A powerful motor ensures a creamy blend. This results in a perfect smoothie every time. Choose a blender with variable speed settings. It allows you to control the blending process. This way, you achieve your desired consistency.

Measuring Tools

Accurate measurements are key to the perfect smoothie. Measuring cups and spoons help maintain consistency. They ensure each ingredient is added in the right amount. This guarantees a balanced flavor. Use a liquid measuring cup for liquids. Dry measuring cups are best for solid ingredients. This distinction helps achieve precise measurements. Consistency in measurements leads to a delicious smoothie.

Preparation Steps

Creating a delicious Thai coconut smoothie at home can be easy and fun. The key to a great smoothie is the preparation steps. Let’s dive into the details of preparing the coconut and gathering the ingredients.

Preparing The Coconut

Fresh coconut is the secret to an authentic Thai coconut smoothie. Follow these steps:

  1. Crack the coconut: Use a hammer or the back of a heavy knife. Tap around the middle to split it open.
  2. Drain the water: Pour the coconut water into a bowl. You can use this in your smoothie.
  3. Extract the meat: Use a spoon to separate the white flesh from the shell.
  4. Blend the meat: Place the coconut meat in a blender. Add a bit of the coconut water and blend until smooth.

Gathering Ingredients

Now that the coconut is ready, gather the other ingredients. Here is a list:

  • Banana: One ripe banana, peeled and sliced.
  • Mango: One ripe mango, peeled and diced.
  • Coconut Milk: One cup of coconut milk for a rich texture.
  • Honey: One tablespoon of honey for sweetness.
  • Ice Cubes: One cup of ice cubes for a refreshing chill.

With these ingredients, you are ready to make your Thai coconut smoothie. Blend everything together until smooth. Serve immediately and enjoy the tropical flavors!

Thai Coconut Smoothie Recipe: Creamy, Refreshing, and Delicious

Credit: www.sheknows.com

Blending Process

The blending process is key to making a delicious Thai Coconut Smoothie. Follow these simple steps to create a smooth, creamy drink that bursts with tropical flavors.

Combining Ingredients

First, gather all your ingredients. You will need:

  • 1 cup of coconut milk
  • 1 banana, sliced
  • 1 cup of frozen pineapple chunks
  • 1 tablespoon of honey
  • 1/2 teaspoon of vanilla extract
  • 1/2 cup of ice

Start by adding the coconut milk to your blender. Coconut milk gives the smoothie its rich, creamy base. Next, add the sliced banana. The banana adds natural sweetness and a smooth texture.

Add the frozen pineapple chunks. These give the smoothie a fresh, tropical taste. Honey brings extra sweetness, while vanilla extract enhances the flavors. Lastly, add the ice to make the smoothie cool and refreshing.

Blending To Perfection

Once all the ingredients are in the blender, it’s time to blend. Start on a low speed to break down the larger chunks. Gradually increase the speed to high.

Blend until the mixture is smooth and creamy. This may take about 1-2 minutes. Stop the blender and scrape down the sides if needed. Blend again until all ingredients are well combined.

Check the consistency of the smoothie. If it’s too thick, add a little more coconut milk. If it’s too thin, add more ice or frozen pineapple chunks. Blend again to achieve the perfect texture.

Your Thai Coconut Smoothie is now ready to enjoy. Pour it into a glass and savor the tropical flavors.

Serving Suggestions

Serving a Thai Coconut Smoothie can be a delightful experience. This creamy, tropical drink is versatile and fits many occasions. Let’s explore some ideal times to serve it and creative ways to garnish.

Best Times To Serve

Serve this smoothie as a refreshing breakfast drink. It’s a great way to start the day. You can also serve it as a mid-morning snack. It helps to keep energy levels high. This smoothie is perfect for a light lunch or a post-workout refreshment. It hydrates and rejuvenates the body. Consider serving it at a summer party. Guests will love its cool, tropical taste.

Garnishing Ideas

Add a sprinkle of toasted coconut flakes on top. It enhances the coconut flavor. Use a slice of fresh pineapple or mango as a garnish. It adds a burst of color and taste. A sprig of mint can make the smoothie look more appealing. You can also add a small wedge of lime on the glass rim. It gives a zesty twist. Consider using edible flowers. They add a beautiful, natural touch.

Thai Coconut Smoothie Recipe: Creamy, Refreshing, and Delicious

Credit: www.twofitmoms.com

Variations

Thai Coconut Smoothie is delightful on its own. Yet, there are ways to tweak it. These variations can make it more exciting and cater to different tastes. Whether you like adding fruits or making it vegan, there’s a twist for everyone. Let’s explore some fun and easy ways to change up your Thai Coconut Smoothie.

Adding Fruits

Adding fruits can enhance the flavor of your smoothie. Mangoes are a popular choice. They blend well with the coconut base. Bananas add a creamy texture. Pineapple offers a tropical twist. Strawberries provide a fresh, tangy note. Simply blend your favorite fruit with the basic smoothie ingredients. The fruit can be fresh or frozen. Both work well and add their unique taste.

Making It Vegan

Making your Thai Coconut Smoothie vegan is simple. Use coconut milk or almond milk instead of dairy. These plant-based options keep the smoothie creamy. For added protein, blend in some chia seeds or hemp seeds. Sweeten it naturally with dates or maple syrup. Ensure all ingredients are vegan-friendly. This way, you can enjoy a delicious and cruelty-free smoothie.

Storage Tips

Keep your Thai coconut smoothie fresh by storing it in an airtight container. Refrigerate immediately and consume within 2 days. For a longer shelf life, freeze in ice cube trays and blend when ready to enjoy.

Storing your Thai Coconut Smoothie properly ensures it stays fresh and delicious. Whether you refrigerate or freeze, these tips will help you enjoy your smoothie anytime.

Refrigeration

Store your Thai Coconut Smoothie in a glass jar or airtight container. This keeps it fresh. Place it in the refrigerator. It will stay good for up to 3 days. Shake well before drinking. This ensures the ingredients mix again.

Freezing For Later

Pour your smoothie into freezer-safe containers. Leave some space for expansion. Seal the containers tightly. Store them in the freezer for up to a month. Thaw in the fridge overnight. Blend again for the best texture. Enjoy your smoothie anytime. “`

Health Benefits

The Thai Coconut Smoothie isn’t just a tasty treat; it also offers numerous health benefits. Packed with essential nutrients, this smoothie can support your overall well-being. Let’s dive into the specific health benefits you can gain from this delicious drink.

Nutritional Value

Thai Coconut Smoothies are rich in vitamins and minerals. Here’s a quick overview:

Nutrient Amount per Serving
Calories 150
Vitamin C 20 mg
Potassium 400 mg
Calcium 30 mg
Fiber 3 g

The smoothie is low in calories and high in essential nutrients. Vitamin C boosts your immune system. Potassium helps maintain healthy blood pressure. Calcium supports strong bones. Fiber aids in digestion.

Boosting Immunity

This smoothie can help strengthen your immune system. Here’s how:

  • Vitamin C: Fights off infections.
  • Antioxidants: Protects your cells from damage.

Vitamin C is a powerful antioxidant. It reduces the duration of colds. Antioxidants in the smoothie protect your cells from damage. This reduces the risk of chronic diseases.

Frequently Asked Questions

What Ingredients Are In A Thai Coconut Smoothie?

A Thai coconut smoothie typically includes coconut milk, banana, pineapple, and sometimes mango. These ingredients blend to create a creamy and tropical flavor.

How Do You Make A Thai Coconut Smoothie?

To make a Thai coconut smoothie, blend coconut milk, banana, pineapple, and ice. Add mango or honey for extra sweetness.

Is A Thai Coconut Smoothie Healthy?

Yes, a Thai coconut smoothie is healthy. It provides essential vitamins, minerals, and healthy fats from coconut milk.

Can I Use Frozen Fruit In A Thai Coconut Smoothie?

Yes, you can use frozen fruit in a Thai coconut smoothie. It helps to create a thicker, colder texture.

Conclusion

Enjoy the refreshing taste of a Thai coconut smoothie today. It’s simple to make and delicious. Blend coconut milk, banana, and ice for a tropical treat. Perfect for any time of day. Boost your energy and stay hydrated. Share this recipe with friends and family.

They will love it too. Happy blending and sipping!

Eye of Round Slow Cook Recipe: Tender, Flavorful Perfection

The Eye of Round cut is lean and flavorful, perfect for slow cooking. Slow cooking enhances its tenderness and brings out rich flavors.

Slow cooking Eye of Round is a game-changer for your weeknight dinners. This method transforms a tough cut into a succulent, mouth-watering dish. With minimal prep and a bit of patience, you can enjoy a hearty, satisfying meal. Whether you’re a busy professional or a home cook seeking simplicity, this recipe is for you.

The slow cooker does all the work while you go about your day. This guide will walk you through the steps, ensuring a perfect dish every time. Get ready to impress your family with a delicious and tender Eye of Round!

Eye of Round Slow Cook Recipe: Tender, Flavorful Perfection

Credit: www.persnicketyplates.com

Ingredients Needed

Preparing a delicious Eye of Round Slow Cook Recipe starts with gathering the right ingredients. The right balance of spices and herbs can transform a simple cut of meat into a flavorful feast. Here, we will explore the essential ingredients you need.

Essential Spices

Spices add depth and complexity to your dish. You will need:

  • Salt: Enhances the natural flavors of the meat.
  • Black Pepper: Adds a hint of heat and aroma.
  • Garlic Powder: Provides a rich, savory taste.
  • Onion Powder: Adds a subtle sweetness and depth.
  • Paprika: Gives a smoky flavor and a touch of color.

Fresh Herbs

Fresh herbs elevate the flavor profile. They bring freshness and brightness to the dish. Here are the must-haves:

  • Rosemary: Adds a pine-like aroma and flavor.
  • Thyme: Offers an earthy and slightly minty taste.
  • Parsley: Provides a fresh, peppery flavor.

Using fresh herbs ensures the meat absorbs all the vibrant flavors.

Eye of Round Slow Cook Recipe: Tender, Flavorful Perfection

Credit: ifoodreal.com

Choosing The Right Cut

Selecting the right cut is crucial for a tender Eye of Round slow cook recipe. This lean, flavorful cut becomes incredibly tender and juicy when cooked slowly. Enjoy a delicious and satisfying meal with minimal effort.

Selecting the right cut of meat is crucial for a delicious Eye of Round Slow Cook Recipe. The Eye of Round is a lean, flavorful cut that benefits from slow cooking. This method allows it to become tender and juicy. Here’s how to choose and prepare the perfect cut for your recipe.

Selecting Quality Meat

To get the best results, always start with quality meat. Here are some tips:
  • Look for a bright red color. This indicates freshness.
  • Check for a firm texture. The meat should spring back when pressed.
  • Avoid cuts with too much fat. Eye of Round is naturally lean.
You can buy Eye of Round from your local butcher or supermarket. Always choose USDA Choice or Prime grades for the best quality.

Preparing The Cut

Proper preparation makes a huge difference. Follow these steps:
  1. Trim: Remove any excess fat. This helps the meat cook evenly.
  2. Season: Rub the meat with salt, pepper, and your favorite herbs.
  3. Marinate: Let the meat sit in the refrigerator for at least 2 hours. This enhances flavor.
Step Description
Trim Remove excess fat for even cooking.
Season Use salt, pepper, and herbs for flavor.
Marinate Refrigerate for at least 2 hours.
By selecting and preparing the right cut, you ensure a delicious and tender result. Remember, the key is in the details. “`

Preparing The Marinade

Creating the perfect marinade for your Eye of Round Slow Cook Recipe enhances the flavor and tenderness of the meat. This section will guide you through mixing the ingredients and offer tips on marinating your beef effectively.

Mixing The Ingredients

To start, gather the following ingredients for your marinade:

  • 1/2 cup olive oil
  • 1/4 cup soy sauce
  • 1/4 cup Worcestershire sauce
  • 2 cloves minced garlic
  • 1 tablespoon honey
  • 1 teaspoon black pepper
  • 1 teaspoon dried thyme
  • 1 teaspoon dried rosemary

Use a medium-sized bowl to mix these ingredients. Whisk until well combined. The olive oil and soy sauce create a rich base. Garlic and honey add depth and sweetness. Black pepper, thyme, and rosemary provide an aromatic touch.

Marinating Tips

Here are some tips to ensure your eye of round is well-marinated:

  1. Use a zip-lock bag: Place the beef and marinade in a large zip-lock bag. This ensures even coverage and minimizes mess.
  2. Marinate overnight: For the best results, let the beef marinate in the refrigerator for at least 8 hours. This allows the flavors to penetrate the meat.
  3. Turn occasionally: If possible, turn the bag every few hours. This ensures all sides of the beef absorb the marinade evenly.
  4. Room temperature before cooking: Let the marinated beef sit at room temperature for 30 minutes before cooking. This helps it cook evenly.

Following these steps will enhance the taste and tenderness of your eye of round beef. Happy cooking!

Slow Cooking Techniques

Slow cooking techniques bring out the best flavors in the Eye of Round. The low and slow method tenderizes this lean cut of beef, making it juicy and delicious.

Setting Up The Slow Cooker

Start by setting up your slow cooker on a sturdy surface. Make sure it’s plugged into a reliable outlet. Choose the right size slow cooker for your recipe. A smaller roast fits well in a 4-quart slow cooker, while a larger one needs a 6-quart. Place the Eye of Round at the bottom of the cooker. Add your vegetables and seasoning on top.

Optimal Cooking Time

Cooking time is crucial for a tender roast. Set your slow cooker to low for 8 to 10 hours. This slow and steady process breaks down the tough fibers. If you’re short on time, cook on high for 4 to 5 hours. Avoid opening the lid during cooking. This keeps the heat and moisture inside. Patience is key for the perfect Eye of Round.

Adding Vegetables

Adding vegetables to your Eye of Round slow cook recipe enhances the flavor. Vegetables also add nutrients to the meal. Let’s explore the best vegetables to use and the timing for adding them.

Best Vegetables To Use

Choosing the right vegetables is key. Here is a list of the best options:

  • Carrots – Sweet and hearty.
  • Potatoes – Absorb flavors well.
  • Onions – Add sweetness and depth.
  • Celery – Provides a subtle crunch.
  • Mushrooms – Earthy and rich.

These vegetables complement the Eye of Round roast perfectly. They also hold up well during slow cooking.

Timing For Adding Veggies

Adding vegetables at the right time is crucial. Follow this simple guide:

  1. Add root vegetables like carrots and potatoes at the start. They need more time to cook.
  2. Add softer vegetables like onions and celery halfway through. This keeps them from getting mushy.
  3. Add mushrooms in the last hour. They cook quickly and add a lot of flavor.

By timing the addition of each vegetable, you ensure they all cook to perfection. Enjoy a well-balanced and flavorful dish.

Enhancing The Flavor

Enhancing the flavor of an eye of round slow cook recipe can take it from good to great. By focusing on key elements like broth, wine, and seasoning, you can ensure that your dish is both delicious and memorable. Let’s delve into these components to make your recipe truly stand out.

Using Broth And Wine

Broth adds depth to your dish. Use beef broth for a rich taste. Chicken broth works too, offering a lighter flavor. Wine, on the other hand, adds a sophisticated touch. Red wine is ideal for a robust flavor. White wine can be used for a milder profile. Combine both for a complex taste. Remember, the alcohol will cook off, leaving only the essence.

Seasoning Adjustments

Seasoning is crucial. Start with basic salt and pepper. Add garlic for a punch. Use onion powder for a savory kick. Herbs like thyme and rosemary can elevate the dish. Consider adding a bay leaf for extra depth. Adjust the seasoning as it cooks. Taste often to ensure balance. Don’t forget a touch of paprika for color and mild heat.

Serving Suggestions

The Eye of Round Slow Cook Recipe is a tender and flavorful dish. Serve it with sides that complement its rich taste. This section provides suggestions for side dishes and plating ideas to make your meal special.

Side Dishes

Pair your Eye of Round with these delicious side dishes:

  • Mashed Potatoes: Creamy mashed potatoes soak up the rich gravy.
  • Steamed Vegetables: Broccoli, carrots, and green beans add a fresh touch.
  • Roasted Garlic Bread: Crispy bread with a hint of garlic complements the beef.
  • Garden Salad: A light, refreshing salad balances the hearty meat.

Plating Ideas

Presentation makes your dish more appealing. Try these plating ideas:

  1. Use a large white plate: The white plate makes the food colors pop.
  2. Arrange the meat in the center: Slice the beef and fan it out.
  3. Add sides around the meat: Place mashed potatoes, vegetables, and bread neatly.
  4. Drizzle with sauce: Pour a bit of gravy over the beef for added flavor.
  5. Garnish with herbs: Sprinkle fresh parsley or thyme for a touch of green.

These suggestions will enhance your Eye of Round Slow Cook Recipe and impress your guests.

Storing And Reheating

Properly storing and reheating your Eye of Round Slow Cook Recipe ensures it stays delicious and safe to eat. Follow these simple guidelines to enjoy your leftovers without any compromise in flavor or texture.

Proper Storage

Store the cooked Eye of Round in airtight containers. Use shallow containers to allow the meat to cool quickly in the refrigerator. This prevents the growth of harmful bacteria.

Label the containers with the date. This helps you keep track of how long the meat has been stored. It is best to consume refrigerated meat within 3-4 days.

If you need to store the meat for a longer period, freeze it. Wrap the meat tightly in aluminum foil or plastic wrap before placing it in a freezer-safe bag. This prevents freezer burn. Frozen meat can last up to 3 months.

Reheating Techniques

Reheating your Eye of Round properly is crucial for maintaining its flavor and texture. Use these methods to ensure your meal remains tasty:

  • Microwave: Place the meat in a microwave-safe dish. Cover with a microwave-safe lid or plastic wrap. Heat on medium power for 2-3 minutes. Stir halfway through to ensure even heating.
  • Oven: Preheat your oven to 300°F (150°C). Place the meat in an oven-safe dish and cover with foil. Heat for 20-25 minutes, or until the meat reaches an internal temperature of 165°F (74°C).
  • Stovetop: Place the meat in a skillet. Add a small amount of broth or water to prevent drying out. Cover the skillet and heat over medium-low for 10-15 minutes, stirring occasionally.

Remember, it is important not to reheat the meat more than once. Doing so can affect its texture and may lead to food safety issues.

Eye of Round Slow Cook Recipe: Tender, Flavorful Perfection

Credit: eatpicks.com

Frequently Asked Questions

What Is Eye Of Round?

Eye of Round is a lean beef cut. It’s taken from the cow’s hindquarters. It’s often used in slow-cooking recipes.

How Do You Cook Eye Of Round?

Slow cook the Eye of Round for tenderness. Season it, then cook on low heat for 6-8 hours.

What Seasonings Are Best For Eye Of Round?

Use salt, pepper, garlic, and rosemary. These seasonings enhance the beef’s natural flavors.

Can You Overcook Eye Of Round In A Slow Cooker?

Yes, overcooking makes it tough. Cook on low heat for the recommended time for best results.

Conclusion

Enjoy a tender and flavorful Eye of Round with this slow cook recipe. Simple steps and ingredients make it easy to follow. The slow cooking process ensures juicy, melt-in-your-mouth meat. Perfect for family dinners or special gatherings. Try it today and impress your loved ones.

Happy cooking!

Paula Deen Cookbook Recipes: Southern Comfort Food Classics

Craving some Southern comfort food? Paula Deen’s cookbook recipes are what you need.

Known for her rich, flavorful dishes, Paula Deen brings the taste of the South to your kitchen. Paula Deen’s cookbooks are filled with recipes that capture the essence of Southern cooking. From savory main dishes to delectable desserts, each recipe is crafted to bring warmth and joy to your meals.

Whether you’re a seasoned cook or new to the kitchen, Paula’s recipes are easy to follow and promise delicious results. Her cookbooks offer a variety of dishes, ensuring there’s something for every palate. Dive into the world of Paula Deen’s recipes and discover the magic of Southern cuisine. Get ready to cook up some comfort and create memorable meals with ease.

Introduction To Paula Deen

Paula Deen is a beloved figure in the culinary world. She is known for her rich, Southern-style cooking. Her recipes are flavorful and full of comfort. Let’s take a closer look at her life and culinary journey.

Biography

Paula Deen was born on January 19, 1947, in Albany, Georgia. She grew up in a Southern family and learned to cook from her grandmother. Paula faced many struggles early in life. She married at 18 and had two sons. Her first marriage ended in divorce. Paula worked hard to provide for her family.

In her 40s, Paula started a catering business called “The Bag Lady.” She made sandwiches and meals in her home. Her sons helped deliver the food. This small business was the start of her culinary career.

Culinary Journey

Paula Deen’s career took off in 1996. She opened her first restaurant, “The Lady & Sons,” in Savannah, Georgia. The restaurant became famous for its Southern cuisine. Dishes like fried chicken, collard greens, and biscuits were crowd favorites.

In 1999, Paula published her first cookbook, “The Lady & Sons Savannah Country Cookbook.” The book was a hit. It showcased her love for traditional Southern cooking. Paula’s success continued to grow. She appeared on television shows and launched her own cooking show, “Paula’s Home Cooking,” on the Food Network.

Paula has published many cookbooks since then. Each book is filled with delicious recipes and personal stories. Her cookbooks are a reflection of her warm and inviting personality. Paula Deen’s recipes bring people together and celebrate Southern hospitality.

Southern Comfort Food

Southern Comfort Food is a beloved cuisine that warms the heart and soul. It’s rich, flavorful, and deeply rooted in tradition. Paula Deen’s cookbook recipes bring this to life with her unique touch. Let’s delve into what makes Southern Comfort Food so special.

What Defines Southern Comfort Food?

Southern Comfort Food is all about hearty, home-cooked meals. It includes dishes like fried chicken, collard greens, and cornbread. These meals are filling and flavorful, offering a sense of nostalgia and warmth. Often, the recipes are passed down through generations. They remind us of family gatherings and cherished moments.

Ingredients are simple but used in creative ways. Butter, cream, and spices play a big role. The cooking methods are often slow, allowing flavors to meld together. This results in dishes that are rich and satisfying. The focus is on comfort and taste, not calories.

Historical Roots

The history of Southern Comfort Food is a tapestry of cultures. It blends Native American, African, and European influences. Native Americans introduced corn and beans. Africans brought okra and black-eyed peas. Europeans contributed meats and breads.

These diverse influences created a unique culinary tradition. Recipes evolved based on what was available and affordable. Slaves and sharecroppers made do with what they had, creating dishes that were both practical and delicious.

Over time, these recipes became staples in Southern kitchens. They symbolize resilience and creativity. Today, they continue to bring people together, celebrating a rich cultural heritage.

Signature Ingredients

Paula Deen’s cookbook recipes are known for their rich flavors and hearty dishes. What sets her recipes apart are the signature ingredients she uses. These ingredients add a unique touch to her Southern cuisine, making them irresistible to many. Let’s dive into some of these signature ingredients that make Paula Deen’s recipes so special.

Staple Ingredients

Paula Deen’s recipes often feature a few staple ingredients that are essential in Southern cooking.

  • Butter: Butter is a key ingredient in many of Paula’s dishes. It adds richness and flavor to everything from biscuits to desserts.
  • Heavy Cream: Heavy cream is used to create creamy, indulgent sauces and soups.
  • Flour: Flour is a base for many of her baked goods, including pies and cakes.
  • Sugar: Sugar is used generously in her sweet recipes, providing that classic Southern sweetness.
  • Buttermilk: Buttermilk adds a tangy flavor and tenderizes baked goods.

Unique Seasonings

Paula Deen’s recipes also stand out because of her use of unique seasonings. These seasonings bring out the best in her dishes, making them unforgettable.

  • Cayenne Pepper: Cayenne pepper adds a spicy kick to many of her savory dishes.
  • Old Bay Seasoning: This seasoning blend is often used in her seafood recipes, adding a distinctive flavor.
  • Creole Seasoning: Creole seasoning adds a bold, savory flavor to many of her Southern dishes.
  • Garlic Powder: Garlic powder is a staple in her kitchen, adding depth to a variety of recipes.
  • Onion Powder: Onion powder enhances the flavor of many of her savory dishes.
Paula Deen Cookbook Recipes: Southern Comfort Food Classics

Credit: www.amazon.com

Popular Appetizers

Paula Deen’s cookbooks are famous for their delightful Southern recipes. Her appetizers are particularly popular. They are simple yet flavorful. These starters will make your guests ask for more.

Fried Green Tomatoes

Fried Green Tomatoes are a classic Southern appetizer. They are crispy and tangy. Paula Deen’s recipe makes them even better. She uses buttermilk to soak the tomatoes. This gives them a unique taste. Then, they are coated in a cornmeal mixture. The result is a crunchy and delicious treat. Serve them with a spicy remoulade sauce. Your guests will love them.

Southern Deviled Eggs

Southern Deviled Eggs are another hit in Paula Deen’s cookbooks. They are creamy and flavorful. The secret is in the filling. Paula uses mayonnaise, mustard, and sweet pickle relish. This combination is irresistible. The eggs are then topped with a dash of paprika. They are perfect for any gathering. Easy to make and delightful to eat.

Main Course Delights

When it comes to southern cooking, Paula Deen’s recipes bring comfort and flavor. Her cookbook features main course delights that promise to satisfy. In this section, we explore two beloved dishes. Classic Fried Chicken and Shrimp and Grits. These recipes are a testament to good home cooking.

Classic Fried Chicken

Paula Deen’s Classic Fried Chicken is a staple. The chicken is marinated in buttermilk for tenderness. Then, it is coated in a seasoned flour mixture. The secret? A perfect blend of spices. The chicken is fried to golden perfection. The result is crispy on the outside and juicy inside. Serve it with mashed potatoes or a fresh salad.

Shrimp And Grits

Shrimp and Grits is another favorite from Paula’s cookbook. The shrimp is cooked with garlic, onions, and bell peppers. It is then served over creamy, buttery grits. The combination of flavors is divine. This dish is both hearty and comforting. Perfect for a family dinner or a special occasion.

Savory Sides

Paula Deen’s cookbooks offer a treasure trove of delicious recipes. The savory sides stand out with their rich flavors and comforting textures. They add a perfect touch to any meal.

Buttermilk Biscuits

Buttermilk biscuits are a Southern staple. Paula’s recipe makes them fluffy and golden. Mix flour, baking powder, and salt in a bowl. Cut in cold butter until it resembles coarse crumbs. Stir in buttermilk until just combined. Roll out the dough and cut into rounds. Bake until golden brown. Serve warm with butter or honey.

Collard Greens

Collard greens are a must-have for any Southern feast. Paula’s recipe brings out their best flavors. Start by cooking bacon in a large pot. Add onions and garlic to the bacon drippings. Sauté until tender. Stir in chicken broth, vinegar, and sugar. Add collard greens and simmer until tender. The result is a savory and slightly tangy dish. Perfect as a side for any main course.

Decadent Desserts

Paula Deen’s cookbook is a treasure trove for dessert lovers. Her decadent desserts are rich, flavorful, and often indulgent. Whether you’re hosting a dinner or craving something sweet, her recipes will satisfy your taste buds.

Pecan Pie

The Pecan Pie from Paula Deen’s cookbook is a classic. This Southern favorite is loaded with crunchy pecans and a sweet, gooey filling. It’s perfect for holidays or any special occasion.

  • Ingredients: Pecans, sugar, corn syrup, butter, and eggs.
  • Preparation: Mix the ingredients, pour into a pie crust, and bake.
  • Serving Tip: Serve with a scoop of vanilla ice cream.

Banana Pudding

The Banana Pudding is another crowd-pleaser. This creamy dessert is layered with fresh bananas, vanilla wafers, and a rich custard. It’s a comfort food that brings back childhood memories.

  1. Ingredients: Bananas, vanilla wafers, milk, sugar, eggs, and vanilla extract.
  2. Steps:
    • Layer bananas and wafers in a dish.
    • Cook custard and pour over layers.
    • Chill and serve.
  3. Tip: Top with whipped cream for extra indulgence.

Cooking Tips And Techniques

Paula Deen’s cookbooks are full of delicious recipes. To cook her recipes well, you need to follow some key tips and techniques. From deep frying to making a perfect pie crust, these tips will help you cook like a pro. Let’s dive into some essential cooking tips straight from Paula Deen’s kitchen.

Deep Frying Tips

Deep frying is an art. Use these tips to get it right:

  • Oil Temperature: Keep the oil at 350-375°F. Use a thermometer.
  • Don’t Overcrowd: Fry in small batches. This keeps the oil hot.
  • Drain Properly: Use a wire rack. Paper towels can make food soggy.
  • Choose the Right Oil: Use oils with high smoke points. Peanut oil is a good choice.

These tips ensure your food is crispy and delicious.

Perfecting Pie Crust

A perfect pie crust is flaky and tender. Follow these steps:

  1. Keep Ingredients Cold: Use cold butter and ice water. This prevents the butter from melting too soon.
  2. Don’t Overwork the Dough: Mix until ingredients just come together. Overmixing makes the crust tough.
  3. Chill the Dough: After mixing, chill the dough for at least 30 minutes. This relaxes the gluten and makes rolling easier.
  4. Use a Light Touch: Roll the dough gently. Pressing too hard can make the crust dense.

With these steps, your pie crust will always be a hit.

Personal Touches

Paula Deen’s cookbook recipes are more than just instructions on cooking. They carry a piece of her heart, making each dish special. Here, we explore the personal touches that make her recipes unique and memorable.

Family Traditions

Paula Deen’s recipes often reflect her family’s traditions. These dishes are a fusion of flavors passed down through generations. Each recipe tells a story of family gatherings and shared memories.

  • Southern Fried Chicken: A staple in her household, fried to perfection.
  • Grandma’s Biscuits: Fluffy and buttery, just like Grandma used to make.
  • Pecan Pie: A holiday favorite, rich and sweet.

These recipes are not just about food. They are about keeping family traditions alive. Every bite takes you back to those cherished moments.

Modern Twists

While Paula honors family traditions, she also adds modern twists to her recipes. This blend keeps the dishes fresh and exciting.

For example, her Cauliflower Mac and Cheese offers a healthy spin on a classic comfort food. This dish uses cauliflower instead of pasta, making it low-carb and nutritious.

Another innovative dish is her Avocado Toast with Southern Flair. It combines creamy avocado with a hint of spice, giving a new life to a simple breakfast item.

Traditional Recipe Modern Twist
Mac and Cheese Cauliflower Mac and Cheese
Toast Avocado Toast with Southern Flair

These modern twists make Paula Deen’s recipes versatile. They cater to both traditional and contemporary tastes, ensuring everyone finds something to love.

Paula Deen Cookbook Recipes: Southern Comfort Food Classics

Credit: somekindagood.com

Paula Deen Cookbook Recipes: Southern Comfort Food Classics

Credit: somekindagood.com

Frequently Asked Questions

What Are Paula Deen’s Best Recipes?

Paula Deen’s best recipes include her famous Southern fried chicken, shrimp and grits, and gooey butter cake. These dishes are beloved for their rich flavors and comforting taste. Her cookbooks offer step-by-step instructions.

How Many Cookbooks Has Paula Deen Written?

Paula Deen has written over 15 cookbooks. Each one is packed with Southern-inspired recipes. They cover everything from appetizers to desserts. Her books are popular for their easy-to-follow recipes.

Are Paula Deen’s Recipes Easy To Follow?

Yes, Paula Deen’s recipes are known for being easy to follow. They include clear instructions and simple ingredients. Even beginners can successfully make her dishes.

Where Can I Buy Paula Deen Cookbooks?

You can buy Paula Deen cookbooks at major bookstores and online retailers like Amazon. They are also available on her official website. Many local libraries also carry her cookbooks.

Conclusion

Paula Deen’s cookbook recipes offer comforting, delicious meals for everyone. Her easy-to-follow instructions make cooking enjoyable and stress-free. From hearty dinners to sweet desserts, there’s something for every taste. Try these recipes and bring joy to your kitchen. Your family will love the flavors and warmth of Paula Deen’s dishes.

Cooking becomes a delightful experience with her trusted recipes. Happy cooking and enjoy every bite!

Nacho Cheese Fries Recipe: Irresistibly Crunchy & Cheesy Delight

Who doesn’t love a plate of nacho cheese fries? This delightful dish combines crispy fries with creamy, cheesy goodness.

Craving something tasty and easy to make? Nacho cheese fries are the perfect choice. This recipe brings together the best of both worlds—crunchy fries and rich nacho cheese sauce. It’s a fantastic snack for parties, game nights, or just a casual evening at home.

Simple ingredients and quick steps make it a favorite for many. Whether you’re a cooking newbie or a seasoned chef, you’ll find this recipe easy to follow. Ready to dive into a plate of cheesy, crispy perfection? Let’s get started on making these irresistible nacho cheese fries!

Nacho Cheese Fries Recipe: Irresistibly Crunchy & Cheesy Delight

Credit: www.thereciperebel.com

Ingredients

Creating the perfect nacho cheese fries starts with gathering the right ingredients. From the essential components to optional add-ons, each element plays a crucial role in delivering that mouth-watering flavor. Let’s dive into the ingredients that make these fries truly special.

Essential Ingredients

These are the must-have items for your nacho cheese fries recipe. Each ingredient is key to achieving that irresistible taste.

  • Frozen Fries: Choose your favorite brand or cut of frozen fries.
  • Cheddar Cheese: Shredded cheddar cheese melts perfectly over the fries.
  • Cheese Sauce: A creamy cheese sauce adds a smooth texture.
  • Jalapeños: Sliced jalapeños bring a spicy kick.
  • Ground Beef: Cooked and seasoned ground beef adds a hearty touch.
  • Salt: A pinch of salt enhances the overall flavor.

Optional Add-ons

These add-ons can elevate your nacho cheese fries to the next level. Customize your dish with any of these delicious extras.

  • Sour Cream: A dollop of sour cream adds a tangy contrast.
  • Guacamole: Fresh guacamole brings a creamy, rich flavor.
  • Pico de Gallo: Fresh pico de gallo adds a burst of freshness.
  • Black Beans: Black beans offer a protein-packed addition.
  • Olives: Sliced black olives add a salty bite.
  • Green Onions: Chopped green onions provide a mild onion flavor.

Preparing The Fries

Nacho Cheese Fries Recipe: Preparing the Fries

Making perfect nacho cheese fries starts with preparing the fries. This step is crucial. It ensures the fries are crispy outside and soft inside. Follow these steps for the best results.

Choosing The Right Potatoes

Use Russet potatoes for making fries. They have the right starch content. This makes them crispy. You can also use Yukon Gold potatoes. They work well too. Avoid waxy potatoes. They do not get as crispy.

Type of Potato Crispiness Level
Russet High
Yukon Gold Medium
Waxy (e.g., Red or New Potatoes) Low

Cutting And Seasoning

Wash and peel the potatoes. Cut them into even sticks. This ensures they cook evenly. The ideal size is about 1/4 inch thick.

Season the fries before cooking. Use a mix of salt, pepper, and garlic powder. You can add paprika for extra flavor. Toss the fries in a bowl with the seasoning. Make sure each piece is well-coated.

  • 1/4 inch thick slices
  • Salt
  • Pepper
  • Garlic Powder
  • Optional: Paprika

Tip: Soak the cut fries in water for 30 minutes. This removes excess starch. It helps them get extra crispy. Dry them well before seasoning.

Cooking Methods

Cooking methods play a significant role in the final taste and texture of Nacho Cheese Fries. Whether you prefer baking or frying, each method offers its own unique benefits. Let’s explore these cooking techniques to help you decide which one suits your preferences best.

Baking Vs. Frying

Baking your Nacho Cheese Fries is a healthier option. It uses less oil and produces a lighter, less greasy fry. Preheat your oven to 425°F. Place the fries on a baking sheet lined with parchment paper. Bake for 20-25 minutes, turning once midway through.

Frying, on the other hand, gives a crispier and more traditional texture. Heat oil in a deep fryer or large pot to 350°F. Fry the fries in batches for about 3-4 minutes until golden brown. Drain on paper towels to remove excess oil.

Tips For Extra Crunch

For an extra crunch, start by soaking the potato slices in cold water. This helps remove excess starch. Pat them dry thoroughly before cooking. Another tip is to double fry the fries. Fry them once at a lower temperature to cook through. Then fry again at a higher temperature to crisp up.

Using cornstarch can also add to the crunch. Lightly coat the fries with a mix of cornstarch and seasoning before cooking. This creates a crispy exterior while keeping the inside tender.

Lastly, don’t overcrowd the pan or baking sheet. This ensures even cooking and helps maintain that desired crunch.

Nacho Cheese Fries Recipe: Irresistibly Crunchy & Cheesy Delight

Credit: www.seriouseats.com

Making The Cheese Sauce

Making the perfect cheese sauce is key to delicious Nacho Cheese Fries. The sauce should be creamy, smooth, and packed with flavor. This section will guide you through the process of creating a mouth-watering cheese sauce. Follow these simple steps for the best results.

Ingredients For Cheese Sauce

To make a tasty cheese sauce, you will need the following ingredients:

  • 2 tablespoons of butter
  • 2 tablespoons of all-purpose flour
  • 1 cup of milk
  • 1 cup of shredded cheddar cheese
  • 1/4 teaspoon of salt
  • 1/4 teaspoon of garlic powder
  • 1/4 teaspoon of paprika

Step-by-step Preparation

Let’s start by melting the butter in a saucepan over medium heat. Add the flour and stir continuously for about two minutes. This will remove the raw flour taste.

Slowly pour in the milk while whisking constantly. This helps to avoid lumps in the sauce. Continue to cook and stir until the mixture thickens, which takes about three to five minutes.

Reduce the heat to low. Add the shredded cheddar cheese gradually. Stir until the cheese melts completely and the sauce becomes smooth.

Season the sauce with salt, garlic powder, and paprika. Stir well to combine. Your delicious cheese sauce is now ready to pour over the fries!

Assembling The Nacho Cheese Fries

Assembling the perfect Nacho Cheese Fries can be a fun and delicious task. This section will guide you through the process, ensuring your fries are loaded with flavor. Follow these steps for a tasty treat that will impress your family and friends.

Layering The Fries

Start by spreading a layer of crispy fries on a baking sheet. Make sure the fries are evenly distributed. This ensures every bite has a crunchy texture. Next, drizzle warm nacho cheese sauce over the fries. Cover as many fries as possible with the cheese. This step is crucial for a cheesy and flavorful experience.

Adding Toppings

Once the cheese is on, it’s time for the toppings. Sprinkle cooked ground beef or shredded chicken over the fries. Add diced tomatoes and sliced jalapeños for extra flavor. For a bit of crunch, sprinkle some chopped onions. Finally, top it all off with a dollop of sour cream and a handful of chopped cilantro. These toppings add freshness and a burst of flavor to your dish.

Serving Suggestions

Nacho Cheese Fries are a delicious treat that can be enjoyed in many ways. Serving them with the right accompaniments can enhance your culinary experience. Below are some suggestions to make your dish even more delightful.

Perfect Pairings

These fries pair wonderfully with a variety of dips. Try serving them with guacamole, salsa, or sour cream. For a protein boost, consider adding grilled chicken or beef. A side salad with fresh greens can balance the richness of the cheese.

Beverages also play a crucial role. Iced tea or a light beer can complement the flavors well. For a non-alcoholic option, lemonade or soda works great.

Presentation Ideas

Presentation can make your dish look more appealing. Serve the nacho cheese fries on a large platter. Sprinkle chopped cilantro or green onions on top for a pop of color. If you have a party, consider using small serving bowls or baskets. This makes it easy for guests to grab and go.

Another idea is to layer the fries in a baking dish. Add the cheese and toppings in between the layers. Bake until everything is melted and bubbly. This method makes each bite flavorful.

Remember, the goal is to make the dish look as good as it tastes. A little effort in presentation can go a long way.

Tips And Tricks

Creating the perfect nacho cheese fries can be a fun and satisfying experience. To ensure your fries turn out crispy and flavorful, follow these tips and tricks. These simple tips can make a big difference in your final dish.

Avoiding Soggy Fries

Soggy fries can ruin the taste and texture of your dish. Start by choosing thick-cut fries. They hold up better under the cheese. Pre-bake the fries in the oven. This helps them stay crispy. After baking, let them cool for a few minutes. This step reduces moisture and keeps the fries firm.

Use a wire rack to bake the fries. This allows air to circulate and keeps them from getting soggy. Avoid adding the cheese sauce too early. Add it just before serving. This keeps the fries from absorbing too much moisture.

Customizing Flavors

Customizing the flavors of your nacho cheese fries can make them unique. Start with the cheese sauce. Use different types of cheese for a richer taste. Cheddar, Monterey Jack, and Pepper Jack are great options. Mix and match to find your favorite blend.

Spice up your fries with toppings. Add jalapeños for a kick. Sprinkle chopped onions or cilantro for freshness. Add crumbled bacon for extra crunch. Don’t forget the seasoning. A sprinkle of chili powder or paprika can enhance the flavor.

Experiment with sauces. Drizzle some sour cream or guacamole on top. This adds a creamy texture and extra flavor. Remember, customizing flavors makes your nacho cheese fries stand out. Enjoy the process and make it your own.

Nacho Cheese Fries Recipe: Irresistibly Crunchy & Cheesy Delight

Credit: easybudgetrecipes.com

Frequently Asked Questions

What Are Nacho Cheese Fries?

Nacho cheese fries are a delicious combination of crispy fries topped with melted cheese, jalapenos, and other toppings.

How Do You Make Nacho Cheese Fries?

Start with crispy fries, then add melted cheese, jalapenos, and any other preferred toppings.

Can I Use Store-bought Fries?

Yes, you can use store-bought fries for convenience. Just bake or fry them as per package instructions.

What Toppings Go Well With Nacho Cheese Fries?

Toppings like jalapenos, sour cream, green onions, and diced tomatoes complement nacho cheese fries perfectly.

Conclusion

These Nacho Cheese Fries are a delicious and easy treat. Perfect for sharing with friends and family. Crispy fries paired with gooey cheese create a delightful snack. Try them at your next gathering. Everyone will love this tasty dish. Enjoy the simple pleasure of homemade nacho cheese fries.

Happy cooking and happy eating!

Vegetable Wellington Recipes: Delicious and Nutritious Options

Vegetable Wellington Recipes are perfect for both special occasions and everyday dinners. They combine rich flavors and beautiful presentation in one dish.

Are you looking to impress your guests with a delicious and elegant meal? Vegetable Wellington might be the answer. This savory pastry dish, filled with a variety of vegetables, offers a delightful twist on the classic beef Wellington. Imagine a golden, flaky crust enveloping a rich, flavorful vegetable filling.

It’s not only a feast for the eyes but also a joy for the taste buds. Plus, it’s a great way to include more vegetables in your diet. Whether you’re a seasoned cook or a beginner, these Vegetable Wellington recipes will guide you to culinary success. Dive in and discover how to create this stunning dish.

Vegetable Wellington Recipes: Delicious and Nutritious Options

Credit: www.seriouseats.com

Introduction To Vegetable Wellington

Introduction to Vegetable Wellington

Vegetable Wellington is a delightful dish that brings together a variety of flavors. It is a vegetarian twist on the traditional Beef Wellington. This dish is perfect for special occasions or a hearty family meal. The combination of vegetables wrapped in a flaky puff pastry makes it a crowd-pleaser.

History And Origin

The traditional Beef Wellington has a rich history dating back to the 19th century. It was named after the Duke of Wellington, Arthur Wellesley. The dish gained popularity in England for its elegant presentation and exquisite taste. The vegetarian version, Vegetable Wellington, emerged as a popular alternative in the late 20th century. It catered to the growing demand for plant-based meals.

Why Choose Vegetable Wellington

There are many reasons to choose Vegetable Wellington for your next meal. Here are a few:

  • Healthy: Packed with a variety of vegetables, it is rich in vitamins and nutrients.
  • Flavorful: The combination of different vegetables and herbs creates a unique taste.
  • Versatile: You can customize it with your favorite vegetables and seasonings.
  • Impressive: Its beautiful presentation makes it perfect for special occasions.

In conclusion, Vegetable Wellington is a delicious and healthy choice. It is easy to make and sure to impress your guests. Try it for your next meal and enjoy the burst of flavors!

Classic Vegetable Wellington

The Classic Vegetable Wellington is a delightful dish. It combines a rich medley of vegetables with a flaky pastry. This recipe is perfect for special occasions or a cozy dinner at home. The flavorful filling and golden crust make it a crowd-pleaser. Follow the steps below to create this delicious dish.

Ingredients Needed

  • 1 large eggplant
  • 2 zucchinis
  • 1 red bell pepper
  • 1 yellow bell pepper
  • 2 tablespoons olive oil
  • 1 teaspoon salt
  • 1 teaspoon black pepper
  • 4 cloves garlic, minced
  • 1 onion, finely chopped
  • 1 cup spinach leaves
  • 2 tablespoons balsamic vinegar
  • 1 sheet puff pastry, thawed
  • 1 egg, beaten

Step-by-step Preparation

  1. Preheat your oven to 400°F (200°C).
  2. Slice the eggplant, zucchinis, and bell peppers.
  3. Place the vegetables on a baking sheet.
  4. Drizzle with olive oil, salt, and black pepper.
  5. Roast the vegetables for 20 minutes.
  6. In a pan, sauté the garlic and onion until soft.
  7. Add the spinach and cook until wilted.
  8. Mix in the balsamic vinegar and roasted vegetables.
  9. Roll out the puff pastry on a floured surface.
  10. Place the vegetable mixture in the center of the pastry.
  11. Fold the pastry over the filling, sealing the edges.
  12. Brush the pastry with the beaten egg.
  13. Bake for 30-35 minutes until golden brown.
  14. Let it cool for a few minutes before slicing.

Mushroom And Spinach Wellington

The Mushroom and Spinach Wellington is a delightful twist on the classic dish. It features earthy mushrooms and vibrant spinach, wrapped in a flaky puff pastry. This hearty dish is perfect for vegetarians and meat-lovers alike. Below, you’ll find a detailed guide on the flavor profile and cooking instructions.

Flavor Profile

The Mushroom and Spinach Wellington offers a rich, earthy flavor. The mushrooms bring a deep umami taste, while the spinach adds a fresh and slightly bitter contrast. The puff pastry encases these ingredients, adding a buttery and flaky texture. This combination creates a balanced and satisfying dish.

Cooking Instructions

Follow these simple steps to create your own Mushroom and Spinach Wellington:

  1. Prepare the mushrooms: Clean and slice 2 cups of mushrooms. Sauté them in a pan with 2 tablespoons of olive oil until tender.
  2. Cook the spinach: Add 4 cups of fresh spinach to the pan. Cook until wilted and any excess moisture evaporates. Season with salt and pepper to taste.
  3. Prepare the pastry: Roll out a sheet of puff pastry on a floured surface. Ensure it is large enough to enclose the filling.
  4. Assemble the Wellington: Place the mushroom and spinach mixture in the center of the pastry. Fold the pastry over the filling, sealing the edges. Brush the top with a beaten egg for a golden finish.
  5. Bake: Preheat your oven to 375°F (190°C). Place the Wellington on a baking sheet and bake for 25-30 minutes, or until golden brown.

Enjoy your homemade Mushroom and Spinach Wellington with a side salad or roasted vegetables for a complete meal.

Lentil And Root Vegetable Wellington

The Lentil and Root Vegetable Wellington is a hearty and satisfying dish. It combines earthy lentils and sweet root vegetables wrapped in flaky pastry. This vegan-friendly recipe is perfect for special occasions or a Sunday dinner. It offers a nutritious and delicious alternative to traditional meat Wellingtons.

Nutritional Benefits

This dish is packed with nutrients that contribute to a balanced diet. Lentils provide a rich source of protein and fiber. Root vegetables like carrots, parsnips, and sweet potatoes are high in vitamins and minerals. They are especially good sources of vitamin A and potassium.

Ingredient Key Nutrients
Lentils Protein, Fiber, Iron
Carrots Vitamin A, Fiber
Parsnips Vitamin C, Potassium
Sweet Potatoes Vitamin A, Fiber

In addition to these key nutrients, the dish is low in saturated fat. This makes it a healthier option compared to meat-based dishes. It is also rich in antioxidants, which help fight inflammation and support overall health.

Recipe Guide

Here is a simple guide to making your own Lentil and Root Vegetable Wellington:

  1. Preheat the oven to 400°F (200°C).
  2. Cook 1 cup of lentils in 2 cups of water until tender. Drain and set aside.
  3. Chop 2 carrots, 1 parsnip, and 1 sweet potato into small cubes.
  4. In a large pan, sauté the vegetables in olive oil until soft. Season with salt, pepper, and thyme.
  5. Mix the cooked lentils with the sautéed vegetables.
  6. Roll out a sheet of puff pastry on a floured surface.
  7. Place the lentil and vegetable mixture in the center of the pastry.
  8. Fold the pastry over the mixture and seal the edges with water.
  9. Brush the top with a little olive oil for a golden finish.
  10. Bake for 30-35 minutes until the pastry is golden brown.

Let the Wellington cool slightly before slicing and serving. Enjoy this nutritious and delicious meal with a side of green salad or steamed vegetables.

Vegan-friendly Wellington

Vegetable Wellington is a delightful dish perfect for any occasion. The vegan-friendly version swaps out animal products for plant-based ingredients. This makes it suitable for vegans and those looking to reduce meat intake. The result is a tasty, wholesome meal.

Substitute Ingredients

Traditional Wellington recipes use meat and dairy. For a vegan-friendly Wellington, choose plant-based substitutes. Use mushrooms or lentils instead of meat. They offer a rich, hearty texture. Replace butter with vegan margarine. It gives a similar flaky crust.

Substitute dairy milk with almond or soy milk. These alternatives work well for brushing the pastry. Nutritional yeast can replace cheese. It adds a cheesy flavor without any dairy.

Vegan Cooking Tips

Cook vegetables thoroughly to enhance their flavor. Roasting brings out their natural sweetness. Ensure the pastry is sealed well. This keeps the fillings inside while baking. Pre-cook the filling to remove extra moisture. This prevents the pastry from becoming soggy.

Use a sharp knife to cut the pastry. This helps keep its shape. Brush the top with plant-based milk for a golden finish. Let the Wellington cool slightly before slicing. This helps it hold together better.

Vegetable Wellington Recipes: Delicious and Nutritious Options

Credit: www.lazycatkitchen.com

Gluten-free Wellington

Discover delicious gluten-free Vegetable Wellington recipes, perfect for a hearty and healthy meal. Enjoy layers of flavorful vegetables wrapped in a crispy, gluten-free pastry. Ideal for special occasions or everyday dinners.

Vegetable Wellington is a classic dish, but making it gluten-free can be tricky. Gluten-free Wellington offers a delicious alternative for those with dietary restrictions. You can create a stunning centerpiece for any meal by using gluten-free ingredients.

Alternative Flours

Choosing the right flour is crucial for a gluten-free Wellington. Almond flour is a great option. It adds a nutty flavor and helps bind ingredients. Rice flour is another choice. It’s light and creates a nice, crispy texture. Buckwheat flour, despite its name, is gluten-free. It has a rich, earthy taste. Experiment with these flours to find your perfect blend.

Baking Techniques

Baking gluten-free Wellington requires special techniques. Start by preheating your oven. This ensures even cooking. Chill your dough before rolling it out. This step prevents sticking and tearing. Use parchment paper. It helps move the dough without breaking. Bake at a consistent temperature. This avoids undercooking or overcooking. Keep an eye on the crust. Gluten-free dough can brown quickly. Adjust your baking time as needed.

Serving Suggestions

Vegetable Wellington is a delicious and impressive dish. To elevate your meal, consider these serving suggestions. These ideas will help you create a well-rounded and memorable dining experience.

Side Dishes

Pair your Vegetable Wellington with complementary side dishes for a balanced meal. Here are some ideas:

  • Roasted Vegetables: Carrots, Brussels sprouts, or parsnips add color and flavor.
  • Mashed Potatoes: Creamy and smooth, they are a perfect match.
  • Green Salad: A fresh, crisp salad with a light vinaigrette.
  • Grilled Asparagus: Tender and slightly charred, they complement the Wellington well.

These sides enhance the flavors and textures of the main dish. They provide a variety of tastes and colors.

Presentation Ideas

Presentation is key to making your Vegetable Wellington stand out. Here are some tips:

  • Plating: Use white plates to make the colors pop.
  • Garnishes: Fresh herbs like parsley or thyme add a touch of elegance.
  • Sauces: Drizzle a balsamic reduction or a light gravy around the Wellington.
  • Slices: Cut the Wellington into even slices for a neat presentation.

These ideas can transform your meal from ordinary to extraordinary. They add visual appeal and make the dining experience special.

Side Dish Description
Roasted Vegetables Carrots, Brussels sprouts, or parsnips, roasted to perfection.
Mashed Potatoes Creamy and smooth, a classic side dish.
Green Salad Fresh, crisp greens with a light vinaigrette.
Grilled Asparagus Tender and slightly charred, perfect for pairing.

These serving suggestions ensure your Vegetable Wellington is the star of the meal. They provide balance, visual appeal, and an unforgettable dining experience.

Storing And Reheating

Keep Vegetable Wellington fresh by storing it in the refrigerator. Reheat slices in the oven for a crispy crust.

Storing and reheating your Vegetable Wellington correctly ensures it tastes great every time. Proper storage keeps it fresh, while the right reheating method maintains its texture.

Best Practices

Store your Vegetable Wellington in an airtight container. This prevents it from drying out. Place it in the refrigerator if you plan to eat it within three days. For longer storage, freeze it. Wrap it in plastic wrap, then foil.

Maintaining Freshness

To reheat, preheat your oven to 350°F. Remove the Wellington from the fridge or freezer. Let it come to room temperature if frozen. Place it on a baking sheet. Cover it with foil to prevent burning. Heat for 20-25 minutes. Check if it’s warmed through. Enjoy your fresh-tasting Vegetable Wellington! “`
Vegetable Wellington Recipes: Delicious and Nutritious Options

Credit: www.connoisseurusveg.com

Frequently Asked Questions

What Is A Vegetable Wellington?

A Vegetable Wellington is a savory pastry dish. It features a variety of seasoned vegetables. The vegetables are wrapped in puff pastry.

How To Make Vegetable Wellington?

To make Vegetable Wellington, prepare seasoned vegetables. Wrap them in puff pastry. Bake until golden and crispy. Serve hot.

Can I Freeze Vegetable Wellington?

Yes, you can freeze Vegetable Wellington. Wrap it tightly in plastic wrap. Store it in an airtight container. Reheat before serving.

What Vegetables Are Best For Wellington?

Best vegetables for Wellington are mushrooms, spinach, carrots, and bell peppers. They add flavor and texture. Use fresh and well-seasoned vegetables.

Conclusion

Vegetable Wellington recipes offer a delicious, hearty meal option. They are perfect for family dinners or special occasions. Easy to make and full of flavor, they impress everyone. Try different vegetables to find your favorite combination. Enjoy the rich, savory taste with every bite.

Start cooking today and bring joy to your table. Happy cooking!

Coconut Mocha Coffee Recipe: Indulge in a Tropical Delight

Coffee lovers are always on the lookout for new flavors. Coconut mocha coffee is a delicious twist on your usual cup.

This recipe combines the rich taste of chocolate with the tropical hint of coconut, creating a drink that’s both sweet and refreshing. Imagine starting your day with a coffee that feels like a mini-vacation. This coconut mocha coffee recipe is perfect for anyone who wants to add a bit of excitement to their morning routine.

Whether you are a seasoned barista or a coffee newbie, this simple recipe is easy to follow. It’s a great way to impress guests or treat yourself to something special. Ready to elevate your coffee game? Let’s dive into the world of coconut mocha coffee!

Coconut Mocha Coffee Recipe: Indulge in a Tropical Delight

Credit: www.spicesinmydna.com

Introduction To Coconut Mocha Coffee

Coconut Mocha Coffee is a delightful blend of tropical coconut and rich chocolate flavors. This unique combination creates a luxurious and refreshing coffee experience. Perfect for those who love both coconut and mocha.

What Is Coconut Mocha Coffee?

Coconut Mocha Coffee is a delicious drink that combines the flavors of coconut and chocolate with coffee. The result is a creamy, sweet, and slightly nutty beverage. It is perfect for a morning treat or an afternoon pick-me-up.

This coffee can be made with various ingredients, including:

  • Coconut milk or coconut cream
  • Chocolate syrup or cocoa powder
  • Freshly brewed coffee or espresso
  • Sweeteners like sugar or honey (optional)
  • Whipped cream for topping (optional)

Origins And Popularity

The origins of Coconut Mocha Coffee are not well-documented. However, the combination of coconut and coffee has been popular in tropical regions for many years. Both ingredients are readily available in these areas, making it a natural pairing.

In recent years, this drink has gained popularity worldwide. People love the unique taste and the tropical twist it brings to their coffee routine. It’s also a popular choice at many coffee shops and cafes.

Here is a quick table to summarize the key points:

Aspect Details
Primary Ingredients Coconut milk, chocolate, coffee
Optional Ingredients Sweeteners, whipped cream
Popularity Global, especially in tropical regions

Enjoy the refreshing taste of Coconut Mocha Coffee and bring a bit of the tropics to your day.

Ingredients Needed

Creating a delightful Coconut Mocha Coffee at home requires a few essential ingredients. These ingredients ensure a rich, flavorful, and creamy coffee experience. Below, you will find a detailed list of both basic and optional ingredients.

Basic Ingredients

  • Freshly Brewed Coffee: Use your favorite coffee beans for the best flavor.
  • Coconut Milk: Adds a creamy and tropical touch.
  • Chocolate Syrup: Provides a sweet and rich chocolate flavor.
  • Sugar: Adjust to taste for sweetness.
  • Ice: If you prefer an iced version.

Optional Additions

  • Whipped Cream: Adds a luxurious texture.
  • Coconut Flakes: For an extra coconutty crunch.
  • Vanilla Extract: Enhances the overall flavor profile.
  • Cinnamon: A pinch adds warmth and spice.
  • Espresso Shot: Boosts the coffee’s strength.

These ingredients together create a delightful balance of flavors. Customize your Coconut Mocha Coffee to your liking with these simple additions. Enjoy the rich, tropical taste right at home.

Choosing The Right Coffee

Creating the perfect Coconut Mocha Coffee starts with choosing the right coffee. The quality of your coffee beans and the brewing method you use play crucial roles in the final taste. Let’s explore these aspects in detail.

Best Coffee Beans

Selecting the best coffee beans is essential. Opt for high-quality, freshly roasted beans to get the best flavor. Here are a few tips:

  • Arabica beans: Known for their smooth and rich flavor.
  • Robusta beans: These have a stronger, more bitter taste.
  • Medium roast: Balances flavor and acidity well.
  • Dark roast: Adds a robust, smoky flavor.

Brewing Methods

The brewing method you choose can affect the taste of your Coconut Mocha Coffee. Here are a few popular methods:

Method Description
French Press Produces a rich, full-bodied coffee.
Pour Over Offers a clean, crisp taste.
Espresso Machine Creates a strong, concentrated coffee.

Choose the method that best suits your taste preferences. Each method has its unique characteristics.

Selecting The Coconut Milk

Selecting the right coconut milk can elevate your Coconut Mocha Coffee. The texture, flavor, and creaminess of your coffee will depend on it. Understanding the different types of coconut milk and their benefits can help you make the best choice.

Types Of Coconut Milk

Coconut milk comes in various forms. The most common types are canned coconut milk, coconut milk beverages, and coconut cream. Canned coconut milk is thick and rich. It’s perfect for adding a creamy texture to your coffee. Coconut milk beverages are lighter and usually found in cartons. They work well for a smoother, lighter coffee experience. Coconut cream is thicker than regular coconut milk. It adds an extra creamy and luxurious feel to your coffee.

Benefits Of Coconut Milk

Coconut milk offers many health benefits. It’s a good source of healthy fats. These fats can help you stay full longer. Coconut milk also contains vitamins and minerals. These include vitamin C, E, B1, B3, B5, and B6. Its antioxidants can support your immune system. Additionally, coconut milk is lactose-free. It’s a great option for those who are lactose intolerant. Choosing coconut milk can make your Coconut Mocha Coffee both delicious and nutritious.

Preparing The Mocha Base

Preparing the perfect mocha base is essential for a delicious coconut mocha coffee. The right balance of flavors creates a rich and satisfying drink. This section will guide you through making the chocolate syrup and choosing alternative sweeteners.

Making The Chocolate Syrup

Start with high-quality cocoa powder. Mix it with sugar and water in a saucepan. Stir the mixture over low heat until smooth. Avoid boiling to maintain the chocolate’s integrity. Once thickened, remove from heat. Let it cool before using. This syrup forms the heart of your mocha base.

Alternative Sweeteners

Traditional sugar isn’t the only option. Honey adds a floral sweetness. Agave syrup offers a mild taste. Stevia is a great choice for a low-calorie option. Each sweetener brings a unique flavor. Experiment to find your favorite. Adjust the amount to taste. Enjoy your custom mocha base.

Coconut Mocha Coffee Recipe: Indulge in a Tropical Delight

Credit: www.chocolatemoosey.com

Combining Ingredients

Combining ingredients to create the perfect Coconut Mocha Coffee is an art. The right blend of coffee, coconut milk, and chocolate syrup makes this drink irresistible. Let’s explore how to mix these ingredients for a delightful cup.

Mixing Coffee And Coconut Milk

Start with a cup of freshly brewed coffee. The coffee should be hot and strong. Pour it into a large mug or a bowl. Next, add coconut milk. Use about half a cup for a rich and creamy texture. Stir the mixture well to combine the coffee and coconut milk.

If you prefer a smoother drink, use an electric frother. Froth the mixture until it becomes light and airy. This step enhances the texture of your coffee. The unique flavor of coconut milk pairs perfectly with the bold taste of coffee.

Adding Chocolate Syrup

Now, it’s time to add the chocolate syrup. Use two tablespoons of chocolate syrup for a sweet and decadent touch. Pour the syrup into the coffee and coconut milk mixture. Stir thoroughly to ensure the syrup dissolves completely.

For an extra touch, drizzle some chocolate syrup on top. This not only adds flavor but also makes the drink look appealing. You can adjust the amount of syrup based on your preference for sweetness.

Here is a simple table to summarize the ingredients and their quantities:

Ingredient Quantity
Coffee 1 cup
Coconut Milk 1/2 cup
Chocolate Syrup 2 tablespoons

Enjoy your homemade Coconut Mocha Coffee by following these simple steps. Each ingredient plays a crucial role in creating a delightful and balanced flavor. Experiment with the quantities to find your perfect blend.

Serving Suggestions

Serving your Coconut Mocha Coffee perfectly can elevate the entire experience. This section provides some amazing serving suggestions to enhance both presentation and taste. Let’s dive into some creative ideas to make your Coconut Mocha Coffee a treat for all senses.

Garnishing Ideas

Garnishing your Coconut Mocha Coffee adds a delightful touch. Here are some simple yet elegant ideas:

  • Whipped cream: A classic choice for a creamy finish.
  • Shredded coconut: Sprinkle some on top for added flavor and texture.
  • Chocolate shavings: Use a grater to add some rich chocolate goodness.
  • Cinnamon stick: Place one in the cup for a warm, spicy aroma.
  • Cocoa powder: Lightly dust the top for a beautiful presentation.

Perfect Pairings

Pairing your Coconut Mocha Coffee with the right foods can make your coffee time even more enjoyable. Here are some perfect pairings:

Food Description
Chocolate croissant Rich and buttery, complements the mocha flavor.
Almond biscotti Crunchy and nutty, pairs well with the coconut.
Banana bread Moist and sweet, enhances the coffee’s creaminess.
Fruit salad Fresh and light, balances the coffee’s rich taste.
Vanilla ice cream Cold and creamy, a delightful contrast to hot coffee.
Coconut Mocha Coffee Recipe: Indulge in a Tropical Delight

Credit: thekitchenprepblog.com

Health Benefits

Coconut Mocha Coffee is not just a delightful drink. It offers several health benefits as well. By combining coffee, coconut milk, and cocoa, you create a delicious beverage that can boost your health in many ways. Below, we will explore the nutritional information and potential health benefits of this tasty coffee recipe.

Nutritional Information

Understanding the nutritional content of your Coconut Mocha Coffee can help you make informed decisions about your diet. Here’s a simple breakdown:

Ingredient Calories Protein Fats Carbohydrates
1 cup Coffee 2 0g 0g 0g
1/2 cup Coconut Milk 230 2.3g 24g 6g
1 tbsp Cocoa Powder 12 1g 0.7g 3g
1 tsp Sugar 16 0g 0g 4g

Potential Health Benefits

Coconut Mocha Coffee combines ingredients that each offer unique health benefits. Let’s break them down:

  • Boosts Energy: The caffeine in coffee helps increase alertness and energy levels.
  • Rich in Antioxidants: Cocoa powder contains flavonoids, which are powerful antioxidants.
  • Supports Heart Health: Coconut milk contains lauric acid that promotes good cholesterol levels.
  • Improves Digestion: Coconut milk can help improve digestion and soothe the gut.
  • Enhances Mood: Cocoa powder can boost serotonin levels, improving mood.

In summary, a cup of Coconut Mocha Coffee can provide a delightful blend of flavors and health benefits. Enjoy it as a part of your daily routine for a tasty and beneficial treat.

Variations And Customizations

Coconut Mocha Coffee is a delightful treat. You can try different variations to suit your taste. Customizing your coffee can make each cup unique and enjoyable. Let’s explore some exciting variations.

Iced Coconut Mocha

For a refreshing twist, try Iced Coconut Mocha. Start by brewing a strong cup of coffee. Let it cool to room temperature. Mix in coconut milk and chocolate syrup. Pour the mix over ice cubes in a tall glass. Stir well. Add whipped cream on top if desired.

This cold version is perfect for hot days. The blend of coconut and chocolate flavors is refreshing. You can also add a shot of espresso for extra kick. Experiment with the ratios to find your perfect balance.

Spiced Coconut Mocha

Spice up your coffee with a Spiced Coconut Mocha. Brew your coffee as usual. Add coconut milk and chocolate syrup. Next, sprinkle in some cinnamon and nutmeg. Stir the mixture well.

Top with whipped cream and a dash of cinnamon. The spices add warmth and depth to the drink. This variation is great for cozy mornings or chilly evenings. Adjust the spice levels to your liking.

Frequently Asked Questions

What Are The Ingredients For Coconut Mocha Coffee?

To make Coconut Mocha Coffee, you’ll need coconut milk, brewed coffee, cocoa powder, sugar, and vanilla extract.

How Do You Prepare Coconut Mocha Coffee?

Mix brewed coffee, coconut milk, cocoa powder, sugar, and vanilla extract. Stir well and serve hot.

Can I Use A Dairy-free Alternative?

Yes, you can use almond milk or soy milk as a dairy-free alternative for this recipe.

Is Coconut Mocha Coffee Healthy?

Coconut Mocha Coffee can be healthy if you use unsweetened coconut milk and limit the sugar added.

Conclusion

Enjoy the delightful blend of coconut and mocha in your coffee. This recipe is easy to make and perfect for any time. Share it with friends or savor it alone. The rich flavors will bring joy to your mornings. Try it today, and experience the tropical twist.

Your taste buds will thank you. Happy sipping!

Easy Pecan Candy Recipes: Quick and Delicious Treats

Craving a sweet treat that’s easy to make? Pecan candy recipes are perfect for you.

These delightful sweets combine rich flavors with simple ingredients. Pecan candy is a favorite dessert for many, offering a satisfying crunch and sweetness in every bite. Whether you’re a seasoned cook or a beginner in the kitchen, these recipes are simple to follow and sure to impress.

Imagine the joy of biting into a piece of homemade pecan candy, with its perfect balance of nutty and sugary goodness. From classic pralines to chocolate-covered pecans, there’s a recipe here for everyone. Ready to get started? Let’s dive into the world of easy pecan candy recipes and discover your new favorite treat.

Easy Pecan Candy Recipes: Quick and Delicious Treats

Credit: iheartrecipes.com

Introduction To Pecan Candy

Pecan candy is a delightful treat. It is perfect for any occasion. These candies boast a rich, nutty flavor. The sweetness complements the crunch of pecans. Whether for a holiday or a simple snack, pecan candy is a favorite. Here, we explore the world of pecan candy recipes.

Why Pecan Candy?

Pecan candy is a crowd-pleaser. The unique flavor of pecans shines in these treats. They provide a balance of sweetness and nuttiness. This makes them a hit with everyone. Pecan candy is also versatile. It can be made in different ways. You can add chocolate, caramel, or spices. This allows for endless variations.

Benefits Of Homemade Treats

Making pecan candy at home has many benefits. Firstly, you control the ingredients. This means no preservatives or artificial flavors. You can use fresh, high-quality nuts. Secondly, homemade treats often taste better. They have a fresh, homemade flavor. Lastly, making candy can be a fun activity. It is a perfect project for families or friends.

Classic Pecan Pralines

The Classic Pecan Pralines are a beloved Southern treat. These delightful candies combine the rich flavors of caramel and pecans. They are perfect for any occasion and easy to make at home. Below, you’ll find everything you need to create these sweet treats.

Ingredients Needed

  • 2 cups of granulated sugar
  • 1 cup of packed brown sugar
  • 1/2 cup of evaporated milk
  • 1/2 cup of heavy cream
  • 4 tablespoons of unsalted butter
  • 2 cups of pecan halves
  • 1 teaspoon of vanilla extract
  • 1/4 teaspoon of salt

Step-by-step Instructions

  1. Prepare a baking sheet with parchment paper. Set aside.
  2. In a large saucepan, combine both sugars, evaporated milk, and cream.
  3. Cook over medium heat, stirring constantly until the sugars dissolve.
  4. Add the butter and continue to cook until the mixture reaches 238°F on a candy thermometer.
  5. Remove the saucepan from heat. Stir in the vanilla extract and salt.
  6. Add the pecan halves and stir until the mixture thickens slightly.
  7. Quickly drop spoonfuls of the mixture onto the prepared baking sheet.
  8. Allow the pralines to cool completely before serving.

Enjoy your homemade Classic Pecan Pralines with family and friends. These candies are sure to be a hit!

Simple Pecan Turtles

Craving something sweet and nutty? Simple Pecan Turtles are the perfect treat. Combining pecans, caramel, and chocolate, this candy is easy to make. It is ideal for any occasion. Let’s dive into the process of creating this delightful snack.

Gathering Ingredients

First, gather all the necessary ingredients. You need:

  • 1 cup of pecan halves
  • 1 cup of soft caramels
  • 1 cup of semi-sweet chocolate chips
  • 1 tablespoon of vegetable oil

Ensure you have these items ready before starting. This helps make the process smooth and enjoyable.

Preparation Process

Start by preheating your oven to 350°F (175°C). Place the pecans on a baking sheet. Toast them in the oven for about 5 minutes. This enhances their flavor.

Next, melt the caramels in a saucepan over low heat. Stir continuously until smooth. Remove from heat. Let it cool for a minute.

Arrange the toasted pecans in clusters on a parchment-lined baking sheet. Spoon the melted caramel over each cluster. Allow the caramel to set for a few minutes.

Melt the chocolate chips with vegetable oil in a microwave-safe bowl. Heat in 30-second intervals, stirring each time. Continue until the chocolate is smooth.

Drizzle the melted chocolate over the caramel-pecan clusters. Let them cool until the chocolate hardens. Simple Pecan Turtles are ready to enjoy!

Quick Pecan Brittle

Quick Pecan Brittle is a delightful treat that you can whip up fast. It’s crunchy, sweet, and perfect for satisfying your sweet tooth. This easy recipe brings a classic candy to your kitchen with minimal effort.

Essential Ingredients

To make Quick Pecan Brittle, you need a few simple ingredients. Here’s what you’ll need:

  • 1 cup of sugar
  • 1/2 cup of light corn syrup
  • 1 cup of pecan halves
  • 1/4 cup of water
  • 1/4 teaspoon of salt
  • 1 tablespoon of butter
  • 1 teaspoon of vanilla extract
  • 1 teaspoon of baking soda

Cooking Directions

First, prepare a baking sheet by greasing it well. This prevents sticking.

Next, combine the sugar, corn syrup, water, and salt in a saucepan. Cook over medium heat. Stir constantly until the mixture boils.

Once boiling, add the pecan halves. Continue cooking without stirring. Watch until the mixture reaches a golden brown color.

Remove from heat. Quickly stir in the butter, vanilla extract, and baking soda. The mixture will foam.

Pour the hot mixture onto the prepared baking sheet. Spread it out thinly with a spatula.

Let it cool completely. Once cool, break the brittle into pieces.

Homemade Pecan Divinity

Homemade Pecan Divinity is a classic Southern candy. It has a fluffy, meringue-like texture with crunchy pecans throughout. This sweet treat is perfect for holidays or special occasions. It’s also a great way to impress your guests with a delightful homemade dessert.

Required Ingredients

To make Pecan Divinity, you will need the following ingredients:

  • 2 ½ cups of granulated sugar
  • ½ cup of light corn syrup
  • ½ cup of water
  • 2 egg whites
  • 1 teaspoon of vanilla extract
  • 1 cup of chopped pecans
  • A pinch of salt

How To Make It

Follow these simple steps to make Pecan Divinity:

  1. In a heavy saucepan, combine the sugar, corn syrup, water, and salt.
  2. Cook over medium heat, stirring until the sugar dissolves.
  3. Once dissolved, stop stirring and let it boil until it reaches 260°F on a candy thermometer.
  4. While the syrup is boiling, beat the egg whites in a large bowl until stiff peaks form.
  5. Once the syrup reaches 260°F, slowly pour it into the egg whites while beating constantly.
  6. Continue to beat the mixture until it holds its shape and becomes less glossy.
  7. Fold in the vanilla extract and chopped pecans.
  8. Drop spoonfuls of the mixture onto wax paper and let them cool completely.

Enjoy your delicious homemade Pecan Divinity with friends and family!

Chocolate-covered Pecans

Chocolate-covered pecans are a delightful treat. They combine the richness of chocolate with the crunch of pecans. Perfect for any occasion, these sweet bites are easy to make. Whether for a party or a quick snack, they are sure to impress.

Ingredients List

  • 1 cup of pecan halves
  • 1 cup of dark chocolate chips
  • 1 tablespoon of coconut oil
  • Pinch of sea salt (optional)

Easy Preparation Steps

  1. Prepare a baking sheet. Line it with parchment paper.
  2. Melt the chocolate. Use a microwave or double boiler.
  3. Add coconut oil. Stir until smooth.
  4. Dip the pecans. Coat each pecan in melted chocolate.
  5. Place on baking sheet. Arrange in a single layer.
  6. Sprinkle sea salt. This step is optional but adds flavor.
  7. Refrigerate. Chill for 30 minutes until chocolate sets.

Your chocolate-covered pecans are ready to enjoy. Store them in an airtight container. They stay fresh for up to a week.

Caramel Pecan Clusters

Caramel Pecan Clusters are a delightful treat. They combine rich caramel, crunchy pecans, and smooth chocolate. This sweet and salty snack is perfect for any occasion. It’s easy to make and sure to impress your friends and family.

What You Need

To make Caramel Pecan Clusters, gather these ingredients:

  • 2 cups of pecan halves
  • 1 cup of caramel candies
  • 2 tablespoons of heavy cream
  • 1 cup of semisweet chocolate chips
  • 1 tablespoon of vegetable oil

Making The Clusters

First, preheat your oven to 350°F (175°C). Spread the pecan halves on a baking sheet. Toast them in the oven for 8-10 minutes. Let them cool.

Next, melt the caramel candies in a microwave-safe bowl. Add the heavy cream. Microwave in 30-second intervals. Stir until smooth.

Arrange the toasted pecans in small clusters on a parchment-lined baking sheet. Spoon melted caramel over each cluster.

In another bowl, melt the chocolate chips with vegetable oil. Microwave in 30-second intervals. Stir until smooth.

Finally, spoon the melted chocolate over the caramel pecan clusters. Let them set at room temperature or refrigerate them for quicker results.

Storing And Sharing

Making pecan candy at home is fun and rewarding. But knowing how to store and share your sweet creations is essential. This ensures your candy stays fresh and delicious. Let’s dive into the best practices for storing and creative ideas for sharing your homemade pecan candy.

Best Storage Practices

Proper storage keeps your pecan candy fresh and tasty. Here are some best practices:

  • Airtight Containers: Use airtight containers to keep moisture out. This prevents your candy from becoming sticky or hard.
  • Cool, Dry Place: Store your candy in a cool, dry place. Avoid direct sunlight and heat sources.
  • Wax Paper Layers: Place wax paper between layers of candy. This prevents them from sticking together.
  • Refrigeration: If you live in a warm climate, consider refrigerating the candy. Ensure it’s in an airtight container to avoid moisture absorption.
  • Freezing: For long-term storage, freeze your pecan candy. Wrap each piece in wax paper and place in a freezer-safe bag. Thaw at room temperature before enjoying.

Gift Ideas

Homemade pecan candy makes a wonderful gift. Here are some creative ideas:

  1. Decorative Jars: Use small mason jars. Fill them with pecan candy and tie with a ribbon. Add a handwritten label for a personal touch.
  2. Gift Boxes: Purchase decorative gift boxes. Line them with tissue paper and arrange the candy neatly inside.
  3. Holiday Themes: For holidays, use themed bags or boxes. Add a festive touch with seasonal decorations.
  4. Personalized Tins: Buy metal tins and personalize them with stickers or paint. These make reusable and charming gift containers.
  5. Gift Baskets: Create a gift basket with assorted treats. Include your homemade pecan candy along with other goodies like chocolates and cookies.

These ideas will make your gifts memorable and show how much you care. Enjoy making, storing, and sharing your delicious homemade pecan candy!

Tips For Perfect Pecan Candy

Creating the perfect pecan candy can be an enjoyable culinary adventure. With the right techniques, you can produce mouth-watering treats that everyone will love. Below are some tips to ensure your pecan candy turns out perfectly every time.

Common Mistakes To Avoid

Even simple recipes can go wrong. Here are some mistakes to avoid:

  • Overcooking the syrup: This can make the candy too hard.
  • Using low-quality pecans: Fresh, high-quality pecans are key.
  • Skipping the cooling step: Let the candy cool completely to set properly.

Expert Tips

Take your pecan candy to the next level with these expert tips:

  1. Use a candy thermometer: This ensures the syrup reaches the right temperature.
  2. Roast the pecans: Roasting enhances their natural flavor.
  3. Butter the pan: Buttering prevents the candy from sticking.
  4. Stir constantly: Constant stirring prevents burning and ensures even cooking.
  5. Use parchment paper: This makes removing the candy easier.

By following these tips, your pecan candy will be perfect every time.

Easy Pecan Candy Recipes: Quick and Delicious Treats

Credit: www.momlovesbaking.com

Easy Pecan Candy Recipes: Quick and Delicious Treats

Credit: rosebakes.com

Frequently Asked Questions

What Are Pecan Candies?

Pecan candies are sweet treats made using pecans as the main ingredient. They often include sugar, butter, and other flavorings.

How To Make Simple Pecan Candies?

To make simple pecan candies, combine pecans, sugar, and butter in a pan. Cook until caramelized.

Are Pecan Candies Healthy?

Pecan candies are delicious but high in sugar and fat. Enjoy them in moderation for a balanced diet.

Can Pecan Candies Be Stored?

Yes, pecan candies can be stored in an airtight container. Keep them in a cool, dry place for freshness.

Conclusion

Creating pecan candy at home is simple and fun. These recipes require basic ingredients. Perfect for holidays or everyday treats. Your family and friends will love them. Enjoy the sweet, nutty flavors. Impress everyone with your homemade pecan candies. Try these easy recipes today.

Happy cooking!