Spicy Shot Recipes: Ignite Your Taste Buds with Bold Flavors

Are you ready to heat up your next party? Spicy shot recipes add an exciting twist to your gatherings.

These fiery drinks bring a new level of fun and flavor to any event. Spicy shots are not just about the burn; they’re about creating memorable experiences. From bold combinations to unique ingredients, these recipes are sure to impress your guests.

Whether you’re hosting a summer barbecue, a cozy winter party, or just a casual get-together, spicy shots are perfect for any occasion. They blend heat and flavor in a way that keeps everyone coming back for more. Get ready to explore a world of zest and spice with our collection of spicy shot recipes. Your taste buds will thank you!

Introduction To Spicy Shots

Spicy shots are the perfect way to add an exciting twist to your usual drink routine. These shots combine the heat of spices with the refreshing taste of your favorite spirits. They are a great way to warm up on a cold night or to add some excitement to your next gathering. Whether you like a mild kick or a fiery blaze, there is a spicy shot recipe for everyone.

What Makes A Shot Spicy

Several ingredients can make a shot spicy. The most common are:

  • Chili Peppers: Fresh or dried, they add a fiery kick.
  • Hot Sauces: These come in various flavors and heat levels.
  • Spices: Cayenne, paprika, and black pepper are popular choices.
  • Infused Spirits: Some spirits are infused with spices for an extra kick.

Each ingredient brings its own unique flavor and level of heat. Experiment with different combinations to find your perfect blend.

Benefits Of Spicy Ingredients

Spicy ingredients are not just about heat; they offer several benefits:

Benefit Description
Boosts Metabolism Spices like cayenne can increase your metabolic rate.
Improves Digestion Spicy foods can stimulate digestive juices.
Rich in Antioxidants Many spices are high in antioxidants, promoting good health.
Enhances Mood Capsaicin, found in chili peppers, can release endorphins.

Including spicy ingredients in your shots can make your drink not only exciting but also beneficial for your health. Now, get ready to explore some delicious and fiery shot recipes!

Essential Ingredients

Creating the perfect spicy shot requires a careful selection of ingredients. The balance between heat and flavor is crucial. Let’s dive into the essential ingredients that make these shots stand out.

Popular Spices

The right spices can elevate your spicy shots. Here are some of the most popular ones:

  • Cayenne Pepper: Adds a fiery kick.
  • Jalapeño: Offers a milder, yet distinct heat.
  • Black Pepper: Provides a sharp, spicy flavor.
  • Chili Powder: Combines heat with a touch of smokiness.
  • Horseradish: Delivers a sharp and pungent taste.

Choosing The Right Alcohol

The type of alcohol you choose is just as important as the spices. Here are some options to consider:

Alcohol Flavor Profile
Vodka Neutral flavor, allows spices to shine.
Tequila Earthy and agave notes, pairs well with heat.
Whiskey Rich and smoky, adds depth to spicy shots.
Rum Sweet and smooth, balances spicy flavors.

Combining these elements will help you create a well-rounded spicy shot. The right blend of spices and alcohol will make your drink memorable.

Preparation Tips

Creating the perfect spicy shot can be both fun and rewarding. The key lies in balancing flavors and ensuring a smooth blend. This section will guide you through some essential preparation tips. Dive into the art of mixing techniques and explore creative serving suggestions.

Mixing Techniques

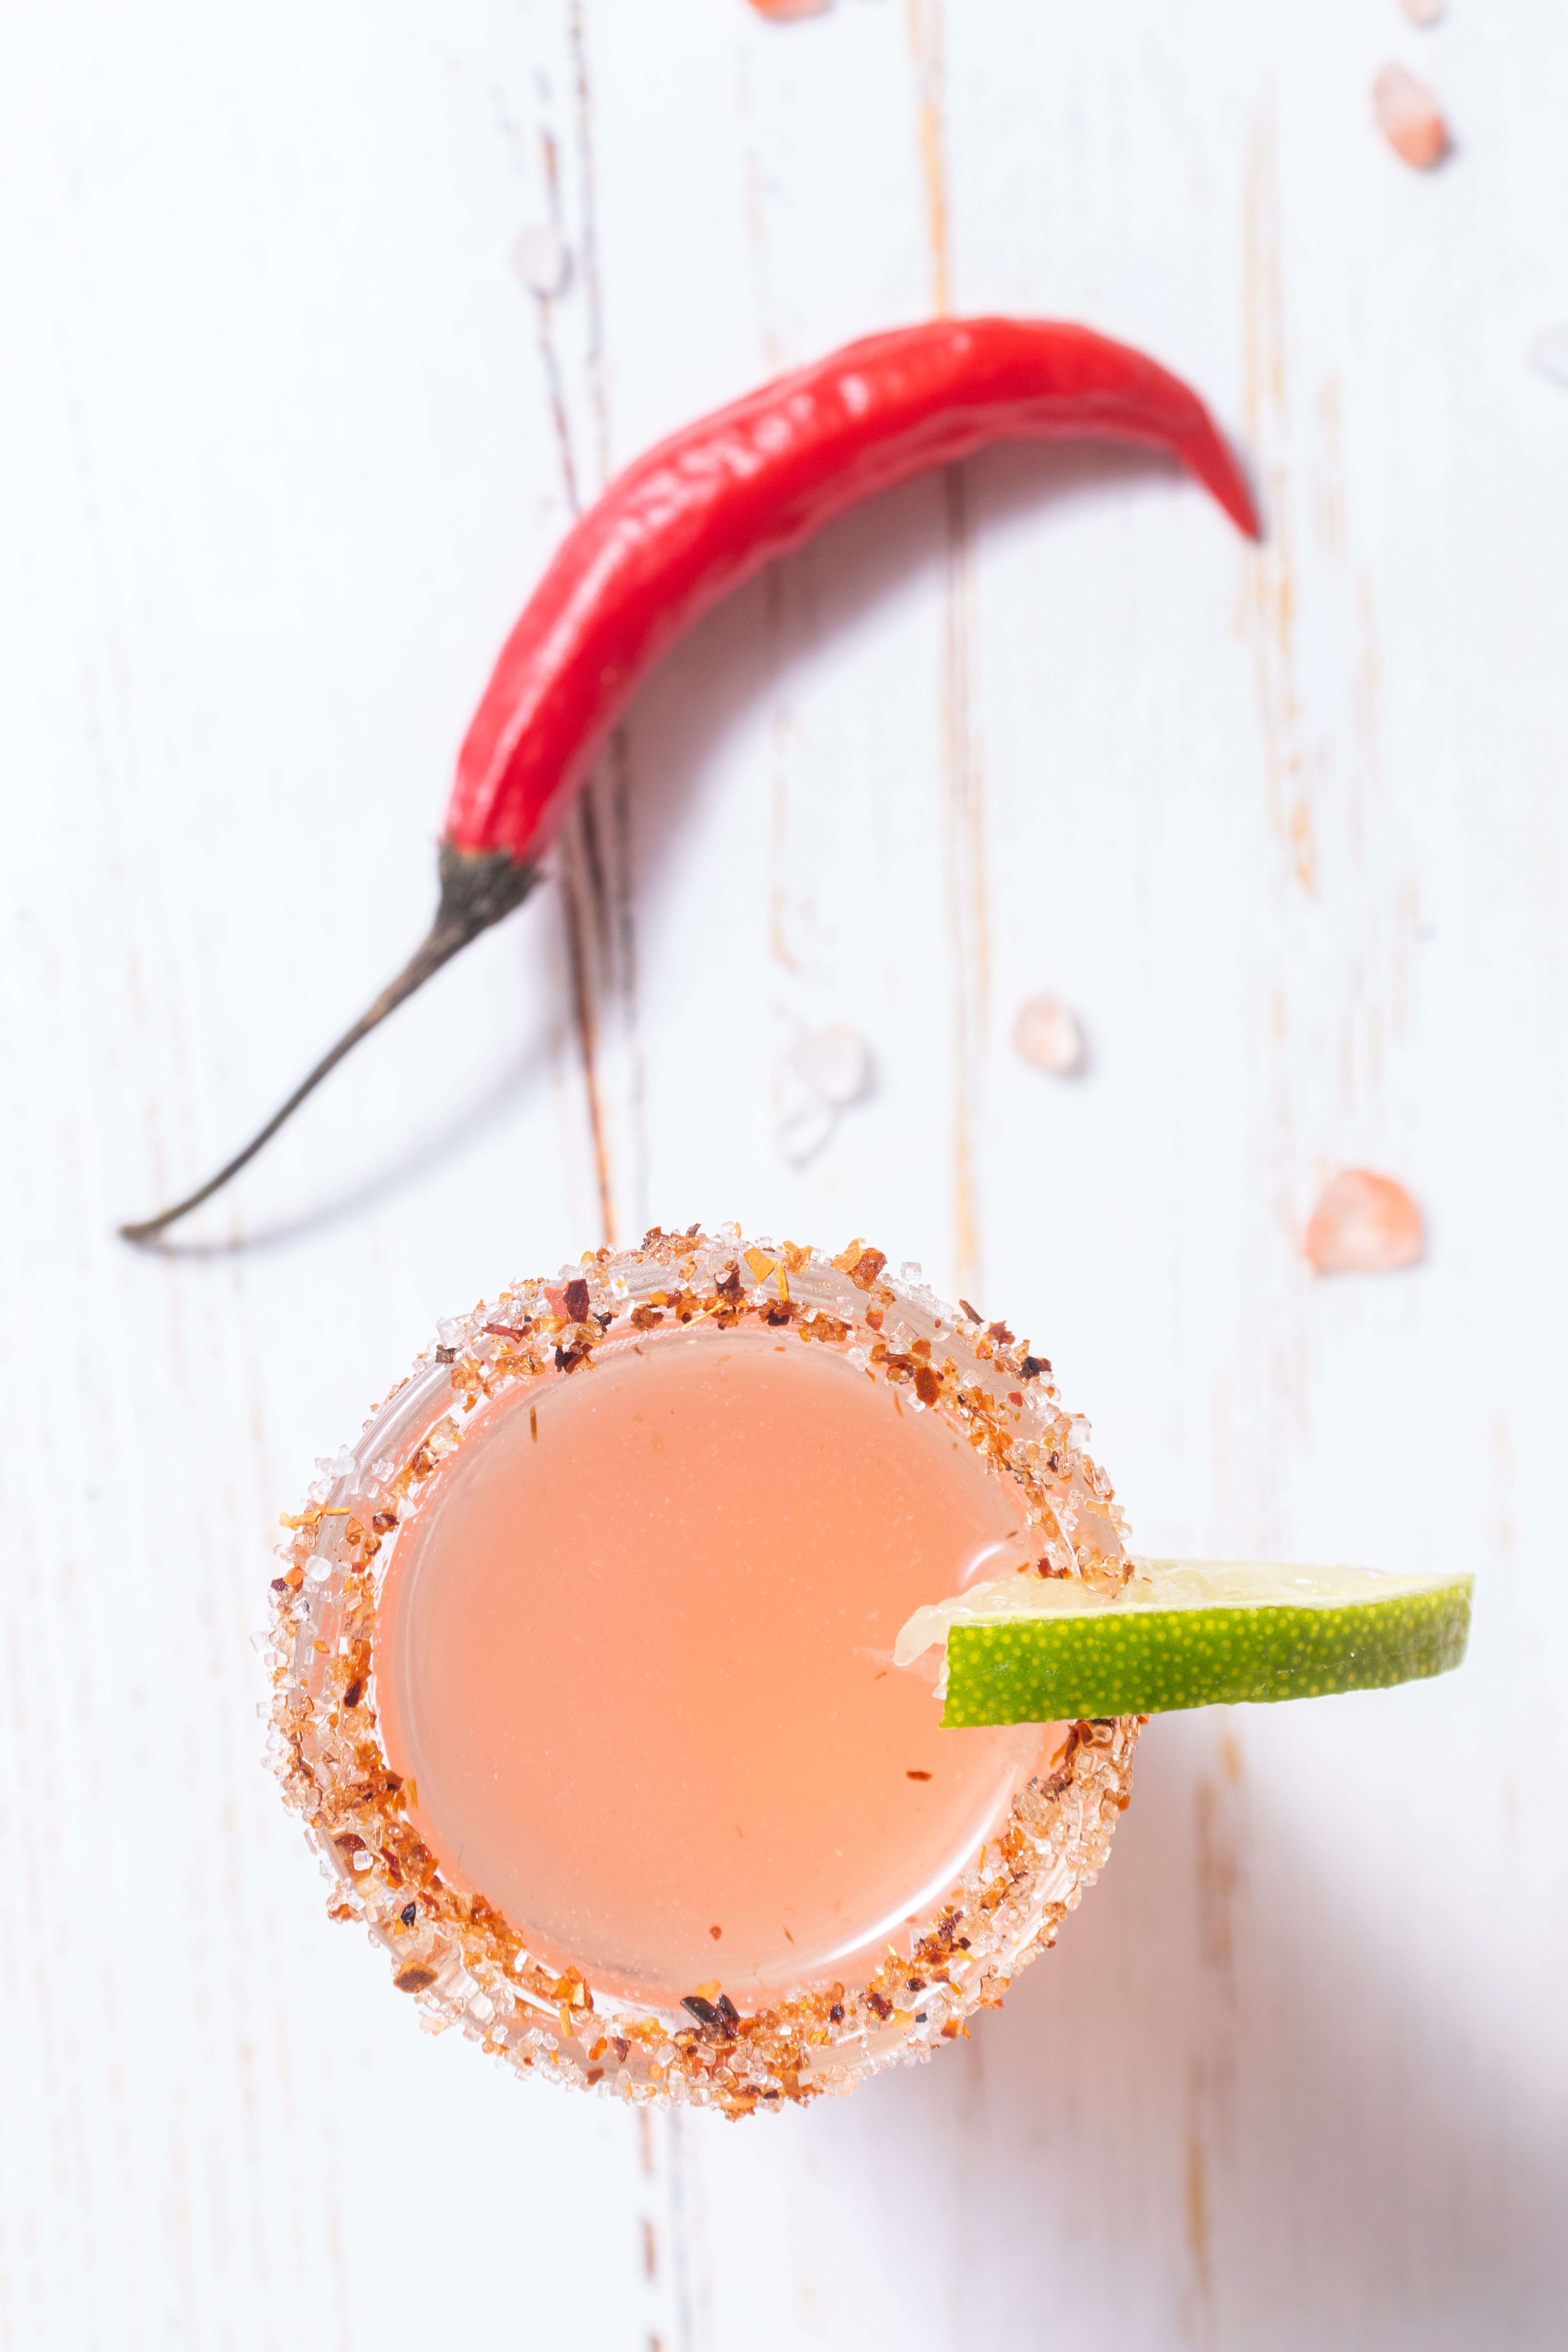
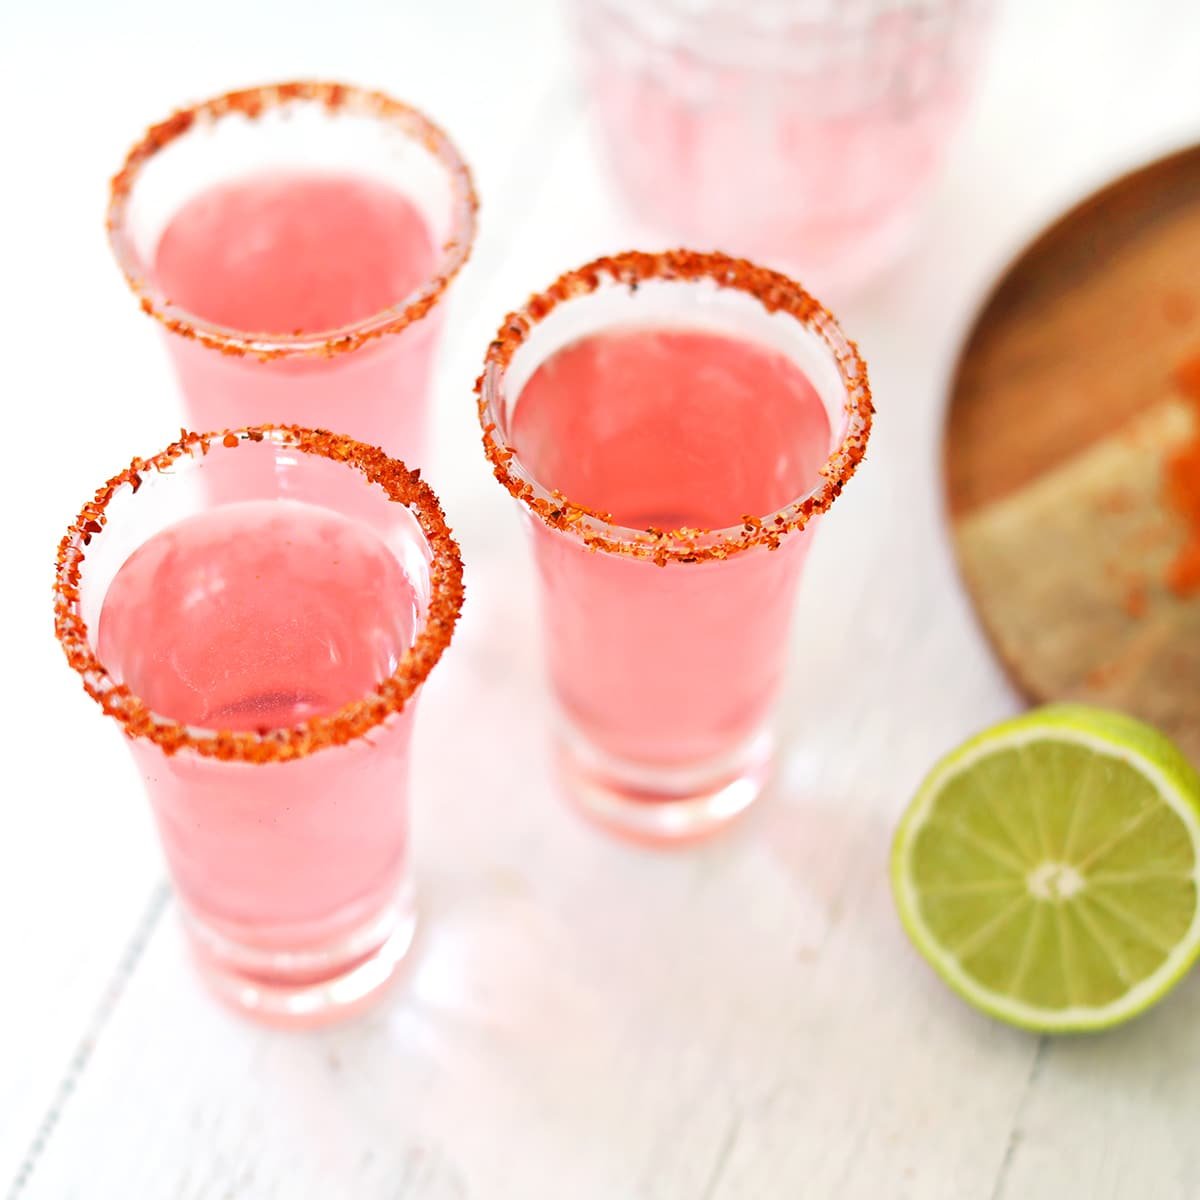
Start by choosing quality ingredients. Fresh spices and high-quality alcohol make a difference. Use a shaker to mix the ingredients well. This helps in achieving a consistent flavor. Add ice cubes to the shaker for a chilled shot. Shake vigorously for at least 30 seconds. Strain the mixture into shot glasses to remove any ice or spice bits. For an extra kick, rim the glasses with chili powder before pouring the shot.

Serving Suggestions

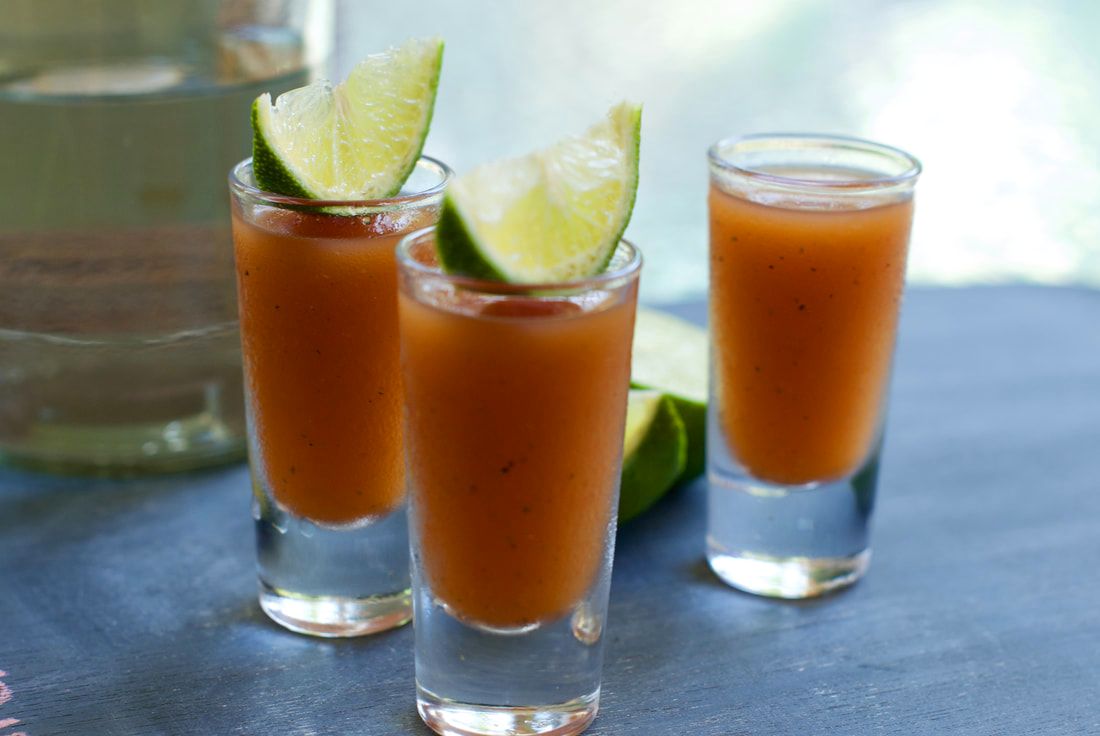
Presentation matters. Serve the shots in clear, small glasses. This allows the vibrant colors to stand out. Garnish with a slice of chili or a twist of lime. It adds a visual appeal and enhances the flavor. Arrange the shots on a tray with a few lime wedges. This gives guests an option to add a citrus touch. For a themed party, use colorful shot glasses to match the decor. Ensure the shots are served chilled for the best experience.

Spicy Shot Recipes: Ignite Your Taste Buds with Bold Flavors

Credit: www.thebewitchinkitchen.com

Classic Spicy Shot Recipes

Spicy shots add a fiery twist to any party or gathering. These classic spicy shot recipes are perfect for those who love a bit of heat with their drinks. Whether you’re a fan of tequila or margaritas, there’s something here for you.

Spicy Margarita Shot

The Spicy Margarita Shot combines the tangy taste of lime with a kick of spice. It’s a perfect start to an evening of fun.

  • Ingredients:
  • 1 oz tequila
  • 1/2 oz lime juice
  • 1/4 oz simple syrup
  • 1 slice jalapeño
  • Salt for rimming
  • Instructions:
    1. Rim the shot glass with salt.
    2. Add tequila, lime juice, and simple syrup to a shaker.
    3. Shake well with ice.
    4. Strain into the shot glass.
    5. Garnish with a jalapeño slice.

    Jalapeño Tequila Shot

    The Jalapeño Tequila Shot brings a bold flavor to your taste buds. It’s simple yet packs a punch.

    • Ingredients:
    • 1 oz tequila
    • 1 slice jalapeño
    • Dash of lime juice
  • Instructions:
    1. Place a jalapeño slice in the shot glass.
    2. Add a dash of lime juice.
    3. Pour tequila over the jalapeño.
    4. Let it sit for a minute.
    5. Shoot it back in one go.

    These classic spicy shot recipes are easy to make and full of flavor. They are sure to be a hit at your next event.

    Unique And Creative Shots

    Are you looking for a way to spice up your next gathering? Unique and creative shots can add that extra zing to your party. They are fun, exciting, and easy to make. Let’s dive into two fiery options that will surely impress your guests.

    Sriracha Vodka Shot

    This shot is perfect for those who love a kick of heat. The combination of Sriracha and vodka creates a bold and spicy flavor.

    • Ingredients:
    • 1 oz vodka
    • 1/2 tsp Sriracha
    • 1 lime wedge (for garnish)

    Instructions:

    1. Pour vodka into a shot glass.
    2. Add Sriracha and stir well.
    3. Garnish with a lime wedge on the rim.

    Enjoy the spicy thrill of this unique shot!

    Cayenne Whiskey Shot

    If you prefer whiskey, this shot is for you. The cayenne pepper adds a fiery twist to the smooth whiskey.

    • Ingredients:
    • 1 oz whiskey
    • 1 pinch cayenne pepper
    • 1 lemon slice (for garnish)

    Instructions:

    1. Pour whiskey into a shot glass.
    2. Sprinkle a pinch of cayenne pepper into the glass.
    3. Garnish with a lemon slice on the rim.

    This shot offers a perfect blend of warmth and spice.

    Pairing Spicy Shots With Food

    Pairing spicy shots with food can elevate your culinary experience. The heat of the shots complements various dishes, making each bite memorable. But what foods go best with spicy shots? Let’s explore the best appetizers and complementary flavors.

    Best Appetizers

    Appetizers set the stage for your meal. Spicy shots pair well with several starters. Think crispy chicken wings. The crunch and spice create a delightful contrast. Or try cheesy nachos. The rich cheese balances the heat. Shrimp cocktails are another great option. The tangy sauce and spicy shot blend perfectly. You can also opt for jalapeno poppers. Their heat matches the shot, amplifying the experience.

    Complementary Flavors

    Complementary flavors enhance the enjoyment of spicy shots. Sweet and spicy is a classic combo. Mango salsa with your shot? Perfection. A honey-glazed ham also works well. The sweetness tames the heat. Tangy flavors are another great match. Lemon or lime zest can highlight the spice. Think ceviche with a spicy shot. The citrus cuts through the heat, creating balance. Salty snacks also pair well. Pretzels or salted nuts offer a satisfying crunch. Their saltiness contrasts the shot’s heat, making each sip enjoyable.

    Health Considerations

    Spicy shot recipes can be exciting and flavorful. But, it’s important to consider health aspects. Different people have different spice tolerance levels. Some might have allergies. Let’s explore these considerations in detail.

    Spice Tolerance

    Not everyone can handle high spice levels. It’s essential to know your spice tolerance before trying spicy shots.

    • Start with mild spices.
    • Gradually increase the spice level.
    • Listen to your body. If it feels too hot, stop.

    Some symptoms of low spice tolerance include:

    Symptom Description
    Heartburn A burning sensation in the chest.
    Stomach Pain Discomfort or pain in the stomach area.
    Excessive Sweating Unusual amount of sweat.

    Potential Allergies

    Allergies can be a concern with spicy ingredients. Some common allergens include:

    1. Peppers
    2. Ginger
    3. Garlic

    Check for allergic reactions such as:

    • Rashes
    • Swelling
    • Difficulty breathing

    If you experience any of these symptoms, seek medical attention. Always read the ingredient list carefully. Avoid any known allergens.

    Spicy Shot Recipes: Ignite Your Taste Buds with Bold Flavors

    Credit: abeautifulmess.com

    Hosting A Spicy Shot Party

    Hosting a spicy shot party is a fun way to spice up any gathering. Imagine friends laughing, enjoying unique spicy shots, and creating unforgettable memories. You can make your party even more memorable with themed decor, exciting games, and engaging activities. Let’s dive into some ideas to make your spicy shot party a hit.

    Themed Decor Ideas

    Create a lively atmosphere with bold, vibrant colors. Think red, orange, and yellow. Use chili pepper string lights to add a festive touch. Place small bowls of colorful peppers around the room. You can also use themed tablecloths and napkins. This will set the mood for a spicy adventure.

    A photo booth corner with spicy props like sombreros, fake mustaches, and giant chili cutouts can be a great addition. It encourages guests to take fun pictures and share the experience. Don’t forget to have a sign that says “Spicy Shot Party” at the entrance. It welcomes guests and sets the tone from the start.

    Games And Activities

    Keep the energy high with interactive games. A spicy shot challenge can be the main event. Create different levels of spiciness and let guests test their limits. The last person standing wins a small prize. This adds excitement and a bit of competition.

    Another fun activity is a “Guess the Spice” game. Prepare a few spicy shots with different ingredients. Let guests taste and guess what’s in them. The person with the most correct guesses gets a prize. This game is not only fun but also educates guests about different spices.

    Consider adding a DIY shot station. Set up a table with various ingredients and let guests create their own spicy shots. Provide recipes for inspiration. This allows guests to be creative and try new combinations.

    Spicy Shot Recipes: Ignite Your Taste Buds with Bold Flavors

    Credit: www.thespruceeats.com

    Frequently Asked Questions

    What Are Some Popular Spicy Shot Recipes?

    Popular spicy shot recipes include the Spicy Margarita Shot, Jalapeño Tequila Shot, and Fireball Whiskey Shot. Each offers a unique and fiery taste.

    How Do You Make A Spicy Margarita Shot?

    Mix tequila, lime juice, simple syrup, and a dash of hot sauce. Shake well and serve chilled.

    What Ingredients Are In A Jalapeño Tequila Shot?

    A Jalapeño Tequila Shot includes tequila, fresh lime juice, and a slice of jalapeño. It’s spicy and refreshing.

    Can You Make Spicy Shots With Whiskey?

    Yes, you can make spicy shots with whiskey. Try Fireball Whiskey, which has a natural cinnamon spice flavor.

    Conclusion

    Spicy shots add excitement to any party. They are easy to make and fun to share. Experiment with different ingredients to find your favorite mix. Friends will love trying your creative recipes. Remember to enjoy responsibly and savor each spicy kick.

    The variety of flavors can surprise and delight your taste buds. So, next time you host a gathering, impress your guests with these spicy shot recipes. Cheers to good times and great drinks!

    Mongolian Duck Recipe: Authentic, Flavorful, and Easy to Make

    Looking to try a new recipe? Mongolian duck might be the dish for you.

    Rich, flavorful, and easy to prepare, it’s a great addition to any meal plan. Mongolian duck is a delightful blend of tender duck meat and bold, savory sauces. This recipe combines traditional Mongolian flavors with easy-to-follow steps, perfect for home cooks.

    The duck is usually marinated in a mix of soy sauce, garlic, and other spices, then cooked to perfection. This dish offers a unique taste experience that stands out from typical poultry recipes. Perfect for special occasions or a cozy dinner at home, Mongolian duck will impress your guests and satisfy your taste buds. Dive into this culinary adventure and discover the rich flavors of Mongolian cuisine.

    Introduction To Mongolian Duck

    The Mongolian Duck recipe is a savory and delightful dish. It blends rich flavors with traditional cooking techniques. This dish is a favorite among those who love flavorful Asian cuisine. Let’s dive into the origins, history, and cultural significance of this amazing recipe.

    Origins And History

    The Mongolian Duck recipe has ancient roots. It originates from Mongolia’s nomadic culture. The dish traditionally used ingredients that were readily available. Ducks were abundant, making them a key ingredient in many recipes. Over time, these recipes evolved. Today, they reflect a blend of old and new culinary techniques.

    Popularity And Cultural Significance

    The Mongolian Duck holds a special place in Mongolian cuisine. It is often served during festivals and special occasions. Families gather to enjoy this delicious dish. The recipe symbolizes hospitality and sharing. Its rich flavors and tender meat make it a crowd favorite. The dish also showcases the culinary skills of Mongolian chefs.

    Essential Ingredients

    Creating a delicious Mongolian Duck dish starts with the right ingredients. Freshness and quality are key to achieving rich flavors and textures. Here is a guide to the essential ingredients needed for this mouthwatering recipe.

    Fresh Duck Selection

    Choose a fresh duck from a trusted source. Look for a duck with clear eyes and firm flesh. The skin should be free of blemishes and have a pale, even color. A fresh duck ensures the best taste and texture for your dish.

    Spices And Seasonings

    Spices and seasonings bring out the unique flavors in Mongolian Duck. Common spices include ginger, garlic, and star anise. Soy sauce and hoisin sauce add depth and umami. A touch of honey balances the savory with a hint of sweetness.

    Vegetables And Sides

    Include a variety of vegetables like bell peppers, onions, and carrots. These add color and crunch to your dish. Serve the duck with steamed rice or noodles. Fresh herbs like cilantro or green onions can garnish the dish, adding a fresh, aromatic touch.

    Preparation Techniques

    Cooking a delicious Mongolian Duck involves careful preparation techniques. These steps ensure that each component of the dish is flavorful. Let’s dive into the details of marinating the duck, preparing the sauce, and chopping the vegetables.

    Marinating The Duck

    Marinating the duck is a crucial step. This process helps tenderize the meat and infuse it with flavor. Begin by combining soy sauce, garlic, ginger, and a bit of brown sugar in a bowl. Ensure the duck is coated evenly. Cover and refrigerate for at least four hours. For best results, let it marinate overnight.

    Preparing The Sauce

    The sauce is the heart of the Mongolian Duck recipe. To prepare, mix hoisin sauce, soy sauce, and rice vinegar in a pan. Add minced garlic and grated ginger for extra flavor. Simmer the mixture for 10 minutes. Stir occasionally to prevent sticking. Once thickened, remove from heat and let it cool.

    Chopping Vegetables

    Fresh vegetables add a vibrant crunch to the dish. Use a sharp knife to chop bell peppers, onions, and carrots into thin strips. For added color, include green beans and broccoli. Keep the pieces uniform for even cooking. Arrange the chopped vegetables on a plate, ready for quick stir-frying.

    Cooking Methods

    Cooking a Mongolian duck can be a delightful experience. Different cooking methods bring out unique flavors. Let’s explore stovetop, oven baking, and grilling methods for your Mongolian duck recipe.

    Stovetop Instructions

    Start by heating your pan over medium heat. Add a bit of oil to prevent sticking. Place the duck breast skin-side down in the pan. Cook for about 6-8 minutes until the skin is golden and crispy. Flip the duck and cook the other side for another 5 minutes. For added flavor, baste the duck with its own fat. Ensure the internal temperature reaches 165°F. Let the duck rest before slicing.

    Oven Baking Tips

    Preheat your oven to 375°F. Season the duck with your favorite spices. Place the duck on a roasting rack in a pan. Roast it for about 25-30 minutes. Baste the duck with its juices every 10 minutes. Check the internal temperature; it should be 165°F. Let the duck rest for 10 minutes before serving.

    Grilling Option

    Preheat your grill to medium-high heat. Season the duck breasts with salt and pepper. Place the duck skin-side down on the grill. Grill for about 5-6 minutes until the skin is crispy. Flip the duck and cook for another 4 minutes. Ensure the internal temperature reaches 165°F. Let the duck rest before cutting into it.

    Plating And Presentation

    Plating and presentation are essential in enhancing your Mongolian Duck recipe. The way you present the dish can make it more appealing. Proper presentation can elevate the dining experience.

    Garnishing Ideas

    Garnishing adds a visual appeal to your Mongolian Duck. Here are some ideas:

    • Fresh herbs: Sprinkle chopped cilantro or parsley on top.
    • Sesame seeds: Add a sprinkle of toasted sesame seeds for texture.
    • Orange slices: Place thin slices of orange around the duck.
    • Green onions: Finely chop and scatter over the dish.
    • Carrot ribbons: Use a peeler to create thin carrot ribbons for color.

    Serving Suggestions

    Serving Mongolian Duck in a visually pleasing way enhances the experience. Consider these suggestions:

    Serving Style Description
    Family-style Serve on a large platter for sharing.
    Individual plates Arrange duck slices neatly on each plate.
    Bowl presentation Place the duck in bowls with a bed of rice or noodles.
    Layered Layer the duck over vegetables for a balanced look.

    Pair the duck with complementary sides for a complete meal:

    • Steamed rice
    • Stir-fried vegetables
    • Fresh salad
    • Wontons or dumplings

    By focusing on garnishing and serving, you can create a memorable Mongolian Duck dish.

    Mongolian Duck Recipe: Authentic, Flavorful, and Easy to Make

    Credit: artisantandoors.com.au

    Pairing With Beverages

    Pairing your delicious Mongolian duck recipe with the right beverage can elevate your dining experience. Let’s explore some great options that complement this savory dish.

    Traditional Drinks

    Traditional Mongolian drinks often bring out the best in a Mongolian duck recipe. These drinks have unique flavors that pair well with the rich, savory taste of the duck.

    • Kumis: This fermented mare’s milk is a traditional Mongolian drink. Its tangy and slightly alcoholic taste pairs wonderfully with the rich flavors of the duck.
    • Airag: Another fermented dairy product, Airag has a slightly sour taste. It is refreshing and enhances the dish’s flavor.
    • Milk tea: Mongolian milk tea, or Suutei Tsai, is a warm, salty beverage. It balances the richness of the duck with its mild flavor.

    Modern Pairing Options

    Modern beverages can also complement Mongolian duck beautifully. Here are some popular choices that you might enjoy.

    Drink Description
    Red Wine A good Merlot or Cabernet Sauvignon pairs well. The wine’s bold flavors match the duck’s richness.
    Craft Beer A dark beer, like a stout or porter, enhances the savory taste of the duck.
    Green Tea For a non-alcoholic option, green tea is perfect. Its light, earthy notes complement the dish without overpowering it.

    Experiment with these options to find your perfect pairing. Enjoy your meal with the drink that best suits your taste!

    Health Benefits

    The Mongolian Duck Recipe is not only delicious but also packed with health benefits. It provides essential nutrients and can be modified to suit various dietary needs. Let’s explore how this dish can contribute to a healthier lifestyle.

    Nutritional Information

    The Mongolian Duck Recipe offers a rich source of proteins, vitamins, and minerals. Duck meat is known for its high protein content, which is crucial for muscle repair and growth. Here’s a breakdown of its nutritional value per 100 grams:

    Nutrient Amount
    Protein 19 grams
    Fat 15 grams
    Calories 200 kcal
    Vitamin B6 0.5 mg
    Iron 2.7 mg

    Duck meat also contains essential fatty acids, which are important for brain function. It is rich in iron, which supports the production of red blood cells.

    Healthy Modifications

    To make the Mongolian Duck Recipe even healthier, consider these modifications:

    • Skinless Duck: Remove the skin to reduce fat content.
    • Lean Cuts: Use lean cuts of duck to lower calorie intake.
    • Vegetable Addition: Add more vegetables like carrots, bell peppers, and broccoli.
    • Low-Sodium Soy Sauce: Substitute regular soy sauce with a low-sodium version.
    • Healthy Cooking Methods: Opt for grilling or steaming instead of frying.

    These changes can make the dish lighter and more nutrient-dense, while still maintaining its rich flavor.

    Mongolian Duck Recipe: Authentic, Flavorful, and Easy to Make

    Credit: www.youtube.com

    Common Mistakes To Avoid

    Preparing the perfect Mongolian duck requires attention to detail. Many home cooks make common mistakes that can easily ruin the dish. By avoiding these pitfalls, you can create a delicious and authentic Mongolian duck recipe that will impress your guests.

    Overcooking The Duck

    Overcooking the duck is one of the biggest mistakes. Duck meat dries out quickly if cooked too long. To avoid this, use a meat thermometer. The internal temperature should be 165°F (74°C). Cooking the duck at a lower temperature for a longer period helps retain its moisture. This method ensures the duck remains juicy and tender.

    Incorrect Seasoning

    Seasoning is crucial for flavor. Incorrect seasoning can make the dish bland. Use a mix of traditional Mongolian spices. Common spices include ginger, garlic, and soy sauce. Balance the saltiness and sweetness. Taste the seasoning before applying it to the duck. This step ensures the right flavor combination.

    Improper Marination

    Improper marination affects the taste and texture. Marinating the duck enhances its flavor. Use a marinade with soy sauce, ginger, garlic, and honey. Marinate the duck for at least 4 hours or overnight. This allows the flavors to penetrate the meat. Do not skip this step for the best results.

    Common Mistake Solution
    Overcooking Use a meat thermometer
    Incorrect Seasoning Balance spices and taste
    Improper Marination Marinate for at least 4 hours

    By avoiding these common mistakes, you can achieve a perfect Mongolian duck. Enjoy the process and the delicious results!

    Mongolian Duck Recipe: Authentic, Flavorful, and Easy to Make

    Credit: www.theintrepideater.com

    Frequently Asked Questions

    How Do You Cook Mongolian Duck?

    To cook Mongolian duck, marinate it in a mix of soy sauce, hoisin sauce, and spices. Roast it until the skin is crispy and the meat is tender.

    What Ingredients Are Needed For Mongolian Duck?

    For Mongolian duck, you need duck, soy sauce, hoisin sauce, garlic, ginger, and some spices. Optional ingredients include green onions and sesame seeds.

    How Long To Marinate Mongolian Duck?

    Marinate Mongolian duck for at least 4 hours. For best results, marinate it overnight to let the flavors fully absorb into the meat.

    Can I Use Store-bought Hoisin Sauce?

    Yes, store-bought hoisin sauce works perfectly for Mongolian duck. It adds a delicious sweet and savory flavor to the dish.

    Conclusion

    This Mongolian duck recipe is both delicious and easy to make. With simple ingredients, you can create a flavorful meal that will impress family and friends. Give it a try and enjoy the rich taste of Mongolian cuisine at home.

    Cooking should be fun and this recipe makes it easy. Remember, practice makes perfect. Happy cooking!

    Red Idaho Potatoes Recipes: Delicious Dishes to Try Today

    Red Idaho potatoes are versatile and delicious. They can be the star of many dishes.

    From hearty stews to crisp salads, these potatoes can do it all. They have a creamy texture and a rich flavor that enhances any meal. Whether you are a seasoned cook or a beginner in the kitchen, red Idaho potatoes offer endless possibilities.

    Their distinct taste and texture make them a favorite among chefs and home cooks alike. In this blog post, we will explore various recipes that highlight the unique qualities of red Idaho potatoes. You will discover new ways to prepare and enjoy this humble yet extraordinary ingredient. Get ready to impress your family and friends with these mouth-watering recipes!

    Red Idaho Potatoes Recipes: Delicious Dishes to Try Today

    Credit: idahoan.com

    Introduction To Red Idaho Potatoes

    Red Idaho Potatoes are a versatile and delicious addition to any meal. These small, red-skinned potatoes are known for their smooth texture and slightly sweet flavor. They are easy to cook and can be used in a variety of recipes. Whether you are roasting, boiling, or mashing, Red Idaho Potatoes always deliver a tasty result.

    Unique Characteristics

    Red Idaho Potatoes stand out for several reasons. Their smooth, red skin is thin and edible, which means there’s no need to peel. This makes them perfect for quick and easy recipes. The flesh is firm, yet creamy, and holds its shape well during cooking. This makes them ideal for salads and soups. Additionally, their slightly sweet flavor adds a delightful touch to any dish.

    Nutritional Benefits

    Red Idaho Potatoes are not just tasty; they are also packed with nutrients. Here are some key nutritional benefits:

    • Low in Calories: One medium potato contains about 110 calories.
    • High in Vitamin C: They provide 27% of the daily recommended intake of Vitamin C.
    • Rich in Potassium: They contain more potassium than a banana.
    • Good Source of Fiber: One potato provides 2 grams of dietary fiber, aiding digestion.
    Nutrient Amount per Medium Potato
    Calories 110
    Vitamin C 27% of Daily Value
    Potassium 620 mg
    Fiber 2 grams

    Adding Red Idaho Potatoes to your diet can provide essential vitamins and minerals. They are naturally fat-free, cholesterol-free, and low in sodium. This makes them a healthy choice for any meal.

    Classic Mashed Potatoes

    Classic Mashed Potatoes are a timeless favorite that never disappoints. Using Red Idaho Potatoes adds a unique twist to this beloved dish. Their natural creaminess and slight sweetness make for the perfect mashed potatoes. Let’s dive into how to make this delicious recipe.

    Ingredients Needed

    • 2 pounds of Red Idaho Potatoes
    • 1/2 cup of unsalted butter
    • 1 cup of whole milk
    • Salt to taste
    • Freshly ground black pepper

    Step-by-step Instructions

    1. Peel and cut the Red Idaho Potatoes into even-sized chunks.
    2. Place the potatoes in a large pot and cover them with cold water.
    3. Add a pinch of salt to the water.
    4. Bring to a boil over medium-high heat.
    5. Once boiling, reduce the heat and let them simmer for 15-20 minutes.
    6. Check if the potatoes are tender by piercing them with a fork.
    7. Drain the potatoes and return them to the pot.
    8. Add the butter and start mashing the potatoes.
    9. Gradually add the milk, continuing to mash until smooth.
    10. Season with salt and pepper to taste.
    11. Serve hot, garnished with a pat of butter if desired.

    Enjoy your Classic Mashed Potatoes made with Red Idaho Potatoes. They are perfect for any meal!

    Crispy Roasted Red Potatoes

    Red Idaho Potatoes are perfect for creating crispy roasted potatoes. Their texture and flavor make them ideal for a delicious side dish. Let’s explore how to make these tasty potatoes, ensuring they are crispy and flavorful.

    Seasoning Options

    Seasoning plays a crucial role in enhancing the flavor of roasted potatoes. Here are some seasoning options you can consider:

    • Classic: Salt, pepper, and garlic powder.
    • Herb: Rosemary, thyme, and parsley.
    • Spicy: Paprika, cayenne pepper, and chili powder.
    • Cheesy: Parmesan cheese and Italian seasoning.

    Baking Tips

    Follow these tips to achieve perfectly crispy roasted red potatoes:

    1. Preheat your oven to 425°F (220°C).
    2. Cut potatoes into even-sized pieces. This ensures they cook evenly.
    3. Toss the potatoes in olive oil and your chosen seasonings.
    4. Spread the potatoes in a single layer on a baking sheet.
    5. Bake for 25-30 minutes, turning halfway through.
    6. Check for crispiness. Bake a few more minutes if needed.

    Enjoy your crispy roasted red potatoes as a side dish or a snack. Their versatility makes them a favorite for many meals.

    Red Potato Salad

    Red Potato Salad is a delightful dish made with Red Idaho Potatoes. It is perfect for any occasion, from casual family dinners to festive gatherings. The salad is creamy, tangy, and full of flavor. This recipe highlights the natural taste of red potatoes, making it a favorite among potato lovers.

    Essential Ingredients

    To make a delicious Red Potato Salad, you will need the following ingredients:

    • 2 pounds of Red Idaho Potatoes
    • 1 cup of mayonnaise
    • 2 tablespoons of Dijon mustard
    • 1 small red onion, finely chopped
    • 2 celery stalks, chopped
    • 2 hard-boiled eggs, chopped
    • 2 tablespoons of fresh dill, chopped
    • Salt and pepper to taste

    Preparation Method

    First, wash the Red Idaho Potatoes thoroughly. Cut them into bite-sized pieces. Place them in a large pot, cover with water, and add a pinch of salt. Bring to a boil, then reduce heat and simmer for 10-15 minutes until tender. Drain and let them cool.

    While the potatoes are cooling, prepare the dressing. In a large mixing bowl, combine mayonnaise and Dijon mustard. Add the chopped red onion, celery, hard-boiled eggs, and fresh dill. Mix well.

    Once the potatoes are cool, add them to the bowl with the dressing. Gently toss to coat the potatoes with the dressing. Season with salt and pepper to taste. Chill in the refrigerator for at least one hour before serving to enhance the flavors.

    Enjoy your Red Potato Salad as a tasty side dish or a light meal!

    Cheesy Potato Casserole

    The Cheesy Potato Casserole is a classic comfort food. It’s perfect for family dinners. This dish combines creamy cheese and tender Red Idaho potatoes. The result is a delicious, hearty meal. The cheese melts into the potatoes, creating a rich flavor. It’s a crowd-pleaser and easy to make.

    Required Ingredients

    For this recipe, you will need:

    • 6 cups of Red Idaho potatoes, peeled and diced
    • 2 cups of shredded cheddar cheese
    • 1 cup of sour cream
    • 1 can of cream of chicken soup
    • 1/4 cup of melted butter
    • 1/2 cup of chopped onions
    • 1 teaspoon of salt
    • 1/2 teaspoon of pepper

    Baking Instructions

    Preheat your oven to 350°F (175°C). Grease a 9×13 inch baking dish.

    In a large bowl, mix all ingredients. Combine well until evenly coated.

    Pour the mixture into the prepared baking dish. Spread it out evenly.

    Bake in the preheated oven for 45 minutes. The top should be golden and bubbly.

    Let it cool for a few minutes before serving. Enjoy your Cheesy Potato Casserole!

    Garlic Herb Smashed Potatoes

    Red Idaho Potatoes are versatile and delicious. One of the best ways to enjoy them is by making Garlic Herb Smashed Potatoes. This recipe brings out their natural flavor and adds an aromatic touch with garlic and herbs. It’s a simple yet flavorful dish that can complement any meal.

    Herb Selection

    Choosing the right herbs is essential. Fresh herbs like rosemary, thyme, and parsley are great choices. Rosemary adds a pine-like flavor. Thyme brings a subtle earthiness. Parsley offers a mild, fresh taste. Using fresh herbs enhances the dish’s aroma and taste.

    Cooking Process

    Begin by boiling the Red Idaho Potatoes until tender. This usually takes about 15 minutes. Drain the potatoes and let them cool slightly. Then, place them on a baking sheet. Use a fork to gently smash each potato. This creates a flat surface with some texture.

    Next, prepare the garlic herb mixture. In a small bowl, combine minced garlic, melted butter, and your selected herbs. Brush this mixture over the smashed potatoes. Season with salt and pepper to taste.

    Bake the potatoes in a preheated oven at 425°F for 20-25 minutes. They should be golden and crispy. Serve hot and enjoy your flavorful Garlic Herb Smashed Potatoes.

    Stuffed Red Potatoes

    Savor the deliciousness of stuffed red potatoes made with Red Idaho Potatoes. These creamy, flavorful bites are perfect for any meal. Enjoy a delightful blend of simple ingredients and rich taste.

    Stuffed Red Potatoes offer a delightful twist on a classic favorite. These versatile treats can be customized to suit any taste. Perfect as appetizers or side dishes, they bring a burst of flavor in every bite. The rich texture of Red Idaho Potatoes makes them ideal for stuffing. Let’s explore some exciting filling ideas and baking guidelines.

    Filling Ideas

    Cheese and Bacon: Combine cheddar cheese with crispy bacon bits. Add a dollop of sour cream. Broccoli and Cheese: Steam broccoli until tender. Mix with shredded cheese and a bit of garlic. Creamy Spinach: Sauté spinach with garlic. Mix with cream cheese and a pinch of salt. Mexican Style: Use black beans, corn, and a sprinkle of taco seasoning. Top with shredded cheese. Ham and Swiss: Dice cooked ham. Mix with Swiss cheese and a touch of Dijon mustard.

    Baking Guidelines

    Preheat the oven to 375°F (190°C). Wash and scrub the potatoes clean. Cut each potato in half lengthwise. Scoop out the center, leaving a small border. Brush the potato halves with olive oil. Place them on a baking sheet. Bake for 20 minutes or until tender. Remove from the oven and fill with your chosen filling. Return to the oven. Bake for another 10 minutes or until the filling is hot and bubbly. Allow to cool slightly before serving. Enjoy your delicious stuffed Red Idaho Potatoes! “`
    Red Idaho Potatoes Recipes: Delicious Dishes to Try Today

    Credit: www.browneyedbaker.com

    Red Potato Soup

    Red potato soup is a comforting dish for chilly days. Red Idaho potatoes add a rich, creamy texture. This soup is easy to prepare and full of flavor. Let’s explore how to make it.

    Soup Base Preparation

    First, wash and peel the red potatoes. Cut them into small cubes. Heat a large pot over medium heat. Add a bit of olive oil. Sauté chopped onions until they are soft. Add minced garlic and cook for one more minute. Pour in chicken or vegetable broth. Bring it to a boil.

    Add the cubed potatoes to the pot. Let them cook until tender. This usually takes about 15 minutes. Once the potatoes are soft, blend the mixture. Use an immersion blender for a smooth texture. If you prefer a chunky soup, blend only half of the potatoes. Return the blended soup to the pot.

    Flavor Enhancements

    Now, it’s time to enhance the flavor. Add salt and pepper to taste. Stir in some heavy cream for extra richness. You can also add a bit of shredded cheese. Let the soup simmer for a few more minutes. This helps the flavors meld together.

    For a touch of freshness, add chopped parsley or chives. A squeeze of lemon juice can brighten the flavors. If you like a bit of heat, add a pinch of red pepper flakes. Serve the soup hot. Garnish with more herbs and a dollop of sour cream.

    Red Potato Tacos

    Red Potato Tacos are a delicious and unique twist on traditional tacos. These tasty bites are perfect for a quick dinner or a fun party dish. The combination of soft red Idaho potatoes, fresh veggies, and zesty toppings makes these tacos a hit.

    Taco Assembly

    Start by cooking the red potatoes until they are soft. You can either boil or roast them. Once cooked, cut them into small cubes. Prepare your taco shells by warming them in the oven or on a skillet.

    • Place a generous scoop of cubed red potatoes into each taco shell.
    • Add your favorite toppings. Some great options are:
    • Shredded lettuce
    • Diced tomatoes
    • Sliced avocado
    • Grated cheese
    • Sour cream

    Serving Suggestions

    Red Potato Tacos are versatile and can be served with various sides. Here are some ideas:

    1. Serve with a side of black beans for added protein.
    2. Pair with a fresh corn salad for a crunchy texture.
    3. Add a bowl of guacamole and chips for dipping.

    For an extra touch, sprinkle some fresh cilantro over the tacos. This adds a burst of flavor.

    Enjoy these Red Potato Tacos with family and friends. They are simple to make and full of flavor!

    Red Idaho Potatoes Recipes: Delicious Dishes to Try Today

    Credit: lilluna.com

    Frequently Asked Questions

    What Are Some Popular Red Idaho Potatoes Recipes?

    Red Idaho potatoes are great for roasting, mashing, and salads. They hold their shape well and have a creamy texture.

    How Do You Cook Red Idaho Potatoes?

    You can bake, boil, or roast Red Idaho potatoes. They cook quickly and evenly due to their small size.

    Are Red Idaho Potatoes Good For Health?

    Yes, Red Idaho potatoes are nutritious. They are rich in vitamins, minerals, and fiber. They also have antioxidants.

    Can I Use Red Idaho Potatoes In Soups?

    Yes, Red Idaho potatoes are perfect for soups. They maintain their texture and add a rich, creamy taste.

    Conclusion

    Wrap up your culinary journey with Red Idaho potatoes. These recipes are easy. Delicious and nutritious. Perfect for any meal. Try them now and enjoy. Your taste buds will thank you. Red Idaho potatoes bring flavor and versatility. Happy cooking!

    Medieval Wassail Recipe: Warm Up with Authentic Festive Flavors

    Wassail is a traditional holiday drink. It’s full of rich history and flavor.

    This medieval wassail recipe takes you back to festive celebrations of the past. Imagine the warmth of a fire, the sound of carols, and the scent of spices filling the air. Wassail was more than a drink; it was a symbol of good cheer and community.

    Served during Yuletide, it brought people together. The recipe combines apples, spices, and ale or wine. Simple ingredients create a hearty drink. As you make this recipe, think of the joy it brought to medieval folk. This wassail can warm your heart and spirit today, just as it did centuries ago. Ready to explore this historic treat? Let’s dive in!

    Introduction To Medieval Wassail

    Welcome to the enchanting world of Medieval Wassail! This delightful drink has warmed hearts and homes for centuries. Journey back in time as we explore the rich history and traditions of this festive beverage. Discover why it remains a cherished part of holiday celebrations.

    Origins And Traditions

    The origins of Wassail date back to medieval England. The word “wassail” comes from the Old Norse phrase “ves heill,” meaning “be healthy.” Villagers would toast to each other’s health and prosperity with this warm, spiced drink. They often enjoyed it during Yuletide and other winter festivities.

    Traditionally, Wassail was made with ale or mead, spiced with cinnamon, ginger, and nutmeg. Apples and oranges added a fruity twist. People would sing carols and visit their neighbors, sharing the drink and spreading cheer. This practice, known as wassailing, aimed to ensure a good apple harvest for the coming year.

    Cultural Significance

    Wassail holds a special place in medieval culture. It symbolized community, friendship, and goodwill. The drink brought people together during cold, dark winters. Sharing Wassail was a way to bond and support each other.

    Even today, Wassail remains a beloved tradition in many parts of the world. It is a reminder of simpler times and the importance of community. Whether enjoyed at a holiday gathering or a cozy night by the fire, Wassail brings warmth and joy to all who partake in it.

    Medieval Wassail Recipe: Warm Up with Authentic Festive Flavors

    Credit: www.pinterest.com

    Ingredients For Authentic Wassail

    Creating an authentic medieval Wassail involves a blend of spices, fruits, and alcohol. These ingredients bring out the rich and warm flavors of this traditional drink. Below, we explore the essential components needed to make a perfect Wassail.

    Essential Spices And Fruits

    Spices and fruits are the heart of Wassail. They infuse the drink with a festive aroma and taste. Here’s a list of what you need:

    • Apples: Use fresh, firm apples. They add a natural sweetness and texture.
    • Oranges: Slice them thin. Their zest and juice give a citrusy twist.
    • Cinnamon Sticks: Essential for a warm, spicy note.
    • Cloves: Whole cloves add depth and a hint of bitterness.
    • Nutmeg: A pinch of grated nutmeg enhances the spice blend.
    • Ginger: Fresh ginger root provides a subtle heat.

    Traditional Alcohol Choices

    Alcohol is a key component of Wassail. It brings a robust flavor and warmth. Here are the traditional choices:

    Alcohol Type Description
    Hard Cider Fermented apple juice. Provides a crisp and fruity base.
    Ale Traditional English beer. Adds a malty and rich flavor.
    Brandy Distilled wine. Enhances the drink with a strong, warm kick.

    These ingredients come together to create a delicious and authentic Wassail. Use them to celebrate the festive season in true medieval style.

    Preparing The Wassail Base

    Creating the perfect medieval wassail base is a delightful process. It involves boiling a mix of ingredients and infusing them with rich flavors. This section will guide you through each step to ensure your wassail is flavorful and authentic.

    Boiling The Ingredients

    Start by gathering the primary ingredients: apples, sugar, and ale. These are the foundation of your wassail.

    • 4-5 medium-sized apples
    • 1 cup of sugar
    • 2 quarts of ale

    Place the apples in a large pot. Add the ale and sugar. Bring the mixture to a boil over medium heat. Stir occasionally to dissolve the sugar completely. This process should take about 15 minutes.

    Once the mixture reaches a boil, reduce the heat to low. Allow it to simmer for another 30 minutes. This will soften the apples and blend the flavors.

    Infusing The Flavors

    Adding spices is the key to a flavorful wassail. Common spices include cinnamon, cloves, and nutmeg. You will also need some citrus fruits like oranges and lemons.

    1. Add 2 cinnamon sticks.
    2. Add 6-8 whole cloves.
    3. Grate a small amount of nutmeg.
    4. Cut one orange and one lemon into slices.

    Add the spices and citrus slices to the simmering pot. Stir gently to mix them with the base. Let the mixture simmer for another 30 minutes. This allows the flavors to infuse fully.

    After the final simmering, your wassail base is ready. Strain out the solids before serving. Enjoy the warm, spiced goodness!

    Medieval Wassail Recipe: Warm Up with Authentic Festive Flavors

    Credit: britishfoodhistory.com

    Adding Festive Garnishes

    Adding festive garnishes to your medieval wassail can elevate the drink to new heights. Simple touches can transform it into a visually appealing and delightful treat. Whether you choose traditional or modern garnishes, each adds a unique flair.

    Classic Garnish Options

    Classic garnishes maintain the drink’s authentic medieval charm. A popular choice is a cinnamon stick. It adds both aroma and flavor. Cloves can also be used. They provide a warm, spicy touch. Sliced oranges and lemons are often added. They offer a burst of citrus and a pop of color.

    Another classic option is star anise. Its unique shape makes a beautiful garnish. Dried cranberries or raisins can be included. They add sweetness and texture. These traditional garnishes not only taste good but also evoke the spirit of medieval feasts.

    Creative Modern Twists

    Creative modern twists bring a contemporary flair to your wassail. Fresh rosemary sprigs are a great choice. They add a fragrant, herbal note. Edible flowers can also be used. They provide a splash of color and elegance.

    Candied ginger is another creative option. It adds a spicy-sweet zing. Apple slices cut into star shapes can be used. They are both decorative and tasty. Pomegranate seeds are a fun addition. They add color, crunch, and a tart flavor.

    For a unique touch, consider using a cinnamon sugar rim. It adds sweetness and a festive look. These modern twists make your wassail both beautiful and flavorful.

    Serving And Presentation

    Serving and presenting your Medieval Wassail Recipe can make a difference in the experience. The right temperature and vessel add to the charm. Here, we discuss the ideal serving temperature and traditional serving vessels.

    Ideal Serving Temperature

    The perfect serving temperature for wassail is crucial. The drink should be served warm, not boiling. Aim for a temperature between 120°F to 140°F (49°C to 60°C). This range keeps the flavors intact and ensures a comforting warmth.

    Use a food thermometer to check the temperature. This ensures that your wassail is neither too hot nor too cold. Serving at the right temperature enhances the taste and experience.

    Traditional Serving Vessels

    In the medieval era, wassail was served in special vessels. These were often made from wood, pewter, or ceramics. The most traditional vessel is the wassail bowl. This bowl is large and ornate, often passed around the group for sharing.

    For a modern touch, you can use ceramic mugs or glass cups. Ensure they are heat-resistant to hold the warm drink. Decorate your vessel with festive ribbons or holly for an authentic look.

    Here is a quick guide on traditional and modern vessels:

    Traditional Vessels Modern Alternatives
    Wassail Bowl Ceramic Mugs
    Wooden Tankards Glass Cups
    Pewter Goblets Heat-resistant Glasses

    Choose the vessel that best suits your occasion. Whether traditional or modern, ensure it complements the medieval theme of your wassail.

    Wassail Variations

    Wassail, a warm and spiced beverage, has a rich history dating back to medieval times. Over the years, variations of this festive drink have emerged, influenced by local ingredients and preferences. Let’s explore some of these delightful Wassail Variations.

    Regional Recipe Differences

    Different regions have their own unique twists on the traditional wassail recipe. Here are a few notable examples:

    Region Ingredients Notes
    England Apples, ale, spices Classic and traditional
    Scotland Whisky, honey, spices Stronger flavor
    Wales Cider, spices, sugar Sweeter taste

    Non-alcoholic Alternatives

    For those who prefer a non-alcoholic option, there are several delicious alternatives available:

    • Apple Juice Wassail: Replace ale or cider with apple juice. Add traditional spices like cinnamon, cloves, and nutmeg.
    • Fruit Punch Wassail: Mix apple juice with orange juice and cranberry juice. Add your favorite spices for a festive flavor.
    • Herbal Wassail: Use herbal tea as a base. Add honey, lemon, and spices for a soothing beverage.

    These non-alcoholic alternatives are perfect for all ages and can be enjoyed by everyone at your gathering.

    Pairing Wassail With Food

    Pairing Wassail with food can elevate your festive experience. Wassail, a warm and spicy drink, complements many holiday dishes. The blend of fruits and spices in Wassail pairs well with both savory and sweet foods.

    Complementary Festive Dishes

    Wassail goes well with roasted meats. Think turkey or chicken with crispy skin. The drink’s warmth and spices enhance the flavors of the meat. Serve Wassail alongside stuffing and gravy. The drink’s fruitiness balances the savory flavors.

    Another great pairing is with cheese platters. Choose strong cheeses like aged cheddar. The sharpness of the cheese contrasts nicely with the sweet and spicy notes of Wassail.

    Root vegetables are also a good match. Roasted carrots, parsnips, and potatoes complement the drink’s hearty flavors. The caramelized edges of the vegetables add a sweet note, echoing the fruitiness of Wassail.

    Perfect Desserts

    Wassail pairs wonderfully with many desserts. Serve it with apple pie. The spices in both the drink and the pie complement each other. The warm drink enhances the apple flavors.

    Gingerbread is another perfect match. The spices in the gingerbread echo the spices in the Wassail. The sweetness of the gingerbread balances the drink’s tart notes.

    Try Wassail with fruitcake. The rich, dense cake pairs well with the drink’s fruity flavors. The spices in the fruitcake match the spices in the Wassail, creating a harmonious pairing.

    For a lighter option, consider serving Wassail with shortbread cookies. The buttery cookies offer a simple, yet delicious, contrast to the complex flavors of the drink.

    Historical Anecdotes

    Wassail is a drink steeped in history and tradition. This festive beverage dates back to the medieval period. It was more than just a drink; it was a symbol of celebration and community. Let’s dive into some historical anecdotes surrounding this classic recipe.

    Medieval Celebrations

    In medieval times, people gathered for grand feasts and celebrations. During these events, Wassail played a central role. It was often served from a large bowl, passed around the table. This act of sharing the drink symbolized unity and good fortune.

    Wassailing was not just for the nobility. Common folk also enjoyed this tradition. They would go from house to house, singing and offering good wishes. In return, they received a cup of Wassail or other treats. This practice helped foster a strong sense of community.

    Wassail In Literature

    Wassail has also found its place in literature. It often appears in medieval poems and stories. For example, in Geoffrey Chaucer’s “The Canterbury Tales,” Wassail is mentioned as part of the festive atmosphere. The drink’s presence in literature highlights its importance in medieval culture.

    Shakespeare also referenced Wassail. In “Hamlet,” the character refers to Wassail as part of a night of revelry. These literary mentions show how deeply ingrained Wassail was in social and cultural activities.

    Medieval Wassail Recipe: Warm Up with Authentic Festive Flavors

    Credit: www.thesaucyfig.com

    Frequently Asked Questions

    What Is A Medieval Wassail?

    A medieval wassail is a traditional spiced drink. It was enjoyed during winter celebrations. The drink often includes ale, cider, or wine.

    How Do You Make Wassail?

    To make wassail, combine ale or cider with spices. Common spices include cinnamon, cloves, and nutmeg. Simmer the mixture and serve warm.

    What Ingredients Are In Wassail?

    Wassail typically includes ale or cider, sugar, and spices. Spices like cinnamon, cloves, and nutmeg are common. Sometimes, fruits like apples are added.

    What Does Wassail Taste Like?

    Wassail has a warm, spiced flavor. It is sweet from sugar and fruits. The spices give it a festive taste.

    Conclusion

    Enjoy crafting your own medieval wassail at home. It’s simple and delightful. With each sip, travel back in time. Share this recipe with friends and family. Create warm and memorable gatherings. The natural spices and flavors bring cheer. Perfect for cold winter nights.

    Try it, and enjoy the timeless tradition. Your taste buds will thank you. Cheers to good health and happiness!

    Essential Oil Skin Lightening Recipe: Achieve Radiant Glow Naturally

    Essential oils can help lighten your skin naturally. They offer a safe alternative to chemical products.

    In recent years, essential oils have gained popularity for their skin benefits. People now seek natural solutions to improve their complexion. Essential oils can reduce dark spots and even out skin tone. But how do you use them effectively? This blog post shares a simple and effective essential oil skin lightening recipe.

    You will learn the best oils to use and how to blend them. Discover how to achieve a brighter, more radiant complexion with natural ingredients. Say goodbye to harsh chemicals and hello to glowing skin. Ready to get started? Let’s explore this easy recipe together.

    Essential Oil Skin Lightening Recipe: Achieve Radiant Glow Naturally

    Credit: www.netmeds.com

    Introduction To Essential Oils For Skin Lightening

    Essential oils have been used for centuries for their healing properties. These natural extracts offer various benefits for the skin. Many people use essential oils to lighten their skin. They seek a more even skin tone. In this blog post, we will explore how essential oils can help. We will also compare them to chemical products.

    Benefits Of Essential Oils

    Essential oils are natural and safe. They do not have harsh chemicals. This reduces the risk of skin irritation. Many essential oils have skin-lightening properties. They can help reduce dark spots. They can also improve the overall complexion. Essential oils like lemon, lavender, and tea tree oil are popular. They offer many benefits for the skin. They also have a pleasant aroma.

    Essential oils contain antioxidants. These help fight free radicals. Free radicals cause skin damage and aging. Antioxidants help to keep the skin healthy. They also promote a youthful appearance. Essential oils are also rich in vitamins. These nourish the skin. They help in skin repair and regeneration. This results in a more even skin tone.

    Natural Vs. Chemical Products

    Natural products like essential oils are free from synthetic ingredients. They are gentler on the skin. Chemical products often contain harsh ingredients. These can cause irritation and allergic reactions. Many people prefer natural products for this reason. Essential oils provide a safer alternative.

    Chemical products can deliver faster results. But they may also come with side effects. Skin lightening creams may contain hydroquinone. This can cause skin thinning and sensitivity. Natural products take longer to show results. But they are safer for long-term use. Essential oils offer a natural way to achieve lighter skin.

    Choosing between natural and chemical products depends on your skin type. It also depends on your personal preference. Essential oils are a great option for those who prefer natural remedies. They offer a gentle yet effective way to lighten the skin.

    Key Ingredients For Radiant Skin

    Discover the magic of essential oils for skin lightening. These natural ingredients can give you radiant skin. Let’s dive into the key ingredients that can help brighten your complexion.

    Lemon Essential Oil

    Lemon essential oil is rich in vitamin C. It helps lighten dark spots and evens skin tone. This oil is known for its brightening properties. Use it sparingly as it can be potent.

    Lavender Essential Oil

    Lavender essential oil is soothing and healing. It reduces inflammation and can help with skin discoloration. This oil also promotes skin cell regeneration. Use it to achieve a more even skin tone.

    Frankincense Essential Oil

    Frankincense essential oil is a powerful anti-aging agent. It helps to lighten dark spots and scars. This oil improves skin elasticity and promotes a youthful glow. Include it in your skin care routine for radiant skin.

    Preparation Steps

    Creating your own essential oil skin lightening recipe is both rewarding and easy. Follow these simple preparation steps to ensure you achieve the best results. Let’s dive in.

    Gathering Ingredients

    Start by collecting the necessary ingredients for your skin lightening blend. You will need:

    • 3 drops of lemon essential oil
    • 2 drops of lavender essential oil
    • 1 tablespoon of carrier oil (like coconut or jojoba oil)

    Make sure your essential oils are pure and of high quality. This ensures safety and effectiveness.

    Necessary Tools

    Before you begin, gather the tools you will need. These include:

    • A small glass bowl
    • A dropper for measuring oils
    • A small dark glass bottle for storage
    • A spoon for mixing

    Using the right tools helps maintain the integrity of your essential oils. It also makes the process smoother and more enjoyable.

    Diy Skin Lightening Recipe

    Creating your own DIY skin lightening recipe with essential oils can be simple and effective. These natural ingredients can help brighten your complexion without harsh chemicals. Follow this easy recipe to start your journey to radiant skin.

    Step-by-step Instructions

    1. Gather your ingredients. You will need:
      • 2 tablespoons of carrier oil (like coconut or almond oil)
      • 3 drops of lemon essential oil
      • 2 drops of lavender essential oil
      • 1 drop of tea tree essential oil
    2. In a small bowl, mix the carrier oil with the essential oils.
    3. Stir the mixture well to ensure the oils blend together.
    4. Transfer the mixture to a dark glass bottle. This helps preserve the oils.
    5. Store the bottle in a cool, dark place.

    Application Tips

    • Clean your face thoroughly before applying the oil mixture.
    • Use a few drops and gently massage into your skin.
    • Apply the mixture at night for best results.
    • Do a patch test to check for any allergic reactions.
    • Avoid sun exposure after application, as lemon oil can make the skin sensitive.

    Safety Precautions

    Essential oils can enhance your skin lightening routine. Yet, they must be used with care. The following safety precautions ensure you enjoy their benefits without harm.

    Patch Testing

    Before using any essential oil, always perform a patch test. Apply a small amount to your inner forearm. Wait 24 hours to check for any allergic reaction. Redness, itching, or swelling indicates an allergy. Discontinue use immediately.

    Dilution Guidelines

    Essential oils are potent. Never use them undiluted on your skin. Mix them with a carrier oil like coconut or jojoba. A safe dilution ratio is 2-3 drops of essential oil per teaspoon of carrier oil. This prevents irritation and ensures safe application.

    Incorporating Essential Oils Into Daily Routine

    Using essential oils for skin lightening can be a part of your daily routine. With the right approach, you can see benefits without much effort. Below are some simple ways to add essential oils into your morning and evening skincare rituals.

    Morning Routine

    Start your day with a fresh face. In the morning, your skin needs hydration and protection. Follow this routine:

    • Cleanse: Use a mild cleanser to wash your face.
    • Moisturize: Mix a few drops of essential oil with your favorite moisturizer.
    • Sun Protection: Apply sunscreen to protect your skin from UV rays.

    Here is a simple recipe for a morning moisturizer:

    Ingredient Amount
    Carrier Oil (e.g., jojoba or almond) 1 tablespoon
    Lavender Essential Oil 2-3 drops
    Lemon Essential Oil 1-2 drops

    Mix the ingredients in your palm. Apply gently to your face.

    Evening Routine

    Evening is the time for repair and rejuvenation. Follow this simple evening routine:

    • Cleanse: Remove makeup and dirt with a gentle cleanser.
    • Exfoliate: Use a mild exfoliant once or twice a week.
    • Serum: Apply a serum with essential oils for skin lightening.

    Here is a simple recipe for an evening serum:

    Ingredient Amount
    Carrier Oil (e.g., rosehip or argan) 1 tablespoon
    Frankincense Essential Oil 2-3 drops
    Sandalwood Essential Oil 1-2 drops

    Mix the ingredients and apply them to your face before bed. This routine helps repair your skin overnight.

    Additional Skin Care Tips

    Adding essential oils to your skincare routine can be effective. But that’s not all you need. Here are some additional tips to enhance your skin lightening results.

    Hydration And Diet

    Staying hydrated is crucial for healthy skin. Drink at least 8 glasses of water daily. Water helps flush out toxins. It also keeps your skin moisturized.

    Your diet affects your skin too. Eat foods rich in vitamins and minerals. Include fruits and vegetables in your meals. They provide antioxidants that fight free radicals. Omega-3 fatty acids are also beneficial. You can find them in fish, nuts, and seeds.

    Sun Protection

    Sun protection is essential for skin lightening. The sun’s UV rays can darken your skin. Always wear sunscreen with SPF 30 or higher. Apply it even on cloudy days.

    Wear protective clothing too. Long sleeves and wide-brimmed hats are good choices. Sunglasses protect the delicate skin around your eyes. Seek shade whenever possible. Avoid the sun between 10 a.m. and 4 p.m. when it is strongest.

    Essential Oil Skin Lightening Recipe: Achieve Radiant Glow Naturally

    Credit: www.pinterest.com

    Success Stories And Testimonials

    Discover the transformative power of essential oils for skin lightening. Real users share their success stories and testimonials. Witness the incredible changes through their experiences and before-and-after results. These genuine accounts will inspire and guide you.

    User Experiences

    Many users have tried essential oil skin lightening recipes. They report positive changes in their skin tone. Below are some of their experiences:

    • Maria: “My dark spots faded within weeks. I feel more confident.”
    • James: “My skin looks brighter and feels smoother. I love it.”
    • Sophia: “I noticed a reduction in pigmentation. My skin is glowing now.”

    These real-life experiences highlight the effectiveness of essential oils.

    Before And After Results

    Here are some before and after results from our users. These images show the visible changes in their skin tone.

    User Before After
    Maria Before Maria After Maria
    James Before James After James
    Sophia Before Sophia After Sophia

    These images showcase the remarkable improvements users have achieved.

    Essential Oil Skin Lightening Recipe: Achieve Radiant Glow Naturally

    Credit: pronounceskincare.com

    Frequently Asked Questions

    What Essential Oils Are Best For Skin Lightening?

    Lemon, lavender, and tea tree essential oils are popular for skin lightening. They contain natural bleaching properties and antioxidants. Always dilute with a carrier oil.

    How Often Should I Apply The Recipe?

    Apply the essential oil skin lightening recipe twice daily. Consistency is key for noticeable results. Always perform a patch test first.

    Are There Any Side Effects Of Using Essential Oils?

    Some essential oils can cause irritation or allergic reactions. Always dilute and perform a patch test. Consult a dermatologist if unsure.

    Can Essential Oils Permanently Lighten Skin?

    Essential oils can help lighten skin temporarily by reducing dark spots and pigmentation. Consistent use is required for maintaining results.

    Conclusion

    Achieving brighter skin can be simple with essential oils. Follow this easy recipe for natural skin lightening. Remember to patch test first. Consistency is key for visible results. Use the mixture regularly for best outcomes. Healthy, glowing skin is within reach.

    Enjoy the benefits of nature’s bounty. Feel confident in your skin. Stay patient and persistent. Your skin will thank you.

    Rice Flour Vietnamese Recipes: Authentic and Delicious Dishes

    Rice flour is a versatile ingredient in Vietnamese cuisine. It creates delicious, unique dishes.

    Vietnamese recipes using rice flour are easy and tasty. From savory to sweet, there’s something for everyone. Vietnamese cuisine is known for its rich flavors and fresh ingredients. Rice flour plays a vital role in many traditional dishes. From crispy pancakes to soft, chewy cakes, it offers a delightful texture.

    These recipes are not only delicious but also simple to prepare. Whether you’re a seasoned cook or a beginner, you’ll find rice flour recipes easy to follow. They bring a taste of Vietnam right to your kitchen. Let’s explore some popular rice flour Vietnamese recipes that will surely impress your family and friends.

    Rice Flour Vietnamese Recipes: Authentic and Delicious Dishes

    Credit: thevietvegan.com

    Introduction To Rice Flour In Vietnamese Cuisine

    Rice flour is a key ingredient in Vietnamese cooking. It is made from finely milled rice and used in many traditional recipes. This versatile flour brings a unique texture and flavor to dishes. Vietnamese cuisine uses rice flour to create both sweet and savory meals. Let’s explore its significance and common uses in Vietnamese cooking.

    Culinary Significance

    Rice flour holds a special place in Vietnamese kitchens. It is gluten-free, making it a staple for those with gluten sensitivity. The flour is light and fine, giving dishes a soft and smooth texture. Rice flour is also economical, making it accessible for all households. Its neutral flavor allows it to blend well with various ingredients. From street food to festive dishes, rice flour is essential.

    Benefit Description
    Gluten-Free Suitable for people with gluten allergies.
    Economical Affordable and widely available.
    Neutral Flavor Blends easily with other ingredients.
    Light Texture Gives dishes a soft and smooth feel.

    Common Uses

    Rice flour is used in a variety of Vietnamese recipes. Here are some common uses:

    • Bánh Xèo: A crispy pancake filled with shrimp, pork, and bean sprouts.
    • Bánh Cuốn: Steamed rice rolls filled with minced pork and mushrooms.
    • Bánh Khọt: Small savory rice cakes topped with shrimp and herbs.
    • Chè: Sweet dessert soups made with rice flour and coconut milk.
    1. Bánh Xèo: Mix rice flour with water and turmeric. Pour on a hot pan. Add fillings and cook until crispy.
    2. Bánh Cuốn: Steam rice flour batter. Fill with cooked pork and mushrooms. Serve with dipping sauce.
    3. Bánh Khọt: Pour rice flour batter into small molds. Add shrimp and cook until golden.
    4. Chè: Combine rice flour with coconut milk and sugar. Cook until thickened. Serve warm or cold.

    Rice flour is a versatile and essential ingredient in Vietnamese cuisine. It enhances the texture and flavor of many dishes. Whether for savory pancakes or sweet desserts, rice flour is a must-have in your kitchen.

    Bánh Xèo: Vietnamese Sizzling Pancakes

    Bánh Xèo, or Vietnamese Sizzling Pancakes, offers a delightful crunch. These savory pancakes boast a vibrant yellow hue, thanks to turmeric. The crispy exterior encases a flavorful filling of shrimp, pork, and bean sprouts. Perfect for a light meal or a tasty snack, Bánh Xèo is a favorite in Vietnamese cuisine.

    Ingredients Needed

    • 1 cup rice flour
    • 1 cup coconut milk
    • 1 cup water
    • 1/2 teaspoon turmeric powder
    • 1/2 teaspoon salt
    • 200 grams shrimp, peeled and deveined
    • 200 grams pork belly, thinly sliced
    • 1 cup bean sprouts
    • 1 small onion, thinly sliced
    • 2 cloves garlic, minced
    • Fresh herbs (mint, basil, cilantro)
    • Lettuce leaves for wrapping
    • Fish sauce for dipping

    Cooking Method

    Mix rice flour, coconut milk, water, turmeric, and salt. Stir until smooth. Let the batter rest for 30 minutes.

    Heat oil in a skillet over medium heat. Sauté garlic until fragrant. Add shrimp and pork, then cook until both are done.

    Pour a ladle of batter into the skillet, tilting to spread thinly. Add shrimp, pork, bean sprouts, and onions on one side.

    Cover and cook until the pancake’s edges lift from the skillet. Fold the pancake in half to encase the filling. Cook until crispy and golden.

    Serve Bánh Xèo with fresh herbs and lettuce. Dip in fish sauce for extra flavor.

    Bánh Cuốn: Steamed Rice Rolls

    Rice flour finds its way into many Vietnamese recipes. One standout dish is Bánh Cuốn, or steamed rice rolls. These delicate rolls are a beloved breakfast or snack option. They offer a unique texture and a burst of flavors.

    Traditional Fillings

    The traditional filling for Bánh Cuốn includes minced pork. This is often mixed with wood ear mushrooms and shallots. The combination creates a savory and slightly crunchy filling. Some variations include shrimp or tofu for a different taste.

    Seasoning is simple yet effective. Fish sauce, pepper, and a bit of sugar enhance the natural flavors. Fresh herbs like cilantro or mint often complement the filling. These ingredients create a balance of savory and fresh notes.

    Serving Suggestions

    Bánh Cuốn is usually served with a side of nước chấm. This is a dipping sauce made from fish sauce, lime juice, sugar, and chili. The sauce adds a tangy and spicy kick. It elevates the flavors of the steamed rolls.

    Fried shallots are often sprinkled on top. They provide a nice contrast to the soft rolls. Fresh herbs and cucumber slices add a refreshing touch. Bean sprouts can be served on the side for extra crunch.

    Some people like to add Vietnamese sausage, known as chả lụa. This makes the dish heartier. You can also serve Bánh Cuốn with a small bowl of broth. The broth can be sipped between bites for a comforting experience.

    Rice Flour Vietnamese Recipes: Authentic and Delicious Dishes

    Credit: www.ricenflour.com

    Bánh Khọt: Mini Rice Flour Pancakes

    Bánh Khọt: Mini Rice Flour Pancakes Recipe

    Bánh Khọt, also known as mini rice flour pancakes, is a beloved Vietnamese street food. These bite-sized delights are crispy on the outside and soft inside. They are perfect for any occasion, offering a delightful mix of textures and flavors.

    Preparation Steps

    Making Bánh Khọt involves a few simple steps. Here’s how:

    1. Prepare the batter: Mix rice flour, coconut milk, and water. Add a pinch of turmeric powder for color.
    2. Heat the pan: Use a special Bánh Khọt pan or a regular non-stick pan with small molds.
    3. Cook the pancakes: Pour the batter into the molds. Add shrimp or minced pork on top. Cover and cook until the edges are crispy.
    4. Remove and serve: Carefully remove the pancakes from the pan. Place them on a serving plate.

    Toppings And Dips

    The right toppings and dips enhance the flavor of Bánh Khọt. Here are some popular options:

    • Fresh herbs: Mint, cilantro, and basil add freshness.
    • Pickled vegetables: Carrot and daikon radish provide a tangy crunch.
    • Nuoc Cham: This Vietnamese dipping sauce combines fish sauce, lime juice, sugar, and chili. It’s essential for Bánh Khọt.
    • Crushed peanuts: Sprinkle these on top for extra texture.

    Bánh Bèo: Water Fern Cakes

    Bánh Bèo, or Water Fern Cakes, are delightful Vietnamese street food. These small, savory rice cakes are a favorite in Central Vietnam. The cakes are soft and delicate, topped with shrimp, scallions, and crunchy toppings. They are served with a side of fish sauce for dipping. Their unique texture and flavor make them a beloved treat.

    Making The Batter

    To start, gather rice flour, tapioca starch, and water. Mix these ingredients in a large bowl. Stir until the mixture is smooth and free of lumps. Let the batter rest for about 30 minutes. This helps the flour absorb the water.

    During this time, prepare the shrimp topping. Cook and finely chop the shrimp. Mix with finely chopped green onions. Add a pinch of salt and pepper. Set the topping aside for later.

    Steaming Process

    Prepare a steamer with enough water for 20 minutes of steaming. Grease small, shallow dishes with oil. Pour the batter into each dish, filling about halfway. Place the dishes in the steamer. Cover and steam for about 7-10 minutes.

    Check the cakes for doneness. They should be firm but soft. Remove the dishes from the steamer. Let them cool slightly before topping with the shrimp mixture.

    Serve the Bánh Bèo with a side of fish sauce for dipping. Enjoy the balance of flavors and textures in each bite.

    Bánh Canh: Thick Noodle Soup

    Bánh Canh: Thick Noodle Soup is a beloved Vietnamese dish. This comforting soup features thick, chewy noodles made from rice flour. The dish is famous for its rich, flavorful broth and hearty ingredients. It’s perfect for a filling meal any time of the day.

    Homemade Noodles

    Making Bánh Canh noodles at home is simple and satisfying. Here’s a step-by-step guide:

    • Mix rice flour and tapioca starch in a bowl.
    • Gradually add water while stirring until a dough forms.
    • Knead the dough until smooth and elastic.
    • Roll out the dough on a floured surface.
    • Cut the dough into thick strips, around 1/4 inch wide.

    Boil the noodles until they float, then rinse under cold water. Your homemade noodles are ready!

    Flavorful Broth

    The broth is the heart of Bánh Canh. A rich, savory broth enhances the dish’s taste. Follow these steps to prepare the broth:

    1. Start with a base of chicken or pork bones.
    2. Simmer the bones in water for a few hours.
    3. Add shallots, garlic, and ginger for depth of flavor.
    4. Season with fish sauce, salt, and pepper.
    5. Strain the broth to remove any solids.

    This broth pairs perfectly with the thick noodles. Add toppings like shrimp, pork, or quail eggs for extra flavor.

    Enjoy your homemade Bánh Canh with fresh herbs and lime wedges.

    Tips For Perfect Rice Flour Dishes

    Creating the perfect rice flour dishes can be a delightful experience. This ingredient is versatile and essential for many Vietnamese recipes. To ensure your dishes turn out great, follow these tips. You’ll learn to choose quality rice flour and avoid common mistakes.

    Choosing Quality Rice Flour

    Not all rice flour is the same. Look for fine, white rice flour. It should feel smooth when rubbed between your fingers. Avoid rice flour with a gritty texture. It can affect the final dish’s consistency. Check the packaging for added ingredients. Pure rice flour works best for Vietnamese recipes. Buy small quantities to keep it fresh. Store it in an airtight container in a cool, dry place.

    Common Mistakes To Avoid

    Many people make mistakes that can ruin their dishes. Using old rice flour is one. It loses its freshness and can change the texture. Measure your ingredients correctly. Too much or too little rice flour can alter the dish. Don’t rush the cooking process. Some recipes need time for the batter to rest. This improves the texture and flavor. Avoid using too much water when mixing. The batter should be thick and smooth, not runny. Finally, ensure your pan or steamer is hot enough. This helps achieve the right consistency and cook evenly.

    Pairing Rice Flour Dishes With Drinks

    Rice flour is a key ingredient in many traditional Vietnamese dishes. These dishes are often enjoyed with specific drinks that enhance their flavors. Pairing rice flour dishes with the right drinks can elevate your dining experience.

    Traditional Vietnamese Beverages

    Vietnamese cuisine offers a variety of traditional beverages that pair well with rice flour dishes. These drinks are not only delicious but also deeply rooted in Vietnamese culture.

    • Tra Da (Iced Tea): A refreshing drink that balances the richness of rice flour dishes.
    • Nuoc Mia (Sugarcane Juice): Sweet and cool, it complements savory rice flour treats.
    • Che (Sweet Dessert Soup): Often served after meals, it pairs well with sweet rice flour desserts.

    Modern Drink Pairings

    While traditional beverages are wonderful, modern drink pairings can add a new twist to your meal. These pairings bring a fresh perspective to classic Vietnamese dishes.

    Drink Recommended Dish
    Fruit Smoothies Banh Xeo (Savoury Pancake)
    Craft Beer Banh Cuon (Steamed Rice Rolls)
    Green Tea Latte Banh Khot (Mini Savoury Pancake)

    Experimenting with drink pairings can make your meals more enjoyable. Whether you prefer traditional or modern beverages, there’s something for everyone.

    Rice Flour Vietnamese Recipes: Authentic and Delicious Dishes

    Credit: beyondsweetandsavory.com

    Frequently Asked Questions

    What Is Rice Flour Used For In Vietnamese Recipes?

    Rice flour is a staple in Vietnamese cuisine. It’s used to make bánh xèo, bánh cuốn, and bánh khọt. These dishes are popular for their unique textures and flavors.

    How Do You Make Bánh Xèo?

    To make bánh xèo, mix rice flour, turmeric, and water. Pour the batter into a hot pan and add fillings like shrimp and bean sprouts. Cook until crispy.

    Can I Substitute Rice Flour In Vietnamese Recipes?

    Yes, you can substitute rice flour with tapioca flour or cornstarch. However, the texture and flavor may slightly differ.

    What Are Gluten-free Vietnamese Dishes?

    Many Vietnamese dishes are naturally gluten-free. Examples include phở, gỏi cuốn (spring rolls), and bánh xèo. These dishes use rice flour or rice noodles.

    Conclusion

    Rice flour brings unique flavors to Vietnamese dishes. Its versatility impresses home cooks. Try these recipes at your next meal. Delight your family with new tastes. Rice flour adds a special touch. These recipes are easy to make. Enjoy authentic Vietnamese cuisine at home.

    Share these dishes with friends. They will appreciate the effort. Experiment with rice flour and discover its many uses. Cooking can be fun and rewarding. Happy cooking!

    Making Burgers from Scratch Recipe: Ultimate DIY Guide

    Who doesn’t love a good burger? Making burgers from scratch can be a fun and rewarding experience.

    Cooking at home gives you control over ingredients and flavors. Freshly made burgers taste better and are healthier than store-bought ones. You can get creative with your toppings and sauces. Plus, it’s a great way to impress family and friends.

    Making your own burgers might seem hard, but it’s easier than you think. With simple steps and a few fresh ingredients, you can create a delicious burger from scratch. Ready to dive in and make the best burger of your life? Let’s get started!

    Introduction To Homemade Burgers

    Crafting burgers from scratch offers a delicious and fun cooking experience. Fresh ingredients and homemade patties make all the difference. Enjoy the process and the tasty results.

    Making burgers from scratch is a rewarding experience. It allows you to control every ingredient. This guarantees a fresh and delicious outcome. You can customize your burger to your taste. Plus, the aroma of cooking burgers fills your kitchen with mouthwatering scents.

    Why Make Burgers At Home?

    Homemade burgers offer many advantages. First, you know exactly what goes into them. No hidden preservatives or additives. You can choose the best quality meat. Fresh vegetables, and flavorful spices. Also, making burgers at home is fun. It’s a great activity for family and friends. Everyone can join in the process. From shaping the patties to adding toppings.

    Health And Taste Benefits

    Making burgers at home can be healthier. You control the fat content and portion size. You can use lean cuts of meat. Or even opt for plant-based alternatives. Add fresh, organic vegetables. This makes the meal nutritious and balanced. Homemade burgers taste better. Fresh ingredients make a big difference. The flavors are richer and more vibrant. You can experiment with different seasonings. Create your unique burger masterpiece. Homemade burgers are more satisfying. Every bite is a testament to your effort and creativity. “`
    Making Burgers from Scratch Recipe: Ultimate DIY Guide

    Credit: feelgoodfoodie.net

    Essential Ingredients

    Making burgers from scratch requires the right ingredients. Each component contributes to the flavor, texture, and overall experience. Let’s explore the essential ingredients for the perfect homemade burger.

    Choosing The Right Meat

    The foundation of any great burger is the meat. Choose ground beef with a good fat content. Aim for 80% lean and 20% fat. This ratio ensures a juicy and flavorful patty. Avoid very lean meat. It can result in dry burgers. Freshly ground beef from a butcher is the best option. It often has a better texture and taste.

    Must-have Seasonings

    Seasonings elevate the taste of your burger. Salt and pepper are essential. They enhance the natural flavor of the meat. Use kosher salt and freshly ground black pepper for the best results. Garlic powder and onion powder add depth. A teaspoon of each can make a big difference. Some people like to add Worcestershire sauce. A tablespoon can add a savory kick. Do not overdo the seasonings. You want to taste the meat.

    Preparing The Patties

    Mix ground beef with salt and pepper. Form into patties. Make a small dent in the middle to keep their shape.

    Making burgers from scratch starts with preparing the patties. This step is vital for a tasty burger. Fresh, well-prepared patties enhance the flavor and texture. Let’s dive into the details of shaping and seasoning the perfect patty.

    Shaping The Perfect Patty

    Choose high-quality ground beef for your patties. An 80/20 ratio of meat to fat works best. Divide the meat into equal portions. Roll each portion into a ball. Flatten the ball gently with your hands. Aim for a uniform thickness of about three-quarters of an inch. This ensures even cooking. Make a small indent in the center of each patty. This prevents puffing up during cooking.

    Seasoning Tips And Tricks

    Seasoning is key for flavor. Salt and pepper are essential. Sprinkle them evenly on both sides of the patty. Add garlic powder, onion powder, or paprika for extra taste. Do not overdo the seasoning. You want to enhance, not overpower, the beef flavor. Fresh herbs like parsley or thyme can add a fresh touch. Mix them into the meat before shaping the patties. Avoid using too many ingredients. Simple seasoning keeps the burger delicious and true to its flavor. “`
    Making Burgers from Scratch Recipe: Ultimate DIY Guide

    Credit: www.allrecipes.com

    Cooking Techniques

    Cooking burgers from scratch can be a fun and rewarding experience. Knowing the right cooking techniques can make all the difference. Whether you prefer the smoky flavor of grilled burgers or the juicy texture of pan-fried ones, mastering these techniques is key. Let’s dive into the details.

    Grilling Vs. Pan-frying

    Choosing between grilling and pan-frying your burgers depends on your preference and the tools you have.

    Grilling Pan-Frying
    Flavor: Smoky and charred Flavor: Rich and juicy
    Texture: Crispy outside, soft inside Texture: Evenly cooked, tender
    Tools: Grill, tongs, brush Tools: Skillet, spatula

    Grilling Tips:

    • Preheat the grill for 10 minutes.
    • Oil the grates to prevent sticking.
    • Grill burgers for 4-5 minutes on each side.

    Pan-Frying Tips:

    • Preheat the skillet on medium-high heat.
    • Add a small amount of oil to the pan.
    • Cook burgers for 5-6 minutes on each side.

    Achieving The Ideal Doneness

    Cooking burgers to the right doneness ensures they are safe to eat and full of flavor. Use a meat thermometer to check the internal temperature.

    Doneness Temperature
    Rare 120-125°F (49-52°C)
    Medium Rare 130-135°F (54-57°C)
    Medium 140-145°F (60-63°C)
    Medium Well 150-155°F (65-68°C)
    Well Done 160°F (71°C) and above

    Tips for Checking Doneness:

    1. Insert the thermometer into the center of the burger.
    2. Avoid touching the grill or pan with the thermometer.
    3. Check the temperature after the suggested cooking time.

    With these techniques, you can create delicious homemade burgers tailored to your taste. Enjoy experimenting and perfecting your method!

    Building The Burger

    Building a burger from scratch is a fun and rewarding experience. It allows you to customize every element to your taste. From selecting the perfect bun to choosing creative toppings, each step is crucial. Let’s dive into the essential components that make a homemade burger delicious and unique.

    Best Buns To Use

    The bun is the foundation of any great burger. Opt for fresh, soft buns. Brioche buns add a slight sweetness. Pretzel buns offer a chewy texture. Whole wheat buns give a healthy twist. The bun should complement the burger’s flavors and hold all the ingredients well.

    Creative Toppings

    Toppings can elevate your burger to new heights. Classic options include lettuce, tomato, and onion. For a twist, add grilled mushrooms or caramelized onions. Avocado slices give a creamy texture. Pickles add a tangy crunch. Cheese choices vary from cheddar to blue cheese. Experiment with different toppings to find your favorite combination.

    Making Burgers from Scratch Recipe: Ultimate DIY Guide

    Credit: www.inspiredtaste.net

    Delicious Sauces

    Creating the perfect burger starts with the right ingredients. A crucial component is the sauce. The right sauce can elevate your burger from good to great. In this section, we’ll explore some delicious sauce options. We will cover classic recipes and unique flavor combinations.

    Classic Sauce Recipes

    Classic sauces are timeless. They have simple ingredients and are easy to make. Start with a basic mayonnaise and ketchup blend. This creates a creamy, tangy base. Add mustard for a hint of spice. You can also mix in some relish for extra texture.

    Another classic is the Thousand Island dressing. Combine mayonnaise, ketchup, and pickle relish. This sauce adds a sweet and tangy kick to your burger. You can also try making a barbecue sauce. Mix ketchup, brown sugar, and vinegar. The result is a smoky, sweet flavor.

    Unique Flavor Combinations

    For a twist, experiment with unique sauces. Try a sriracha mayo. Mix mayonnaise and sriracha sauce. This adds a spicy, creamy touch. You can also create a garlic aioli. Blend mayonnaise with minced garlic and lemon juice. This sauce is rich and flavorful.

    Another idea is a blue cheese sauce. Combine blue cheese, sour cream, and lemon juice. This adds a tangy, bold flavor. You can also try a honey mustard sauce. Mix honey, mustard, and mayonnaise. This creates a sweet and tangy profile.

    Experimenting with sauces can be fun. It allows you to personalize your burger. Try different combinations and find your favorite. A great sauce can make your homemade burger unforgettable.

    Serving Suggestions

    Creating a delicious burger from scratch is an art. But what about serving suggestions? Pairing the right sides and beverages with your homemade burgers can enhance your dining experience.

    Side Dishes That Complement

    Side dishes add variety to your meal. Here are some ideas:

    • French Fries: Classic, crispy, and always a hit.
    • Sweet Potato Fries: A healthier, sweet alternative.
    • Coleslaw: Fresh, crunchy, and creamy. Perfect for balancing flavors.
    • Onion Rings: Crunchy and full of flavor. A great match for any burger.
    • Grilled Vegetables: Healthy and tasty. Adds a nice charred flavor.
    • Pickles: Tangy and crunchy. They cut through the richness of the burger.

    Beverage Pairings

    The right beverage can elevate your burger experience. Consider these options:

    • Lemonade: Refreshing and tangy. Pairs well with a juicy burger.
    • Iced Tea: A classic choice. Can be sweetened or unsweetened.
    • Craft Beer: Bold flavors that complement the richness of a burger.
    • Soda: Fizzy and sweet. A favorite for many.
    • Milkshake: Creamy and indulgent. Perfect for a special treat.
    • Water: Simple and refreshing. Keeps things light and balanced.

    Tips For The Perfect Burger Experience

    Crafting a burger from scratch starts with fresh ingredients. Choose quality meat and mix in your favorite spices. Grill to perfection and enjoy a delicious homemade burger.

    Creating the perfect burger is an art. From choosing the right ingredients to perfecting the cooking technique, each step counts. Below are some tips to ensure your homemade burgers are always a hit.

    Avoiding Common Mistakes

    Many people make simple mistakes that can ruin a great burger. Avoid overworking the meat. Mixing the ground beef too much can make your burger tough. Handle the meat gently. Ensure the grill or pan is hot before placing the patty. This ensures a nice sear and locks in the juices. Using a meat thermometer can help you cook the patty to the desired doneness. Aim for an internal temperature of 160°F (71°C). Season the patty just before cooking. Salt can draw moisture out of the meat if added too early. Use a light hand with the seasoning, and let the natural flavors of the beef shine.

    Presentation Tips

    Presentation matters. A well-presented burger can enhance the dining experience. Start with a fresh, quality bun. Toasting the bun adds a nice texture and helps it hold up better. Layer the ingredients thoughtfully. Place the lettuce on the bottom bun. This prevents the bottom bun from getting soggy. Follow with the patty, then add cheese, tomatoes, onions, and pickles. Top with the other half of the bun. Serve with style. Arrange the burger on a plate with a side of fries or a salad. Use a skewer to hold everything together if needed. A touch of garnish, like a sprig of parsley, can add a professional touch.
    Step Details
    1 Choose fresh ingredients
    2 Handle the meat gently
    3 Season just before cooking
    4 Toast the bun
    5 Layer ingredients thoughtfully
    6 Serve with style

    Frequently Asked Questions

    How Do You Make Burgers From Scratch?

    To make burgers from scratch, use fresh ground beef. Season it with salt and pepper. Form patties and cook them on a grill or skillet.

    What Ingredients Are Needed For Homemade Burgers?

    For homemade burgers, you’ll need ground beef, salt, pepper, buns, lettuce, tomato, onion, cheese, and condiments like ketchup and mustard.

    How Long To Cook Homemade Burgers?

    Cook homemade burgers for about 4-5 minutes per side. Ensure they reach an internal temperature of 160°F for safety.

    Can You Make Burgers Without A Grill?

    Yes, you can make burgers without a grill. Use a skillet or a griddle on medium-high heat to cook them.

    Conclusion

    Creating burgers from scratch can be fun and rewarding. Fresh ingredients make a big difference. Customize your burger to match your taste. Enjoy the process of cooking and sharing. Impress friends and family with your homemade burgers. Practice makes perfect, so keep experimenting.

    Soon, you’ll master your own delicious recipe. Happy cooking and bon appétit!

    Fried Tilapia Fish Recipes: Delicious and Easy Cooking Ideas

    Fried tilapia fish is a delight for seafood lovers. This versatile fish can be cooked in many delicious ways.

    If you’re looking for tasty, easy-to-make recipes, you’re in for a treat. Fried tilapia is a popular dish around the world, and for good reason. It’s a great source of protein and can be flavored with a variety of spices and marinades.

    Whether you’re a seasoned chef or a beginner in the kitchen, you can create mouth-watering meals with fried tilapia. These recipes can be perfect for family dinners or special gatherings. Dive into this blog to discover some of the best fried tilapia fish recipes that will make your taste buds dance. Get ready to impress your guests with these simple yet flavorful dishes.

    Fried Tilapia Fish Recipes: Delicious and Easy Cooking Ideas

    Credit: www.youtube.com

    Introduction To Fried Tilapia

    Fried Tilapia is a delightful dish that many seafood lovers enjoy. Its mild flavor and crispy texture make it a favorite. Whether you’re hosting a dinner or just craving some comfort food, fried tilapia can be a perfect choice. Let’s dive into why you might want to choose tilapia and its health benefits.

    Why Choose Tilapia?

    Tilapia is an affordable fish. It’s available in many grocery stores. Its mild taste appeals to many people. It doesn’t have a strong fishy flavor. This makes it versatile in recipes. You can season it in many ways. It’s also quick to cook. Perfect for busy weeknights.

    Health Benefits

    Tilapia is rich in protein. It helps build and repair muscles. It’s also low in calories. Great for those watching their weight. It contains omega-3 fatty acids. These are good for heart health. Tilapia also has essential vitamins and minerals. These include vitamin B12, potassium, and selenium. All these nutrients support overall health.

    Fried Tilapia Fish Recipes: Delicious and Easy Cooking Ideas

    Credit: littlesunnykitchen.com

    Essential Ingredients

    Fried tilapia fish recipes are both delicious and easy to make. The key to a mouth-watering dish lies in the essential ingredients. These ingredients not only enhance the flavor but also make the cooking process smooth.

    Fresh Tilapia Selection

    Choosing the right tilapia is crucial. Always opt for fresh fish. Fresh tilapia has clear eyes and bright red gills. The skin should be shiny and firm to the touch. Avoid fish with a strong odor. Fresh tilapia smells like clean water. This ensures your dish tastes fresh and delicious.

    Key Spices And Herbs

    The right spices and herbs can elevate your fried tilapia. Common spices include salt, pepper, and paprika. Garlic powder and onion powder add depth. Cumin and coriander give a warm, earthy flavor. Fresh herbs like parsley and cilantro bring a burst of freshness. You can also use lemon zest for a tangy twist.

    For a spicier kick, add red pepper flakes. Experiment with different combinations to find your perfect blend. The right spices and herbs make all the difference in your dish.

    Basic Fried Tilapia Recipe

    Fried tilapia is a delicious and easy meal to prepare. Its mild flavor and flaky texture make it a favorite for many. This basic fried tilapia recipe is perfect for beginners. With simple ingredients and steps, you can have a tasty dish on your table in no time.

    Step-by-step Instructions

    Start by gathering your ingredients. You will need fresh tilapia fillets, flour, salt, pepper, and oil. First, rinse the tilapia fillets under cold water. Pat them dry with paper towels.

    Next, season the fillets with salt and pepper on both sides. Then, coat each fillet in flour. Make sure the fillets are fully covered.

    Heat oil in a large skillet over medium heat. Once the oil is hot, place the fillets in the skillet. Cook each side for about 3-4 minutes. The fish should be golden brown and crispy.

    Remove the fillets from the skillet and place them on a paper towel-lined plate. This will help drain any excess oil. Serve hot with your favorite sides.

    Cooking Tips

    Use fresh tilapia for the best flavor. Frozen fillets can also work, but fresh is better.

    Do not overcrowd the skillet. Cook the fillets in batches if needed.

    For extra crunch, you can double coat the fillets in flour.

    Adjust the seasoning to your taste. You can add garlic powder, paprika, or other spices.

    Keep the oil at a consistent temperature. Too hot, and the fish will burn. Too cool, and it will be greasy.

    Serve the fried tilapia with lemon wedges. A squeeze of lemon juice adds freshness to the dish.

    Fried Tilapia Fish Recipes: Delicious and Easy Cooking Ideas

    Credit: www.cookedbyjulie.com

    Crispy Fried Tilapia

    Nothing compares to the delectable taste of Crispy Fried Tilapia. This dish is a favorite for many, offering a delightful crunch with each bite. The recipe is straightforward, making it perfect for both beginners and seasoned cooks. Let’s dive into the steps to prepare this mouth-watering dish.

    Batter Preparation

    The secret to the perfect crispy fried tilapia lies in the batter. Here’s how you can prepare it:

    • In a bowl, mix 1 cup of all-purpose flour with 1/2 cup of cornstarch.
    • Add 1 teaspoon of baking powder, 1 teaspoon of salt, and 1/2 teaspoon of black pepper.
    • For a flavorful twist, include 1/2 teaspoon of paprika and 1/2 teaspoon of garlic powder.
    • Gradually whisk in 1 cup of cold water until the mixture is smooth.

    Frying Techniques

    Frying the tilapia correctly is crucial for achieving that desired crispiness. Follow these steps:

    1. Heat oil in a deep-fryer or large skillet to 350°F (175°C).
    2. Pat the tilapia fillets dry with paper towels. This helps the batter stick better.
    3. Dip each fillet into the prepared batter, ensuring it’s evenly coated.
    4. Carefully place the battered fillet into the hot oil. Fry for 3-4 minutes on each side until golden brown.
    5. Use a slotted spoon to remove the fillets. Place them on a plate lined with paper towels to drain excess oil.

    Serve your crispy fried tilapia with a side of tartar sauce or a squeeze of fresh lemon juice. Enjoy the crunch and the flavor!

    Spicy Fried Tilapia

    Spicy Fried Tilapia is a delightful dish that brings a burst of flavor to your table. This recipe is perfect for those who enjoy a kick in their meals. The crispiness of the fried fish combined with the spicy marinade will leave you craving for more.

    Marination Process

    To achieve the perfect spicy fried tilapia, start with a good marination process. Marinating the fish helps in soaking up all the flavors. Here’s a simple marination recipe:

    • 2 tilapia fillets
    • 1 teaspoon salt
    • 1 teaspoon black pepper
    • 1 tablespoon paprika
    • 1 teaspoon garlic powder
    • 1 teaspoon onion powder
    • 1 teaspoon cayenne pepper (adjust to taste)
    • 2 tablespoons lemon juice

    Mix all the spices with lemon juice in a bowl. Rub this mixture generously over the tilapia fillets. Let the fish marinate for at least 30 minutes. This allows the flavors to penetrate the fish, enhancing its taste.

    Heat Control

    Controlling the heat while frying is crucial for achieving the perfect crispy texture. Follow these steps:

    1. Heat oil in a deep frying pan over medium-high heat.
    2. Ensure the oil reaches around 350°F (175°C).
    3. Carefully place the marinated tilapia fillets in the hot oil.
    4. Fry each side for 3-4 minutes, or until golden brown.
    5. Use a slotted spoon to remove the fish and drain on paper towels.

    Avoid overcrowding the pan as it can lower the oil temperature. This ensures even cooking and maintains the fish’s crispy exterior.

    Enjoy your spicy fried tilapia with a side of fresh salad or steamed vegetables for a balanced meal.

    Tilapia With Garlic And Lemon

    Tilapia with Garlic and Lemon is a delightful dish. The combination of garlic and lemon enhances the mild flavor of tilapia. This recipe is easy to make and perfect for a quick weeknight dinner. The flavors are light, yet they pack a punch, making it a favorite for many.

    Garlic Infusion

    Garlic adds depth to the tilapia. Mince several cloves of garlic. Heat olive oil in a pan over medium heat. Add the minced garlic and sauté until fragrant. This step ensures the garlic flavor infuses into the oil. Place the tilapia fillets in the pan. Cook for about 3-4 minutes on each side. The garlic will create a tasty crust on the fish.

    Lemon Zest

    Fresh lemon zest brightens the dish. Zest one lemon using a fine grater. Sprinkle the zest over the cooked tilapia. Squeeze fresh lemon juice over the fish. This adds a tangy flavor that balances the garlic. Serve the tilapia with a side of vegetables or rice. The result is a light, flavorful meal.

    Serving Suggestions

    Serving fried tilapia fish can be an enjoyable experience. The right accompaniments enhance the dish. This section offers ideas to elevate your meal. From side dishes to garnishing, discover ways to make your fried tilapia fish memorable.

    Side Dishes

    Pair fried tilapia with classic sides. Rice is a popular choice. Jasmine or basmati rice works well. Vegetables are also a great option. Steamed broccoli or sautéed spinach complement the fish. You can also serve it with mashed potatoes. A creamy texture pairs nicely with crispy fish.

    Salads are another excellent side. A simple green salad adds freshness. Use lettuce, tomatoes, and cucumbers. A tangy vinaigrette dressing works best. For a heartier option, try coleslaw. Its crunch and tang balance the fried fish.

    Garnishing Ideas

    Garnish plays a key role. It adds flavor and visual appeal. Fresh herbs are a great start. Cilantro, parsley, or dill work well. Sprinkle them over the fish before serving. Lemon wedges are another must-have. They add a burst of freshness.

    You can also use thinly sliced red onions. They add color and a mild bite. Cherry tomatoes cut in halves are also good. They bring a pop of color and sweetness. Finally, consider adding a dollop of tartar sauce. It pairs perfectly with fried tilapia.

    Tips For Perfect Fried Tilapia

    Fried tilapia is a popular dish worldwide. Perfecting this recipe can be simple with the right tips. Whether you’re a beginner or an experienced cook, these pointers will help you achieve the best results.

    Avoiding Common Mistakes

    Avoid overcrowding the pan. This can lower the oil temperature and lead to soggy fish. Cook in batches if needed. Dry the tilapia well before frying. Excess moisture can cause the oil to splatter. Season the fish evenly. This ensures a consistent flavor throughout.

    Maintaining Crispiness

    Use the right oil. Choose oils with high smoke points, like canola or peanut oil. Keep the oil at a constant temperature. Use a thermometer to maintain around 350°F. Avoid flipping the fish too often. Let each side cook fully before turning.

    Drain on a wire rack. This prevents the fish from becoming soggy. Serve immediately. Enjoy the tilapia while it’s hot and crispy.

    Frequently Asked Questions

    How Do You Fry Tilapia Fish?

    To fry tilapia fish, season it with spices, then coat it in flour. Heat oil in a pan over medium heat. Fry each side for 3-4 minutes until golden and crispy.

    What Seasoning Is Best For Fried Tilapia?

    The best seasoning for fried tilapia includes salt, pepper, paprika, garlic powder, and lemon juice. These spices enhance the fish’s natural flavor, making it more delicious.

    Can You Fry Tilapia Without Flour?

    Yes, you can fry tilapia without flour. Use cornmeal or breadcrumbs as an alternative for a crispy texture. You can also fry it directly with just seasoning.

    How Do You Know When Tilapia Is Done?

    Tilapia is done when it turns opaque and flakes easily with a fork. The internal temperature should reach 145°F (63°C). Ensure both sides are golden brown.

    Conclusion

    Fried tilapia fish recipes offer simple, delicious meal options. They are easy to prepare and full of flavor. Perfect for a quick dinner or special occasion. Try different seasonings for variety. Serve with your favorite sides. Enjoy the crispy texture and savory taste.

    Cooking tilapia at home saves money and time. Share these recipes with family and friends. They will love the delicious results. Happy cooking!

    Lemon Butter Chicken Pasta Recipe: Irresistibly Creamy Delight

    Lemon Butter Chicken Pasta Recipe is a delightful dish. It combines the zest of lemon, richness of butter, and savory chicken.

    Pasta lovers always seek new recipes to excite their taste buds. Lemon Butter Chicken Pasta offers a fresh and vibrant flavor that stands out. This dish is perfect for a quick weeknight meal or a special dinner. The lemon adds a tangy kick, while the butter creates a creamy sauce that coats the pasta perfectly.

    Chicken pieces add protein, making it a well-rounded meal. Simple ingredients come together to create a restaurant-quality dish at home. Ready to impress your family or guests? This Lemon Butter Chicken Pasta recipe is the answer. Let’s dive into this delicious and easy-to-make dish!

    Ingredients

    The ingredients of a Lemon Butter Chicken Pasta Recipe are simple and delicious. Fresh, wholesome components come together to create a flavorful dish. This section will break down the essential elements and some optional add-ins. Let’s dive in!

    Main Ingredients

    For this recipe, you will need boneless, skinless chicken breasts. Cut them into bite-sized pieces. Fresh lemon juice and zest add a bright flavor. Butter provides richness and a creamy texture. Garlic cloves enhance the dish’s aroma and depth. Olive oil helps with cooking the chicken evenly.

    A good quality pasta, like fettuccine or linguine, works best. Fresh parsley, chopped finely, adds a touch of color and freshness. Salt and pepper are essential for seasoning. Grated Parmesan cheese gives a savory finish.

    Optional Add-ins

    You can customize this recipe with optional add-ins. Baby spinach leaves add a burst of green and extra nutrients. Cherry tomatoes bring a sweet and tangy flavor. Red pepper flakes offer a subtle heat for spice lovers. Capers provide a briny, tangy contrast.

    Mushrooms, sliced thinly, blend well with the other flavors. A splash of white wine can elevate the dish’s sophistication. Remember, these are optional. Feel free to experiment and make the recipe your own!

    Lemon Butter Chicken Pasta Recipe: Irresistibly Creamy Delight

    Credit: www.delish.com

    Preparation Steps

    Preparing a delicious Lemon Butter Chicken Pasta involves a few key steps. Follow this guide for a seamless cooking experience. We’ll break it down into manageable parts. Let’s get started with the essentials.

    Prepping The Chicken

    First, gather all your ingredients. Start by seasoning the chicken breasts. Use salt, pepper, and garlic powder. Coat the chicken evenly on both sides.

    Next, heat a skillet over medium heat. Add a tablespoon of olive oil. Place the chicken in the skillet. Cook each side for about 5-7 minutes. Ensure the chicken is cooked through. It should be golden brown and juicy.

    Remove the chicken from the skillet. Let it rest on a cutting board. Slice the chicken into thin strips. This makes it easier to mix with the pasta later.

    Cooking The Pasta

    Fill a large pot with water. Add a pinch of salt. Bring the water to a boil. Add your choice of pasta. Cook it according to the package instructions.

    Stir the pasta occasionally. This prevents sticking. Once the pasta is al dente, drain the water. Reserve a cup of pasta water. This will help with the sauce later.

    Return the pasta to the pot. Keep it warm while you prepare the sauce. This ensures everything is hot when you combine it.

    Making The Lemon Butter Sauce

    The lemon butter sauce is the heart of this delicious pasta recipe. It adds a zesty and creamy flavor that pairs perfectly with the chicken and pasta. Let’s break down how to make this delightful sauce step by step.

    Ingredients For The Sauce

    To create the perfect lemon butter sauce, gather the following ingredients:

    Ingredient Quantity
    Butter 1/4 cup
    Garlic (minced) 2 cloves
    Lemon Juice 2 tablespoons
    Lemon Zest 1 teaspoon
    Chicken Broth 1/2 cup
    Heavy Cream 1/4 cup
    Salt to taste
    Pepper to taste

    Cooking The Sauce

    Follow these simple steps to cook the lemon butter sauce:

    1. In a skillet, melt the butter over medium heat.
    2. Add the minced garlic and cook until fragrant, about 1 minute.
    3. Pour in the chicken broth and bring to a simmer.
    4. Add the lemon juice and lemon zest. Stir well.
    5. Slowly stir in the heavy cream and let it simmer for 3-4 minutes.
    6. Season with salt and pepper to taste.
    7. Once the sauce thickens, remove from heat.

    Your lemon butter sauce is now ready to be mixed with the pasta and chicken. Enjoy the burst of flavors in every bite!

    Combining Chicken And Pasta

    Lemon Butter Chicken Pasta is a delightful dish that combines the zest of lemon with the rich flavor of butter. The star components of this recipe are the tender pieces of chicken and the perfectly cooked pasta. Together, they create a mouth-watering meal that’s both satisfying and easy to prepare.

    Mixing Everything Together

    To start, cook the pasta until al dente and set it aside. In a large pan, melt some butter and sauté minced garlic. Add the cooked chicken pieces to the pan and stir well. Cook the chicken until it is golden brown and fully cooked.

    Next, pour in fresh lemon juice and add some lemon zest. This will give the dish its signature citrus flavor. Stir everything together, ensuring the chicken is well-coated with the lemon butter sauce. Finally, add the cooked pasta to the pan and toss everything together until the pasta is evenly coated.

    Ensuring Even Coating

    To ensure every bite is flavorful, make sure the sauce coats the pasta and chicken evenly. Use tongs or a large spoon to mix everything thoroughly. This helps distribute the sauce, chicken, and pasta uniformly.

    As an optional step, sprinkle some grated Parmesan cheese on top for an extra layer of flavor. You can also add fresh parsley for a touch of color and freshness. Serve the Lemon Butter Chicken Pasta hot and enjoy the harmony of flavors in every bite.

    Finishing Touches

    The final steps of making Lemon Butter Chicken Pasta bring everything together. Adding the right garnishes and serving the dish correctly can enhance the flavors. These small details can elevate your pasta to restaurant quality.

    Garnishing Ideas

    Fresh herbs can make a big difference. Sprinkle chopped parsley or basil over the pasta. These herbs add color and a fresh taste. Grated Parmesan cheese is another great option. It melts slightly and adds a rich, salty flavor.

    Consider adding lemon zest for an extra punch of citrus. It will brighten up the whole dish. Don’t forget a crack of black pepper. It adds a bit of heat and complexity.

    Serving Suggestions

    Serve the Lemon Butter Chicken Pasta in a large bowl. This makes it easy for everyone to help themselves. Add a side of garlic bread. It is perfect for soaking up any extra sauce.

    A green salad pairs well with this pasta. It adds a refreshing crunch. You can also serve with a glass of white wine. The acidity complements the lemon in the pasta.

    For a non-alcoholic option, try lemon water. It keeps the citrus theme going. Enjoy your meal with family and friends. This dish is perfect for sharing.

    Lemon Butter Chicken Pasta Recipe: Irresistibly Creamy Delight

    Credit: www.averiecooks.com

    Tips And Tricks

    Are you ready to elevate your Lemon Butter Chicken Pasta dish? Here are some tips and tricks to ensure your meal turns out perfect every time. From making it extra creamy to avoiding common mistakes, these insights will help you impress your friends and family.

    Making It Extra Creamy

    Want your pasta to be extra creamy? Here’s how:

    • Use Heavy Cream: Replace milk with heavy cream for a richer texture.
    • Include Cream Cheese: Add a dollop of cream cheese to the sauce.
    • Simmer Gently: Cook the sauce over low heat to avoid curdling.

    These steps will enhance the creaminess of your pasta, making it more delightful.

    Avoiding Common Mistakes

    To ensure your Lemon Butter Chicken Pasta is perfect, watch out for these common mistakes:

    Common Mistake Solution
    Overcooking Chicken Cook chicken until it’s no longer pink in the center.
    Curdled Sauce Use low heat and stir constantly to avoid this.
    Too Much Lemon Start with a small amount and add more as needed.

    By following these solutions, you can avoid these common pitfalls and make a delicious dish every time.

    Storing And Reheating

    Storing and reheating your Lemon Butter Chicken Pasta properly ensures you enjoy it later. These tips will help maintain its delicious flavor and texture.

    Proper Storage Techniques

    To keep your Lemon Butter Chicken Pasta fresh, follow these steps:

    • Allow the pasta to cool completely before storing.
    • Place the pasta in an airtight container to prevent moisture loss.
    • Store the container in the refrigerator for up to 3-4 days.
    • If freezing, use freezer-safe containers and label with the date.

    Proper storage helps maintain the dish’s quality and safety.

    Reheating For Best Results

    Reheating your Lemon Butter Chicken Pasta correctly ensures it tastes as good as fresh.

    1. Microwave: Place a single serving in a microwave-safe dish. Cover with a microwave-safe lid or plastic wrap, leaving a small vent. Heat on medium power for 1-2 minutes, stirring halfway through.
    2. Stovetop: Heat a non-stick skillet over medium heat. Add the pasta and a splash of water or broth to prevent drying out. Stir occasionally until heated through.
    3. Oven: Preheat the oven to 350°F (175°C). Transfer the pasta to an oven-safe dish and cover with foil. Bake for 15-20 minutes or until heated through.

    Use these methods to enjoy your pasta with its original taste and texture.

    Lemon Butter Chicken Pasta Recipe: Irresistibly Creamy Delight

    Credit: www.butterbeready.com

    Frequently Asked Questions

    How To Make Lemon Butter Chicken Pasta?

    To make lemon butter chicken pasta, cook pasta and chicken separately. Prepare a lemon butter sauce with lemon juice, butter, and garlic. Combine everything together and serve.

    What Ingredients Are Needed For This Recipe?

    You need pasta, chicken breast, lemon juice, butter, garlic, salt, and pepper. Optional ingredients include parsley and Parmesan cheese for garnish.

    Can I Use Any Type Of Pasta?

    Yes, you can use any type of pasta. Popular choices include spaghetti, fettuccine, or penne. Choose your favorite or what you have on hand.

    Is Lemon Butter Chicken Pasta Healthy?

    Lemon butter chicken pasta can be a healthy meal if prepared with lean chicken breast and whole wheat pasta. Adjust portion sizes and add vegetables for more nutrients.

    Conclusion

    This Lemon Butter Chicken Pasta recipe will delight your taste buds. It’s easy, quick, and perfect for any meal. The combination of lemon and butter creates a refreshing flavor. Chicken adds protein, making it a balanced dish. You can prepare this delicious meal in under 30 minutes.

    Ideal for busy weeknights. Enjoy this simple yet tasty recipe with your family. Cooking doesn’t need to be complicated to be delicious. Try it today and share with friends. Your kitchen will thank you!

    Brussel Sprouts Prosciutto Recipe: Delicious and Easy to Make

    Brussels sprouts and prosciutto make a delicious pairing. This combination is sure to please your taste buds.

    Brussels sprouts are often overlooked. But with the right recipe, they can become a favorite. Adding prosciutto brings a savory twist, elevating this humble vegetable to gourmet status. Imagine crispy prosciutto wrapped around tender Brussels sprouts, creating a delightful balance of flavors and textures.

    This dish is perfect for any occasion, whether it’s a family dinner or a special gathering. It’s simple to prepare yet impressive enough to wow your guests. If you’re looking to add a new, tasty dish to your repertoire, this Brussels sprouts prosciutto recipe is a must-try. Read on to discover how easy it is to create this mouth-watering dish at home.

    Brussel Sprouts Prosciutto Recipe: Delicious and Easy to Make

    Credit: www.cocospaleokitchen.com

    Ingredients Needed

    Creating a delicious Brussels Sprouts Prosciutto dish starts with the right ingredients. Fresh, high-quality ingredients make all the difference. Let’s dive into what you need.

    Fresh Brussels Sprouts

    Choose fresh Brussels sprouts. Look for bright green, firm, and compact heads. Avoid those with yellow or wilted leaves. Fresh sprouts ensure the best flavor and texture.

    Quality Prosciutto

    Select high-quality prosciutto. This cured meat adds a salty and savory taste. Thin slices work best for even distribution throughout the dish.

    Olive Oil

    Use extra virgin olive oil. It adds richness and a subtle fruity flavor. Olive oil helps to roast the Brussels sprouts to perfection.

    Seasonings

    Seasonings bring out the best in your dish. Basic salt and pepper are essential. You can also add garlic powder or onion powder for extra flavor.

    Preparing The Brussels Sprouts

    Preparing the Brussels sprouts is a crucial step for a delicious prosciutto recipe. Fresh and properly prepared sprouts enhance the flavor and texture. Let’s dive into the details to ensure your Brussels sprouts are ready for the recipe.

    Cleaning And Trimming

    Start by rinsing the Brussels sprouts under cold water. This removes any dirt or pesticides. Pat them dry with a clean towel. Once clean, trim the ends using a sharp knife. Remove any yellow or damaged outer leaves. This ensures only the fresh and green parts remain.

    Cutting Techniques

    Cutting Brussels sprouts correctly is essential for even cooking. For smaller sprouts, halve them lengthwise. This allows them to cook thoroughly and absorb flavors well. For larger sprouts, quarter them for consistent cooking. Uniform pieces ensure each bite is delicious.

    Slicing The Prosciutto

    Prosciutto adds a rich, savory flavor to brussel sprouts. Slicing it the right way ensures it cooks perfectly. This section covers the best methods to slice prosciutto for your recipe.

    Choosing The Right Thickness

    The thickness of your prosciutto slices affects the texture and flavor. Thin slices cook quickly and become crispy. Thicker slices remain tender and chewy. For this recipe, aim for slices about 1/8 inch thick. This balance gives a delightful mix of crispy and tender bites.

    Best Slicing Methods

    There are several ways to slice prosciutto, depending on what tools you have. Below are some methods to consider:

    • Using a knife: A sharp chef’s knife works well. Place the prosciutto flat on a cutting board. Hold it steady and slice evenly.
    • Using a slicer: A meat slicer is ideal for uniform slices. Set the thickness to 1/8 inch. Slide the prosciutto through smoothly.
    • Pre-sliced prosciutto: For convenience, buy pre-sliced prosciutto. Ensure it’s thin and not too thick.

    Each method has its benefits. A knife is simple and available. A slicer offers precision. Pre-sliced is quick and easy.

    Brussel Sprouts Prosciutto Recipe: Delicious and Easy to Make

    Credit: www.halfbakedharvest.com

    Cooking Techniques

    Cooking Brussels sprouts with prosciutto can be a delightful experience. The right techniques can make this dish truly special. Let’s dive into two popular methods: pan frying and roasting in the oven.

    Pan Frying

    Pan frying Brussels sprouts with prosciutto is quick and easy. Start by cutting the Brussels sprouts in half. Heat some olive oil in a large skillet over medium heat. Add the Brussels sprouts, cut side down. Fry them until they are golden brown and crispy. This usually takes about 5-7 minutes.

    Once the Brussels sprouts are crispy, add sliced prosciutto to the skillet. Cook until the prosciutto is crispy as well. This will take another 2-3 minutes. Stir everything together, allowing the flavors to meld. Season with salt and pepper to taste. Serve hot and enjoy the delicious combination of crispy sprouts and salty prosciutto.

    Roasting In The Oven

    Roasting Brussels sprouts in the oven is another fantastic method. Preheat your oven to 400°F (200°C). Cut the Brussels sprouts in half and toss them with olive oil, salt, and pepper. Spread them out on a baking sheet in a single layer.

    Roast the Brussels sprouts for about 20-25 minutes. They should be tender and golden brown. While the sprouts roast, prepare the prosciutto. Slice it thinly and set aside. After the Brussels sprouts are done, remove the baking sheet from the oven. Sprinkle the sliced prosciutto over the roasted sprouts. Return the baking sheet to the oven for another 5 minutes. This will crisp up the prosciutto perfectly.

    Once done, remove from the oven and serve immediately. The roasted Brussels sprouts and crispy prosciutto create a mouth-watering combination. Perfect for any meal.

    Combining Ingredients

    Creating a delicious Brussels sprouts prosciutto dish involves combining simple ingredients. Each component brings unique flavors. Together, they create a balanced and mouth-watering meal. This section will guide you through the process.

    Layering Techniques

    Layering is key to enhancing the taste and texture of this dish. Start by roasting the Brussels sprouts until they are crispy. Next, add thin slices of prosciutto on top. The heat will make the prosciutto slightly crispy. This adds a delightful crunch. Finally, sprinkle some grated Parmesan cheese. Let it melt over the warm sprouts and prosciutto. This creates a rich, savory layer.

    Balancing Flavors

    Balancing flavors ensures that no ingredient overpowers the others. Brussels sprouts have a slightly bitter taste. Prosciutto offers a salty, savory flavor. Parmesan cheese adds a nutty, creamy element. To balance these, add a drizzle of honey or balsamic glaze. This adds sweetness and acidity. It helps to round out the flavors. A sprinkle of black pepper adds a mild heat. This completes the dish.

    Serving Suggestions

    Serving Brussels sprouts with prosciutto can elevate any meal. The combination of savory prosciutto and earthy Brussels sprouts offers a delightful contrast. Here, we’ll explore some creative serving suggestions to impress your guests.

    Plating Ideas

    Presentation matters. Arrange the Brussels sprouts and prosciutto on a large white plate. This makes the colors pop. For a rustic feel, use a wooden platter. Stack the Brussels sprouts in a pyramid shape. Lay the prosciutto slices around it. This adds visual interest.

    Try a layered approach. Create a bed of Brussels sprouts. Top it with crispy prosciutto pieces. This ensures every bite has both flavors. Use small, individual plates for a personal touch. This makes each serving feel special.

    Garnishing Tips

    Garnishes can enhance the dish. Sprinkle grated parmesan cheese on top. It adds a salty kick. Fresh herbs work well too. Use chopped parsley or chives. They add color and freshness. A drizzle of balsamic glaze can provide a sweet contrast.

    Consider adding a few pomegranate seeds. They bring a burst of color and a tart flavor. Lemon zest can also brighten up the dish. Just a little goes a long way. Finish with a light sprinkle of sea salt. This enhances all the flavors.

    Wine Pairings

    Pairing the perfect wine with your Brussel Sprouts Prosciutto dish can elevate the dining experience. The right wine complements the flavors, enhancing both the food and the drink. Here, we explore the best wine options for this delicious recipe.

    White Wine Options

    White wine pairs well with the savory and salty notes of prosciutto. A crisp Sauvignon Blanc is a great choice. Its acidity balances the richness of the prosciutto. Another option is Chardonnay. Choose one with minimal oak aging. This preserves its fresh, fruity qualities. A Pinot Grigio is also a good match. Its light and refreshing profile complements the dish without overpowering it.

    Red Wine Options

    Red wine can also pair nicely with Brussel Sprouts Prosciutto. A light-bodied Pinot Noir is an excellent option. It has subtle tannins that won’t overwhelm the flavors. A Beaujolais is another great choice. Its fruity and slightly spicy notes enhance the prosciutto. For a bolder option, try a Grenache. Its rich flavors can stand up to the savory dish without clashing.

    Brussel Sprouts Prosciutto Recipe: Delicious and Easy to Make

    Credit: www.crumbtopbaking.com

    Health Benefits

    Discovering the health benefits of a Brussels Sprouts Prosciutto recipe can add both flavor and nutrition to your meals. This delightful combination offers a blend of essential nutrients and rich flavors. Let’s dive into the nutritional benefits of Brussels sprouts and prosciutto.

    Nutritional Value Of Brussels Sprouts

    Brussels sprouts are a powerhouse of nutrients. They are packed with vitamins and minerals that boost overall health.

    • Vitamin C: Supports the immune system and skin health.
    • Vitamin K: Essential for blood clotting and bone health.
    • Fiber: Aids in digestion and promotes gut health.
    • Antioxidants: Helps protect cells from damage.

    One cup of Brussels sprouts provides:

    Nutrient Amount
    Calories 38
    Protein 3 grams
    Fiber 3 grams
    Vitamin C 125% of the Daily Value (DV)
    Vitamin K 195% of the DV

    Prosciutto Health Facts

    Prosciutto, an Italian dry-cured ham, is rich in flavor and nutrients. Although it is high in sodium, it provides essential nutrients in moderation.

    • Protein: Helps build and repair tissues.
    • Iron: Important for blood health.
    • Vitamins: Contains B vitamins for energy metabolism.

    Prosciutto is also a good source of:

    1. Oleic acid, a healthy fat.
    2. Low carbohydrates, suitable for low-carb diets.

    Combining Brussels sprouts with prosciutto creates a nutrient-dense dish. This blend offers a balance of essential vitamins, minerals, and proteins. Enjoy the health benefits while savoring every bite!

    Frequently Asked Questions

    What Ingredients Are Needed For Brussel Sprouts Prosciutto Recipe?

    You’ll need Brussel sprouts, prosciutto, olive oil, garlic, salt, and pepper. Optional ingredients include parmesan cheese and balsamic glaze.

    How Do You Prepare Brussel Sprouts For This Recipe?

    Trim the ends of the Brussel sprouts and remove any yellow leaves. Cut them in half for even cooking.

    Can I Use Bacon Instead Of Prosciutto?

    Yes, bacon can be used as a substitute. It will give a slightly different flavor.

    How Long Does It Take To Cook Brussel Sprouts?

    It takes about 25-30 minutes to cook Brussel sprouts in the oven at 400°F (200°C).

    Conclusion

    This Brussels sprouts prosciutto recipe adds a tasty twist to your meal. The crispy prosciutto pairs perfectly with the tender sprouts. It’s a simple dish that impresses guests and delights family. Perfect for any occasion. Enjoy the rich flavors and the easy preparation.

    Try it out in your next meal plan. You’ll love the combination of textures and tastes. Happy cooking!