Air Fryer Fried Shrimp Recipes: Crispy, Delicious & Easy

Air fryer fried shrimp recipes are a delightful treat. They offer a healthier twist on a classic dish.

Craving a crispy, golden shrimp without the guilt? Air fryer fried shrimp recipes are your answer. These recipes use less oil but still deliver that satisfying crunch. Perfect for busy weeknights or weekend gatherings, air fryer shrimp is fast, easy, and delicious.

Whether you love spicy, garlic, or classic flavors, there’s a recipe for you. Plus, air frying keeps your kitchen cleaner and safer. Get ready to explore these tasty shrimp recipes and enjoy a healthier, flavorful meal. Dive into the world of air-fried shrimp and make your taste buds dance with joy!

Air Fryer Fried Shrimp Recipes: Crispy, Delicious & Easy

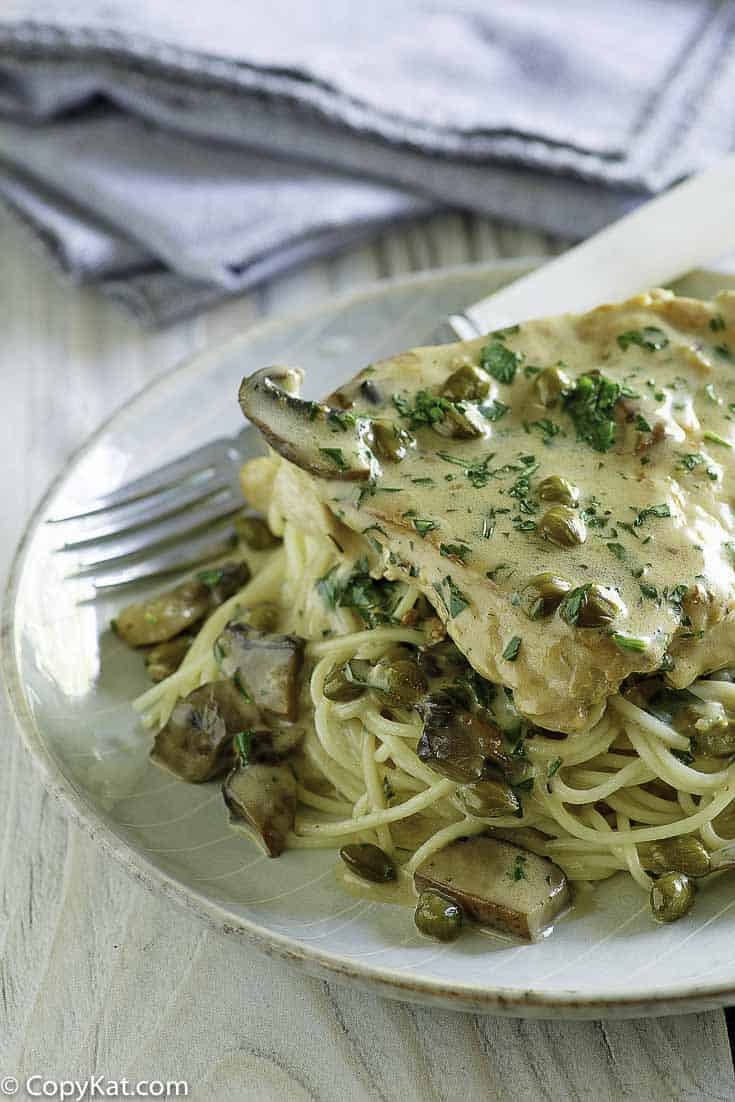
Credit: skinnysouthernrecipes.com

Introduction To Air Fryer Fried Shrimp

Welcome to the world of Air Fryer Fried Shrimp! If you love crispy shrimp but dislike the mess of deep frying, this is for you. An air fryer offers a healthier, easier way to enjoy fried shrimp. Let’s dive in!

Why Choose Air Fryer

Air fryers are becoming popular for a reason. They use hot air to cook food, reducing the need for oil. This makes meals healthier and less greasy. Plus, air fryers are quick and convenient. Cooking shrimp in an air fryer takes less time than traditional methods.

Benefits Of Air Fryer Cooking

Using an air fryer means less oil and fewer calories. This is great for anyone watching their diet. Air fryers also cook food evenly, so your shrimp will be crispy and delicious every time. Clean-up is a breeze. No more dealing with pots of hot oil.

Another benefit is versatility. You can cook many different foods in an air fryer, not just shrimp. Vegetables, chicken, even desserts can be air-fried. This makes it a useful tool in any kitchen.

Essential Ingredients

Creating the perfect air fryer fried shrimp starts with having the essential ingredients. These ingredients not only enhance the flavor but also ensure a crispy and delightful texture. Let’s dive into the necessary elements for this delicious dish.

Choosing The Right Shrimp

The type of shrimp you use can greatly impact the dish. Fresh or frozen shrimp works, but ensure they are deveined and peeled. Preferably, use medium to large-sized shrimp. They cook evenly and offer a better bite. If using frozen shrimp, thaw them completely before use.

Seasonings And Coatings

Seasonings and coatings bring out the best flavors in your air fryer fried shrimp. Here’s a simple yet effective list of what you need:

Ingredient Purpose
Salt and Pepper Basic seasoning
Garlic Powder Adds a savory taste
Old Bay Seasoning Provides a classic shrimp flavor
Paprika Gives color and a mild spice
Bread Crumbs or Panko Creates the crispy coating
Flour Helps the coating stick
Eggs Acts as a binding agent

To coat the shrimp:

  1. Season the shrimp with salt, pepper, garlic powder, and Old Bay Seasoning.
  2. Dip the shrimp in flour, then in beaten eggs.
  3. Finally, coat them with bread crumbs or panko.

This simple process ensures your shrimp are flavorful and crispy. Experiment with different seasonings to find your perfect blend. Enjoy cooking!

Preparing The Shrimp

Get ready to savor delicious air fryer fried shrimp. Clean and devein shrimp, then coat with seasoned breadcrumbs. Cook in the air fryer until crispy.

Getting the shrimp ready is the first step to a delicious meal. Proper preparation ensures tasty and crispy air fryer shrimp. This section will guide you through the essential steps of cleaning, deveining, and marinating the shrimp.

Cleaning And Deveining

Start with fresh or thawed shrimp. Rinse them under cold water. Remove the shell by gently pulling it off. Leave the tails on for a nice presentation, or remove them if you prefer. Next, use a small knife to cut along the back of each shrimp. This will expose the vein. Use the tip of the knife or a toothpick to pull out the vein. Rinse the shrimp once more under cold water. Pat them dry with a paper towel. Now your shrimp are clean and ready for the next step.

Marinating Tips

Marinating adds flavor to your shrimp. Use simple ingredients you have at home. Olive oil, lemon juice, garlic, and paprika work well together. In a bowl, mix your chosen marinade ingredients. Add the shrimp and toss to coat them evenly. Cover the bowl with plastic wrap and refrigerate for at least 15 minutes. Do not marinate for longer than 30 minutes. Over-marinating can make the shrimp mushy. After marinating, your shrimp are ready for the air fryer. “`

Coating Techniques

Creating the perfect coating for air fryer fried shrimp can be an art. The right coating gives shrimp a delightful crunch. It also locks in moisture. Let’s explore some great techniques to coat shrimp for your next air fryer recipe.

Breading Options

Breading adds a crispy layer to shrimp. You can use panko breadcrumbs for a light crunch. Regular breadcrumbs work well too. For a richer taste, try seasoned breadcrumbs. Mix breadcrumbs with herbs and spices. This boosts flavor and makes the shrimp delicious.

Gluten-free Alternatives

Need a gluten-free option? Use almond flour. It gives a nutty taste. Another choice is coconut flour. It adds a hint of sweetness. Rice flour is also a good choice. It creates a light, crispy texture. You can mix gluten-free flours with spices. This enhances the flavor while keeping it gluten-free.

Air Fryer Settings

Making perfect fried shrimp in an air fryer involves the right settings. The correct temperature and cooking time are crucial. Follow these guidelines for delicious, crispy shrimp.

Temperature Guidelines

The temperature setting is key to cooking shrimp well. Set the air fryer to 370°F (188°C). This temperature ensures the shrimp cook evenly. It also makes them crispy.

If the temperature is too high, the shrimp can overcook. They may become dry and rubbery. Too low, and they might not get crispy.

Here is a quick reference:

Temperature (°F) Temperature (°C)
370°F 188°C

Cooking Time

The cooking time also matters. Cook the shrimp for 8-10 minutes. This time frame works best. The shrimp should be pink and opaque.

Halfway through cooking, shake the basket. This helps the shrimp cook evenly. Below is a simple guide:

  • Set timer for 8 minutes.
  • Shake basket at 4 minutes.
  • Check doneness at 8 minutes.
  • If needed, cook for 2 more minutes.

Following these steps, you will get crispy and tasty shrimp every time.

Step-by-step Cooking Process

Discover the perfect Air Fryer Fried Shrimp recipe with easy steps. Coat shrimp with seasoned breadcrumbs, then air fry until crispy. Enjoy a tasty and healthier seafood treat.

Cooking shrimp in an air fryer is quick and easy. Follow these steps for perfectly crispy shrimp every time.

Preheating The Air Fryer

Begin by preheating your air fryer. Set the temperature to 400°F. Let it heat for about 5 minutes. This ensures the shrimp cooks evenly.

Arranging Shrimp In The Basket

Next, arrange the shrimp in the air fryer basket. Place them in a single layer. Avoid overcrowding to ensure crispiness. If needed, cook in batches. Lightly spray the shrimp with cooking oil. This helps them turn golden brown. Cook the shrimp for 6-8 minutes. Turn them halfway through cooking. They are ready when pink and slightly firm. Enjoy your delicious air fryer shrimp! “`

Serving Suggestions

Air fryer fried shrimp is a delicious and easy dish. To make the meal special, consider how to serve it. The right serving suggestions can enhance the flavors and presentation. Below are some ideas for dipping sauces and side dishes.

Dipping Sauces

Dipping sauces add extra flavor to your air fryer fried shrimp. Here are some popular options:

  • Cocktail Sauce – A classic choice with a tangy kick.
  • Tartar Sauce – Creamy with a hint of pickle.
  • Garlic Aioli – Rich and full of garlic flavor.
  • Spicy Mayo – A blend of mayo and sriracha.
  • Sweet Chili Sauce – Sweet and a little spicy.

Side Dishes

Pair your air fryer fried shrimp with delicious side dishes. Here are some ideas:

Side Dish Description
Coleslaw Crisp and refreshing with a tangy dressing.
French Fries Golden and crispy, perfect with shrimp.
Caesar Salad Fresh greens with a creamy Caesar dressing.
Steamed Vegetables Healthy and colorful, adds balance to the meal.
Garlic Bread Warm and buttery with a hint of garlic.
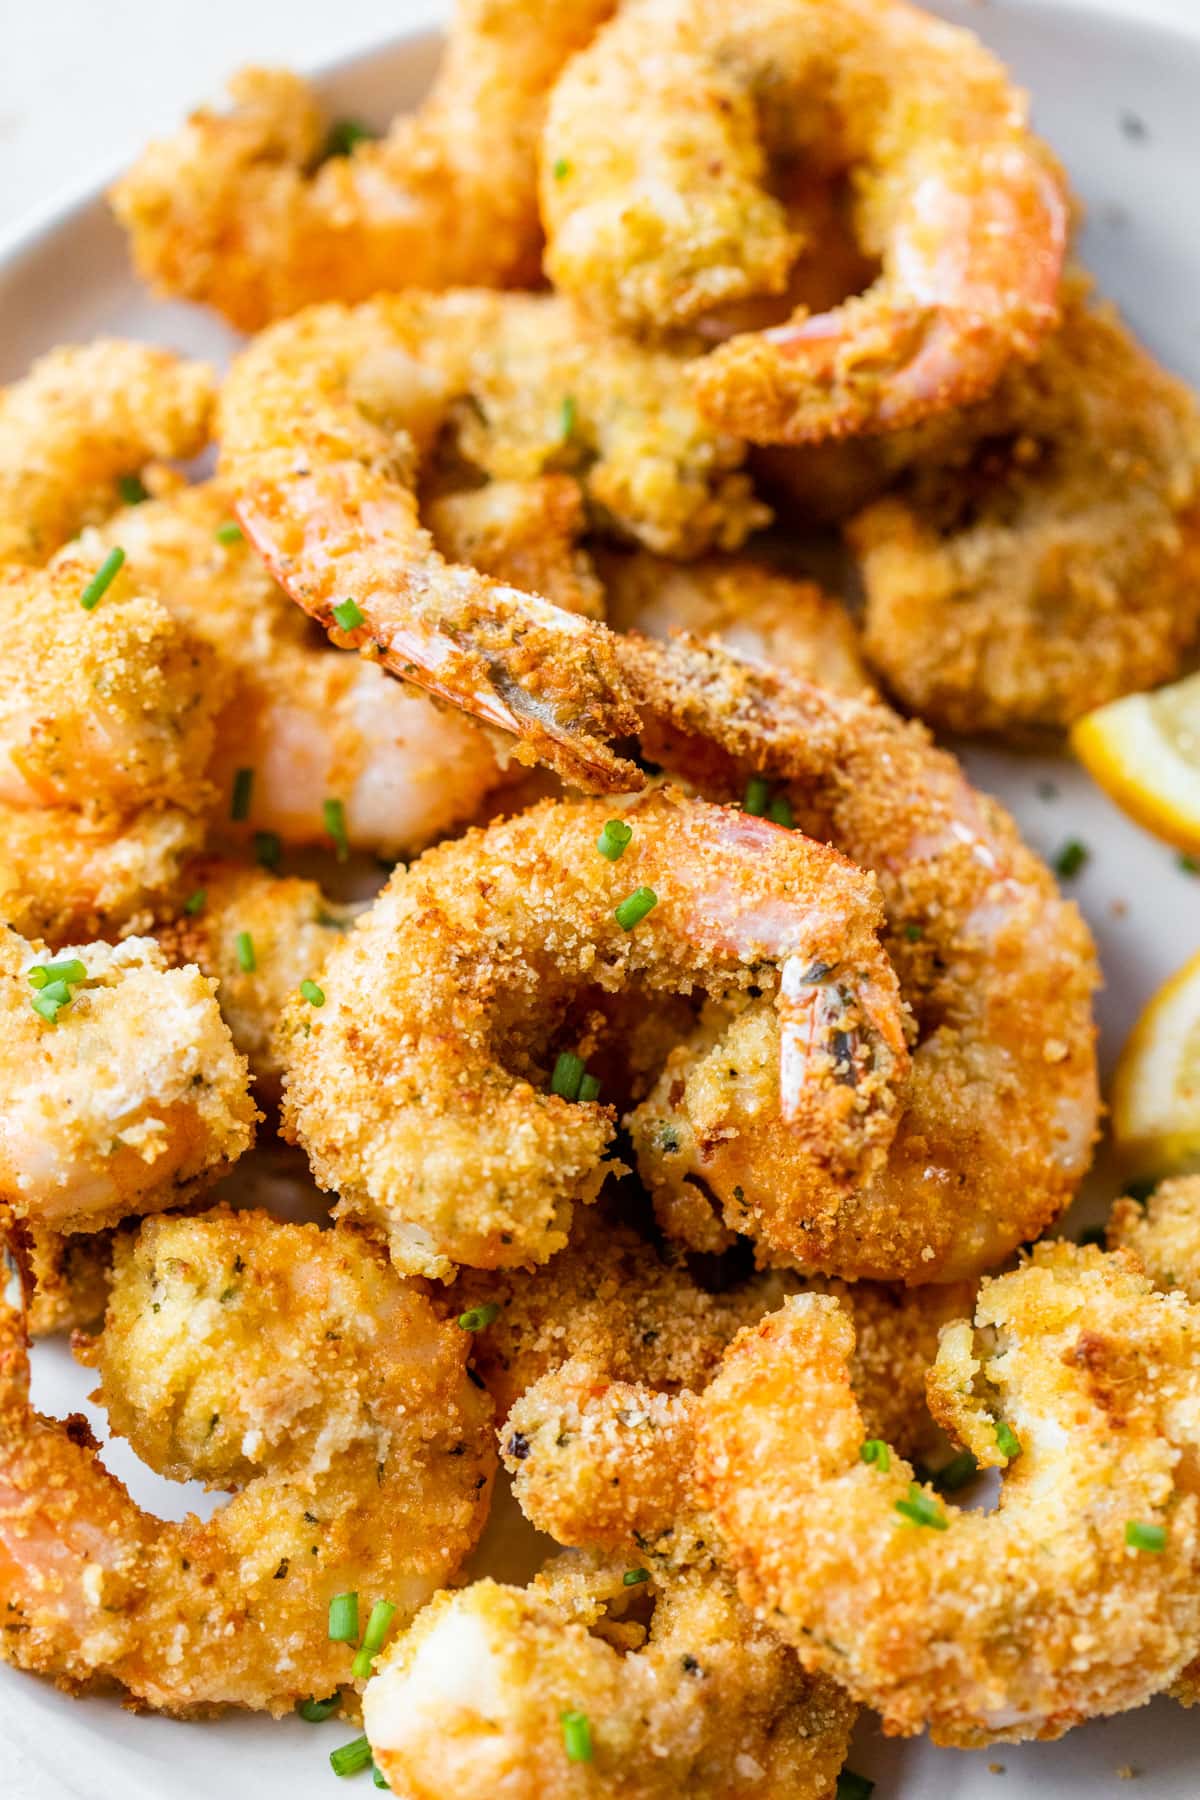
Air Fryer Fried Shrimp Recipes: Crispy, Delicious & Easy

Credit: www.allrecipes.com

Tips For Perfectly Crispy Shrimp

Air fryer fried shrimp can be a delicious and healthy alternative. But achieving perfectly crispy shrimp can sometimes be tricky. Follow these tips to ensure your shrimp comes out perfect every time.

Avoiding Common Mistakes

Do not overcrowd the air fryer basket. This can cause uneven cooking. Cook shrimp in single layers. Overlapping can result in soggy shrimp.

Pat the shrimp dry before seasoning. Moisture can prevent the shrimp from getting crispy. Use paper towels to remove excess water.

Use enough oil spray. Lightly coat the shrimp with oil. This helps achieve a golden, crispy texture.

Enhancing Flavor

Marinate the shrimp for at least 15 minutes. This allows the flavors to penetrate. Use lemon juice, garlic, and spices.

Season the shrimp generously. Salt, pepper, and paprika work well. Adjust the spices to your taste.

Add a breadcrumb coating. Use panko breadcrumbs for extra crunch. Mix with grated Parmesan for added flavor.

Storing And Reheating

Store leftover air fryer fried shrimp in an airtight container in the fridge. Reheat in the air fryer for crispiness.

Storing and reheating air fryer fried shrimp can be simple. Follow these tips to keep your shrimp tasty and fresh.

Best Practices

First, let your shrimp cool down completely. Place them in an airtight container. Store the container in the fridge for up to three days. For longer storage, use the freezer. Shrimp can be frozen for up to a month. Use a freezer-safe bag to avoid freezer burn.

Maintaining Crispiness

Reheating shrimp can be tricky. Nobody likes soggy shrimp. To keep them crispy, use the air fryer again. Preheat the air fryer to 350°F. Place the shrimp in a single layer. Heat for about 3-4 minutes. Flip halfway through. Avoid microwaving, as it makes shrimp rubbery and soft. For best results, enjoy your reheated shrimp right away. This ensures they remain crispy and delicious. “`
Air Fryer Fried Shrimp Recipes: Crispy, Delicious & Easy

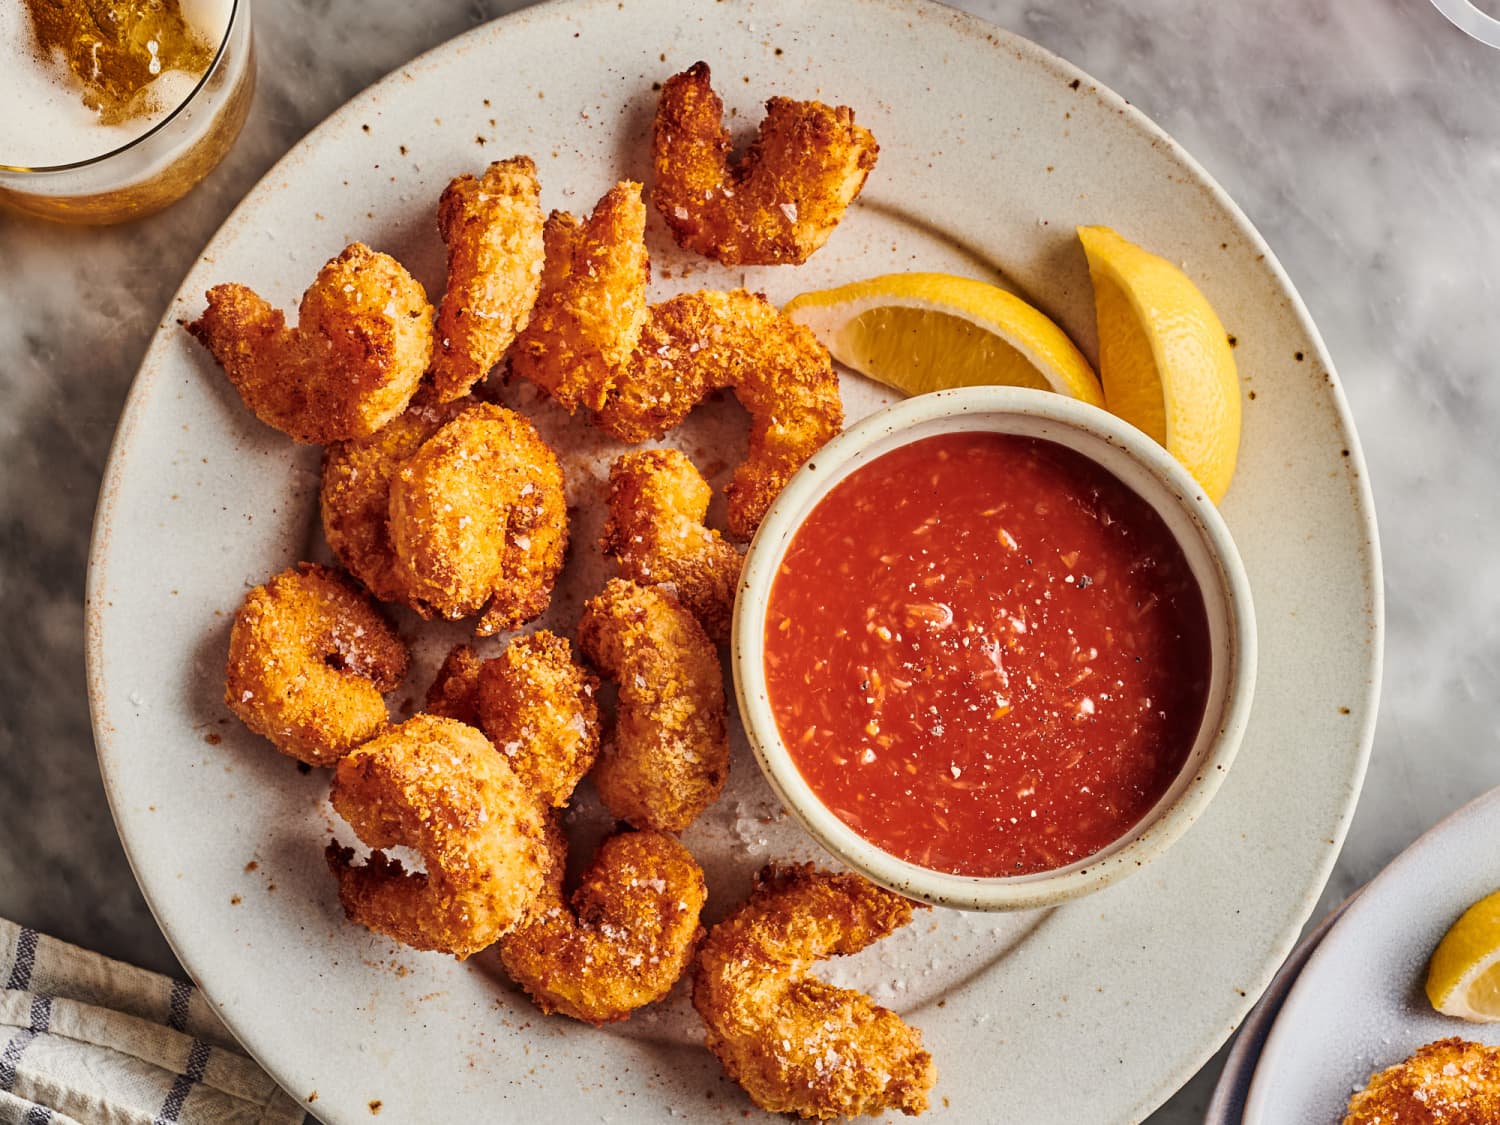
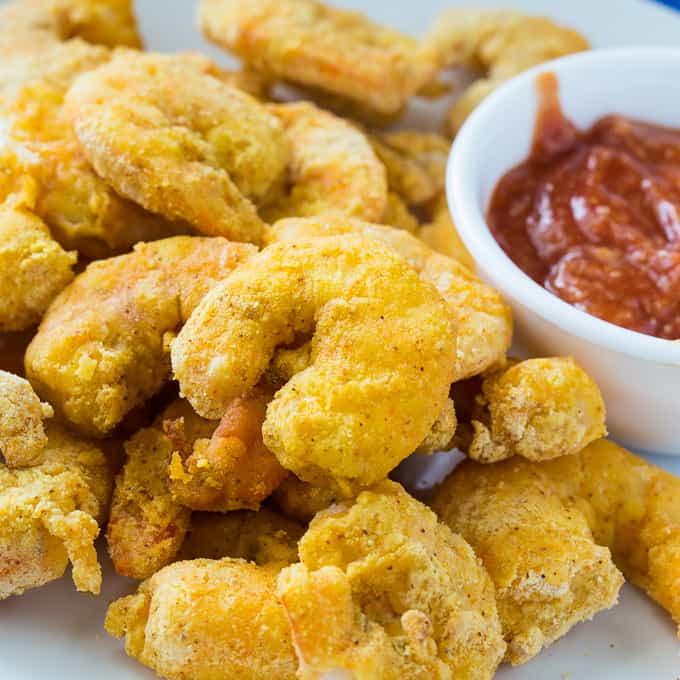
Credit: www.thekitchn.com

Frequently Asked Questions

How To Cook Shrimp In An Air Fryer?

Preheat your air fryer to 400°F. Season the shrimp. Place them in the air fryer basket. Cook for 8-10 minutes, shaking halfway through. Serve immediately.

Can You Air Fry Frozen Shrimp?

Yes, you can air fry frozen shrimp. Preheat the air fryer to 400°F. Cook for 10-12 minutes, shaking halfway through.

What Seasoning Is Best For Air Fryer Shrimp?

The best seasonings include garlic powder, paprika, salt, and pepper. For extra flavor, add lemon zest or Old Bay seasoning.

How Long To Air Fry Shrimp At 400°f?

Air fry shrimp at 400°F for 8-10 minutes. Shake the basket halfway through cooking. Ensure they are pink and opaque.

Conclusion

Enjoy creating delicious air fryer fried shrimp recipes at home. It’s simple. It’s quick. Perfect for busy weeknights or special gatherings. You can experiment with various seasonings and sauces. Your family and friends will love the crispy texture. Healthy, tasty, and easy to prepare.

Explore different recipe ideas and make them your own. Dive into the world of air fryer cooking today. Happy cooking!

Award Winning Cornish Pasty Recipe: Ultimate Guide to Perfection

Craving a delicious and traditional Cornish pasty? You’ve come to the right place.

This award-winning Cornish pasty recipe is just what you need. The Cornish pasty is a beloved dish with a rich history. Originating from Cornwall, England, it has been a staple for centuries. This recipe has won awards for its perfect balance of flavors and authentic taste.

Imagine biting into a flaky, golden crust filled with tender meat, potatoes, and vegetables. It’s a comforting meal that satisfies every time. Whether you’re a pasty novice or a seasoned fan, this recipe is sure to impress. Ready to learn how to make this classic dish? Read on and discover the secrets to creating an award-winning Cornish pasty.

Award Winning Cornish Pasty Recipe: Ultimate Guide to Perfection

Credit: cornishpastyassociation.co.uk

Introduction To Cornish Pasties

Discover the award-winning Cornish pasty recipe, a traditional British dish filled with seasoned meat and vegetables. Learn how to create this delicious pastry that has won hearts and accolades alike.

The Cornish pasty is a beloved dish with a rich history. This savory pastry is a staple in Cornwall, England. Its unique taste and simple ingredients make it a favorite. Let’s dive into its origins and cultural significance.

History And Origin

The Cornish pasty dates back to the 13th century. It was first made as a meal for tin miners. The miners needed a hearty, portable lunch. The pasty’s thick crust served as a handle. This kept their food clean from dirt and grime. Originally, the filling was simple. Meat, potatoes, and onions were common. Over time, other ingredients were added. Today, you can find many variations of the pasty.

Significance In Cornish Culture

The pasty is more than just a meal. It’s a symbol of Cornish heritage. Many families have their own recipes. They pass these recipes down through generations. In Cornwall, pasties are celebrated. There are pasty festivals and competitions. These events honor the tradition and craft of pasty-making. The Cornish pasty even has a Protected Geographical Indication. This means only pasties made in Cornwall can be called “Cornish pasties.” This protection preserves the pasty’s authenticity and quality. Cornish pasties are a point of pride for the people of Cornwall. They connect the community and celebrate their history. “`

Essential Ingredients

The secret to an award-winning Cornish pasty lies in its essential ingredients. Each ingredient plays a crucial role in creating the perfect balance of flavors. Let’s delve into the key components that make this traditional dish so special.

Traditional Components

A true Cornish pasty starts with a sturdy pastry. This pastry needs to be strong enough to hold all the fillings. The traditional filling includes beef, potatoes, swede, and onions. These simple ingredients blend together to create a delicious, hearty filling.

Beef is the star of the show. Use skirt steak for its tenderness. Potatoes add bulk and absorb the flavors of the meat. Swede, also known as rutabaga, provides a sweet, earthy taste. Onions bring a subtle sharpness to the mix.

Choosing Quality Ingredients

Quality is key. Fresh, high-quality ingredients make a huge difference. Choose beef that is fresh and free from added hormones. Potatoes should be firm and free from sprouting. Swede should be firm and heavy for its size. Onions should be fresh and free from soft spots.

Always use fresh, unsalted butter for the pastry. This ensures a rich, flaky crust. Use sea salt to season the filling. Its coarse texture provides a better flavor.

Remember, each ingredient adds to the overall taste and texture. Pay attention to quality. Your Cornish pasty will be all the better for it.

Preparing The Pastry Dough

Preparing the pastry dough is a vital step in making the perfect Cornish pasty. Achieving the right texture and taste in the dough can make or break this traditional dish. Let’s dive into the process of making award-winning pastry dough.

Step-by-step Instructions

First, gather all your ingredients. You’ll need flour, butter, water, and a pinch of salt. Ensure the butter is cold. This will help create a flaky texture.

Next, mix the flour and salt in a large bowl. Cut the butter into small cubes and add it to the flour mixture. Use your fingertips to rub the butter into the flour until it resembles breadcrumbs.

Slowly add water, one tablespoon at a time. Mix until the dough starts to come together. Be careful not to add too much water. The dough should be firm but not sticky.

Once the dough forms a ball, wrap it in cling film. Chill it in the fridge for at least 30 minutes. This resting period helps the dough to relax and makes it easier to roll out later.

Tips For Perfect Dough

Keep all your ingredients cold. Cold butter creates flaky layers in the pastry. If the butter warms up, it can make the dough greasy and tough.

Do not overwork the dough. Overmixing can develop gluten in the flour, making the pastry tough. Handle the dough gently.

Rest the dough. Chilling the dough helps it firm up, making it easier to handle and roll out. It also prevents shrinkage during baking.

Roll out the dough evenly. Aim for a uniform thickness of about 1/8 inch. This ensures even baking and a consistent texture.

Use a light touch when rolling. Pressing too hard can cause the dough to stick or tear. Dust your surface and rolling pin with flour to prevent sticking.

Crafting The Filling

The secret to a perfect Cornish pasty lies in the filling. This section will guide you through the steps of crafting the filling, ensuring each bite is packed with flavor. Whether you prefer the classic taste or want to experiment with new ingredients, we’ve got you covered.

Classic Filling Recipe

The traditional Cornish pasty filling is hearty and delicious. It’s a simple combination of beef, potatoes, swede (rutabaga), and onions. These ingredients create a mouth-watering flavor that has been loved for generations.

Ingredients:

  • 300g beef skirt or chuck steak, finely diced
  • 150g potatoes, peeled and diced
  • 100g swede (rutabaga), peeled and diced
  • 1 medium onion, finely chopped
  • Salt and pepper to taste

Instructions:

  1. Mix the beef, potatoes, swede, and onion in a large bowl.
  2. Season with salt and pepper. Stir well to combine.
  3. Your filling is now ready to be placed in the pastry.

Alternative Filling Ideas

Looking to try something new? Here are some alternative filling ideas that will delight your taste buds. These variations offer a creative twist on the classic recipe.

Chicken and Leek Filling:

  • 300g chicken breast, finely diced
  • 150g leeks, thinly sliced
  • 100g potatoes, peeled and diced
  • 1 medium onion, finely chopped
  • Salt and pepper to taste

Instructions: Follow the same steps as the classic recipe, replacing beef with chicken and swede with leeks.

Vegetarian Filling:

  • 200g butternut squash, peeled and diced
  • 150g potatoes, peeled and diced
  • 100g carrots, peeled and diced
  • 1 medium onion, finely chopped
  • Salt and pepper to taste

Instructions: Mix all the vegetables together in a large bowl. Season with salt and pepper. Stir well to combine. Use this mixture as your filling.

Assembling The Pasty

Assembling the Cornish pasty is a delicate art. It requires attention to detail to create the perfect pastry. This section will guide you through the process step-by-step.

Filling And Folding

Start by placing a generous spoonful of filling onto the center of the pastry circle. Ensure the filling is well-distributed. Avoid overfilling to prevent the pasty from breaking. Once the filling is in place, gently fold the pastry over to form a semi-circle. Align the edges carefully.

Sealing Techniques

Sealing the pasty is crucial. It keeps the filling inside while baking. Begin by pressing the edges together with your fingers. Create a tight seal. Next, use a fork to crimp the edges. This adds an extra layer of security. Ensure no gaps are visible. The pasty should be tightly sealed to hold its shape during baking.

Award Winning Cornish Pasty Recipe: Ultimate Guide to Perfection

Credit: phatathome.com

Baking To Perfection

The secret to a delicious Cornish pasty lies in the baking process. Getting the right temperature and crust can make all the difference. Below, we explore the essential steps for baking to perfection.

Optimal Baking Temperature

Setting the oven to the right temperature is crucial. Preheat your oven to 220°C (428°F). This ensures the pasty begins to bake immediately. The initial high temperature helps in creating a crispy crust. After 15 minutes, reduce the oven temperature to 180°C (356°F). This allows the filling to cook thoroughly without burning the crust.

Stage Temperature Duration
Initial 220°C (428°F) 15 minutes
Final 180°C (356°F) 35-40 minutes

Achieving The Perfect Crust

A golden, flaky crust is the hallmark of a great Cornish pasty. Follow these steps to ensure your pasty achieves this perfection:

  1. Chill the Dough: Cold dough holds its shape better and creates flakier layers. Chill your dough for at least 30 minutes before rolling it out.
  2. Brush with Egg Wash: Before baking, brush the pasty with an egg wash. This gives the crust a shiny, golden finish. Mix one beaten egg with a tablespoon of milk for the perfect egg wash.
  3. Seal the Edges: Crimp the edges of the pasty well. This prevents the filling from leaking and keeps the crust intact.

By following these steps, your Cornish pasty will have a crust that is both crispy and flavorful.

Serving Suggestions

The Award Winning Cornish Pasty is a delightful meal on its own. Yet, there are many ways to elevate this dish. Serving suggestions can transform your pasty into a true feast. Here, we explore accompaniments and presentation tips to enhance your dining experience.

Accompaniments And Sides

Pair your Cornish Pasty with simple sides. Traditional choices include mashed potatoes or peas. These sides complement the rich flavors of the pasty. Another option is a fresh, crisp salad. The lightness of the salad balances the hearty pasty. For a classic touch, add a serving of gravy. It adds depth and moisture to every bite.

For a unique twist, try roasted vegetables. Carrots, parsnips, and brussels sprouts work well. Their sweetness contrasts the savory pasty. Consider serving pickles or chutney on the side. These add a tangy kick and enhance the overall taste. Lastly, serve with a crusty bread roll. It’s perfect for soaking up any leftover juices.

Presentation Tips

Presentation makes a difference. Start by placing the pasty on a large, clean plate. Arrange your sides around the pasty. Use vibrant vegetables to add color. A sprinkle of fresh herbs adds a touch of elegance. Consider a garnish of parsley or chives. They add a pop of green and a hint of flavor.

Use sauces sparingly. A drizzle of gravy or a dollop of chutney is enough. Too much can overwhelm the dish. Arrange the table with care. Use matching plates and cutlery. Cloth napkins add a special touch. Set the scene with soft lighting. Candles or a gentle lamp create a cozy atmosphere. Finally, serve with a smile. A welcoming attitude enhances the meal.

Troubleshooting Common Issues

Even with the best recipes, problems can still occur. Making the perfect Cornish pasty requires attention to detail. Here, we will solve some common issues. Let’s ensure your pasties turn out perfect every time.

Preventing Soggy Bottoms

A soggy bottom can ruin a pasty. To avoid this, follow these steps:

  • Use cold ingredients: Cold butter and water help make flaky pastry.
  • Chill the dough: Let the dough rest in the fridge for at least 30 minutes.
  • Drain fillings: Ensure your fillings are not too wet. Drain any excess moisture before adding.
  • Bake on a hot tray: Preheat your baking tray in the oven. This helps the bottom cook faster.

Avoiding Overcooked Fillings

Overcooked fillings can turn dry and unappetizing. Here’s how to prevent it:

  • Cut ingredients evenly: Ensure all filling pieces are the same size for even cooking.
  • Cook meat partially: If using raw meat, partially cook it before adding to the pasty.
  • Adjust cooking time: Bake pasties at a consistent temperature. Check doneness halfway through.
  • Use a meat thermometer: Check the internal temperature of meat fillings. Aim for 165°F (74°C).

By following these tips, you can avoid common pitfalls. Your Cornish pasties will be the star of any meal.

Storing And Reheating

Store leftover Cornish pasties in an airtight container in the fridge. Reheat in the oven at 350°F for 15 minutes. Enjoy the fresh taste!

Fresh Cornish pasties are a delight. But storing and reheating them can be tricky. Proper storage and reheating methods keep them tasting as good as fresh. Below are some tips to help you enjoy your pasties later.

Best Storage Practices

Store your Cornish pasties in an airtight container. This keeps them fresh and prevents them from drying out. Refrigerate if you plan to eat them within a few days. For longer storage, freeze them. Wrap them tightly in plastic wrap or aluminum foil first. This prevents freezer burn.

Reheating Without Drying Out

Preheat your oven to 350°F (175°C). Place the pasty on a baking sheet. Cover it with aluminum foil to keep it moist. Bake for about 20 minutes. Remove the foil for the last 5 minutes. This ensures a crispy crust. Avoid microwaving pasties. This can make them soggy and unevenly heated. Enjoy your reheated Cornish pasties with the same delicious flavor as when fresh. “`
Award Winning Cornish Pasty Recipe: Ultimate Guide to Perfection

Credit: www.daringgourmet.com

Frequently Asked Questions

What Makes A Cornish Pasty Authentic?

An authentic Cornish pasty features a crimped edge and contains beef, potato, swede, and onion. It’s seasoned simply with salt and pepper.

How Do You Crimp A Cornish Pasty?

To crimp, fold the pastry edge and pinch it together. Continue to fold and pinch along the edge.

Can You Freeze Cornish Pasties?

Yes, you can freeze Cornish pasties. Wrap them individually and store in an airtight container.

What Is The Best Pastry For Cornish Pasties?

Shortcrust pastry is the traditional choice for Cornish pasties. It’s sturdy and holds the filling well.

Conclusion

Enjoy making and tasting this award-winning Cornish pasty recipe. It’s simple and delicious. Perfect for family dinners or special gatherings. The unique flavors will impress everyone. You can customize ingredients to suit your taste. Try this recipe today. Experience the rich Cornish tradition.

Your kitchen will smell amazing. Happy cooking and savor every bite!

Mulled Wine Gift Recipe: Perfect Homemade Holiday Delight

Mulled wine makes a perfect holiday gift. It’s warm, aromatic, and delightful.

The holidays are a time for warmth and joy. A mulled wine gift recipe captures this spirit beautifully. This festive drink, with its blend of spices and wine, is a heartwarming treat. It’s easy to make and even easier to enjoy.

Imagine gifting a homemade mulled wine kit to friends or family. They’ll love the fragrant blend of cinnamon, cloves, and citrus. It’s more than just a drink; it’s an experience. Giving a mulled wine gift shows thoughtfulness and care. This blog post will guide you on how to create the perfect mulled wine gift recipe. Get ready to spread some holiday cheer with this delightful and thoughtful gift idea.

Mulled Wine Gift Recipe: Perfect Homemade Holiday Delight

Credit: www.thehappyhousie.com

Introduction To Mulled Wine

Mulled wine gift recipes make perfect holiday presents. Warm spices and rich flavors create a cozy, festive drink. Enjoy sharing this traditional treat with loved ones.

Mulled wine is a warm, spiced drink. It brings comfort during cold seasons. This festive beverage has a rich history. It combines red wine with spices and fruits. The result is a flavorful and aromatic drink. Perfect for sharing with loved ones.

History And Tradition

Mulled wine dates back to ancient Rome. Romans heated wine to stay warm during winter. They added spices to enhance the flavor. This tradition spread across Europe. Each country added its unique twist. Today, it’s popular in many cultures. It’s a symbol of warmth and celebration.

Why It’s A Holiday Favorite

Mulled wine is synonymous with holiday cheer. The warm spices evoke nostalgia. It fills the home with a cozy aroma. Friends and family gather around to enjoy it. It pairs well with holiday treats. The preparation is simple but feels special. It’s a staple at holiday markets and gatherings. “`
Mulled Wine Gift Recipe: Perfect Homemade Holiday Delight

Credit: injohnnaskitchen.com

Essential Ingredients

Creating the perfect mulled wine gift recipe starts with understanding the essential ingredients. These ingredients set the stage for a delightful and aromatic beverage that warms the soul. Let’s explore what makes a mulled wine truly special.

Choosing The Right Wine

The foundation of mulled wine is, of course, the wine itself. Selecting the right type of wine is crucial. Here are some tips:

  • Red Wine: Choose a bold red wine like Merlot or Cabernet Sauvignon. These wines bring rich flavors.
  • Dry or Semi-Dry: Opt for dry or semi-dry wine to balance the sweetness of the added sugar and spices.

Spices And Add-ins

Spices and add-ins are what give mulled wine its unique taste. They create a warm, inviting aroma. Common spices and add-ins include:

Spice Flavor Profile
Cinnamon Sticks Warm, sweet, and woody
Cloves Strong, aromatic, and slightly bitter
Star Anise Licorice-like, sweet, and spicy
Orange Slices Fresh, citrusy, and slightly tart
Honey Sweet, floral, and smooth

For a more complex flavor, consider adding:

  1. Vanilla Pods: Adds a creamy, sweet note.
  2. Nutmeg: Introduces a warm, spicy touch.
  3. Cardamom: Provides a sweet, herbal essence.

Experiment with these ingredients to find the perfect balance. Your mulled wine will be both aromatic and flavorful.

Preparation Steps

Creating the perfect mulled wine gift requires a few simple steps. Follow these preparation steps to ensure your mulled wine gift is flavorful and delightful. Let’s start with mixing the ingredients and then move on to the cooking instructions.

Mixing Ingredients

First, gather all your ingredients. You will need red wine, oranges, cloves, cinnamon sticks, star anise, and sugar. Measure each ingredient accurately. Pour the red wine into a large pot. Slice the oranges and add them to the pot. Place the cloves, cinnamon sticks, and star anise into a cheesecloth. Tie the cheesecloth and add it to the pot. Finally, add the sugar and stir well.

Cooking Instructions

Place the pot on the stove over low heat. Warm the wine gently. Do not let it boil. Stir occasionally to ensure the sugar dissolves. Let the mixture simmer for 30 minutes. This allows the flavors to blend. After 30 minutes, remove the cheesecloth with the spices. Taste the mulled wine. Add more sugar if needed. Stir until the extra sugar dissolves. Once ready, let the wine cool slightly. Pour the mulled wine into a clean bottle. Seal the bottle tightly. Your mulled wine gift is now ready to be enjoyed.

Mulled Wine Gift Recipe: Perfect Homemade Holiday Delight

Credit: brittanystager.com

Creative Variations

Creating mulled wine at home is a delightful activity, especially when you explore creative variations. You can customize your mulled wine recipe to make it unique and enjoyable for everyone. Below, we will discuss some exciting variations, including non-alcoholic options and unique flavor twists.

Non-alcoholic Mulled Wine

For those who prefer a non-alcoholic version, you can still enjoy the warm, spiced flavors. Here’s how:

  • Use apple cider or grape juice as the base.
  • Add spices like cinnamon, cloves, and star anise.
  • Sweeten with honey or sugar as needed.
  • Simmer gently to blend the flavors.

This version is perfect for kids or anyone avoiding alcohol.

Unique Flavor Twists

To make your mulled wine stand out, consider adding some unique flavor twists:

Ingredient Flavor
Vanilla Bean Sweet and creamy
Cranberries Tart and festive
Ginger Warm and spicy
Orange Zest Citrusy and fresh

These ingredients can elevate the taste and make your mulled wine truly special.

Packaging Your Mulled Wine Gift

Packaging your mulled wine gift adds a special touch. A well-packaged gift shows thoughtfulness and care. It makes the gift more appealing and exciting. Here are some tips to make your mulled wine gift stand out.

Choosing The Right Bottle

The bottle you choose matters. Select a bottle that seals well. This ensures the freshness of the wine. Clear bottles work best. They showcase the rich color of the mulled wine. Pick a size that fits your recipe. Small bottles are perfect for individual gifts. Larger bottles work well for family gifts.

Decorative Ideas

Add a personal touch with decorations. Use festive ribbons around the bottle neck. Attach a small tag with a handwritten note. This adds a warm, personal touch. You can also use fabric or paper to wrap the bottle. Choose colors that match the holiday season. Add a sprig of rosemary or cinnamon stick for a rustic look. Small ornaments can also be tied around the neck of the bottle. They add a festive charm.

Consider using a gift box. Line the box with tissue paper. Place the bottle inside gently. Add some dried fruits or spices to the box. This enhances the presentation and ties in with the mulled wine theme. Your gift will look thoughtful and beautiful.

Personal Touches

Adding personal touches to your mulled wine gift makes it special. It shows you care and took the time to create something unique. Small details can make a big difference in how your gift is received. Here are a few ideas to get you started.

Custom Labels

Create custom labels for your mulled wine bottles. Design the labels with festive colors and fonts. You can include the recipient’s name or a special message. This adds a personal touch and makes the gift look professional.

Handwritten Notes

Include a handwritten note with your mulled wine gift. Write a short, heartfelt message to the recipient. Share why you chose this gift for them or a favorite memory. This personal touch makes the gift even more meaningful.

Serving Suggestions

Mulled wine is a festive treat that warms the soul. To enjoy it fully, consider how you serve it. Here are some serving suggestions to make your mulled wine experience delightful.

Pairing With Foods

Mulled wine pairs well with many foods. It complements both sweet and savory dishes. Here are some ideas:

  • Cheeses: Aged cheddar, brie, and gouda are excellent choices.
  • Meats: It pairs well with roasted turkey, ham, or lamb.
  • Fruits: Serve with dried fruits like figs, apricots, and raisins.
  • Pastries: Gingerbread cookies, apple pie, and cinnamon rolls enhance the flavors.

Ideal Serving Temperature

To enjoy mulled wine’s full flavor, serve it warm. The ideal temperature is around 140°F (60°C). Follow these steps for perfect serving:

  1. Heat the wine gently on the stove.
  2. Use a thermometer to check the temperature.
  3. Once it reaches 140°F, remove from heat.
  4. Pour into heat-resistant glasses or mugs.

For the best experience, avoid boiling the wine. Boiling can make the wine taste bitter and lose its aroma.

Food Pairing Notes
Cheeses Enhances the wine’s richness.
Meats Balances savory flavors with sweetness.
Fruits Complements the fruity notes.
Pastries Highlights the spices in the wine.

Enjoy your mulled wine with these serving suggestions to make the most of your festive gatherings.

Storing And Reheating

Storing and reheating mulled wine properly ensures it remains delicious and aromatic. Proper storage keeps the flavors intact. Reheating it correctly ensures it tastes as good as when it was first made. Here’s how you can achieve both effortlessly.

Best Storage Practices

Let the mulled wine cool to room temperature before storing. Use a glass or ceramic container with a tight lid. Avoid plastic containers as they might affect the taste. Store it in the refrigerator to keep it fresh. Mulled wine can be stored for up to three days.

Reheating Tips

Reheat the mulled wine gently to preserve its flavors. Use a saucepan and warm it over low heat. Stir occasionally to ensure even heating. Avoid boiling it as this can diminish the taste and aroma. If using a microwave, heat it in short bursts of 30 seconds, stirring in between. This method prevents overheating and retains the wine’s essence.

Frequently Asked Questions

What Is Mulled Wine?

Mulled wine is a spiced, warm wine typically enjoyed during winter. It’s made by heating red wine with spices and fruits.

How Do You Make Mulled Wine?

To make mulled wine, heat red wine with cinnamon, cloves, star anise, orange slices, and sugar. Simmer gently.

Can Mulled Wine Be A Gift?

Yes, mulled wine can be a thoughtful and festive gift. Package the ingredients attractively with a recipe card.

What Type Of Wine Is Best For Mulling?

A full-bodied red wine like Merlot or Cabernet Sauvignon is ideal for mulling. It holds up well to spices.

Conclusion

Creating mulled wine at home is easy and fun. This gift recipe adds a personal touch. Friends and family will appreciate the warmth and thoughtfulness. Perfect for holiday gatherings or cozy nights in. Ingredients are simple and affordable. Follow the steps, and enjoy the festive aroma.

Share the joy of homemade mulled wine. Happy gifting!

Okra South Indian Recipe: Delicious and Authentic Flavors

Okra, also known as bhindi, is a beloved vegetable in South Indian cuisine. Its unique flavor and texture make it a staple in many households.

South Indian recipes often highlight the natural taste of okra, combining it with spices and herbs. This brings out its best qualities. Cooking okra can be tricky. But with the right recipe, it can become a delicious part of any meal.

In South India, okra is prepared in various ways. Each method offers a different taste experience. From stir-fries to curries, there’s something for everyone. This blog post will guide you through a classic South Indian okra recipe. It’s simple, flavorful, and perfect for any occasion. Let’s dive into the world of South Indian cooking and discover how to make the perfect okra dish.

Okra South Indian Recipe: Delicious and Authentic Flavors

Credit: www.youtube.com

Introduction To Okra South Indian Recipe

Okra, also known as “ladies’ fingers,” is a staple in South Indian cuisine. This vegetable is beloved for its unique texture and nutritional benefits. The South Indian Okra Recipe offers a delightful blend of flavors. Combining spices, herbs, and fresh ingredients, it creates a mouth-watering dish.

Cultural Significance

In South India, food is more than sustenance. It is a celebration of culture and tradition. Okra has a special place in this region’s culinary landscape. It is often used in festive meals and family gatherings.

The vegetable is not just part of daily meals but also in religious ceremonies. Its presence in South Indian cuisine signifies prosperity and health. The recipes passed down through generations maintain the authenticity of flavors.

Popularity In South India

Okra is immensely popular in South India. It is featured in various traditional dishes. From simple stir-fries to elaborate curries, okra is a versatile ingredient.

Here is a table showcasing some popular okra dishes in South India:

Dish Name Key Ingredients Cooking Method
Vendakkai Poriyal Okra, onions, mustard seeds Stir-fried
Bendakaya Pulusu Okra, tamarind, jaggery Simmered
Bhindi Fry Okra, garlic, cumin Fried

The versatility of okra makes it a favorite among many. It adapts to different cooking styles and spices. This adaptability has cemented its place in South Indian kitchens.

To explore the delightful South Indian Okra Recipe, one must appreciate the cultural and culinary significance of this humble vegetable.

Okra South Indian Recipe: Delicious and Authentic Flavors

Credit: www.archanaskitchen.com

Ingredients Needed

Preparing a delicious South Indian okra dish requires a few essential ingredients. Fresh okra is the star of the dish, while various spices and seasonings add flavor and aroma. Let’s explore the ingredients needed in detail.

Fresh Okra

The main ingredient in this recipe is fresh okra. Choose okra that is bright green and firm. Avoid okra that is soft or has spots. You will need around 500 grams of fresh okra for this recipe. Wash the okra thoroughly and pat dry. Cut the okra into 1-inch pieces.

Spices And Seasonings

South Indian cuisine is known for its rich and aromatic spices. Here is a list of spices and seasonings needed for this okra recipe:

  • Mustard seeds: 1 teaspoon
  • Cumin seeds: 1 teaspoon
  • Turmeric powder: 1/2 teaspoon
  • Red chili powder: 1 teaspoon
  • Coriander powder: 1 teaspoon
  • Garam masala: 1/2 teaspoon
  • Asafoetida: a pinch
  • Salt: to taste

For tempering, you will need:

  • Oil: 2 tablespoons
  • Curry leaves: a few fresh leaves

These spices and seasonings will give the dish its unique South Indian flavor. Make sure to measure them accurately for the best results.

Preparing Okra

Preparing Okra for South Indian Recipe

Okra, also known as lady’s finger, is a popular vegetable in South Indian cuisine. Preparing okra properly ensures your dish tastes amazing and is free from slime. Below, you will find detailed steps on selecting, cleaning, and cutting okra for your recipe.

Selecting Fresh Okra

Choosing fresh okra is the first step for a perfect dish. Look for bright green pods that are firm to touch. Avoid okra that is dull, soft, or has black spots.

  • Choose smaller pods for tenderness.
  • Check for firmness by gently bending the tip; it should snap easily.

Cleaning And Cutting

Cleaning and cutting okra properly helps reduce slime during cooking. Start by washing the okra under running water to remove any dirt.

  1. Pat the okra dry with a clean kitchen towel.
  2. Trim the ends off each pod.
  3. Cut the okra into uniform pieces, about 1/2 inch thick.

Take care to dry the okra completely before cutting, as moisture can increase slime.

Essential Spices

Spices play a crucial role in South Indian cuisine, especially in okra recipes. They add flavor, aroma, and color to the dish. Let’s explore some essential spices used in making a delicious Okra South Indian recipe.

Turmeric And Chili Powder

Turmeric gives okra its vibrant yellow color. It also has health benefits. It is a must-have in many South Indian dishes. Chili powder adds heat to the recipe. Adjust the quantity based on your spice preference. A little goes a long way.

Mustard Seeds And Curry Leaves

Mustard seeds add a nutty flavor. They crackle in hot oil, releasing their aroma. Curry leaves are another essential spice. They add a unique flavor and fragrance. Fresh curry leaves are best, but dried ones can also work.

Cooking Techniques

Okra, a versatile vegetable, is a staple in South Indian cuisine. There are many cooking techniques to bring out its unique flavor. Two popular methods are stir-frying and simmering with spices.

Stir-frying

Stir-frying is a quick and easy way to cook okra. Slice the okra into thin pieces. Heat oil in a pan over medium heat. Add mustard seeds and let them splutter. Toss in some chopped onions and sauté until golden. Add the sliced okra. Stir continuously to avoid sticking. Season with salt and turmeric. Cook until the okra is tender and slightly crisp. This method keeps the okra’s texture intact.

Simmering With Spices

Simmering with spices gives okra a deep, rich flavor. Heat oil in a pan. Add cumin seeds and let them crackle. Add finely chopped tomatoes and cook until soft. Mix in some ginger-garlic paste. Add the sliced okra and stir well. Sprinkle coriander, cumin, and chili powder. Pour in a little water. Cover the pan and let it simmer on low heat. Cook until the okra absorbs all the spices. This technique makes the okra tender and flavorful.

Serving Suggestions

Serving suggestions can elevate your Okra South Indian Recipe, transforming it into a complete meal. Pairing it with the right accompaniments enhances the flavors and ensures a delightful dining experience. Here are some ideas:

Rice And Roti

Rice is a staple in South Indian cuisine. Steamed rice is the perfect companion to the Okra dish. The mild flavor of rice allows the spices in the okra to shine. For a more aromatic touch, try jeera rice or ghee rice.

Roti, on the other hand, offers a different texture. Soft and warm whole wheat rotis complement the spicy and tangy notes of the okra. Parathas and naan also serve as great alternatives, adding a rich, buttery flavor to the meal.

Traditional South Indian Sides

To complete your meal, consider adding some traditional South Indian sides. Here are a few suggestions:

  • Sambar – A lentil-based vegetable stew, rich in flavor and nutrients.
  • Rasam – A tangy soup made with tamarind, tomatoes, and spices. It’s light and refreshing.
  • Pachadi – A yogurt-based side dish, often made with cucumbers or carrots. It provides a cooling effect to balance the spices.
  • Vada – A deep-fried snack made from lentils. It’s crispy and pairs well with the softness of the okra.

These sides not only enhance the meal but also provide a variety of textures and flavors, making your dining experience more enjoyable.

Health Benefits

Okra, also known as lady’s finger, is a staple in many South Indian kitchens. This humble vegetable not only enhances your meals but also provides numerous health benefits. Let’s dive into the many advantages of including okra in your diet.

Nutritional Value

Okra is rich in essential nutrients. It contains vitamins A, C, and K. Each serving also offers a good amount of folate and magnesium. These nutrients support overall health and well-being. Okra is also low in calories. This makes it a great choice for those watching their weight.

Digestive Health

Okra is high in fiber. Fiber aids in digestion and prevents constipation. It keeps you feeling full for longer periods. This can help in maintaining a healthy weight. The mucilage in okra helps soothe the digestive tract. It can also aid in the treatment of ulcers and gastritis.

Okra South Indian Recipe: Delicious and Authentic Flavors

Credit: somethingiscooking.com

Variations Of The Recipe

Okra, also known as bhindi or ladies’ fingers, is a beloved vegetable in South Indian cuisine. There are many ways to prepare it, each bringing out unique flavors. Here, we explore two popular variations that highlight the versatility of this humble vegetable.

With Coconut

Adding coconut to okra creates a rich and creamy dish. The sweetness of the coconut balances the slight bitterness of the okra. Here’s a simple way to make this dish:

  • Ingredients:
    • 500g okra, sliced
    • 1 cup grated coconut
    • 1 onion, chopped
    • 1 tsp mustard seeds
    • 2 green chilies, slit
    • A few curry leaves
    • Salt to taste
    • 2 tbsp oil
  • Instructions:
    1. Heat oil in a pan. Add mustard seeds and let them crackle.
    2. Add onions, green chilies, and curry leaves. Sauté till onions turn golden.
    3. Add the sliced okra and cook for 5 minutes.
    4. Mix in the grated coconut. Cook for another 5 minutes.
    5. Season with salt. Serve hot.

With Tamarind

Using tamarind in okra recipes introduces a tangy flavor that complements the vegetable well. This variation is a favorite in many South Indian households. Here’s how to prepare it:

  • Ingredients:
    • 500g okra, chopped
    • 1 tbsp tamarind paste
    • 1 onion, sliced
    • 1 tsp cumin seeds
    • 2 dried red chilies
    • A pinch of asafoetida
    • Salt to taste
    • 2 tbsp oil
  • Instructions:
    1. Heat oil in a pan. Add cumin seeds and dried red chilies.
    2. Once they splutter, add asafoetida and sliced onions.
    3. Sauté until onions turn golden brown.
    4. Add the chopped okra and cook for 7-8 minutes.
    5. Stir in the tamarind paste and cook for another 5 minutes.
    6. Season with salt. Serve with rice or roti.

Frequently Asked Questions

What Is Okra South Indian Recipe?

Okra South Indian Recipe is a flavorful dish made using okra, spices, and coconut. It’s popular in South Indian cuisine.

How To Cook Okra South Indian Style?

Cook okra with mustard seeds, curry leaves, turmeric, and grated coconut. This enhances its flavor and texture.

What Are The Ingredients For Okra South Indian Recipe?

Ingredients include okra, mustard seeds, curry leaves, turmeric, grated coconut, and salt. Optionally, add chilies for heat.

Is Okra South Indian Recipe Healthy?

Yes, it is healthy. Okra is rich in fiber and vitamins. The recipe uses minimal oil and natural ingredients.

Conclusion

Wrapping up, this Okra South Indian recipe offers a delightful taste adventure. Its simple ingredients and easy steps make it accessible for everyone. Whether you’re new to cooking or an experienced chef, this dish will impress. The flavors blend perfectly, providing a unique culinary experience.

Try this recipe today and enjoy a piece of South India at home. Happy cooking!

French Puff Pastry Recipe: Flaky, Buttery Perfection

French puff pastry is a delight in the world of baking. Its flaky layers and buttery taste make it a favorite.

For those who love baking, mastering puff pastry is a must. This French recipe is easy to follow and brings authentic flavor to your table. Puff pastry is versatile, used in both sweet and savory dishes. Whether you’re making a dessert or an appetizer, this recipe will be your go-to.

The secret lies in the folding technique, creating thin, crispy layers. With patience and practice, you can achieve perfect puff pastry at home. Ready to impress your family and friends? Let’s dive into this classic French puff pastry recipe and elevate your baking skills.

French Puff Pastry Recipe: Flaky, Buttery Perfection

Credit: m.youtube.com

Introduction To French Puff Pastry

French puff pastry, known for its delicate layers and buttery taste, is a classic in French baking. This versatile dough can be used in both sweet and savory dishes. From croissants to tarts, puff pastry adds a touch of elegance to any recipe. Let’s dive deeper into what makes this pastry so special.

What Is Puff Pastry?

Puff pastry is a light, flaky dough made from simple ingredients: flour, water, salt, and butter. The key to its unique texture lies in the technique of folding and rolling the dough. This process creates multiple thin layers of dough separated by butter. When baked, the water in the butter turns to steam, causing the dough to puff up and form crisp layers.

Here’s a basic breakdown of the puff pastry ingredients:

Ingredient Quantity
Flour 2 cups
Butter 1 cup
Water 1/2 cup
Salt 1/2 tsp

History And Origins

The origins of puff pastry trace back to ancient times. Some historians believe that the Egyptians and Greeks had early versions of layered dough. The modern puff pastry, as we know it, was perfected in France in the 17th century.

Chef Claude Lorrain, a French pastry chef, is often credited with inventing the modern puff pastry. He was experimenting with dough and butter, trying to create a lighter pastry. His technique of folding and rolling the dough with butter resulted in the layered, flaky texture we love today.

Over the centuries, puff pastry has remained a staple in French cuisine. It is used in many traditional dishes like croissants, vol-au-vent, and mille-feuille. Its versatility and rich taste make it a favorite among chefs and home bakers alike.

Essential Ingredients

Creating a perfect French puff pastry requires just a few essential ingredients. Each ingredient plays a crucial role in achieving the flaky, buttery layers that make this pastry so delightful. Let’s explore these ingredients in detail.

Butter

Butter is the heart and soul of puff pastry. It provides the rich flavor and helps in creating those distinct layers. Always use unsalted butter for better control over the seasoning. The butter should be cold but pliable. This ensures it blends well without melting too quickly.

Flour

Flour forms the structure of the puff pastry. Use all-purpose flour for a balance between strength and tenderness. Ensure to sift the flour to remove any lumps. This makes the dough smooth. A little extra flour can be used for dusting while rolling out the dough.

Water And Salt

Water binds the flour and butter together. Use cold water to keep the dough temperature low. This helps in forming the layers. A pinch of salt enhances the flavor. It should be dissolved in water before adding to the flour. This ensures even distribution throughout the dough.

Here’s a quick summary of the ingredients:

Ingredient Quantity
Unsalted Butter 1 cup (225g)
All-Purpose Flour 2 cups (250g)
Cold Water 1/2 cup (120ml)
Salt 1/2 tsp

Equipment Needed

Creating French puff pastry at home can be a rewarding experience. To make the perfect puff pastry, you need the right equipment. Having these tools on hand will make the process smoother and more enjoyable.

Rolling Pin

A rolling pin is essential for puff pastry. It helps flatten the dough evenly. Choose a sturdy rolling pin that feels comfortable in your hands. A heavy rolling pin can help with even rolling.

Pastry Board

A pastry board provides a dedicated surface for rolling out dough. It keeps your countertop clean. Look for a non-stick or marble board. It will make handling the dough easier.

Sharp Knife

A sharp knife is vital for cutting the dough. It ensures clean and precise cuts. Use it to trim edges and shape the pastry. A dull knife can ruin the dough’s layers.

Step-by-step Preparation

Creating authentic French puff pastry can seem challenging. But with a clear, step-by-step guide, it becomes manageable. This section will walk you through each stage of the preparation process. Follow these steps for a flaky, delicious puff pastry.

Mixing The Dough

Start by gathering your ingredients. You will need:

  • 2 1/2 cups all-purpose flour
  • 1 cup cold water
  • 1 teaspoon salt
  • 1 cup unsalted butter

Mix the flour and salt in a large bowl. Add the cold water gradually. Stir until the dough forms a ball. Wrap the dough in plastic wrap. Let it rest for 30 minutes.

Rolling And Folding

Next, roll out the dough on a floured surface. Shape it into a rectangle. Place the cold butter in the center. Fold the dough over the butter. Seal the edges.

Roll the dough into a long rectangle. Fold it into thirds, like a letter. This is known as a “turn.” Rotate the dough 90 degrees. Repeat the rolling and folding process six times.

Chilling The Dough

Chill the dough between each turn. Wrap it in plastic wrap. Place it in the refrigerator for 30 minutes. This step is crucial. It keeps the butter cold and ensures flaky layers.

After completing all the turns, chill the dough for at least an hour. It is now ready to use in your favorite recipe.

Common Techniques

French puff pastry is a delight to the senses. Its flaky, buttery layers are achieved through specific techniques. Understanding these techniques ensures success in creating this delicious pastry.

Laminating

Laminating is essential for puff pastry. It involves folding butter into the dough multiple times. This creates thin layers of dough and butter. These layers puff up during baking, forming the pastry’s characteristic texture. Keep the dough and butter cold. This prevents them from blending together. The result is a perfect, flaky pastry.

Docking

Docking involves piercing the dough with a fork. This prevents excessive puffing during baking. Docking helps the dough rise evenly. It ensures a uniform texture. This step is crucial for pastries that need a flat surface. Examples include tarts and some types of pies.

Blind Baking

Blind baking is pre-baking the pastry shell without filling. This helps achieve a crisp crust. It is often used for pies and tarts with moist fillings. Line the pastry with parchment paper. Fill it with baking weights or dried beans. This keeps the dough from puffing up. Bake until the crust is golden and firm.

Tips For Perfect Puff Pastry

Creating the perfect puff pastry at home can be rewarding. It requires patience and attention to detail. With the right techniques, you can achieve flaky layers and a delicious texture. Below, discover essential tips for making perfect puff pastry.

Maintaining Cold Ingredients

Keep all ingredients chilled. This includes butter and water. Cold ingredients help create the flaky layers in puff pastry.

Use ice-cold water. It prevents the butter from melting. This ensures a perfect dough consistency.

Refrigerate the dough often. Especially between rolling and folding steps. This helps maintain the temperature.

Proper Rolling Technique

Roll out the dough gently. Apply even pressure. This prevents tearing or uneven layers.

Always roll in one direction. Rotate the dough as needed. This keeps the layers intact.

Use a light dusting of flour. Too much flour can dry out the dough. Just enough to prevent sticking.

Avoiding Overworking

Handle the dough as little as possible. Too much handling can make it tough.

Fold the dough carefully. Follow the required number of folds. Over-folding can ruin the texture.

Rest the dough. Allow it to relax between folds. This ensures a tender and flaky pastry.

Popular Puff Pastry Recipes

French puff pastry offers a world of delightful possibilities. Whether it’s sweet or savory, the flaky layers add a touch of elegance to any dish. Let’s explore some popular puff pastry recipes that you can try at home.

Croissants

Croissants are the quintessential puff pastry treat. These buttery, flaky rolls are perfect for breakfast. Serve them warm with a spread of jam or butter. Their golden crust and soft, airy inside make them irresistible.

Vol-au-vent

Vol-au-Vent is a classic French appetizer. It consists of a small, hollow case of puff pastry. Fill it with savory ingredients like mushrooms, chicken, or seafood. The crisp pastry combined with rich fillings creates a delightful bite.

Palmiers

Palmiers are sweet, heart-shaped pastries. Made from sugar and puff pastry, they are caramelized to perfection. These simple yet elegant cookies are great with tea or coffee. Their sugary crunch and delicate layers make them a favorite.

French Puff Pastry Recipe: Flaky, Buttery Perfection

Credit: www.spatuladesserts.com

Serving Suggestions

French puff pastry, with its delicate layers, is versatile. Serve it with a variety of fillings and presentation styles to delight your guests. Below are some serving suggestions for both sweet and savory options, and ideas on how to present them.

Sweet Fillings

Sweet puff pastries are a hit at any gathering. Choose from various fillings to match your taste.

  • Chocolate: Melted chocolate inside the pastry makes for a rich treat.
  • Fruit Preserves: Strawberry, apricot, or raspberry preserves add a fruity punch.
  • Cream Cheese: A blend of cream cheese and sugar creates a creamy filling.
  • Cinnamon Sugar: Sprinkle with a mix of cinnamon and sugar for a classic taste.

Savory Fillings

Savory puff pastries are perfect for brunch or appetizers. Fill them with a variety of ingredients.

  • Cheese: Use gouda, cheddar, or brie for a delightful taste.
  • Spinach and Feta: A Greek-inspired filling that is always popular.
  • Mushroom: Sautéed mushrooms and herbs make a hearty option.
  • Ham and Cheese: A classic combination that never disappoints.

Presentation Ideas

How you present your puff pastries can enhance their appeal. Use these ideas to impress your guests.

  • Plating: Arrange pastries on a decorative platter. Add fresh fruit or herbs for color.
  • Drizzles: For sweet pastries, drizzle with chocolate or caramel sauce. For savory, use balsamic reduction.
  • Powdered Sugar: A light dusting of powdered sugar on sweet pastries looks elegant.
  • Pastry Shapes: Cut dough into different shapes. Twists, braids, and pinwheels add visual interest.
French Puff Pastry Recipe: Flaky, Buttery Perfection

Credit: entertainingwithbeth.com

Frequently Asked Questions

What Is French Puff Pastry?

French puff pastry is a light, flaky, and buttery dough. It’s made by layering butter and dough repeatedly. This creates numerous thin layers.

How Do You Make Puff Pastry Dough?

To make puff pastry dough, start with flour, water, and salt. Incorporate cold butter, then fold and roll multiple times to create layers.

Can I Make Puff Pastry Ahead Of Time?

Yes, you can make puff pastry ahead. Store it in the refrigerator for up to three days. For longer storage, freeze it.

What Dishes Use French Puff Pastry?

French puff pastry is versatile. It can be used for desserts like croissants and savory dishes like beef Wellington.

Conclusion

Creating French puff pastry at home is easier than you think. With just a few ingredients and patience, you can enjoy flaky, buttery pastries. Follow the steps carefully, and you’ll impress your friends and family. Practice makes perfect, so don’t worry if the first attempt isn’t flawless.

Enjoy the process and the delicious results. Happy baking!

Steak And Cheese Burrito Recipe: Delicious and Easy to Make

Steak and cheese burritos are a delicious, satisfying meal. They combine savory steak with gooey cheese in a warm tortilla.

Craving a hearty, tasty meal? This steak and cheese burrito recipe delivers. Packed with flavors, it’s perfect for lunch or dinner. Easy to make, this burrito is a family favorite. Imagine biting into tender steak, melted cheese, and fresh veggies, all wrapped in a soft tortilla.

It’s comfort food at its best. With simple ingredients and clear steps, even beginners can master this dish. Ready to impress your taste buds? Let’s dive into the recipe and make a burrito that’s sure to please everyone at the table.

Steak And Cheese Burrito Recipe: Delicious and Easy to Make

Credit: www.delish.com

Ingredients

The key to a delicious Steak and Cheese Burrito is using the right ingredients. From the essential components to the optional add-ons, each ingredient plays a role in creating a tasty and satisfying meal. Below, we break down the necessary elements for a mouth-watering burrito.

Essential Components

To make a flavorful Steak and Cheese Burrito, you need the following essential ingredients:

  • Steak: Choose a high-quality cut like skirt or flank steak.
  • Cheese: Shredded cheddar or Monterey Jack works best.
  • Flour Tortillas: Opt for large-sized tortillas for easy wrapping.
  • Onions: Sliced and sautéed until golden.
  • Bell Peppers: Red and green peppers add color and flavor.
  • Garlic: Minced garlic for added depth.
  • Olive Oil: For sautéing the vegetables and steak.
  • Salt and Pepper: To season the steak and vegetables.

Optional Add-ons

While the essential components make a great base, optional add-ons can enhance your burrito:

  • Sour Cream: Adds a creamy texture.
  • Guacamole: Fresh and creamy avocado goodness.
  • Jalapeños: For those who like a spicy kick.
  • Black Beans: Adds protein and fiber.
  • Rice: Makes the burrito more filling.
  • Cilantro: For a fresh, herbal flavor.
  • Hot Sauce: A dash for extra heat.

Each ingredient contributes to the overall taste and texture of the burrito. By using fresh and high-quality components, you can create a delicious and satisfying meal that everyone will enjoy.

Choosing The Right Steak

Choosing the right steak is essential for a delicious steak and cheese burrito. The quality and type of steak can make a big difference. This section will guide you through selecting the best cuts and marinating them to perfection.

Best Cuts Of Meat

For a tender and flavorful burrito, choose the best cuts of meat. Ribeye, flank, and skirt steaks are great options. Ribeye is rich and juicy, perfect for a hearty meal. Flank steak is lean and full of flavor. Skirt steak is thin and cooks quickly, ideal for a fast and tasty burrito.

Marinating Tips

Marinating the steak enhances its flavor and tenderness. Use a simple marinade with olive oil, lime juice, garlic, and spices. Let the steak marinate for at least 30 minutes. For more flavor, marinate it overnight in the fridge. This step ensures a juicy and delicious steak for your burrito.

Preparing The Steak

Creating the perfect steak and cheese burrito starts with preparing the steak. This step is crucial for flavor and texture. Here, we will cover two main areas: cooking methods and slicing techniques.

Cooking Methods

There are several ways to cook the steak for your burrito. Choose the method that best suits your taste and available tools.

  • Grilling: This method adds a smoky flavor to the steak. Preheat the grill to medium-high. Grill the steak for 4-5 minutes per side. Let it rest before slicing.
  • Pan-Seared: Ideal for those who prefer a crispy crust. Heat a skillet over high heat. Add a bit of oil. Cook the steak for 3-4 minutes per side. Let it rest.
  • Broiling: A quick and easy method. Preheat the broiler. Place the steak on a broiler pan. Cook for 4-5 minutes per side. Rest the steak.

Slicing Techniques

Proper slicing ensures tender and flavorful bites in each burrito.

  • Against the Grain: Slice the steak against the grain. This makes the meat tender. Look for the lines of muscle fiber. Cut perpendicular to them.
  • Thin Slices: Aim for thin slices, about 1/4 inch thick. This helps the steak blend well with other burrito ingredients.
  • Even Slices: Keep the slices even. This ensures consistent cooking and texture throughout the burrito.

Using these techniques will make your steak juicy and delicious. Perfect for any steak and cheese burrito.

Cheese Selection

Choosing the right cheese for your Steak and Cheese Burrito is crucial. The cheese can make or break your burrito. Let’s dive into the best options and how to use them.

Types Of Cheese

Different cheeses bring unique flavors and textures. Here are some top choices:

  • Cheddar: Sharp and tangy. Adds a punch of flavor.
  • Monterey Jack: Mild and creamy. Melts beautifully.
  • Pepper Jack: Spicy twist. Great for those who love heat.
  • Queso Fresco: Fresh and crumbly. Adds a light touch.

Melting Tips

Proper melting ensures the cheese blends with the steak perfectly. Follow these tips:

  1. Grate the Cheese: Grated cheese melts faster and evenly.
  2. Low Heat: Use low heat to avoid burning the cheese.
  3. Cover the Pan: Covering helps trap heat and melt the cheese.
  4. Stir Often: Keep stirring to ensure even melting.

With these tips, your Steak and Cheese Burrito will be irresistibly cheesy and delicious. Happy cooking!

Assembling The Burrito

Assembling a steak and cheese burrito is both simple and fun. This step-by-step guide ensures your burrito is both delicious and perfectly wrapped. Follow these instructions for a burrito that holds its shape and packs a flavorful punch in every bite.

Layering Ingredients

Begin by laying out your tortilla on a clean surface. A large tortilla works best.

First, add a generous layer of steak strips. Spread them evenly in the center.

Next, sprinkle a layer of shredded cheddar cheese over the steak. The cheese should cover the steak but not the edges of the tortilla.

Then, add your desired toppings. Here are some popular choices:

  • Black beans
  • Cooked rice
  • Guacamole
  • Sour cream
  • Diced tomatoes

Ensure the toppings are evenly distributed. This ensures every bite has a mix of all ingredients.

Wrapping Techniques

Wrapping the burrito correctly ensures it stays together. Follow these steps:

  1. Fold the sides of the tortilla inward. They should cover the edges of the fillings.
  2. Next, fold the bottom part of the tortilla up and over the fillings.
  3. Tuck the bottom part tightly under the fillings. Use your fingers to hold it in place.
  4. Finally, roll the burrito away from you. Ensure it stays tight as you roll.

Once wrapped, place the burrito seam-side down. This helps it stay closed. You can also wrap it in foil for extra security.

And there you have it! A perfectly assembled steak and cheese burrito. Enjoy your meal!

Steak And Cheese Burrito Recipe: Delicious and Easy to Make

Credit: momsdish.com

Serving Suggestions

Serving a Steak and Cheese Burrito can be a delightful experience. The right sides and drinks can elevate the meal. Here are some serving suggestions to make your meal complete.

Side Dishes

A good burrito needs great sides. Fresh guacamole adds a creamy texture. Serve it with tortilla chips for a satisfying crunch. Refried beans are a classic choice. They bring a rich, savory flavor. A simple side salad can balance the rich burrito. Use crisp lettuce, tomatoes, and a light dressing. Mexican rice is another great option. It’s flavorful and complements the burrito well.

Beverage Pairings

Choosing the right drink is important. Fresh lime soda is a refreshing choice. It complements the flavors well. For something classic, try a cold beer. A light lager works best. It doesn’t overpower the burrito’s taste. If you prefer non-alcoholic drinks, iced tea is a good option. Sweet or unsweetened, both work well. Finally, consider a fruity agua fresca. It adds a sweet, refreshing touch to your meal.

Tips And Tricks

Creating the perfect steak and cheese burrito can be simple with a few tips and tricks. These insights will help you prepare the dish smoothly and enjoy every bite. Let’s dive into some handy advice for making ahead and storing leftovers.

Making Ahead

Planning to make your steak and cheese burritos ahead? It’s a great idea! Cook the steak and prepare the cheese mixture in advance. Store them separately in airtight containers. This keeps the ingredients fresh and flavorful.

Wrap the cooked steak and cheese mixture tightly in tortillas. Use plastic wrap or foil to keep them secure. Place the wrapped burritos in the fridge. This method ensures they stay fresh for up to three days.

Want to freeze them? No problem. Place the wrapped burritos in a freezer-safe bag. They can last for up to three months. Thaw them overnight in the fridge before reheating.

Storing Leftovers

Have leftover steak and cheese burritos? Store them properly to enjoy later. Wrap each burrito tightly in plastic wrap. Then, place them in an airtight container.

Keep them in the fridge for up to three days. For longer storage, place the wrapped burritos in a freezer-safe bag. They can last for up to three months in the freezer.

Reheat the burritos in the microwave. Cover with a damp paper towel to keep them moist. Heat for 1-2 minutes until warm. Alternatively, use an oven. Preheat to 350°F and bake for 10-15 minutes.

Steak And Cheese Burrito Recipe: Delicious and Easy to Make

Credit: themixedmenu.com

Frequently Asked Questions

How Do You Make A Steak And Cheese Burrito?

To make a steak and cheese burrito, cook steak with spices, add cheese, beans, and veggies. Wrap it all in a tortilla.

What Kind Of Steak Is Best For Burritos?

Flank steak or skirt steak is best for burritos. They are tender, flavorful, and cook quickly.

Can I Use Other Cheeses In My Burrito?

Yes, you can use other cheeses like Monterey Jack, cheddar, or a Mexican blend for variety.

How Long Does It Take To Cook The Steak?

Cooking the steak takes about 10-15 minutes. Ensure it’s cooked to your preferred level of doneness.

Conclusion

Enjoy making your own steak and cheese burrito at home. It’s simple and tasty. Perfect for family dinners or quick lunches. Customize with your favorite toppings. Fresh ingredients make it even better. Satisfy your cravings with this delightful meal. No need for takeout.

Cooking at home can be fun and rewarding. Try this recipe today and impress your loved ones. They will thank you for it. Happy cooking!

Chicken Breast Ala King Recipe: Deliciously Creamy and Easy

Chicken Breast Ala King is a timeless classic. This creamy, savory dish delights taste buds.

Chicken Breast Ala King is a comforting dish that combines tender chicken breast with a rich, creamy sauce. Often served over rice, pasta, or toast, it’s a meal that satisfies both the heart and the stomach. Originating in the early 20th century, this dish has stood the test of time, becoming a favorite for many home cooks.

Whether you’re a seasoned chef or just starting in the kitchen, this recipe is straightforward and rewarding. Get ready to impress your family and friends with a delicious Chicken Breast Ala King that’s perfect for any occasion. Let’s dive into the steps and make this delightful dish together.

Ingredients

Chicken Breast Ala King is a classic dish that is both comforting and delicious. The recipe calls for a variety of ingredients that blend together to create a rich and creamy sauce, perfectly complementing the tender chicken breast. Below, we will detail the main ingredients and some optional additions that you can consider to personalize your dish.

Main Ingredients

The main ingredients for Chicken Breast Ala King are simple and easy to find. You will need boneless, skinless chicken breasts. Cut these into bite-sized pieces for even cooking. Butter is essential for creating the base of the sauce. Use flour to thicken the sauce, giving it that rich texture.

Chicken broth adds depth to the flavor. Heavy cream or milk makes the sauce creamy and smooth. Add salt and pepper to taste. Don’t forget the bell peppers. They add a sweet crunch to the dish. Finally, sliced mushrooms bring a savory earthiness that balances the flavors.

Optional Additions

To elevate your Chicken Breast Ala King, consider these optional additions. Add peas for a pop of color and sweetness. Use pimentos for a slight tang and extra color. Garlic adds a fragrant depth to the sauce. Try adding sherry for a subtle, sophisticated flavor.

Want more texture? Add toasted almonds for a nutty crunch. Fresh parsley can be sprinkled on top for a burst of freshness. Finally, serve the dish over rice, pasta, or even toast for a complete meal.

Chicken Breast Ala King Recipe: Deliciously Creamy and Easy

Credit: panlasangpinoy.com

Preparation Steps

Preparing Chicken Breast Ala King involves a few essential steps. Each step ensures the dish’s rich flavor and perfect texture. Follow these steps to make your cooking experience smooth and enjoyable.

Preparing The Chicken

First, rinse the chicken breasts under cold water. Pat them dry with paper towels. Trim any excess fat or gristle. Cut the chicken into bite-sized pieces. This helps them cook evenly. Season the pieces with salt and pepper. Heat a skillet over medium heat. Add a tablespoon of oil. Once the oil is hot, add the chicken pieces. Cook until they are no longer pink. This usually takes about 6-8 minutes. Remove the chicken from the skillet. Set it aside on a plate.

Chopping Vegetables

Start with the bell peppers. Rinse them under cold water. Cut them into thin strips. Next, peel and chop the onion. Aim for small, even pieces. Mince the garlic cloves finely. This ensures they mix well. Slice the mushrooms into thin pieces. Arrange all the chopped vegetables in separate bowls. This makes it easier to add them to the skillet later.

Cooking Instructions

Chicken Breast Ala King is a delightful dish that combines tender chicken breast with a rich, creamy sauce. Follow these cooking instructions to create a delicious meal that your family and friends will love.

Sautéing The Chicken

First, prepare the chicken breast. Cut it into small, bite-sized pieces. Season the chicken with salt and pepper. Heat a large skillet over medium heat. Add two tablespoons of butter. Once the butter melts, add the chicken pieces.

Sauté the chicken until it is golden brown and cooked through. This should take about 5-7 minutes. Remove the chicken from the skillet and set it aside. This step ensures the chicken is perfectly cooked and ready to absorb the creamy sauce later.

Making The Cream Sauce

To make the cream sauce, use the same skillet. Add one more tablespoon of butter to the skillet. Once melted, add one chopped onion and one chopped green bell pepper. Sauté until the vegetables are tender.

Next, sprinkle two tablespoons of flour over the vegetables. Stir well to coat the vegetables with the flour. Cook for about one minute to remove the raw flour taste. Gradually add one cup of chicken broth while stirring constantly to prevent lumps.

Continue to stir until the mixture thickens. Then, add one cup of heavy cream and stir until the sauce is smooth and creamy. Reduce the heat to low and let the sauce simmer for a few minutes.

Return the sautéed chicken to the skillet. Stir to coat the chicken pieces with the sauce. Cook for another 5 minutes until the chicken is heated through and the flavors meld together. Serve the Chicken Breast Ala King over rice, pasta, or toast.

Combining Everything

Combining all the ingredients in Chicken Breast Ala King is key. This step ensures you achieve a well-blended, flavorful dish. Follow these simple steps to make your dish perfect.

Mixing Chicken And Sauce

First, add the cooked chicken pieces to the sauce. Stir gently to coat every piece of chicken evenly. This helps the flavors meld together. Make sure the chicken is fully covered with the creamy sauce.

Simmering To Perfection

Next, reduce the heat to low and let the mixture simmer. This step allows the flavors to develop deeply. Stir occasionally to avoid sticking. Simmer until the sauce thickens and the chicken is tender.

Once done, your Chicken Breast Ala King is ready to serve. Enjoy the rich, creamy taste in every bite!

Serving Suggestions

Chicken Breast Ala King is a creamy, flavorful dish. It pairs well with various sides and looks amazing on the plate. Here are some ideas to elevate your meal.

Best Side Dishes

Serve Chicken Breast Ala King with fluffy white rice. The rice soaks up the delicious sauce. Mashed potatoes are another excellent choice. They add comfort and balance the flavors.

Steamed vegetables like broccoli or green beans work well too. They add a fresh, crisp texture. A simple green salad with a light vinaigrette can brighten the meal.

Presentation Tips

Use a wide, shallow bowl for serving. Place the chicken breast in the center. Spoon the sauce generously over it. Garnish with chopped parsley for a pop of color.

Keep the side dishes neat and separate. A scoop of rice or mashed potatoes on one side looks tidy. Arrange vegetables neatly on the other side. This creates a balanced and appealing plate.

For a special touch, use a ring mold to shape the rice. It looks elegant and professional. Remember, presentation makes a big difference. Your meal will look as good as it tastes.

Chicken Breast Ala King Recipe: Deliciously Creamy and Easy

Credit: m.youtube.com

Variations

Chicken Breast Ala King is a versatile dish. It can be easily adapted to suit various dietary preferences. Whether you seek healthier options or need vegan substitutes, you can modify the recipe without losing its delightful flavors.

Healthy Alternatives

Making Chicken Breast Ala King healthier is simple. Here are a few substitutions:

  • Use skinless chicken breast to reduce fat content.
  • Replace heavy cream with low-fat milk or Greek yogurt.
  • Opt for whole wheat flour instead of white flour.
  • Add more vegetables such as bell peppers, carrots, and zucchini for extra nutrients.
  • Use low-sodium chicken broth to control salt intake.

Vegan Substitutes

For a vegan twist, try these substitutions:

  • Replace chicken with tofu or jackfruit for a similar texture.
  • Use vegetable broth instead of chicken broth.
  • Swap out heavy cream for coconut milk or cashew cream.
  • Use vegan butter or olive oil for cooking.
  • Thicken the sauce with cornstarch or arrowroot powder instead of flour.

These variations ensure everyone can enjoy the creamy goodness of Chicken Breast Ala King.

Storage Tips

Proper storage is essential to keep your Chicken Breast Ala King fresh and flavorful. Follow these storage tips to ensure your dish remains safe to eat and maintains its delicious taste.

Refrigeration

Store your Chicken Breast Ala King in the refrigerator for up to 3 days. Use an airtight container to prevent moisture loss and contamination. Place the container on the top shelf, where the temperature is most consistent.

Before refrigerating, let the dish cool to room temperature. This helps prevent condensation inside the container, which can cause spoilage. Label the container with the date to keep track of freshness.

Freezing

For longer storage, freezing is an excellent option. To freeze Chicken Breast Ala King, follow these steps:

  1. Allow the dish to cool completely.
  2. Transfer to a freezer-safe container or heavy-duty freezer bag.
  3. Remove as much air as possible to prevent freezer burn.
  4. Label the container with the date.

Frozen Chicken Breast Ala King can last up to 3 months. To reheat, thaw in the refrigerator overnight and warm on the stove or in the microwave until heated through.

Storage Method Duration
Refrigeration Up to 3 days
Freezing Up to 3 months

Remember, proper storage helps retain the taste and quality of your Chicken Breast Ala King. Follow these tips to enjoy your dish at its best!

Chicken Breast Ala King Recipe: Deliciously Creamy and Easy

Credit: www.facebook.com

Frequently Asked Questions

What Ingredients Are In Chicken Breast Ala King?

Chicken Breast Ala King typically includes chicken breasts, bell peppers, mushrooms, peas, and a creamy sauce.

How Do You Make Chicken Ala King Sauce?

To make the sauce, combine butter, flour, chicken broth, cream, and seasonings. Cook until thickened.

Can Chicken Ala King Be Frozen?

Yes, Chicken Ala King can be frozen. Store it in an airtight container for up to three months.

What To Serve With Chicken Ala King?

Serve Chicken Ala King with rice, pasta, or over toast. Steamed vegetables also pair well.

Conclusion

Enjoy making Chicken Breast Ala King at home. It’s simple and delicious. Your family will love this dish. Remember, fresh ingredients make a big difference. Cooking can be fun and rewarding. Try this recipe soon. Impress your loved ones with your culinary skills.

Happy cooking!

Alcoholic Popsicles Recipe: Refreshing Summer Treats

Summer is the perfect time for icy treats. Alcoholic popsicles are a fun twist.

Imagine lounging by the pool with a refreshing, boozy popsicle in hand. These adult-only treats are easy to make and perfect for any gathering. You can customize them with your favorite flavors and spirits, making each batch unique. Plus, they offer a creative way to beat the heat.

Whether you’re hosting a party or just chilling at home, alcoholic popsicles are sure to impress. Ready to dive into this cool trend? Keep reading to learn more about how to make these delightful frozen treats. Your summer just got a lot more exciting!

Introduction To Alcoholic Popsicles

Discover the delightful world of Alcoholic Popsicles! These frozen treats combine your favorite cocktails with the fun of a popsicle. Perfect for summer parties or a refreshing adult snack.

Imagine savoring a refreshing popsicle that has a twist of alcohol. Sounds exciting, right? Alcoholic popsicles are the latest trend in summer treats. They combine the fun of a frozen dessert with your favorite drink. Perfect for adults who want to cool off in a fun way.

What Are Alcoholic Popsicles?

Alcoholic popsicles are frozen treats made with alcohol. Think of them as ice pops, but for grown-ups. They can include a variety of alcoholic beverages. From wine and beer to cocktails like margaritas and mojitos. These popsicles are easy to make at home. You just need some basic ingredients and a freezer.

Why They Make Perfect Summer Treats

Summer is all about staying cool and refreshed. Alcoholic popsicles help you beat the heat. They offer a fun twist to the usual summer treats. Plus, they are perfect for parties and gatherings. Imagine serving them at a barbecue or pool party. Your guests will love the unique and tasty surprise. Alcoholic popsicles are also versatile. You can experiment with different flavors and alcohol types. This makes them a creative addition to any summer event. They are simple to prepare, making them a quick solution for last-minute plans. In short, alcoholic popsicles are the ultimate summer treat. They mix the joy of a cold popsicle with the fun of your favorite drink. “`
Alcoholic Popsicles Recipe: Refreshing Summer Treats

Credit: sugarspiceandglitter.com

Essential Ingredients

Creating delicious alcoholic popsicles starts with the right ingredients. The key to success lies in choosing the best alcohol, mixing it with fresh fruit, and balancing the flavors. In this section, you’ll learn how to select the essential ingredients for your alcoholic popsicles.

Choosing The Right Alcohol

Picking the correct alcohol is crucial for flavor and freezing. Here are some options:

  • Vodka: Neutral flavor, mixes well with many fruits.
  • Rum: Adds a tropical twist, works great with pineapple and coconut.
  • Tequila: Perfect for citrus flavors like lime and grapefruit.
  • Wine: Sangria popsicles with berries are a hit.
  • Champagne: Adds a fizzy touch, pairs well with strawberries.

Ensure you use alcohol with lower proof for better freezing. Aim for 10-20% alcohol content in your mix.

Fruit And Flavor Combinations

Fresh, ripe fruits are key to tasty popsicles. Choose fruits that complement the alcohol:

Alcohol Fruit Combinations
Vodka Strawberries, blueberries, lemonade
Rum Pineapple, mango, coconut milk
Tequila Lime, grapefruit, orange
Wine Mixed berries, peach slices
Champagne Strawberries, raspberries

Combine fruits for a burst of flavor. Consider adding herbs like mint or basil for extra freshness. Don’t forget to adjust sweetness with sugar or honey. Balance is key for perfect popsicles.

Necessary Equipment

Creating delicious alcoholic popsicles at home requires some basic equipment. This section will outline the necessary tools to make these refreshing treats. Having the right equipment will ensure your popsicles are both tasty and visually appealing.

Popsicle Molds

The first essential item is popsicle molds. These molds come in various shapes and sizes. Select molds made of food-grade materials to ensure safety. Some popular materials include:

  • Silicone
  • Plastic
  • Stainless steel

Silicone molds are flexible and make it easy to remove the popsicles. Plastic molds are durable and often come with built-in sticks. Stainless steel molds are eco-friendly and long-lasting.

Mixing Tools

Proper mixing tools are also crucial for making alcoholic popsicles. These tools help you blend ingredients smoothly and evenly. The basic tools you will need include:

  • Mixing bowls
  • Whisk or electric mixer
  • Measuring cups and spoons

Use mixing bowls to combine all your ingredients. A whisk or electric mixer helps to ensure an even mix. Accurate measurements are essential, so don’t skip the measuring cups and spoons. This ensures your popsicles have the right balance of flavors.

With the right equipment, making alcoholic popsicles becomes a fun and enjoyable process. Gather your tools, and let’s get started!

Alcoholic Popsicles Recipe: Refreshing Summer Treats

Credit: www.happinessishomemade.net

Basic Recipe Steps

Creating alcoholic popsicles at home is a fun and easy process. By following the basic recipe steps, you can enjoy these frozen treats in no time. Let’s dive into the steps to make your own refreshing alcoholic popsicles.

Preparing The Mixture

Start with your favorite alcohol. Vodka, rum, or tequila are great choices. Mix it with juice, soda, or tonic water. Make sure the alcohol content is not too high. A good ratio is one part alcohol to three parts mixer. This helps the popsicles freeze properly. Stir the mixture well to combine all ingredients. You can add fruit pieces for extra flavor and texture.

Freezing The Popsicles

Pour the mixture into popsicle molds. Leave a little space at the top. This allows for expansion as the liquid freezes. Insert sticks into the molds. Place the molds in the freezer. Let them freeze for at least 4-6 hours. Overnight is best for a solid freeze. Once frozen, remove the popsicles from the molds. Run warm water over the outside of the mold to help release them. Enjoy your homemade alcoholic popsicles with friends and family.

Flavor Variations

Creating alcoholic popsicles at home is fun and easy. One of the best parts is experimenting with different flavor variations. Below are a few ideas to get you started. Each variation is simple yet delicious, making your popsicles a hit at any gathering.

Tropical Fruit Mix

If you love the taste of the tropics, try the Tropical Fruit Mix. This combination brings the best of the islands to your popsicles.

  • Pineapple Juice – 1 cup
  • Mango Puree – 1/2 cup
  • Orange Liqueur – 1/4 cup
  • Rum – 1/4 cup
  • Lime Juice – 2 tablespoons

Mix all ingredients in a bowl. Pour into popsicle molds. Freeze for at least 4 hours. Enjoy a taste of the tropics!

Berry Bliss

For a burst of berry flavor, try the Berry Bliss mix. This blend is sweet, tangy, and perfect for summer days.

  • Strawberry Puree – 1 cup
  • Blueberry Juice – 1/2 cup
  • Vodka – 1/4 cup
  • Simple Syrup – 2 tablespoons
  • Lemon Juice – 2 tablespoons

Combine all ingredients in a mixing bowl. Pour into popsicle molds. Freeze for at least 4 hours. Savor the berry goodness!

Tips For Perfect Popsicles

Creating the perfect alcoholic popsicles requires a bit of finesse. You want them to be tasty, refreshing, and just the right amount of boozy. Here are some tips to ensure your popsicles come out just right every time.

Balancing Alcohol Content

Balancing the alcohol content is key. Too much alcohol can prevent the popsicles from freezing properly. Aim for a balance where the alcohol enhances the flavor without overpowering it.

  • Use a mix of juice and alcohol.
  • Stick to about 20% alcohol by volume.
  • Measure carefully to avoid overly strong popsicles.

Achieving The Ideal Texture

Texture is just as important as flavor. You want your popsicles to be smooth and enjoyable to eat.

  1. Mix ingredients thoroughly to avoid icy chunks.
  2. Add a bit of sugar or corn syrup for a softer texture.
  3. Consider using a blender for a consistent mix.

By following these tips, your alcoholic popsicles will be a hit at any gathering. Enjoy your delicious, boozy treats!

Serving Suggestions

Alcoholic popsicles are a fun and refreshing treat for adults. Serving them in creative ways can make them even more enjoyable. Here are some ideas to make your alcoholic popsicles the star of the party.

Garnishing Ideas

Garnishes can add a touch of elegance and flavor. Consider fresh fruit slices like strawberries, oranges, or lemons. They add color and a hint of freshness. Edible flowers can also make your popsicles look beautiful.

For a tropical vibe, use small umbrellas and cocktail picks. Fresh mint leaves can provide a refreshing aroma and taste. You can also drizzle a bit of chocolate or caramel sauce for added sweetness.

Pairing With Other Treats

Pairing alcoholic popsicles with other treats can elevate your snack game. Serve them with a platter of fresh fruit. The natural sweetness of fruit complements the flavors in the popsicles.

Cheese and crackers can also be a great pairing. The savory and creamy textures of cheese balance the popsicles’ sweetness. For a more indulgent option, serve them with chocolate truffles or brownies.

Consider a themed party with matching snacks. For example, if you have margarita popsicles, serve chips and guacamole. This creates a cohesive and delightful experience for your guests.

Alcoholic Popsicles Recipe: Refreshing Summer Treats

Credit: sugarspiceandglitter.com

Safety And Storage

Enjoying alcoholic popsicles can be a fun, refreshing treat. But, it is essential to consider safety and proper storage methods. This ensures everyone has a pleasant experience and the popsicles remain in good condition.

Safe Consumption Tips

  • Moderation is key. Alcoholic popsicles can be strong, so limit intake.
  • Keep away from children. They might mistake them for regular popsicles.
  • Check alcohol content. Know how much alcohol is in each popsicle.
  • Do not drive. Alcohol in any form can impair your ability to drive.
  • Stay hydrated. Drink water to avoid dehydration from alcohol.

Proper Storage Techniques

Proper storage ensures the quality and safety of your alcoholic popsicles. Follow these steps:

  1. Freeze immediately. Place popsicles in the freezer as soon as they are made.
  2. Use airtight containers. This prevents the popsicles from absorbing freezer odors.
  3. Label your popsicles. Mark them clearly as alcoholic to avoid confusion.
  4. Store at -18°C (0°F). This is the optimal temperature for preserving popsicles.
  5. Do not refreeze. Once thawed, do not refreeze to maintain texture and taste.

By following these tips, you can enjoy your alcoholic popsicles safely and keep them fresh for longer.

Frequently Asked Questions

How To Make Alcoholic Popsicles?

To make alcoholic popsicles, mix your favorite alcohol with juice or soda. Pour into molds and freeze. Ensure the alcohol content is balanced for proper freezing.

What Alcohol Is Best For Popsicles?

Vodka, rum, or tequila are popular choices. They blend well with fruity flavors and freeze nicely in popsicle molds.

Can Alcoholic Popsicles Get You Drunk?

Yes, alcoholic popsicles can get you drunk. However, their alcohol content is usually lower. Consume responsibly and in moderation.

How Long Do Alcoholic Popsicles Take To Freeze?

Alcoholic popsicles usually take around 4-6 hours to freeze. The exact time can vary depending on your freezer settings.

Conclusion

Creating alcoholic popsicles at home is fun and easy. They are perfect for parties or a hot day. You can mix your favorite drinks and fruits. Be creative and experiment with flavors. Always enjoy them responsibly. Share your popsicles with friends and family.

They will appreciate the refreshing treat. Remember to freeze them well for the best texture. Start making your own today. Enjoy the cool, delicious results!

Beef Fried Noodles Recipe: Delicious and Easy Weeknight Dinner

Craving a delicious, easy-to-make meal? Try this Beef Fried Noodles recipe.

It’s a perfect mix of savory beef and tasty noodles, ready in just minutes. Beef Fried Noodles is a popular dish in many Asian cuisines. The combination of tender beef, fresh vegetables, and flavorful noodles creates a mouthwatering experience. Whether you’re a kitchen newbie or a seasoned cook, this recipe is simple to follow.

The ingredients are easy to find, making it a convenient choice for any night of the week. Plus, the dish is versatile. You can adjust the flavors to suit your taste. Ready to impress your family or friends with a restaurant-quality meal? Let’s dive into this scrumptious Beef Fried Noodles recipe!

Beef Fried Noodles Recipe: Delicious and Easy Weeknight Dinner

Credit: www.recipetineats.com

Ingredients

When preparing Beef Fried Noodles, the ingredients are crucial. Each component brings its unique flavor to the dish. Below, we break down the essential ingredients needed for this delicious recipe.

Beef

Choose tender cuts of beef. Sirloin or ribeye work well. Slice the beef thinly. This helps it cook quickly and evenly. Marinate the beef for added flavor.

Noodles

Use egg noodles for this recipe. They absorb the sauce well. Cook the noodles until they are al dente. This ensures they don’t become mushy in the stir-fry.

Vegetables

Fresh vegetables add crunch and color. Common choices include bell peppers, carrots, and broccoli. Slice them thinly to match the beef strips. This helps them cook evenly.

Sauce

The sauce ties everything together. A mix of soy sauce, oyster sauce, and sesame oil works great. It adds a savory and slightly sweet flavor. Adjust the sauce to your taste preference.

Spices

Spices enhance the overall taste. Garlic and ginger are must-haves. They add depth and warmth. A pinch of pepper adds a bit of heat. Adjust the spices to suit your palate.

Preparation Steps

Creating the perfect Beef Fried Noodles requires some essential preparation steps. These steps ensure your dish is flavorful and well-cooked. Follow these easy steps to prepare your ingredients efficiently.

Marinating Beef

Marinating beef is crucial for flavor. Start with fresh beef slices. Place them in a bowl.

  • Add soy sauce, oyster sauce, and a pinch of sugar.
  • Include minced garlic and a splash of sesame oil.
  • Mix well and let it sit for 20 minutes.

This step allows the beef to absorb all the flavors, making it tender and delicious.

Chopping Vegetables

Properly chopped vegetables enhance the dish’s texture and taste.

Vegetable Cutting Style
Carrots Julienne
Bell Peppers Thin strips
Onions Slices
Broccoli Small florets

Keep all vegetables in separate bowls for easy access during cooking.

Cooking Noodles

Cook the noodles according to package instructions.

  1. Boil water in a large pot.
  2. Add noodles and cook until al dente.
  3. Drain and rinse with cold water.
  4. Toss with a bit of oil to prevent sticking.

Cooking noodles properly ensures they remain firm and do not turn mushy.

Cooking Beef

Try this delicious beef fried noodles recipe. Quick and easy, it combines tender beef, fresh vegetables, and savory noodles. Perfect for a tasty weeknight dinner.

Cooking the beef is a crucial step in making beef fried noodles. The beef must be tender and flavorful. Follow these steps to ensure the best results.

Heating The Pan

Start by heating your pan on medium-high heat. Ensure it is hot before adding any oil. A hot pan sears the beef better. It creates a nice crust.

Searing The Beef

Add a small amount of oil to the hot pan. Then, add the beef slices. Sear the beef on one side until browned. This should take about 2-3 minutes. Flip the beef and sear the other side. The goal is to lock in the juices.

Setting Beef Aside

Once the beef is seared, remove it from the pan. Set it aside on a plate. This step ensures the beef does not overcook. You will add the beef back to the noodles later. “`

Stir-frying Vegetables

The secret to delicious beef fried noodles lies in the perfect stir-fry of vegetables. This step ensures your dish is colorful, flavorful, and nutritious. Let’s dive into the process of stir-frying vegetables, which is a crucial part of this recipe.

Heating Oil

Begin by heating a generous amount of oil in a wok or large skillet. Use high heat to ensure the vegetables cook quickly and retain their crunch. Peanut oil or sesame oil are great options due to their high smoke points and rich flavors. Once the oil is hot, you’re ready to add the vegetables.

Adding Vegetables

Start with the hardest vegetables first, like carrots and bell peppers. Stir-fry these for a couple of minutes until they begin to soften. Next, add the softer vegetables such as broccoli, snap peas, and baby corn. Keep the vegetables moving in the pan to ensure even cooking and prevent burning.

Cooking Until Tender

Continue stir-frying the vegetables until they are tender-crisp. This means they should be cooked through but still have a slight crunch. Avoid overcooking the vegetables as they will lose their texture and nutrients. Once done, remove the vegetables from the wok and set them aside. They will be added back to the pan later with the noodles and beef.

Combining Ingredients

Combining ingredients is a crucial step in making delicious beef fried noodles. Each component must meld well with the others. Start by preparing your noodles, beef, vegetables, and sauce. Ensure all are ready before you begin cooking. This guarantees a smooth process and a tasty result.

Adding Noodles

Add the noodles to boiling water. Cook them until they are al dente. This means they should be firm to the bite. Drain the noodles and rinse them under cold water. This stops the cooking process and keeps them from sticking together. Set the noodles aside for later.

Mixing Beef And Vegetables

Heat oil in a large pan or wok. Add thinly sliced beef to the hot oil. Stir-fry until the beef is browned and cooked through. Remove the beef from the pan and set it aside. In the same pan, add your choice of vegetables. Common choices are bell peppers, carrots, and broccoli. Stir-fry the vegetables until they are tender but still crisp. Return the cooked beef to the pan. Mix well to combine the beef and vegetables.

Pouring Sauce

Prepare the sauce while the beef and vegetables cook. A simple sauce includes soy sauce, oyster sauce, and a bit of sugar. Mix the ingredients in a bowl. Pour the prepared sauce over the beef and vegetables. Stir well to coat everything evenly. Add the cooked noodles to the pan. Toss everything together until the noodles are well-coated with sauce. Serve hot and enjoy!

Beef Fried Noodles Recipe: Delicious and Easy Weeknight Dinner

Credit: m.youtube.com

Final Touches

Adding the final touches to your Beef Fried Noodles makes all the difference. These small steps enhance the flavor and presentation of your dish. Let’s dive into the key aspects of this process.

Adjusting Seasoning

After cooking, taste your noodles. This step is essential. You need to ensure the seasoning is perfect. If it tastes bland, add a bit more soy sauce or a pinch of salt.

If it’s too salty, balance it with a splash of rice vinegar. You can also add a bit of sugar to enhance the flavors. Remember, the goal is to achieve a balanced taste.

Garnishing

Garnishing adds visual appeal and extra flavor to your dish. Top your noodles with fresh herbs like chopped cilantro or green onions. These herbs add a burst of freshness.

For a bit of crunch, sprinkle some toasted sesame seeds. A few slices of red chili can add a nice color contrast and a touch of heat. Don’t forget to add a wedge of lime on the side. This allows everyone to add a bit of tanginess if they like.

Serving

Serving your Beef Fried Noodles correctly is key to a great dining experience. Use a shallow bowl or a plate with a bit of depth. This helps to keep all the ingredients together.

Place the noodles in the center and arrange the beef slices on top. Make sure to distribute the garnishes evenly. This not only looks good but also ensures every bite is flavorful.

Serve immediately while it’s hot to enjoy the best taste and texture. Pairing with a simple side salad or steamed vegetables can make the meal complete.

Serving Suggestions

Pairing your Beef Fried Noodles with the right side dishes and beverages can elevate the meal. Presenting the dish attractively can also make it more appealing. Here are some serving suggestions to make your meal special.

Side Dishes

The right side dish complements the rich flavors of beef fried noodles. Here are some options:

  • Steamed Vegetables: Broccoli, carrots, and snap peas balance the meal.
  • Spring Rolls: Light and crispy, they add texture.
  • Cucumber Salad: Refreshing and cool, it contrasts the warm noodles.

Beverage Pairings

Choosing the right drink enhances the dining experience. Consider these options:

  • Green Tea: Cleanses the palate and aids digestion.
  • Lemon Water: Refreshing and balances the flavors.
  • Light Beer: Pairs well with the hearty noodles.

Presentation Tips

A well-presented dish is more appealing. Here are some tips:

  1. Garnish with Fresh Herbs: Sprinkle chopped green onions or cilantro.
  2. Serve in a Bowl: Keeps the noodles warm and looks inviting.
  3. Add a Lemon Wedge: Adds color and a fresh option.

These serving suggestions ensure your beef fried noodles are both delicious and visually appealing.

Beef Fried Noodles Recipe: Delicious and Easy Weeknight Dinner

Credit: blackberrybabe.com

Tips And Variations

Beef fried noodles are a delicious and easy dish. You can make it even better with these tips and variations. Try different proteins, vegetarian options, and spice levels. Let’s dive in!

Alternative Proteins

Beef is great, but you can use other proteins too. Here are some options:

  • Chicken: Use boneless, skinless chicken breasts or thighs. Slice them thin.
  • Pork: Pork tenderloin or chops work well. Slice them thin too.
  • Shrimp: Shrimp cooks quickly. Add it in the last few minutes of cooking.
  • Tofu: Firm tofu is a great protein. Press it to remove water, then cube it.

Vegetarian Options

Want a vegetarian version? No problem! Try these ideas:

  • Mushrooms: Use a mix of mushrooms like shiitake, oyster, and button. They add a meaty texture.
  • Tempeh: Tempeh is a fermented soy product. Slice it thin and sauté it for a nutty flavor.
  • Seitan: Also known as wheat meat, seitan is high in protein. Slice it thin.

Spice Level Adjustments

Adjust the spice level to suit your taste. Here are some tips:

  1. Mild: Use less chili flakes or omit them. Add sweet bell peppers for flavor.
  2. Medium: Use a moderate amount of chili flakes or a mild chili sauce.
  3. Spicy: Add more chili flakes or use a hot chili sauce. You can also add fresh chili peppers.

Remember, you can always add more spice, but it’s hard to take it away. Adjust slowly!

Protein Cooking Time
Chicken 4-5 minutes
Pork 3-4 minutes
Shrimp 2-3 minutes
Tofu 5-7 minutes

Experiment with these tips and variations. Make your beef fried noodles unique and tasty!

Frequently Asked Questions

How To Make Beef Fried Noodles?

To make beef fried noodles, cook beef strips until browned. Stir-fry vegetables, add cooked noodles, and mix everything together with sauce.

What Ingredients Are In Beef Fried Noodles?

Beef fried noodles typically include beef strips, noodles, soy sauce, garlic, ginger, and mixed vegetables like bell peppers and carrots.

Can I Use Other Meats Instead Of Beef?

Yes, you can substitute beef with chicken, pork, or shrimp. Adjust the cooking time accordingly to ensure the meat is properly cooked.

Are Beef Fried Noodles Healthy?

Beef fried noodles can be healthy if made with lean beef, lots of vegetables, and minimal oil. Use whole-grain noodles for added fiber.

Conclusion

Enjoy creating this beef fried noodles recipe at home. It’s quick and easy. Perfect for busy weeknights. Packed with flavor and nutritious ingredients. Your family will love it. Happy cooking! Savor the delicious taste of homemade noodles. Share this delightful recipe with friends.

They’ll thank you. Remember, cooking is fun. Experiment with different vegetables and spices. Make it your own. Satisfy your taste buds. Simple, hearty, and delicious. Enjoy every bite!

Cheesecake Factory Piccata Recipe: Authentic & Delicious Copycat

Craving a delicious dish from Cheesecake Factory at home? The Chicken Piccata recipe is a fantastic choice.

It’s flavorful, easy to make, and sure to impress. The Cheesecake Factory’s Chicken Piccata is a beloved dish. It’s known for its tender chicken, tangy lemon sauce, and capers. Preparing this dish at home can seem daunting, but it’s simpler than you think.

With the right ingredients and steps, you can recreate this restaurant favorite in your own kitchen. This recipe is perfect for a family dinner or a special occasion. Let’s explore how to make this mouthwatering Chicken Piccata, bringing the Cheesecake Factory experience to your table.

Cheesecake Factory Piccata Recipe: Authentic & Delicious Copycat

Credit: copykat.com

Introduction To Piccata

Piccata is a classic Italian dish. It’s known for its bright flavors. The dish usually features thinly sliced meat. Chicken or veal are common choices. The meat is cooked in a tangy lemon and caper sauce.

The flavors are fresh and vibrant. Piccata is simple yet elegant. It offers a delightful balance of tastes. The sauce is key to its unique flavor. Lemon juice, white wine, and capers create magic.

History Of Piccata

Piccata has roots in Italian cuisine. It originated in Italy centuries ago. The dish was first made with veal. Veal was a popular meat in Italy. The recipe evolved over time. Chicken became a common substitute.

Italian immigrants brought Piccata to America. The dish gained popularity quickly. It became a restaurant favorite. Many variations emerged. Each adds a unique twist to the original recipe.

Popularity In Modern Cuisine

Piccata is a favorite in modern kitchens. It’s loved for its simple preparation. The dish fits well with healthy diets. The fresh ingredients make it nutritious. Many home cooks enjoy making Piccata.

Restaurants like the Cheesecake Factory feature Piccata. They add their unique touches. This keeps the dish exciting. Piccata remains a beloved dish today. Its flavors are timeless and appealing.

Ingredients Needed

Creating the perfect Cheesecake Factory Piccata at home starts with having the right ingredients. Each component plays a crucial role in delivering the authentic taste and texture. Let’s break down the essential ingredients needed to recreate this delightful dish.

Main Ingredients

Chicken breasts, thinly sliced and pounded
Lemon juice, freshly squeezed for a tangy flavor
Capers, to add a touch of briny saltiness
Butter, unsalted for a creamy base
Chicken broth, for added depth and moisture
Olive oil, for sautéing the chicken and vegetables
Garlic, minced for a rich aroma
All-purpose flour, for dredging the chicken
White wine, to enhance the sauce with a subtle acidity
Parsley, chopped for garnish

Optional Additions

Shallots, finely chopped for a mild onion flavor
Mushrooms, sliced for an earthy taste
Heavy cream, to make the sauce richer
Spinach, for added greens and nutrients
Grated Parmesan cheese, for a savory finish

Preparing The Chicken

Preparing the chicken for the Cheesecake Factory Piccata Recipe is crucial. You want tender, flavorful chicken that pairs perfectly with the tangy piccata sauce. Follow these steps to ensure your chicken is just right.

Slicing The Chicken

Start with boneless, skinless chicken breasts. Place each breast on a cutting board. Use a sharp knife to slice the chicken breast in half horizontally. This gives you thinner pieces that cook evenly and quickly.

You can also pound the chicken to make it even thinner. Place the chicken between two pieces of plastic wrap. Use a meat mallet or rolling pin to gently pound the chicken to an even thickness. This ensures the chicken cooks uniformly.

Seasoning Tips

Seasoning the chicken well is key. Begin by sprinkling both sides with salt and pepper. For extra flavor, consider adding garlic powder and onion powder. These seasonings enhance the taste without overpowering the dish.

You can also marinate the chicken for added flavor. Use a simple marinade of olive oil, lemon juice, and minced garlic. Let the chicken sit in the marinade for at least 30 minutes. This step infuses the chicken with a delicious, zesty flavor.

Here’s a quick table for easy reference:

Ingredients Amount
Salt 1 tsp
Pepper 1/2 tsp
Garlic Powder 1/2 tsp
Onion Powder 1/2 tsp
Olive Oil 2 tbsp
Lemon Juice 2 tbsp
Minced Garlic 2 cloves

Cooking The Chicken

Cooking the chicken is the foundation of the Cheesecake Factory Piccata Recipe. The right techniques ensure the chicken is tender, juicy, and full of flavor. In this section, we’ll explore the best methods for pan-frying the chicken and achieving the perfect texture.

Pan-frying Techniques

Pan-frying chicken for the Piccata recipe requires attention to detail. Use a heavy-bottomed skillet to ensure even heat distribution. Preheat the skillet over medium-high heat. Add enough oil to cover the bottom of the pan. This prevents sticking and ensures even cooking.

Place the chicken breasts in the skillet without crowding. Overcrowding can lead to uneven cooking. Let the chicken cook undisturbed for 3-4 minutes on each side. This creates a golden-brown crust.

Achieving Perfect Texture

Achieving the perfect texture is key for the Piccata recipe. The chicken should be both crispy on the outside and tender on the inside. Use a meat thermometer to check the internal temperature. The safe temperature for chicken is 165°F (74°C).

To keep the chicken tender, avoid overcooking. Overcooked chicken becomes dry and tough. If the chicken cooks too quickly on the outside, reduce the heat. This allows the inside to cook without burning the outside.

Once the chicken reaches the desired temperature, remove it from the skillet. Let it rest for a few minutes before serving. This helps the juices redistribute, keeping the chicken moist and flavorful.

Making The Piccata Sauce

The Piccata Sauce is the heart of the Cheesecake Factory Piccata Recipe. This sauce is tangy, buttery, and full of flavor. It’s what makes the dish so special. Let’s dive into the key ingredients and how to balance them for a perfect sauce.

Key Sauce Ingredients

To make the Piccata Sauce, you need a few essential ingredients. These are:

  • Butter: Adds richness and a creamy texture.
  • Lemon Juice: Provides the tangy flavor.
  • Chicken Broth: Adds depth and umami.
  • Capers: Bring a salty, briny taste.
  • Garlic: Adds a warm, aromatic flavor.
  • White Wine: Adds acidity and complexity.
  • Parsley: Freshens up the sauce with a hint of green.

Balancing Flavors

Balancing the flavors in the Piccata Sauce is crucial. Follow these tips:

  1. Start with Butter: Melt the butter over medium heat. Ensure it doesn’t brown.
  2. Add Garlic: Sauté the minced garlic until fragrant. This takes about 30 seconds.
  3. Pour in White Wine: Let it simmer and reduce to half. This removes the alcohol but keeps the flavor.
  4. Add Chicken Broth: Stir in the broth for a savory base. Let it simmer.
  5. Squeeze in Lemon Juice: Add fresh lemon juice. It should be tangy but not overpowering.
  6. Mix in Capers: Add capers for a salty, briny flavor. They provide a nice contrast.
  7. Finish with Parsley: Sprinkle chopped parsley. It adds a fresh, green note.

Taste the sauce as you go. Adjust each ingredient as needed. The goal is a balanced, flavorful sauce. Perfect for your Piccata dish.

Combining Chicken And Sauce

One of the most beloved dishes from the Cheesecake Factory is the Chicken Piccata. The key to its delicious flavor lies in the perfect combination of tender chicken and a rich, zesty sauce. This combination creates a mouth-watering experience that is sure to delight your taste buds. Let’s dive into the process of combining chicken and sauce to make this dish truly spectacular.

Simmering Together

Once your chicken is cooked to golden perfection, it’s time to let it simmer in the sauce. The sauce, a blend of lemon juice, white wine, and capers, brings a tangy and savory flavor to the dish.

Place the chicken back into the pan with the sauce. Ensure each piece is well-coated. Let it simmer gently. This allows the flavors to meld. The chicken absorbs the sauce, making it juicy and flavorful.

Here’s a quick tip: don’t rush the simmering process. Slow cooking ensures the chicken remains tender. Use medium-low heat to avoid burning the sauce. Stir occasionally to prevent sticking.

Final Adjustments

Before serving, taste the sauce. This is crucial. Adjust the seasoning if needed. A pinch of salt or a squeeze of lemon can enhance the flavors.

Garnish with fresh parsley. It adds a pop of color and a hint of freshness. Serve immediately, preferably with a side of pasta or steamed vegetables.

Ingredient Adjustment
Salt Add a pinch
Lemon Juice Add a squeeze
Parsley Garnish generously

Follow these steps for a delicious Cheesecake Factory Chicken Piccata. Enjoy the perfect balance of tender chicken and rich sauce!

Serving Suggestions

The Cheesecake Factory Piccata Recipe is a delightful dish. It combines tender chicken with a zesty lemon-caper sauce. But what truly elevates it is how you serve it. Here are some serving suggestions to make your meal memorable.

Pairing With Sides

Pair this piccata with a light, fresh salad. A mixed greens salad with a simple vinaigrette works well. Steamed vegetables are also a good choice. Asparagus or green beans add color and texture to your plate. For a heartier meal, serve with garlic mashed potatoes. The creamy potatoes balance the tangy sauce. You can also opt for a side of pasta. Angel hair pasta tossed with olive oil is perfect.

Presentation Tips

Presentation matters. Arrange the chicken pieces neatly on a plate. Spoon the sauce over the chicken. Sprinkle fresh parsley on top for a burst of color. Use a white plate for a clean look. Position the sides artfully around the chicken. Create contrast with the colors and textures. For a restaurant-style touch, add a lemon slice as a garnish. Remember, a well-presented dish is always more appetizing.

Cheesecake Factory Piccata Recipe: Authentic & Delicious Copycat

Credit: www.theslowroasteditalian.com

Common Mistakes To Avoid

Preparing Cheesecake Factory Piccata at home can be tricky. Avoid common mistakes to ensure your dish tastes perfect. Here are some tips to help you.

Overcooking Chicken

One major mistake is overcooking chicken. This can make the chicken dry and tough. To avoid this, follow these steps:

  • Use a meat thermometer.
  • Cook chicken until it reaches 165°F (74°C).
  • Remove chicken from heat once it reaches the right temperature.

Overcooking chicken can ruin your meal. Pay attention to cooking time. Don’t rush. Keep an eye on the thermometer.

Sauce Consistency Issues

The sauce consistency is crucial for a delicious piccata. Common issues include:

Problem Solution
Sauce too thin Simmer longer to reduce liquid.
Sauce too thick Add a bit of chicken broth.

For the best results, monitor the sauce as it cooks. Adjust thickness as needed. This will ensure a rich, flavorful sauce.

Storing And Reheating

Storing and reheating your Cheesecake Factory Piccata can keep it fresh and tasty. Proper methods ensure your dish retains its flavor and texture. Below, we’ll cover the best ways to store and reheat your leftovers.

Proper Storage Methods

Store your piccata in an airtight container. This helps keep it fresh. Place the container in the refrigerator within two hours of cooking. This prevents bacteria from growing. If you plan to keep it for more than three days, consider freezing it.

For freezing, use a freezer-safe container or a heavy-duty freezer bag. Label the container with the date. This helps you remember how long it’s been stored. Piccata can stay in the freezer for up to three months.

Reheating Techniques

Reheat your piccata gently. This maintains its flavor and texture. You can use a microwave or a stovetop. For microwaving, place the piccata in a microwave-safe dish. Cover it with a microwave-safe lid or plastic wrap. Heat on medium power in 30-second intervals. Stir between intervals to ensure even heating.

For stovetop reheating, use a non-stick pan. Heat the pan over medium heat. Add a small amount of water or broth. This prevents drying out. Add the piccata and stir occasionally. Heat until it reaches your desired temperature.

Never reheat your piccata more than once. This can affect its flavor and safety. Enjoy your Cheesecake Factory Piccata just as delicious as the first time!

Cheesecake Factory Piccata Recipe: Authentic & Delicious Copycat

Credit: www.thefoodhussy.com

Frequently Asked Questions

What Ingredients Are In Cheesecake Factory Piccata?

Cheesecake Factory Piccata features chicken breast, lemon, capers, white wine, and butter. It is typically served with pasta and vegetables.

How To Make Cheesecake Factory Piccata?

To make Cheesecake Factory Piccata, cook chicken, then make a sauce with lemon, capers, white wine, and butter. Serve with pasta.

Can I Use Chicken Thighs For Piccata?

Yes, you can use chicken thighs for Piccata. However, the traditional recipe uses chicken breasts for a lighter taste.

What Wine Pairs Well With Piccata?

A crisp white wine like Sauvignon Blanc or Pinot Grigio pairs well with Piccata. They complement the lemony sauce.

Conclusion

This Cheesecake Factory Piccata recipe brings restaurant flavors to your home. The ingredients are easy to find. The steps are simple to follow. You can impress your family and friends with this delicious dish. Cooking at home can be fun and rewarding.

Try this recipe today and enjoy the taste of Cheesecake Factory in your own kitchen. Happy cooking!