Bubbies Pickled Green Tomatoes Recipe: Tangy Homemade Delight

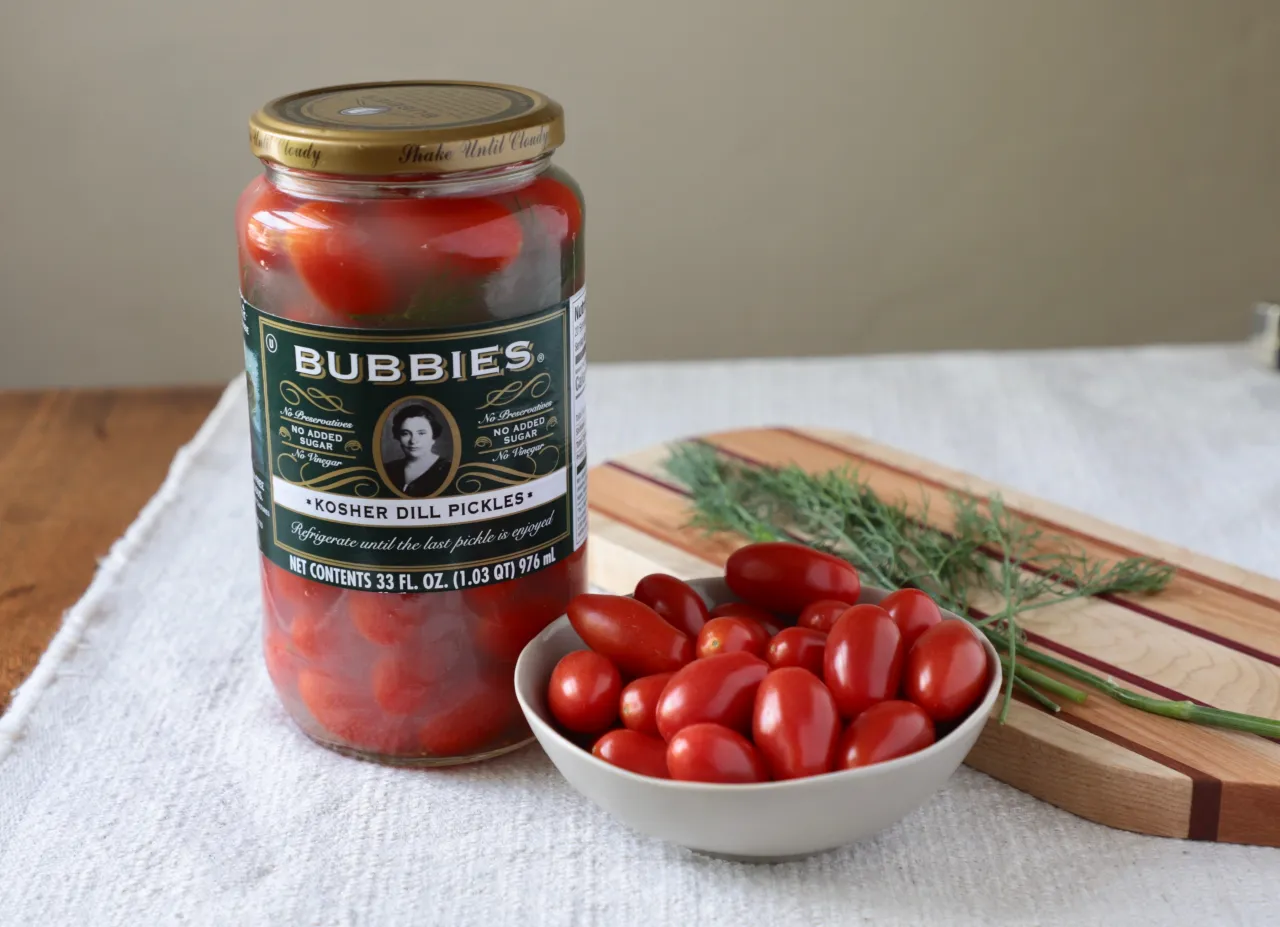
Pickled green tomatoes add a delightful tang to any meal. Bubbies Pickled Green Tomatoes Recipe captures the essence of this tasty treat.

Green tomatoes, when pickled, offer a unique flavor that is both tart and refreshing. They can be a fantastic addition to salads, sandwiches, or enjoyed on their own. The Bubbies recipe stands out for its simplicity and the burst of flavor it brings.

This recipe is perfect for those who love a bit of zing in their dishes but want an easy and quick method. Whether you are a seasoned cook or a beginner in the kitchen, this pickled green tomato recipe is worth trying. Let’s dive into the steps and ingredients needed to make this delicious treat!

Bubbies Pickled Green Tomatoes Recipe: Tangy Homemade Delight

Credit: www.instacart.com

Introduction To Bubbies Pickled Green Tomatoes

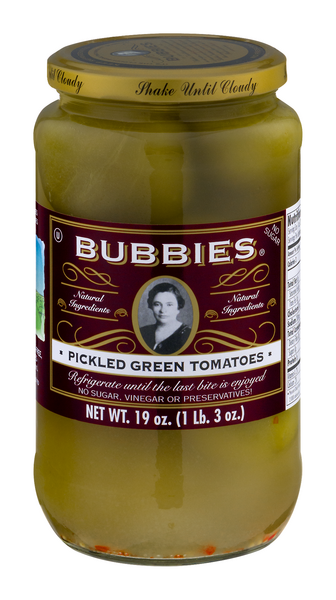
Bubbies Pickled Green Tomatoes are a delightful addition to any meal. Their tangy flavor and crunchy texture make them a favorite for many. Whether you are a pickling enthusiast or a first-timer, this recipe offers a unique twist on traditional pickles.

Origin Of The Recipe

Bubbies Pickled Green Tomatoes have a rich history. This recipe originates from old-world traditions. People have been pickling vegetables for centuries. The method preserves the fresh taste of green tomatoes while adding a tangy kick. Bubbies has perfected this technique over the years, offering a product that tastes both nostalgic and modern.

Why You’ll Love This Tangy Treat

There are many reasons to love Bubbies Pickled Green Tomatoes. Here are a few:

  • Unique Flavor: The tangy taste is unlike any other pickle.
  • Crunchy Texture: Each bite offers a satisfying crunch.
  • Versatility: These pickles can be used in various dishes.
  • Easy to Make: The recipe is simple and quick to follow.

Try Bubbies Pickled Green Tomatoes in your next salad or sandwich. The burst of flavor will surprise you. They also make a great snack on their own. Once you try them, you’ll want to keep a jar in your fridge at all times.

Bubbies Pickled Green Tomatoes Recipe: Tangy Homemade Delight

Credit: www.azurestandard.com

Ingredients Needed

Creating the perfect Bubbies Pickled Green Tomatoes begins with gathering the right ingredients. Each component plays a crucial role in ensuring the flavors meld together beautifully. Below is a list of the essential ingredients you will need.

Fresh Green Tomatoes

The star of this recipe is fresh green tomatoes. Select firm, unripe tomatoes for the best results. They should be free from blemishes and have a bright green color.

  • 5-6 medium-sized green tomatoes
  • Washed and cut into quarters

Essential Spices And Herbs

To achieve that classic pickled taste, you need a mix of essential spices and herbs. These ingredients infuse the tomatoes with rich flavors.

Ingredient Quantity
Dill seeds 1 tablespoon
Garlic cloves 3-4, peeled and smashed
Mustard seeds 1 teaspoon
Black peppercorns 1 teaspoon
Bay leaves 2-3
Fresh dill sprigs 3-4

These spices and herbs bring out the best in your pickled green tomatoes. The dill seeds and fresh dill sprigs add a refreshing taste. Garlic cloves and mustard seeds offer a slight tang. Black peppercorns and bay leaves give depth to the flavor.

Preparation Steps

Preparing Bubbies Pickled Green Tomatoes is a fun and easy process. It involves a few simple steps. Follow these steps to get the best results. Let’s dive into the preparation steps.

Cleaning And Slicing Tomatoes

First, wash the tomatoes thoroughly. Use cold water for best results. Remove any dirt or debris. Make sure the tomatoes are clean. Pat them dry with a clean towel.

Next, slice the tomatoes. Use a sharp knife for clean cuts. Cut the tomatoes into even slices. About 1/4 inch thick is ideal. This ensures they pickle evenly.

Preparing The Brine

Now, it’s time to prepare the brine. Gather your ingredients. You will need:

  • 2 cups of water
  • 1 cup of vinegar
  • 2 tablespoons of salt
  • 1 tablespoon of sugar
  • 2 cloves of garlic (crushed)
  • 1 teaspoon of mustard seeds
  • 1 teaspoon of dill seeds

Combine all the ingredients in a pot. Bring the mixture to a boil. Stir until the salt and sugar dissolve. Remove from heat and let it cool.

Once the brine is ready, pour it over the sliced tomatoes. Make sure the tomatoes are fully submerged. Seal the jar tightly. Store in the refrigerator for at least 24 hours. The longer they sit, the better they taste.

Bubbies Pickled Green Tomatoes Recipe: Tangy Homemade Delight

Credit: hy-vee.com

Pickling Process

The pickling process is the heart of making Bubbies Pickled Green Tomatoes. It involves several steps to ensure the tomatoes stay fresh, crisp, and delicious. Proper pickling not only enhances the taste but also preserves the tomatoes for a long time. Here’s a detailed guide on the pickling process.

Sterilizing Jars

Before starting, sterilizing the jars is crucial to prevent any bacteria. Clean jars ensure that the pickled tomatoes remain safe to eat and extend their shelf life.

  1. Wash the jars with hot, soapy water.
  2. Rinse them well to remove all soap.
  3. Boil the jars in water for 10 minutes.
  4. Place them on a clean towel to dry.

Ensure the jars are completely dry before filling them with tomatoes. Use a clean cloth to wipe the insides if necessary.

Filling And Sealing

Once the jars are ready, the next step is filling and sealing them. This step is crucial to keep the tomatoes fresh and flavorful.

  • Place a few sprigs of dill in each jar.
  • Add garlic cloves and whole black peppercorns.
  • Fill the jars with green tomatoes, leaving some space at the top.
  • Prepare the brine by boiling water, vinegar, and salt.
  • Pour the hot brine over the tomatoes, covering them completely.

Remove any air bubbles by tapping the jars gently. Wipe the rims with a clean cloth and seal the jars with sterilized lids.

Store the jars in a cool, dark place. Let them sit for at least two weeks to develop the full flavor.

Fermentation Time

Fermentation is a crucial step in making Bubbies Pickled Green Tomatoes. The taste and texture depend on proper fermentation. Below, we discuss the optimal temperature and the ideal time for fermentation.

Optimal Temperature

Temperature plays a key role in the fermentation process. The ideal range is between 65°F and 75°F. This temperature range ensures a steady and controlled fermentation.

If the temperature is too low, the process slows down. This can result in under-fermented tomatoes. On the other hand, if the temperature is too high, it can lead to spoilage and undesirable flavors.

How Long To Ferment

Fermenting Bubbies Pickled Green Tomatoes typically takes about 7 to 14 days. The exact time depends on your taste preference and environmental conditions.

Fermentation Stage Time Notes
Early Stage Day 1-3 Initial bubbling, sour aroma starts
Mid Stage Day 4-7 Tomatoes become tangy, bubbling increases
Final Stage Day 8-14 Fully fermented, tangy and crisp

During the first few days, bubbles will form. This is a sign that fermentation is happening. By day 7, you should start tasting the tomatoes. If they are tangy and firm, they are ready. If not, let them ferment for a few more days.

Fermentation time can vary, so it is important to check regularly. Taste and adjust based on your preference. Enjoy your delicious Bubbies Pickled Green Tomatoes!

Storage Tips

Bubbies Pickled Green Tomatoes are a delicious treat that many love. To keep them fresh and tasty, proper storage is essential. Follow these storage tips to ensure your pickled tomatoes stay in prime condition.

Best Storage Practices

Store your pickled green tomatoes in a cool, dark place. A pantry or cupboard works well. Keep the jar tightly sealed to maintain freshness. Once opened, refrigerate the jar immediately. Use a clean utensil to avoid contamination. This prevents bacteria from spoiling the pickles.

Shelf Life Of Pickled Tomatoes

Unopened jars can last for up to one year. This is if they are stored properly. Once opened, consume within three months for the best taste. Always check for signs of spoilage before eating. Look for changes in color, smell, or texture. If in doubt, it’s safer to discard them.

Serving Suggestions

Serving Bubbies Pickled Green Tomatoes can elevate any meal. Their tangy crunch adds a unique flavor. Versatile and tasty, they fit into various dishes seamlessly. Explore these serving suggestions to make the most of this delightful recipe.

Pairing With Dishes

Bubbies Pickled Green Tomatoes pair well with many dishes. Serve them with sandwiches or burgers for extra zest. They add a burst of flavor to salads, enhancing the freshness. Use them as a side dish with grilled meats. Their tanginess complements smoky flavors perfectly. They also go well with cheese platters, balancing richness with acidity. Try them with roasted vegetables for a delicious combination.

Creative Uses

Get creative with Bubbies Pickled Green Tomatoes in your recipes. Chop them into salsas for a tangy twist. Mix them into pasta salads for added crunch. Use them as a topping on pizzas for a unique taste. Add them to tacos for a surprising flavor. Incorporate them into wraps for a fresh bite. Blend them into dips for an unexpected zing. Even add them to Bloody Mary cocktails for a spicy garnish. Experiment and enjoy their versatile use in your kitchen.

Health Benefits

Bubbies Pickled Green Tomatoes are not just delicious. They are also packed with health benefits. These benefits can improve your overall well-being and add a nutritious boost to your diet. Let’s explore the amazing health benefits of these pickled delights.

Nutritional Value

Bubbies Pickled Green Tomatoes are rich in essential nutrients. These nutrients are vital for your health. Below is a table highlighting their nutritional content:

Nutrient Amount per 100g
Vitamin C 23 mg
Vitamin K 13 µg
Fiber 2.5 g
Potassium 237 mg
Calories 20 kcal

The high Vitamin C content boosts your immune system. Fiber aids in digestion and helps maintain a healthy gut. Potassium supports heart health. Low calories make these tomatoes an excellent snack option.

Probiotic Benefits

Bubbies Pickled Green Tomatoes are fermented. This means they contain probiotics. Probiotics are beneficial bacteria that improve gut health. Here are some benefits:

  • Enhanced digestion
  • Improved immune function
  • Balanced gut flora
  • Increased nutrient absorption

Eating foods rich in probiotics can lead to better overall health. Improved digestion means less bloating and discomfort. A strong immune system helps fight off infections. A balanced gut flora keeps harmful bacteria in check.

Incorporating Bubbies Pickled Green Tomatoes into your diet is a simple way to enjoy these health benefits.

Troubleshooting Common Issues

Making Bubbies pickled green tomatoes can be a delightful experience. Yet, sometimes problems arise. Let’s address some common issues you may face.

Cloudy Brine

Cloudy brine can be troubling. It can make you worry about food safety. Here’s how to troubleshoot:

  • Use Non-Iodized Salt: Iodized salt can cause cloudiness. Use pickling or kosher salt.
  • Filter Your Water: Tap water may contain minerals that cloud brine. Use distilled water.
  • Fermentation: Natural fermentation can cloud brine. If the smell is fine, it’s safe.

These steps will help maintain clear brine.

Soft Tomatoes

Soft tomatoes can ruin the texture of your pickles. Here’s how to keep them crisp:

  1. Use Fresh Tomatoes: Fresh, firm tomatoes work best. Overripe ones become mushy.
  2. Soak in Ice Water: Before pickling, soak tomatoes in ice water for 4 hours.
  3. Add Grape Leaves: Grape leaves contain tannins. They help keep tomatoes crisp.

Following these tips ensures your tomatoes stay crunchy and delicious.

Frequently Asked Questions

What Are Bubbies Pickled Green Tomatoes?

Bubbies Pickled Green Tomatoes are tangy, crunchy, and delicious preserved tomatoes. They are perfect for snacking or as a side dish.

How To Make Pickled Green Tomatoes?

To make pickled green tomatoes, slice green tomatoes and place them in a jar with vinegar, spices, and salt. Let them ferment.

What Ingredients Are Needed For Pickled Green Tomatoes?

You need green tomatoes, vinegar, water, garlic, dill, and pickling spices. These ingredients give the tomatoes their unique flavor.

How Long Do Pickled Green Tomatoes Last?

Pickled green tomatoes can last up to six months when stored in a cool, dark place. Refrigerate after opening.

Conclusion

Enjoy making Bubbies Pickled Green Tomatoes at home! This recipe is simple and tasty. Impress your family and friends with this unique dish. It’s perfect for any meal or occasion. The tangy flavor adds a special touch. Try it out and share your experience.

Happy pickling!

Raspberry Filling for Cakes Recipe: Delicious and Easy Guide

Raspberry filling adds a burst of flavor to any cake. Its tangy sweetness pairs perfectly with various cake types.

Raspberry filling can elevate your homemade cakes to a new level. Fresh raspberries create a delightful contrast to the cake’s sweetness, making each bite memorable. Whether you’re baking for a special occasion or just indulging in a sweet treat, raspberry filling can impress guests and satisfy your taste buds.

Plus, making it at home ensures you know exactly what’s in it. No artificial flavors, just pure raspberry goodness. This recipe is simple and requires only a few ingredients. Ready to try? Let’s dive into the world of raspberry-filled cakes!

Raspberry Filling for Cakes Recipe: Delicious and Easy Guide

Credit: chelsweets.com

Introduction To Raspberry Filling

Raspberry filling adds a delightful burst of flavor to any cake. Its bright, tangy taste complements the sweetness of the cake layers. Plus, it’s easy to make and versatile, making it a go-to recipe for many bakers. Let’s dive into what makes raspberry filling so special.

Why Raspberry Filling?

Raspberry filling offers a unique combination of sweetness and tartness. This balance enhances the overall flavor profile of your cake. The vibrant red color also adds a visual appeal, making your cake look as good as it tastes. Raspberries are rich in vitamins and antioxidants, adding a touch of healthiness to your dessert.

Perfect For Cakes

Raspberry filling pairs well with various cake flavors, from vanilla to chocolate. It can be used in layer cakes, cupcakes, or even as a topping. The filling’s texture is smooth yet slightly chunky, providing a pleasant mouthfeel. This versatility makes it a favorite among both novice and experienced bakers. Whether you’re making a birthday cake or a simple weekend treat, raspberry filling elevates your creation.

Ingredients Needed

Creating a delicious raspberry filling for cakes involves using fresh, high-quality ingredients. The right combination of raspberries, sweeteners, and thickeners ensures a perfect balance of flavor and texture. Let’s dive into the ingredients needed for a perfect raspberry filling.

Fresh Or Frozen Raspberries

Both fresh and frozen raspberries work well for this recipe. Fresh raspberries offer a vibrant taste and bright color. They are ideal during the raspberry season. If fresh raspberries are not available, frozen ones are a great alternative. They are picked at peak ripeness and retain their flavor and nutritional value. Ensure to thaw frozen raspberries before use. This helps in achieving the right consistency.

Ingredient Quantity
Fresh Raspberries 2 cups
Frozen Raspberries (thawed) 2 cups

Sweeteners And Thickeners

Sweeteners balance the tartness of raspberries. Common choices include sugar and honey. Sugar is the most traditional option. It dissolves easily and enhances the natural raspberry flavor. Honey adds a unique taste and natural sweetness. Use it for a different flavor profile.

  • Sugar – 1/2 cup
  • Honey – 1/3 cup (optional)

Thickeners ensure the filling is not too runny. Cornstarch and pectin are popular options. Cornstarch is easy to use and widely available. It provides a smooth texture. Pectin, a natural thickener, is perfect for a firmer filling. Use it for a more stable cake layer.

  1. Cornstarch – 2 tablespoons
  2. Pectin – 1 tablespoon (optional)

Choose ingredients based on availability and personal preference. This ensures the best raspberry filling for your cakes.

Essential Kitchen Tools

Creating a delicious raspberry filling for cakes starts with the right tools. Having the essential kitchen tools makes the process easier and more enjoyable. Let’s explore the tools you’ll need for the perfect raspberry filling.

Cookware And Utensils

Quality cookware ensures even cooking. A medium-sized saucepan is ideal for simmering raspberries. Use a wooden spoon to stir the mixture. A fine mesh strainer helps remove seeds for a smooth filling. A silicone spatula is useful for scraping the mixture from the sides.

Measuring Tools

Accurate measurements are key to a successful recipe. Use measuring cups for liquids and dry ingredients. A digital kitchen scale can measure precise amounts. Measuring spoons are necessary for small quantities. Ensure you have all these tools before starting.

Preparing The Raspberries

Preparing raspberries is an essential step for making a delicious raspberry filling for cakes. This guide will help you through the process of cleaning, sorting, mashing, and blending the raspberries. Follow these simple steps to ensure your raspberry filling turns out perfect.

Cleaning And Sorting

Start by placing the raspberries in a colander. Gently rinse them under cold water. Be careful; raspberries are delicate.

Let the raspberries drain for a few minutes. Sort through them and remove any spoiled or damaged berries. This ensures only the best berries are used in your filling.

Mashing And Blending

Place the cleaned raspberries in a large bowl. Use a fork or a potato masher to mash the berries. This step helps release the juices and breaks down the berries.

If you prefer a smoother texture, transfer the mashed raspberries to a blender. Blend until you achieve your desired consistency. You can also use an immersion blender for this step.

Now, your raspberries are ready for the next step in making your cake filling. Enjoy the fresh, sweet flavor they bring to your dessert!

Cooking The Filling

Cooking the filling for a raspberry cake is a crucial step. This process ensures the perfect consistency and enhances the flavor of your cake. Follow these steps to achieve a delicious and smooth raspberry filling.

Combining Ingredients

Start by gathering all the necessary ingredients. You will need fresh raspberries, sugar, lemon juice, and cornstarch. In a medium saucepan, combine the raspberries, sugar, and lemon juice.

Stir the mixture gently to avoid breaking the raspberries. The sugar will dissolve and blend with the lemon juice, creating a sweet and tangy base.

Simmering To Perfection

Place the saucepan over medium heat. Bring the mixture to a gentle simmer. Stir occasionally to prevent sticking and burning.

Once the raspberries start to break down, add the cornstarch. This thickens the filling. Continue to simmer until the filling reaches your desired consistency. This usually takes about 5-7 minutes.

Remove from heat and let it cool completely before using. The filling will thicken more as it cools.

Raspberry Filling for Cakes Recipe: Delicious and Easy Guide

Credit: amycakesbakes.com

Achieving The Right Consistency

Achieving the right consistency in raspberry filling makes your cake delicious. Use fresh raspberries for a rich, fruity flavor.

Getting the right consistency for raspberry filling is crucial. Too thick, and it will be difficult to spread. Too runny, and it will seep out of your cake layers. Finding the perfect balance makes your filling delicious and easy to work with.

Thickening Tips

To thicken your raspberry filling, use cornstarch. Mix cornstarch with cold water to make a slurry. Add the slurry to your raspberries while cooking. Stir constantly to avoid lumps. Let the mixture boil until it thickens. Another option is gelatin. Dissolve gelatin in warm water before adding it to the raspberries. Let the filling cool to set properly. Gelatin helps achieve a firm yet spreadable consistency.

Avoiding Common Mistakes

Avoid adding too much liquid. Extra water or juice can make your filling runny. Measure your ingredients accurately. Do not overcook the filling. Overcooking can break down the pectin in raspberries. This results in a runny filling. Cook just until the mixture thickens. Be careful with sugar. Too much sugar can alter the texture. Follow the recipe’s sugar amount closely. Lastly, cool the filling completely before using. Warm filling can melt cake layers. This can ruin the cake’s structure. “`

Storing And Preserving

After making your delicious raspberry filling, storing it properly is vital. Proper storage ensures the filling stays fresh and flavorful. Below, we will discuss the best storage methods and how to preserve its freshness.

Proper Storage Methods

Store raspberry filling in an airtight container. This prevents air from spoiling the filling. Glass jars with tight lids work best. You can also use plastic containers with secure lids. Place the container in the refrigerator. Cold temperatures help keep the filling fresh.

For longer storage, freeze the filling. Use freezer-safe containers. Leave some space at the top. The filling expands when frozen. Label the container with the date. This helps you track its freshness.

Shelf Life And Freshness

Refrigerated raspberry filling lasts up to one week. Always check for any signs of spoilage. If it smells off, discard it. Frozen filling can last up to six months. Thaw it in the refrigerator before use. Avoid thawing at room temperature. This prevents bacterial growth.

Remember, fresh ingredients ensure the best taste. Use the filling within the recommended time. This keeps your cakes tasting delicious.

Raspberry Filling for Cakes Recipe: Delicious and Easy Guide

Credit: sallysbakingaddiction.com

Creative Uses For Raspberry Filling

Raspberry filling is more than just a sweet addition to cakes. Its vibrant color and tangy flavor make it a versatile ingredient in various desserts. From adding layers to cakes to pairing with other treats, raspberry filling can elevate your baking creations. Let’s explore some creative uses for raspberry filling.

Layering In Cakes

Using raspberry filling to layer cakes can add both flavor and visual appeal. Here’s how you can do it:

  • Classic Layer Cake: Spread raspberry filling between each layer of your cake. This adds a burst of flavor with each bite.
  • Checkerboard Cake: Create a checkerboard pattern with cake batter and raspberry filling. This looks impressive and tastes delightful.
  • Ombre Cake: Use different shades of raspberry filling to create an ombre effect. This can be achieved by mixing raspberry filling with varying amounts of whipped cream.

Pairing With Other Desserts

Raspberry filling pairs well with many other desserts. Try these combinations:

Raspberry Filling Pairing Description
Cheesecake Top your cheesecake with raspberry filling for a fruity twist.
Chocolate Mousse Add a layer of raspberry filling between mousse layers. Chocolate and raspberry are a perfect match.
Pancakes Use raspberry filling as a topping for pancakes. It adds a tangy sweetness.
Ice Cream Swirl raspberry filling into vanilla ice cream. It creates a beautiful and tasty ribbon.

These pairings not only enhance the taste but also make your desserts more visually appealing.

Frequently Asked Questions

What Ingredients Are Needed For Raspberry Filling?

You will need fresh raspberries, sugar, lemon juice, and cornstarch. These ingredients will create a delicious and tangy filling for your cakes.

How To Thicken Raspberry Cake Filling?

To thicken raspberry cake filling, add cornstarch. Mix it with water to form a slurry before adding to the raspberry mixture.

Can I Use Frozen Raspberries?

Yes, you can use frozen raspberries. Thaw them first and drain excess liquid to ensure the filling is not too watery.

How Long Can Raspberry Filling Be Stored?

Raspberry filling can be stored in an airtight container in the refrigerator for up to one week.

Conclusion

Creating your own raspberry filling for cakes is simple and rewarding. With fresh raspberries, sugar, and a few steps, you achieve delicious results. This filling enhances any cake, bringing a burst of fruity flavor. Perfect for birthdays, celebrations, or casual desserts.

Enjoy the taste of homemade goodness in every bite. Experiment with different cakes and share your creations with loved ones. Happy baking!

Kesar Chai Recipe: How to Make Aromatic Saffron Tea at Home

Kesar Chai is a delightful and aromatic Indian tea. It combines saffron’s unique flavor with rich spices.

This recipe is perfect for tea lovers who seek a twist on the traditional chai. Kesar Chai, also known as saffron tea, is a cherished beverage in many Indian households. Saffron, a luxurious spice, adds a distinct flavor and vibrant color to the tea.

This special chai not only tastes heavenly but also has health benefits. Saffron is known for its anti-inflammatory properties and rich antioxidants. Preparing Kesar Chai is simple, and it elevates your tea-drinking experience. Whether you are a chai enthusiast or a curious beginner, this recipe will guide you to make the perfect cup of Kesar Chai. Enjoy a soothing and flavorful tea break with this exquisite recipe.

Introduction To Kesar Chai

Kesar Chai is a delightful beverage that combines the rich flavors of traditional Indian tea with the luxurious touch of saffron. This aromatic drink is perfect for those who love a warm, comforting cup of tea with a hint of exotic spice. Kesar Chai is not only delicious but also offers numerous health benefits due to the presence of saffron, a prized spice known for its therapeutic properties.

What Is Kesar Chai?

Kesar Chai, also known as saffron tea, is a unique blend of black tea, milk, sugar, and saffron. The saffron, also called “Kesar” in Hindi, gives the tea its distinctive golden color and rich aroma. This tea is popular in many Indian households and is often served on special occasions or to welcome guests. The subtle sweetness and warm spice of saffron make Kesar Chai a truly special treat.

Benefits Of Saffron In Tea

Saffron is not just a flavorful addition to tea; it also offers several health benefits. Here are some key benefits of adding saffron to your tea:

  • Rich in Antioxidants: Saffron contains powerful antioxidants that help protect your cells from damage.
  • Improves Mood: Drinking saffron tea can help elevate your mood and reduce symptoms of anxiety and depression.
  • Boosts Immunity: Saffron has immune-boosting properties that can help strengthen your body’s defenses against illnesses.
  • Aids Digestion: Saffron tea can help soothe digestive issues and improve overall gut health.
  • Anti-Inflammatory Properties: Saffron helps reduce inflammation, which can be beneficial for chronic conditions like arthritis.

Incorporating saffron into your daily tea routine can provide these amazing health benefits while adding a unique flavor to your beverage.

Kesar Chai Recipe: How to Make Aromatic Saffron Tea at Home

Credit: www.archanaskitchen.com

Ingredients Needed

Kesar Chai, also known as saffron tea, is a delightful beverage. The ingredients needed are simple but crucial for the perfect flavor. Each component adds to the richness and aroma of this traditional tea. Let’s explore what you’ll need to make this delicious drink at home.

Primary Ingredients

To make Kesar Chai, you need a few key ingredients:

  • Tea leaves: Use black tea for a strong base.
  • Milk: Whole milk gives the best creamy texture.
  • Sugar: Adjust to your taste preference.
  • Water: Fresh, filtered water is ideal.
  • Saffron strands: This is the star ingredient.
  • Cardamom: Adds a subtle, aromatic flavor.

Optional Add-ins

You can enhance your Kesar Chai with these optional add-ins:

  • Ginger: Fresh ginger adds a spicy kick.
  • Cinnamon: A pinch of cinnamon for warmth.
  • Cloves: A couple of cloves for depth.
  • Nutmeg: Just a dash for extra aroma.
  • Rose petals: For a floral touch.

These add-ins can be adjusted based on your taste. Experiment to find your perfect blend!

Preparing The Saffron

Preparing the saffron for your Kesar Chai is a crucial step. This process enhances the flavor and aroma of your tea. Proper preparation ensures you get the most out of your saffron.

Choosing Quality Saffron

First, select high-quality saffron. Look for deep red threads. These should have a strong, pleasant aroma. Avoid saffron with yellow or white streaks. They have less flavor. Quality saffron is usually more expensive. But it makes a big difference in taste.

Soaking Saffron Threads

Next, soak the saffron threads. This process releases their full flavor. Place the threads in a small bowl. Add a few tablespoons of warm water or milk. Let them soak for at least 15 minutes. The liquid will turn a rich golden color. This means the saffron is ready.

Now, your saffron is prepared and ready to use in your Kesar Chai. The soaking step ensures a rich, aromatic tea.

Brewing The Tea

Brewing the perfect cup of Kesar Chai requires attention to detail. Each step ensures the rich flavors blend seamlessly. Follow these simple steps to enjoy a delightful tea experience.

Boiling Water And Milk

Start by boiling water in a saucepan. Use one cup of water for each serving. Once the water boils, add milk. Typically, one cup of milk for each serving works best. Let the mixture come to a boil again. Stir occasionally to avoid burning the milk.

Adding Tea Leaves

Once the milk and water are boiling, add tea leaves. Use one teaspoon of tea leaves per serving. Let the mixture simmer for a few minutes. This allows the tea leaves to release their full flavor. Stir occasionally to blend the tea evenly.

Infusing With Saffron

Kesar Chai Recipe: Infusing with Saffron

Saffron, known as Kesar in India, adds a unique flavor to chai. This delicate spice is not only aromatic but also offers health benefits. The key to a perfect Kesar Chai lies in the proper infusion of saffron.

Incorporating Saffron Water

Begin by taking a few strands of saffron. Place them in a small bowl. Add a tablespoon of warm water. Allow it to sit for 10 minutes. The water will turn a rich golden color. This saffron water is now ready to be added to your chai.

Simmering For Flavor

Start by brewing your tea in a pot. Add water and tea leaves, and bring it to a boil. Pour in milk and sugar as per your taste. Once the tea starts to simmer, add the saffron water. Let the mixture simmer for another 5 minutes. This allows the flavors to blend perfectly. Strain and pour into cups. Enjoy your fragrant Kesar Chai!

Kesar Chai Recipe: How to Make Aromatic Saffron Tea at Home

Credit: m.youtube.com

Sweetening The Tea

Sweetening the tea is an essential part of making the perfect Kesar Chai. The right amount of sweetness balances the strong flavors of saffron and spices. This section will guide you through different ways to sweeten your Kesar Chai.

Using Sugar

Traditional Kesar Chai recipes often use sugar. White granulated sugar blends easily into the hot tea. Start by adding a small amount. Taste and adjust as needed. This method gives a clean, sweet flavor.

Brown sugar can also be used. It adds a hint of molasses. This complements the saffron and spices well. Remember, brown sugar is sweeter than white sugar. Use a bit less to start.

Alternative Sweeteners

For a healthier option, try honey. It dissolves well in hot tea. Honey adds a unique floral sweetness. This pairs nicely with the saffron. Use about one teaspoon per cup. Adjust to taste.

Maple syrup is another good option. It gives a rich, deep sweetness. Start with a small amount. Maple syrup can overpower the other flavors if overused.

Stevia is a zero-calorie sweetener. It’s much sweeter than sugar. Use sparingly to avoid an overly sweet tea. Stevia is a good choice for those watching their sugar intake.

Agave nectar is also popular. It has a mild, neutral taste. Agave is sweeter than sugar. Use less to start and adjust as needed.

Serving Suggestions

Kesar Chai, or saffron tea, is a delightful and aromatic beverage. Perfect for various occasions, it can elevate your tea-drinking experience. Let’s explore some serving suggestions to make the most of this flavorful drink.

Best Time To Serve

Kesar Chai shines during morning and evening tea times. Its warm, rich flavors make it a comforting choice on chilly days. This tea is also excellent during festive gatherings, adding a special touch to celebrations. Serve it during afternoon breaks for a refreshing pick-me-up.

Accompaniments

Pair Kesar Chai with light snacks like biscuits or cookies. Traditional Indian snacks like samosas or pakoras also complement this tea well. For a sweet treat, serve it with jalebis or gulab jamuns. These combinations enhance the tea’s saffron and spice notes.

Kesar Chai Recipe: How to Make Aromatic Saffron Tea at Home

Credit: rakskitchen.net

Health Benefits

Kesar Chai, also known as saffron tea, is not just a tasty drink. It offers a range of health benefits. This aromatic tea blends saffron with the goodness of traditional chai. Let’s explore its nutritional value and potential health boosts.

Nutritional Value

Saffron is rich in vitamins and minerals. It contains vitamin C, which boosts the immune system. It also has magnesium, which helps with muscle function. Kesar Chai includes antioxidants. These help fight free radicals in the body. The tea also has small amounts of calcium and iron.

Potential Health Boosts

Kesar Chai may improve mood. Saffron has natural compounds that act as mood lifters. Drinking this tea can help reduce anxiety. Saffron is also known to aid in digestion. It can soothe the stomach and reduce bloating. Another benefit is its potential to improve skin health. The antioxidants in saffron help to clear skin and reduce inflammation. This tea may also improve eye health. Saffron contains carotenoids that are good for the eyes.

Frequently Asked Questions

What Is Kesar Chai?

Kesar Chai is a traditional Indian tea made with saffron. It is aromatic and flavorful, often enjoyed for its rich taste and health benefits.

How To Make Kesar Chai?

To make Kesar Chai, brew tea leaves with milk, sugar, and saffron strands. Simmer for a few minutes until flavors blend.

What Are The Benefits Of Kesar Chai?

Kesar Chai offers several benefits, including improved digestion, enhanced mood, and reduced stress. It is also rich in antioxidants.

Can I Use Any Saffron For Kesar Chai?

Yes, you can use any high-quality saffron for Kesar Chai. Ensure the saffron is pure and not mixed with artificial dyes.

Conclusion

Enjoy making your own Kesar Chai at home. It’s simple and delightful. The rich aroma and unique flavor create a perfect tea experience. Share this recipe with friends and family. They’ll love it too. Savor every sip of your homemade Kesar Chai.

Happy brewing!

Pargo Restaurant Recipes: Delicious Dishes to Try at Home

Pargo Restaurant Recipes are a treasure for food lovers. They promise delightful flavors and unique dishes.

Many people dream of recreating their favorite restaurant meals at home. Pargo Restaurant, known for its delicious and diverse menu, offers recipes that make this dream possible. Whether you are a seasoned cook or a beginner, these recipes are easy to follow and bring the restaurant experience to your kitchen.

Imagine serving dishes that taste just like those at Pargo, impressing family and friends. This blog post will guide you through some of the best Pargo Restaurant recipes, helping you create mouth-watering meals. Get ready to explore a world of flavors and elevate your home cooking.

Introduction To Pargo Restaurant

Welcome to the world of Pargo Restaurant, where culinary dreams come true. This delightful eatery promises a unique dining experience. The chefs at Pargo create magic on your plate. Their recipes stand out for their creativity and taste. Let’s dive into the essence of Pargo Restaurant.

History And Inspiration

Pargo Restaurant started as a humble food joint. The founders had a vision of serving unique flavors. They drew inspiration from family recipes and world cuisines. Their dedication and passion quickly made Pargo a favorite. Over the years, it has become a renowned name in the food industry. The restaurant’s history is rich with stories of culinary innovation.

Signature Dishes

Pargo is famous for its signature dishes. Each dish tells a story of flavor and tradition. The Grilled Pargo Fish is a must-try. It is seasoned to perfection and grilled to a golden finish. Another favorite is the Pargo Paella, a delightful mix of rice, seafood, and spices.

The Pargo Tacos are also a hit. They are filled with fresh ingredients and topped with unique sauces. For dessert, try the Pargo Flan. It’s creamy, rich, and the perfect end to a meal. Every dish at Pargo is crafted with love and care.

Pargo Restaurant Recipes: Delicious Dishes to Try at Home

Credit: donahabanarestaurant.com

Essential Ingredients

Essential Ingredients for Pargo Restaurant Recipes

The heart of any great dish lies in its ingredients. At Pargo Restaurant, we believe in using only the best. This ensures every meal is memorable. Let’s explore what makes our dishes unique.

Sourcing Fresh Produce

Fresh produce is vital for flavor and nutrition. We source our vegetables and fruits from local farms. This guarantees they are fresh and full of taste.

Here are some key produce we use:

  • Tomatoes: Juicy and ripe, perfect for sauces and salads.
  • Leafy Greens: Spinach, kale, and lettuce for fresh salads.
  • Root Vegetables: Carrots, potatoes, and beets for hearty dishes.

Spices And Herbs

Spices and herbs add depth to our recipes. They bring out the natural flavors of the ingredients. We use a variety of these to create unique tastes.

Here’s a look at our essential spices and herbs:

Spice/Herb Flavor Profile Common Uses
Garlic Bold and pungent Sauces, stews, marinades
Basil Sweet and peppery Pesto, salads, pizza
Cumin Warm and earthy Curry, soups, rice

Appetizers To Start

At Pargo Restaurant, appetizers set the stage for an unforgettable meal. Our appetizers are crafted to excite your taste buds and prepare you for the main course. Here are two crowd favorites that you can try at home: the classic bruschetta and stuffed mushrooms.

Classic Bruschetta

Bruschetta is a simple yet delicious Italian starter. It’s perfect for any gathering. Fresh tomatoes, garlic, and basil come together on toasted bread. The flavors are vibrant and fresh. This appetizer is sure to impress your guests.

  • Ingredients:
  • 4 ripe tomatoes
  • 3 cloves garlic
  • 1 bunch fresh basil
  • 1 loaf crusty bread
  • 3 tbsp olive oil
  • Salt and pepper to taste
  • Instructions:
    1. Chop tomatoes and garlic finely.
    2. Tear basil leaves and mix with tomatoes and garlic.
    3. Drizzle with olive oil and season with salt and pepper.
    4. Slice bread and toast until golden brown.
    5. Spoon tomato mixture onto bread slices.

    Stuffed Mushrooms

    Stuffed mushrooms are a savory appetizer. They are filled with a rich mixture of cheeses and herbs. This dish is easy to prepare and loved by many.

    • Ingredients:
    • 12 large mushrooms
    • 1/2 cup cream cheese
    • 1/4 cup grated parmesan
    • 2 cloves garlic, minced
    • 1 tbsp chopped parsley
    • Salt and pepper to taste
  • Instructions:
    1. Preheat oven to 375°F (190°C).
    2. Clean mushrooms and remove stems.
    3. Mix cream cheese, parmesan, garlic, and parsley.
    4. Season with salt and pepper.
    5. Stuff each mushroom cap with the cheese mixture.
    6. Place on a baking sheet and bake for 20 minutes.

    Main Course Delights

    Welcome to the heart of Pargo Restaurant Recipes! Our main course delights are sure to impress. Each dish is crafted with care, using fresh ingredients. You’ll find flavors that excite and satisfy. Here, we share two standout recipes: Grilled Salmon and Beef Tenderloin.

    Grilled Salmon

    Grilled Salmon is a favorite at Pargo. It’s a dish that’s both healthy and delicious. Here’s how you can make it at home.

    • Fresh salmon fillets
    • Olive oil
    • Lemon juice
    • Garlic powder
    • Salt and pepper

    Instructions:

    1. Preheat your grill to medium-high heat.
    2. Brush the salmon with olive oil.
    3. Sprinkle garlic powder, salt, and pepper over the fillets.
    4. Grill the salmon for 6-8 minutes on each side.
    5. Squeeze fresh lemon juice over the top before serving.

    The result is a tender, flavorful salmon. Perfect for a light, satisfying meal.

    Beef Tenderloin

    Beef Tenderloin is a classic dish. It’s known for its rich flavor and tenderness. Here’s how to make this elegant dish.

    • Beef tenderloin
    • Butter
    • Fresh thyme
    • Garlic cloves
    • Salt and pepper

    Instructions:

    1. Preheat your oven to 400°F (200°C).
    2. Season the beef with salt and pepper.
    3. In a hot skillet, sear the beef on all sides.
    4. Add butter, thyme, and garlic to the skillet.
    5. Place the skillet in the oven and roast for 20-25 minutes.

    Once done, let the beef rest for 10 minutes before slicing. The result is a juicy, flavorful tenderloin. Ideal for a special dinner.

    Vegetarian Options

    Welcome to Pargo Restaurant’s delightful selection of vegetarian options. Our menu is brimming with fresh, flavorful dishes that cater to your vegetarian lifestyle. Whether you’re a full-time vegetarian or just trying to eat healthier, our vegetarian recipes will leave you satisfied and excited for your next meal.

    Quinoa Salad

    This Quinoa Salad is a crowd favorite. It’s light yet packed with nutrients. Quinoa is a super grain, rich in protein and fiber. Combined with fresh veggies and a tangy dressing, it becomes a perfect meal.

    • 1 cup quinoa
    • 2 cups water
    • 1 cucumber, diced
    • 1 bell pepper, chopped
    • 1/2 cup cherry tomatoes, halved
    • 1/4 cup red onion, finely chopped
    • 2 tbsp olive oil
    • Juice of 1 lemon
    • Salt and pepper to taste

    Instructions:

    1. Rinse the quinoa under cold water.
    2. In a pot, bring water to a boil. Add quinoa.
    3. Reduce heat, cover, and simmer for 15 minutes.
    4. Fluff with a fork and let it cool.
    5. In a large bowl, combine quinoa with veggies.
    6. Drizzle with olive oil and lemon juice.
    7. Season with salt and pepper. Toss to mix.

    Vegetable Stir-fry

    Our Vegetable Stir-Fry is quick, easy, and full of flavor. It’s a perfect way to enjoy a variety of vegetables in one meal. Plus, it’s ready in just 20 minutes!

    • 1 tbsp olive oil
    • 2 cloves garlic, minced
    • 1 inch ginger, grated
    • 1 bell pepper, sliced
    • 1 carrot, julienned
    • 1 zucchini, sliced
    • 1 cup broccoli florets
    • 2 tbsp soy sauce
    • 1 tsp sesame oil
    • 2 tbsp sesame seeds

    Instructions:

    1. Heat olive oil in a large pan over medium heat.
    2. Add garlic and ginger. Sauté for 1 minute.
    3. Add bell pepper, carrot, zucchini, and broccoli.
    4. Stir-fry for 5-7 minutes until vegetables are tender-crisp.
    5. Add soy sauce and sesame oil. Stir well.
    6. Sprinkle with sesame seeds before serving.
    Pargo Restaurant Recipes: Delicious Dishes to Try at Home

    Credit: www.instagram.com

    Delectable Desserts

    Welcome to the sweet world of Pargo Restaurant Recipes. Today, we explore two of our most beloved desserts. Get ready to indulge your taste buds!

    Chocolate Lava Cake

    This dessert is a favorite for chocolate lovers. The gooey center and rich flavor make it irresistible. Here’s how you can make it at home.

    Ingredients Quantity
    Dark Chocolate 200g
    Butter 100g
    Sugar 150g
    Eggs 4
    Flour 50g

    Steps to Make Chocolate Lava Cake:

    1. Preheat oven to 200°C (392°F).
    2. Melt chocolate and butter together.
    3. Mix sugar, eggs, and flour in a bowl.
    4. Combine chocolate mixture with the egg mixture.
    5. Pour into greased molds.
    6. Bake for 12 minutes.

    Tiramisu

    Tiramisu is a classic Italian dessert. It’s light, creamy, and has a perfect coffee flavor. Here’s the recipe to create this delicious treat.

    Ingredients Quantity
    Mascarpone Cheese 250g
    Egg Yolks 4
    Sugar 100g
    Ladyfingers 200g
    Espresso Coffee 200ml
    Cocoa Powder For dusting

    Steps to Make Tiramisu:

    1. Whisk egg yolks and sugar until creamy.
    2. Fold in mascarpone cheese.
    3. Dip ladyfingers in espresso coffee.
    4. Layer ladyfingers and mascarpone mixture in a dish.
    5. Repeat layers.
    6. Chill for at least 4 hours.
    7. Dust with cocoa powder before serving.

    Tips For Perfect Execution

    Executing a recipe to perfection requires more than just following instructions. It involves mastering techniques, focusing on presentation, and understanding the little details. Here are some tips for perfect execution of Pargo Restaurant recipes:

    Cooking Techniques

    Mastering cooking techniques is essential for achieving great results. Here are some key points:

    • Temperature Control: Use a thermometer to ensure the right temperature.
    • Timing: Set timers to avoid overcooking or undercooking.
    • Knife Skills: Properly chop and slice ingredients for even cooking.

    Practice these techniques to improve your cooking skills over time.

    Plating And Presentation

    Presentation is just as important as taste. Follow these tips:

    1. Use Clean Plates: Always start with a clean, dry plate.
    2. Layering: Add depth by layering different components.
    3. Garnish: Use fresh herbs or edible flowers for a pop of color.

    A beautiful presentation enhances the dining experience.

    Tip Importance
    Temperature Control Ensures food is cooked to perfection
    Timing Prevents overcooking or undercooking
    Knife Skills Ensures even cooking
    Use Clean Plates Enhances presentation
    Layering Adds depth to the dish
    Garnish Adds color and appeal

    Focus on these tips to perfect the execution of Pargo Restaurant recipes.

    Pargo Restaurant Recipes: Delicious Dishes to Try at Home

    Credit: palrancho.co

    Pairing With Beverages

    Pairing beverages with your meal at Pargo Restaurant can elevate your dining experience. The right drink enhances the flavors of each dish. Let’s explore some perfect beverage pairings.

    Wine Selections

    Wine offers a sophisticated complement to many dishes. For seafood dishes, a crisp Sauvignon Blanc pairs well. It balances the flavors without overpowering them. Red meats and hearty dishes pair well with a robust Cabernet Sauvignon. It enhances the richness of the dish. For those who enjoy chicken or pasta, a Chardonnay works beautifully. Its subtle flavors harmonize with lighter fare.

    Non-alcoholic Options

    Not everyone drinks alcohol. Pargo Restaurant offers refreshing non-alcoholic options. A sparkling water with a twist of lemon pairs well with most dishes. It cleanses the palate between bites. For a sweeter option, try their house-made lemonade. It pairs especially well with spicy dishes. Herbal teas also offer a delightful pairing. Mint tea, for instance, complements both sweet and savory dishes.

    Conclusion And Final Thoughts

    Discover the charm of Pargo Restaurant Recipes. Delight in simple and delicious dishes to recreate at home. Enjoy the flavors and share with loved ones.

    Pargo Restaurant Recipes offer a delightful culinary journey. Each dish tells a unique story. You can recreate these stories at home. Cooking these recipes brings the restaurant experience to your kitchen. You gain new skills and enjoy delicious meals. Sharing these meals with loved ones creates special memories. It’s a rewarding experience. Now, let’s explore how you can enjoy your creations and what future recipes you might try.

    Enjoying Your Creation

    Savor every bite of your Pargo-inspired dish. Take a moment to appreciate the flavors. Enjoy the textures and aromas. Share your creation with family or friends. Their smiles will make your effort worthwhile. Pair your dish with a fitting beverage. A good drink enhances the meal. Create a restaurant-like atmosphere at home. Light some candles. Play soft music. This makes the dining experience more enjoyable.

    Future Recipe Ideas

    Feel inspired to try more Pargo Restaurant Recipes. Each new recipe offers a chance to learn. Start with simple dishes. Gradually, try more complex ones. Consider experimenting with ingredients. Add your own twist to the recipes. This makes cooking more fun. It also helps you create unique flavors. Keep a recipe journal. Note your experiences and adjustments. This helps you improve. Explore other cuisines. Pargo’s menu features diverse dishes. Trying different recipes broadens your culinary skills. It also makes meal times exciting. Happy cooking! “`

    Frequently Asked Questions

    What Is Pargo Restaurant Famous For?

    Pargo Restaurant is famous for its delicious, authentic recipes. They offer a wide range of flavorful dishes.

    Can You Share A Popular Pargo Recipe?

    Yes, a popular Pargo recipe is their signature grilled fish. It is seasoned with fresh herbs and spices.

    How To Make Pargo’s Special Sauce?

    To make Pargo’s special sauce, combine olive oil, lemon juice, garlic, and herbs. Mix well.

    What Ingredients Are Used In Pargo’s Dishes?

    Pargo’s dishes use fresh, high-quality ingredients. They include seafood, herbs, spices, and seasonal vegetables.

    Conclusion

    Enjoying Pargo Restaurant recipes at home is simple and fun. With these easy steps, you can bring restaurant-quality dishes to your table. Experiment with ingredients and make each dish your own. Cooking can be a joyful experience for everyone. Try these recipes today and delight your taste buds.

    Share your creations with friends and family. Happy cooking!

    Southern Corned Beef And Cabbage Recipe: A Flavorful Tradition

    Craving a taste of Southern comfort? Southern Corned Beef and Cabbage is the perfect dish.

    This classic recipe brings warmth and flavor to your table. Imagine tender corned beef, slow-cooked to perfection, paired with hearty cabbage. This Southern twist on a traditional dish is a favorite for many. It’s simple to make and packed with flavor.

    Whether you’re cooking for family or friends, this recipe is sure to please. The best part? You don’t need to be a culinary expert to get it right. With a few basic ingredients and some patience, you’ll create a meal that everyone will love. So, grab your apron and let’s dive into this delicious Southern Corned Beef and Cabbage recipe!

    Southern Corned Beef And Cabbage Recipe: A Flavorful Tradition

    Credit: www.pauladeen.com

    Introduction To Corned Beef And Cabbage

    Discover the flavorful Southern Corned Beef and Cabbage recipe. This dish combines tender corned beef with seasoned cabbage for a classic comfort meal. Enjoy a hearty, satisfying dinner with this traditional recipe.

    Corned beef and cabbage is a classic dish. It has roots in many cultures. This comforting meal is perfect for family gatherings. It’s a blend of savory flavors that everyone enjoys.

    Historical Background

    Corned beef has an interesting history. It dates back to the 17th century. The term “corned” comes from the large grains of salt used. These grains were called “corns” of salt. They helped preserve the beef for long periods. This was crucial before refrigeration existed.

    Cultural Significance

    Corned beef and cabbage hold a special place in many traditions. It’s especially popular in Irish-American communities. This dish is often served on St. Patrick’s Day. It’s a symbol of celebration and heritage. Families gather to enjoy this hearty meal together. This tradition has been passed down through generations. “`

    Ingredients

    Creating a perfect Southern Corned Beef and Cabbage dish starts with the right ingredients. Each component plays a crucial role in the overall flavor. Let’s break down the essential ingredients.

    Corned Beef Cut

    The cut of corned beef is very important. Choose a brisket cut for tender meat. Brisket has the right amount of fat for flavor. Look for a cut with a good balance of meat and fat. This ensures the beef will be juicy and flavorful.

    Vegetable Selection

    Vegetables add color and flavor to your dish. Cabbage is the star vegetable. Use fresh, firm cabbage for the best texture. Potatoes are another key ingredient. Choose russet or Yukon Gold potatoes. These types hold up well during cooking. Carrots add a touch of sweetness. Use medium-sized carrots, peeled and cut into chunks. Onions also enhance the flavor. Yellow onions work best. Peel and quarter them before adding to the pot.

    These ingredients together create a delicious, hearty meal. Each element complements the others. Make sure to use fresh, high-quality ingredients for the best results.

    Preparation

    Preparing Southern Corned Beef and Cabbage involves several key steps. Each step ensures the flavors meld perfectly. Follow these steps for a delicious and satisfying meal.

    Meat Brining

    Brining the beef is crucial. This process infuses the meat with flavors and keeps it tender.

    • Prepare the brine using water, salt, sugar, and spices like bay leaves, peppercorns, and mustard seeds.
    • Submerge the beef brisket in the brine. Ensure it is fully covered.
    • Refrigerate for at least 5 days. Turn the meat daily for even brining.

    Vegetable Prep

    While the meat brines, prepare the vegetables. Fresh vegetables enhance the dish’s taste.

    1. Peel and chop carrots, potatoes, and onions into large chunks.
    2. Core the cabbage and cut it into wedges.
    3. Keep the vegetables in cold water until ready to cook. This keeps them fresh and crisp.

    These preparation steps ensure your Southern Corned Beef and Cabbage is flavorful and delicious. Brining the meat and prepping the vegetables in advance makes cooking easier and more enjoyable.

    Southern Corned Beef And Cabbage Recipe: A Flavorful Tradition

    Credit: southernbite.com

    Cooking Techniques

    Cooking Southern Corned Beef and Cabbage can be a delightful experience. This dish has two primary methods: boiling and using a slow cooker. Both techniques bring out unique flavors and textures. Let’s explore each method in detail.

    Boiling Method

    The boiling method is traditional. It ensures the corned beef remains tender and juicy. Follow these steps:

    1. Place the corned beef brisket in a large pot.
    2. Add enough water to cover the brisket completely.
    3. Include bay leaves, peppercorns, and garlic for added flavor.
    4. Bring the water to a boil, then reduce heat to a simmer.
    5. Cover and cook for about 2-3 hours until the meat is tender.

    Add cabbage, carrots, and potatoes in the last 30 minutes of cooking. This prevents the vegetables from becoming too soft.

    Slow Cooker Option

    The slow cooker method is convenient. It allows the flavors to meld over a long period. Here’s how:

    • Place the corned beef brisket in the slow cooker.
    • Add water to cover the brisket.
    • Include spices such as bay leaves, peppercorns, and mustard seeds.
    • Set the slow cooker to low heat and cook for 8-10 hours.

    Add cabbage, carrots, and potatoes in the last 2 hours of cooking. This ensures they are perfectly tender and flavorful.

    Both methods result in a delicious Southern Corned Beef and Cabbage dish. Choose the one that best fits your schedule and taste preferences.

    Seasoning And Spices

    When making a delicious Southern Corned Beef and Cabbage recipe, the seasoning and spices play a key role. The right blend of spices can enhance the flavors, making your dish unforgettable. Let’s dive into the traditional and modern spices used in this classic dish.

    Traditional Spices

    Traditional spices are at the heart of a Southern Corned Beef and Cabbage recipe. These spices bring out the savory flavors of the beef and the sweetness of the cabbage. Here are some common spices:

    • Bay Leaves – Adds a subtle, earthy flavor.
    • Mustard Seeds – Gives a slight tangy taste.
    • Black Peppercorns – Adds a bit of heat and depth.
    • Cloves – Provides a warm, sweet flavor.
    • Coriander Seeds – Offers a light, citrusy touch.

    Combine these spices to create a balanced seasoning that complements the corned beef and cabbage. The traditional blend brings a taste of heritage to your meal.

    Modern Twists

    While traditional spices are timeless, adding modern twists can bring new life to your dish. These updated spices can create exciting flavors:

    • Smoked Paprika – Adds a smoky, rich flavor.
    • Garlic Powder – Enhances the overall taste with a garlic kick.
    • Red Pepper Flakes – Introduces a spicy, bold taste.
    • Fennel Seeds – Brings a sweet, anise-like flavor.
    • Turmeric – Adds a warm, earthy flavor and vibrant color.

    Experimenting with these modern spices can give your Southern Corned Beef and Cabbage a unique twist. These flavors can surprise and delight your taste buds.

    Remember, the key to a great dish lies in the balance of flavors. Mix traditional and modern spices to create your perfect blend.

    Serving Suggestions

    Serving Southern Corned Beef and Cabbage can be a delightful experience. The right sides and presentation can elevate this traditional dish. Let’s explore some ways to make your meal memorable.

    Accompaniments

    Consider serving warm, crusty bread with your corned beef and cabbage. It’s perfect for soaking up the tasty juices. Mashed potatoes also pair well. Their creaminess complements the tender meat. Try adding some steamed carrots for a touch of sweetness. They balance the savory flavors nicely.

    Pickles can add a tangy crunch to the meal. They contrast beautifully with the rich meat. For a refreshing option, a simple green salad works wonders. Dress it lightly to keep the focus on the main dish.

    Presentation Tips

    First, arrange the corned beef slices neatly on a platter. This makes serving easier. Place the cabbage wedges around the meat. This creates a visually appealing contrast. Add the carrots and potatoes alongside, ensuring they don’t overwhelm the dish.

    Garnish with fresh parsley or dill. It adds a pop of color and a fresh aroma. Use a large, white platter for the best presentation. It allows the colors of the food to stand out. Serving on a wooden board can also give a rustic, homely feel.

    Health Benefits

    Southern Corned Beef and Cabbage is a traditional dish with many health benefits. This classic meal combines protein-rich beef with nutrient-dense vegetables. It is not just delicious but also good for you.

    Nutritional Value

    This dish offers a balanced mix of vitamins, minerals, and macronutrients. Below is a table showing the nutritional value of the main ingredients:

    Ingredient Calories Protein Carbohydrates Fats
    Corned Beef (100g) 250 27g 0g 15g
    Cabbage (100g) 25 1g 6g 0g
    Carrots (100g) 41 1g 10g 0g
    Potatoes (100g) 77 2g 17g 0g

    Corned beef is a great source of protein and iron. These are essential for muscle health and oxygen transport in the body. Cabbage offers vitamins C and K, which boost your immune system and bone health. Carrots provide beta-carotene, good for eyesight. Potatoes are rich in potassium, which helps regulate blood pressure.

    Balanced Meal

    This dish provides a balanced meal with all essential nutrients. It includes:

    • Proteins: Corned beef supplies high-quality protein.
    • Vitamins: Cabbage and carrots are rich in vitamins C, K, and A.
    • Minerals: Potatoes offer potassium and iron.
    • Fiber: Vegetables in this dish add dietary fiber, aiding digestion.

    Including Southern Corned Beef and Cabbage in your diet supports your overall health. It helps build strong muscles, bones, and a healthy immune system.

    Southern Corned Beef And Cabbage Recipe: A Flavorful Tradition

    Credit: www.deepsouthdish.com

    Variations

    Southern Corned Beef and Cabbage is a classic comfort food. There are many variations that give it a unique twist. You can explore regional differences or even make a vegetarian version.

    Regional Differences

    Southern Corned Beef and Cabbage can vary by region. In the South, it often includes ingredients like bacon and collard greens. These add rich flavors and a Southern touch.

    In the Midwest, this dish might include carrots and potatoes. These vegetables make the dish hearty and filling. Each region has its own take, making every version special.

    Vegetarian Option

    For a vegetarian version, you can use tofu or seitan instead of corned beef. These provide a similar texture and can absorb flavors well.

    Use vegetable broth to cook the cabbage and other vegetables. This keeps the dish flavorful without meat. Adding spices like bay leaves and mustard seeds can enhance the taste.

    Ingredients Vegetarian Substitute
    Corned Beef Tofu or Seitan
    Beef Broth Vegetable Broth
    Traditional Spices Bay Leaves, Mustard Seeds

    Creating a vegetarian version is simple and delicious. You can enjoy the same comforting flavors in a meat-free way.

    Frequently Asked Questions

    What Is Southern Corned Beef And Cabbage?

    Southern corned beef and cabbage is a classic dish. It combines tender corned beef with cooked cabbage. The dish is often served with potatoes and carrots. It’s a comforting meal, perfect for family dinners.

    How Do You Cook Corned Beef And Cabbage?

    To cook corned beef and cabbage, simmer the corned beef in water. Add seasoning and cook until tender. Then, add cabbage, potatoes, and carrots. Cook until vegetables are tender. Serve hot.

    Can You Make Corned Beef And Cabbage In A Slow Cooker?

    Yes, you can make corned beef and cabbage in a slow cooker. Place corned beef and vegetables in the slow cooker. Add water and seasonings. Cook on low for 8-10 hours. Enjoy a tender, flavorful meal.

    What Spices Are Used In Corned Beef?

    Common spices in corned beef include mustard seeds, peppercorns, and bay leaves. Other spices may include coriander, allspice, and cloves. These spices give the dish its unique, savory flavor.

    Conclusion

    Enjoy making this Southern Corned Beef and Cabbage recipe at home. It’s simple. It’s delicious. Perfect for any family dinner. Gather your ingredients. Follow the steps. In no time, you’ll have a hearty meal. Your family will thank you. This recipe brings warmth to your table.

    Try it today. Share the joy of homemade comfort food. Happy cooking!

    Refrigerator Yeast Bread Recipes: Easy and Delicious Homemade Bread

    Baking bread at home is satisfying and fun. Refrigerator yeast bread recipes make it even easier.

    These recipes allow you to prepare dough ahead of time and bake fresh bread on demand. Imagine waking up to the smell of fresh bread baking in your oven. Refrigerator yeast bread recipes offer this convenience. They let the dough rise slowly in the fridge.

    This means you can mix the dough one day and bake it the next. It’s perfect for busy schedules. No need to rush through the process. You can enjoy warm, homemade bread anytime. These recipes are simple and straightforward. Even beginners can try them. So, let’s explore how you can make delicious bread with these easy recipes.

    Introduction To Refrigerator Yeast Bread

    Refrigerator Yeast Bread Recipes

    Imagine the joy of waking up to the smell of fresh bread. With refrigerator yeast bread, this dream can come true. This method allows you to prepare dough, refrigerate it, and bake it later. It’s convenient and perfect for busy schedules.

    What Is Refrigerator Yeast Bread?

    Refrigerator yeast bread is a type of bread dough that you can store in the refrigerator. It uses yeast to rise, but the process is slower due to the cold temperature. This slow rise enhances the flavor and texture of the bread.

    Unlike traditional bread, this method offers flexibility. You can prepare the dough in advance and bake it at your convenience. It’s ideal for those who want fresh bread without the rush.

    Benefits Of Homemade Bread

    Homemade bread offers numerous benefits. Here are some key points:

    • Healthier Ingredients: Control what goes into your bread.
    • Cost-effective: Save money by baking at home.
    • Customization: Add your favorite ingredients.
    • Freshness: Enjoy bread that is always fresh.

    Making bread at home can be a rewarding experience. You know exactly what is in your bread. No preservatives, no artificial flavors. Just pure, simple ingredients.

    Baking bread can also be therapeutic. The process of kneading dough can be soothing. And the aroma of fresh bread can lift your spirits.

    Refrigerator Yeast Bread Recipes: Easy and Delicious Homemade Bread

    Credit: redstaryeast.com

    Essential Ingredients

    Creating delicious bread from your refrigerator is both fun and easy. The right ingredients make all the difference. This section will guide you through the essentials you need.

    Basic Ingredients List

    Begin with simple items. Flour, water, yeast, and salt form the base. Flour gives the bread structure. Use all-purpose flour for best results.

    Water activates the yeast and brings the dough together. Use lukewarm water. It helps the yeast grow. Salt adds flavor and controls yeast activity.

    Other optional ingredients include sugar, milk, and butter. Sugar feeds the yeast. Milk makes the bread tender. Butter adds richness.

    Choosing The Right Yeast

    Yeast is a crucial ingredient. It helps the bread rise. There are different types of yeast. Active dry yeast and instant yeast are common.

    Active dry yeast needs to be dissolved in water first. Instant yeast can be mixed directly with the flour. Each type has its own benefits.

    Pick the yeast that suits your recipe. Instant yeast is quick and easy. Active dry yeast gives a more traditional flavor.

    Store yeast in a cool place. It keeps the yeast fresh. Fresh yeast gives the best results.

    Necessary Equipment

    Embarking on the journey of refrigerator yeast bread recipes can be a delightful experience. To ensure success, having the right equipment is essential. This section covers the necessary tools and gadgets for baking yeast bread from the comfort of your kitchen.

    Must-have Baking Tools

    These tools are essential for any home baker looking to perfect their refrigerator yeast bread recipes:

    • Mixing Bowls: Use large and medium-sized bowls for mixing ingredients and letting the dough rise.
    • Measuring Cups and Spoons: Accurate measurements are crucial for the perfect loaf.
    • Wooden Spoon: Ideal for mixing dough without a stand mixer.
    • Baking Sheet or Loaf Pan: Choose based on the shape and size of your bread.
    • Plastic Wrap or Kitchen Towel: Cover the dough while it rests and rises.

    Optional Gadgets

    While not necessary, these gadgets can make the baking process smoother and more enjoyable:

    • Stand Mixer: Reduces the effort of kneading dough by hand.
    • Instant-Read Thermometer: Ensures your bread is baked to the correct internal temperature.
    • Bread Lame: Helps score the dough for better rise and appearance.
    • Kitchen Scale: Provides precise measurements for consistent results.
    • Cooling Rack: Allows the bread to cool evenly, preventing soggy bottoms.

    Equipped with these tools, you are ready to bake delicious refrigerator yeast bread. Happy baking!

    Refrigerator Yeast Bread Recipes: Easy and Delicious Homemade Bread

    Credit: afewshortcuts.com

    Preparing The Dough

    Preparing the dough is the most crucial step in making refrigerator yeast bread. It sets the foundation for the bread’s texture and flavor. Properly mixed and kneaded dough ensures a delicious loaf. Let’s dive into the details of preparing the dough.

    Mixing Ingredients

    Start by gathering all your ingredients. You will need flour, yeast, water, salt, and sugar. Use fresh ingredients for the best results. Measure each ingredient accurately. This ensures consistency in the dough.

    Combine the dry ingredients first. Mix the flour, yeast, salt, and sugar in a large bowl. Make a well in the center of the dry mix. Pour in the water gradually. Stir with a wooden spoon until a sticky dough forms. Be patient during this process.

    Kneading Techniques

    Once the dough is mixed, it’s time to knead. Kneading develops the gluten, giving the bread its structure. Flour your work surface lightly. Turn the dough out onto the surface.

    Use the heel of your hand to push the dough away from you. Fold it back over itself. Turn the dough a quarter turn and repeat. Continue kneading for 10 minutes. The dough should be smooth and elastic.

    If the dough sticks to your hands, add a little more flour. But avoid adding too much. Excessive flour can make the bread dense. Knead until the dough passes the windowpane test. To do this, stretch a small piece of dough thin. If it doesn’t tear easily, it’s ready.

    Refrigeration Process

    Refrigerating bread dough can change your baking routine. This method offers flexibility and convenience. The dough develops flavor and texture while chilling. Let’s explore the key aspects of the refrigeration process.

    Optimal Refrigeration Time

    The ideal refrigeration time varies. Most recipes suggest 12 to 24 hours. This allows flavors to develop fully. For a milder taste, chill for a shorter period. Longer refrigeration can enhance the tangy flavor. Monitor the dough closely during this time.

    Storing The Dough

    Proper storage is essential for quality results. Use a large, airtight container. The dough will expand as it chills. Ensure the container has enough space. Cover the dough loosely with plastic wrap. This prevents drying out. Keep the dough in the coldest part of the fridge. Consistent temperature is crucial. Avoid frequent opening of the fridge door.

    Baking The Bread

    Baking your refrigerator yeast bread is an exciting step. This is where your dough transforms into a delicious loaf. The process involves preheating the oven, setting the right temperature, and timing the bake correctly. Each step is crucial for perfect bread.

    Preheating The Oven

    Always start by preheating your oven. This ensures even baking. Set your oven to the temperature specified in your recipe. Usually, this is around 375°F (190°C). Let it heat up fully before placing the dough inside. A hot oven helps the bread rise well.

    Baking Time And Temperature

    Place your dough in the preheated oven. Bake it for the time given in your recipe. Most breads take about 25-30 minutes. Keep an eye on the crust. It should turn golden brown. Use a thermometer to check if needed. The internal temperature should be 190°F (88°C). This ensures your bread is cooked through. Enjoy the aroma filling your kitchen!

    Popular Recipes

    Refrigerator yeast bread recipes are convenient. They allow you to prepare dough ahead of time. You can store the dough in the fridge and bake fresh bread later. Let’s explore some popular recipes.

    Classic White Bread

    Classic white bread is a favorite. It is soft and fluffy. Making this bread at home is easy with a few steps.

    • Ingredients:
      • 4 cups all-purpose flour
      • 2 1/4 tsp active dry yeast
      • 2 tbsp sugar
      • 1 1/2 tsp salt
      • 1 1/2 cups warm water
      • 2 tbsp melted butter
    1. Mix flour, yeast, sugar, and salt in a large bowl.
    2. Add warm water and melted butter. Stir until the dough forms.
    3. Knead the dough for 8-10 minutes. It should be smooth and elastic.
    4. Place the dough in a greased bowl. Cover it and refrigerate overnight.
    5. Remove the dough from the fridge. Let it rise for 1-2 hours at room temperature.
    6. Preheat the oven to 375°F (190°C).
    7. Shape the dough into a loaf. Place it in a greased loaf pan.
    8. Bake for 30-35 minutes until golden brown.
    9. Let it cool before slicing.

    Whole Wheat Bread

    Whole wheat bread is healthy. It is rich in fiber and nutrients. This recipe is simple.

    • Ingredients:
      • 3 cups whole wheat flour
      • 1 cup bread flour
      • 2 1/4 tsp active dry yeast
      • 3 tbsp honey
      • 1 1/2 tsp salt
      • 1 1/2 cups warm water
      • 2 tbsp olive oil
    1. Combine whole wheat flour, bread flour, yeast, and salt in a bowl.
    2. Add honey, warm water, and olive oil. Mix until the dough forms.
    3. Knead for 10 minutes until smooth and elastic.
    4. Place the dough in a greased bowl. Cover and refrigerate overnight.
    5. Take out the dough. Let it rise for 1-2 hours at room temperature.
    6. Preheat the oven to 375°F (190°C).
    7. Shape the dough into a loaf. Put it in a greased loaf pan.
    8. Bake for 35-40 minutes until golden brown.
    9. Cool before slicing.
    Refrigerator Yeast Bread Recipes: Easy and Delicious Homemade Bread

    Credit: www.homemadeinterest.com

    Tips And Tricks

    Making bread with yeast can be fun and rewarding. But, getting it right can be tricky. Use these tips and tricks to improve your refrigerator yeast bread recipes.

    Achieving The Perfect Crust

    A perfect crust makes bread taste and look great. Start by preheating your oven. A hot oven helps form a good crust. Use a baking stone or steel if you have one. These hold heat well. Steam your oven in the first few minutes. Put a pan of water at the bottom. Or, spray water inside with a spray bottle. This keeps the crust soft while the bread rises. Once it rises, it will form a nice, crisp crust.

    Storing Baked Bread

    Store your bread properly to keep it fresh. Let the bread cool completely before storing. Wrap it in a clean cloth or place it in a paper bag. This will keep the crust crisp. For longer storage, use plastic wrap or an airtight container. This keeps the bread from drying out. Freeze bread if you cannot eat it in a few days. Slice it first. Then, wrap it in plastic and place it in a freezer bag. Thaw slices at room temperature or in a toaster.

    Frequently Asked Questions

    What Is Refrigerator Yeast Bread?

    Refrigerator yeast bread is a type of bread dough that can be stored in the refrigerator. This allows it to ferment slowly. It offers convenience and flexibility for baking fresh bread.

    How Long Can You Store Yeast Dough In The Fridge?

    You can store yeast dough in the refrigerator for up to three days. This slow fermentation process enhances the flavor of the bread. Ensure it’s stored in an airtight container.

    Can I Bake Bread Straight From The Fridge?

    Yes, you can bake bread straight from the fridge. Allow the dough to come to room temperature first. This ensures even baking and better texture.

    Do Refrigerator Yeast Breads Taste Different?

    Refrigerator yeast breads often have a richer flavor. The slow fermentation process enhances the dough’s taste. It can result in a more complex and tangy flavor profile.

    Conclusion

    Creating delicious bread with refrigerator yeast is simple and rewarding. These recipes fit into busy schedules easily. Let your dough rest overnight and enjoy fresh bread. Baking at home saves money and enhances meals. Try different recipes and discover your favorite flavors.

    Share your homemade bread with family and friends. Enjoy the satisfaction of baking from scratch. Happy baking!

    Substitute for Sumac in a Recipe: Top 7 Flavorful Alternatives

    Are you cooking and realize you’re out of sumac? Don’t worry.

    There’s always a solution in the kitchen. Sumac, a tangy spice from the Middle East, adds a unique flavor to dishes. But, it’s not always available in every pantry. Sumac’s bright, lemony taste brings a special zest to meals. It’s often sprinkled over salads, meats, and rice.

    If you find yourself without sumac, there are several substitutes that can mimic its tartness. These alternatives can help you achieve a similar flavor profile in your recipe. Ready to discover some easy-to-find sumac substitutes? Let’s dive in and explore your options.

    Substitute for Sumac in a Recipe: Top 7 Flavorful Alternatives

    Credit: www.rachaelrayshow.com

    Lemon Zest

    Lemon zest is a great substitute for sumac in recipes. It offers a bright, tangy flavor. This makes it a versatile ingredient in various dishes. Lemon zest is the outer yellow skin of a lemon. It is rich in essential oils, adding a burst of citrusy aroma. This can elevate the taste of your meals significantly.

    Flavor Profile

    Lemon zest has a vibrant and refreshing taste. It is tangy, with a slight bitterness. This makes it a good match for sumac’s tart flavor. The zest also has a fragrant citrus aroma. This can enhance the overall flavor of your dish. It pairs well with many herbs and spices.

    How To Use In Recipes

    Using lemon zest in recipes is easy. You can grate the zest directly onto your dish. This works well for salads, dressings, and marinades. It can also be mixed into sauces and dips. For baked goods, add the zest to the batter or dough. This gives a subtle, citrusy note.

    For savory dishes, sprinkle lemon zest over roasted vegetables. It adds a fresh, tangy touch. You can also mix it into rice or couscous. This makes the grains more flavorful. In soups and stews, lemon zest adds brightness. It balances the richness of the dish.

    Remember to use only the yellow part of the skin. The white pith underneath is bitter. A microplane grater is ideal for zesting. It produces fine, delicate strands. These blend well into your recipes.

    Tamarind Paste

    If you need a substitute for sumac in your recipes, consider using Tamarind Paste. This tangy and versatile ingredient can mimic the unique flavor of sumac. Tamarind paste is easy to find and adds a zesty twist to many dishes.

    Flavor Profile

    Tamarind paste offers a tangy and sweet flavor with a hint of sourness. This distinct taste can closely replicate the citrusy and tart profile of sumac. It adds depth and complexity to your dishes, making it an excellent alternative.

    The paste is made from the pulp of tamarind fruit. Its flavor is more intense than sumac, so use it sparingly. When diluted, tamarind paste can provide the desired tartness and zest without overpowering the dish.

    How To Use In Recipes

    Using tamarind paste as a sumac substitute is simple. Here are some tips:

    • Marinades: Mix tamarind paste with olive oil, garlic, and herbs for a tangy marinade.
    • Dressings: Add a teaspoon to salad dressings for a citrusy kick.
    • Dips: Blend with yogurt, spices, and salt for a zesty dip.

    Below is a quick conversion table for using tamarind paste:

    Sumac Tamarind Paste
    1 tsp 1/2 tsp (diluted)
    1 tbsp 1 tsp (diluted)

    Always start with a small amount and adjust to taste. Tamarind paste can be strong, so a little goes a long way.

    Vinegar

    If you need a substitute for sumac in a recipe, vinegar can be a great alternative. Vinegar offers a tangy and acidic flavor that can mimic the tartness of sumac. It is easily available and can be found in most kitchens. Let’s explore how vinegar can be used as a substitute for sumac.

    Flavor Profile

    Vinegar has a sharp, tangy taste. This acidity can replicate the sour notes of sumac. There are different types of vinegar, each with its own flavor. For instance:

    • Apple cider vinegar: Slightly sweet and fruity.
    • White vinegar: Pure and strong acidity.
    • Red wine vinegar: Rich and robust flavor.

    Each type brings a unique taste. Choose the one that best matches your recipe.

    How To Use In Recipes

    Using vinegar to replace sumac is simple. Here are some tips:

    1. Start with a small amount. About 1 teaspoon of vinegar can replace 1 teaspoon of sumac.
    2. Taste and adjust as needed. Vinegar is potent, so add gradually.
    3. Mix it with herbs. Combine vinegar with dried herbs like thyme or oregano.

    Vinegar works well in salads, marinades, and sauces. Here is an example:

    
    Salad Dressing:
    - 2 tablespoons olive oil
    - 1 tablespoon apple cider vinegar
    - 1 teaspoon dried oregano
    - Salt and pepper to taste
    

    Whisk ingredients together and drizzle over your salad. This simple mix gives a tangy and fresh flavor, similar to sumac.

    Substitute for Sumac in a Recipe: Top 7 Flavorful Alternatives

    Credit: www.cozymeal.com

    Pomegranate Molasses

    Pomegranate molasses is an excellent substitute for sumac in recipes. This thick, tangy syrup is made from reduced pomegranate juice. It offers a unique flavor that can enhance various dishes. Let’s explore its flavor profile and how to use it in recipes.

    Flavor Profile

    Pomegranate molasses has a complex flavor. It combines sweet and sour notes. The syrup is intensely tangy with a hint of sweetness. Its deep, fruity taste can mimic sumac’s tartness. This makes it a suitable alternative in many recipes.

    How To Use In Recipes

    Use pomegranate molasses in marinades. Mix it with olive oil, garlic, and herbs. This blend is perfect for chicken, lamb, or beef. It adds a rich, tangy flavor to grilled meats.

    Drizzle pomegranate molasses over roasted vegetables. It enhances their natural sweetness. Try it on carrots, beets, or sweet potatoes. The syrup’s acidity balances their flavors.

    Add it to salad dressings. Combine it with olive oil and lemon juice. This dressing pairs well with mixed greens, nuts, and cheese. It brings a vibrant taste to your salads.

    Pomegranate molasses can also be used in dips. Stir it into hummus or baba ganoush. It adds a unique, tangy twist. Serve these dips with fresh vegetables or pita bread.

    Experiment with pomegranate molasses in your recipes. Its versatility and distinct flavor make it a great sumac substitute.

    Lemon Juice

    Sumac is a popular spice in Middle Eastern cuisine, known for its tangy flavor. If you don’t have sumac, lemon juice can be an excellent substitute. Lemon juice brings a similar tartness and brightness to dishes, making it a versatile replacement.

    Flavor Profile

    Lemon juice offers a fresh, citrusy flavor with a hint of sweetness. Its acidity can enhance the taste of many dishes, adding a vibrant, zesty note. Like sumac, it provides a sharp, tangy taste that can brighten up any recipe.

    How To Use In Recipes

    Using lemon juice as a substitute for sumac is simple. Here are some ways to incorporate it into your cooking:

    • Salads: Drizzle lemon juice over salads for a fresh, tangy flavor.
    • Marinades: Use lemon juice in marinades for meat or vegetables. It tenderizes and adds zest.
    • Dressings: Combine lemon juice with olive oil, garlic, and herbs for a delicious dressing.
    • Seasoning: Sprinkle lemon juice over grilled fish or chicken for a burst of flavor.
    Recipe How to Use Lemon Juice
    Hummus Add 1-2 tablespoons of lemon juice for a tangy twist.
    Tabbouleh Mix lemon juice with parsley, tomatoes, and bulgur for extra zing.
    Grilled Vegetables Drizzle lemon juice before serving for added brightness.

    Remember, lemon juice is more potent than sumac, so start with a small amount and adjust to taste. Its versatility makes it an essential ingredient in your kitchen.

    Citric Acid

    Finding a substitute for sumac in recipes can be challenging. One excellent option is citric acid. Citric acid is a natural compound found in citrus fruits. It is known for its tangy and sour flavor. This makes it a great alternative to sumac.

    Flavor Profile

    Citric acid has a sharp, tangy taste. It mimics the tartness of sumac well. This makes it a suitable replacement in many dishes. Its sour notes add brightness to recipes. It enhances the overall flavor without overpowering other ingredients.

    How To Use In Recipes

    To use citric acid in recipes, start with a small amount. Usually, a pinch or two is enough. Sprinkle it over salads or mix it into dressings. You can also add it to marinades and rubs. This will give your dishes that desired tangy kick. Adjust the amount based on your taste preference. Citric acid is potent, so a little goes a long way.

    Za’atar

    Za’atar is a flavorful spice blend commonly used in Middle Eastern cuisine. It has a complex taste that can elevate many dishes. If you need a substitute for sumac in a recipe, za’atar can be a great option.

    Flavor Profile

    Za’atar typically contains a mix of dried thyme, sesame seeds, sumac, and salt. The blend provides a herbaceous and slightly nutty flavor. Its sumac component adds a touch of tanginess. This makes za’atar a well-rounded and versatile spice.

    How To Use In Recipes

    Using za’atar in recipes is simple and effective. Here are some ideas:

    • Sprinkle on salads: Add za’atar to salads for extra flavor.
    • Season meats: Rub za’atar on chicken, beef, or lamb before cooking.
    • Mix with olive oil: Combine za’atar with olive oil as a dip for bread.
    • Add to roasted vegetables: Toss vegetables with za’atar before roasting.

    Za’atar can also be used in marinades or sprinkled over hummus. Its diverse flavor makes it an excellent substitute for sumac.

    Substitute for Sumac in a Recipe: Top 7 Flavorful Alternatives

    Credit: www.thespicehouse.com

    Frequently Asked Questions

    What Can I Use Instead Of Sumac?

    You can use lemon zest, vinegar, or tamarind as substitutes for sumac. These ingredients provide a similar tangy flavor.

    Is Lemon Juice A Good Sumac Substitute?

    Yes, lemon juice can be a good substitute for sumac. It offers a similar tart and tangy taste.

    Can I Replace Sumac With Vinegar?

    Yes, vinegar can replace sumac in recipes. Choose apple cider or red wine vinegar for the best results.

    What Spice Is Similar To Sumac?

    Tamarind is a spice similar to sumac. It provides a sour and tangy flavor, much like sumac.

    Conclusion

    Finding a substitute for sumac in recipes is easy. Options like lemon zest, vinegar, or tamarind work well. They add the needed tangy flavor. Experiment with these alternatives. Each gives a unique twist to your dish. You won’t miss sumac with these substitutes.

    Cooking is about creativity. Enjoy trying new flavors. Happy cooking!

    Macaroni And Cheese Pizza Recipe: Ultimate Comfort Food Fusion

    Who doesn’t love pizza? And who can resist a classic macaroni and cheese?

    Imagine combining these two favorites into one delicious dish. Yes, we’re talking about a Macaroni and Cheese Pizza! This recipe is a comfort food dream come true. It brings together the creamy, cheesy goodness of macaroni and cheese with the crispy, savory delight of pizza.

    Perfect for family dinners or casual get-togethers, it’s a unique twist that will surprise and delight everyone. Whether you’re a pizza lover, a mac and cheese fan, or both, this recipe is sure to become a new favorite. Read on to discover how to create this mouthwatering masterpiece in your own kitchen.

    Macaroni And Cheese Pizza Recipe: Ultimate Comfort Food Fusion

    Credit: www.thegunnysack.com

    Ingredients

    The key to a delicious Macaroni And Cheese Pizza lies in its ingredients. Choosing the right components will make your pizza a hit. Let’s break down the essential ingredients you will need.

    Pasta

    The foundation of this recipe is the pasta. Use elbow macaroni for the best texture. Cook the pasta until al dente. This ensures it holds up well during baking.

    • 1 cup of elbow macaroni
    • Boil as per package instructions
    • Drain and set aside

    Cheese

    Cheese is the star of this dish. Use a mix of cheeses for the best flavor. Cheddar and mozzarella work great together.

    Cheese Type Quantity
    Cheddar Cheese 1 cup, shredded
    Mozzarella Cheese 1 cup, shredded

    Pizza Dough

    The base of your pizza is equally important. Use a pre-made pizza dough for convenience. If you prefer homemade, ensure it is rolled thin and even.

    1. 1 pre-made pizza dough
    2. Roll out to a 12-inch circle
    3. Place on a baking sheet

    Additional Toppings

    Add extra toppings to enhance your pizza. Choose your favorites from the list below.

    • Cooked bacon bits
    • Chopped green onions
    • Sliced mushrooms
    • Cherry tomatoes, halved

    These toppings add flavor and texture to your pizza. Customize it to your liking!

    Preparation Steps

    Are you ready to make the best Macaroni and Cheese Pizza? Follow these simple steps to prepare this delicious dish. It’s easy, fun, and perfect for a cozy night in.

    Cooking The Macaroni

    First, boil a pot of water. Add a pinch of salt. This helps flavor the pasta. Once boiling, add the macaroni. Cook until al dente. This usually takes about 7-8 minutes. Drain the water. Set the macaroni aside.

    Preparing The Cheese Sauce

    Melt some butter in a pan over medium heat. Add flour to the melted butter. Stir constantly to form a smooth paste. This is your roux. Slowly pour in milk. Keep stirring to avoid lumps. The sauce will start to thicken. Add shredded cheese to the sauce. Stir until the cheese melts completely. Your cheese sauce is ready. Mix the sauce with the cooked macaroni.

    Assembling The Pizza

    Assembling the pizza is the most fun part of making Macaroni and Cheese Pizza. It’s where your creativity shines. This section will guide you through rolling out the dough and layering the ingredients perfectly. Let’s get started!

    Rolling Out The Dough

    First, ensure your dough is at room temperature. This makes it easier to handle. Dust your work surface with flour. Place the dough on the surface. Use a rolling pin to flatten it out. Aim for an even thickness. A 12-inch circle works best. If the dough sticks, add more flour. Once rolled out, transfer it to a pizza stone or baking sheet.

    Layering Ingredients

    Now, spread a thin layer of your favorite pizza sauce. Next, spoon the cooked macaroni and cheese over the sauce. Spread it evenly. Sprinkle shredded mozzarella cheese on top. This adds an extra cheesy layer. Add a bit of parmesan for more flavor. Finally, season with salt and pepper. You can also add herbs like oregano or basil.

    Your pizza is now ready for the oven. Bake at 450°F for 10-15 minutes. Look for a golden crust and bubbling cheese. Enjoy your homemade Macaroni and Cheese Pizza!

    Macaroni And Cheese Pizza Recipe: Ultimate Comfort Food Fusion

    Credit: 4sonrus.com

    Baking Instructions

    Baking the Macaroni and Cheese Pizza to perfection is key. Follow these steps for a deliciously crispy crust and creamy topping. Your family and friends will love the result!

    Ideal Temperature

    Preheat your oven to 425°F (220°C). This temperature ensures the crust gets crispy. The cheese melts evenly. Always use a preheated oven. It provides consistent heat throughout the baking process. A hot oven is essential for a perfect pizza.

    Baking Time

    Place the pizza in the center of the oven. Bake it for 15-20 minutes. Watch for a golden-brown crust. The cheese should bubble slightly. If you prefer a crispier crust, bake it a few minutes longer. Be careful not to burn the edges. Check the pizza at the 15-minute mark. Adjust time as needed.

    Serving Suggestions

    Serving suggestions for Macaroni and Cheese Pizza can elevate your dining experience. Let’s explore some great ideas to make your meal even more delightful.

    Perfect Pairings

    Pairing the right sides with your Macaroni and Cheese Pizza can create a balanced meal. Here are some ideas:

    • Green Salad: Fresh greens with a light vinaigrette can complement the rich flavors.
    • Garlic Bread: Crispy garlic bread adds a wonderful texture contrast.
    • Tomato Soup: A warm bowl of tomato soup is a classic comfort food pairing.
    • Grilled Vegetables: Lightly charred vegetables like zucchini, bell peppers, and asparagus add color and nutrition.
    • Fruit Salad: A mix of fresh fruits provides a sweet and refreshing end to your meal.

    Presentation Tips

    How you present your Macaroni and Cheese Pizza can make a big difference. Here are some tips:

    1. Use a Pizza Stone: A pizza stone helps in even cooking and gives a crispy base.
    2. Garnish: Sprinkle fresh herbs like parsley or basil for added color and aroma.
    3. Serve Hot: Ensure the pizza is served hot to enjoy the gooey cheese.
    4. Use a Pizza Cutter: A sharp pizza cutter will give you clean slices.
    5. Plating: Use a large wooden board or a colorful plate to enhance the visual appeal.

    By following these serving suggestions, your Macaroni and Cheese Pizza will not only taste great but also look inviting and be well-balanced.

    Variations

    Macaroni and cheese pizza is a delightful twist on two favorite dishes. It’s creamy, cheesy, and oh-so-satisfying. While the classic version is hard to beat, there are many ways to customize it. Whether you have dietary restrictions or just like to try new things, these variations will inspire you.

    Gluten-free Option

    For a gluten-free macaroni and cheese pizza, start with a gluten-free pizza crust. Many stores offer pre-made gluten-free crusts that are delicious and easy to use. Choose your favorite gluten-free pasta for the mac and cheese portion. Look for pasta made from rice, quinoa, or corn. Cook the pasta as directed, then mix with your favorite cheese sauce. Spread the cheesy pasta over the gluten-free crust. Bake until bubbly and golden.

    Vegan Alternative

    If you prefer a vegan version, it’s simple to make. Use a vegan pizza crust, which is often available at grocery stores. For the macaroni, choose a pasta made from lentils or chickpeas. Cook the pasta and set aside. Create a creamy vegan cheese sauce using cashews, nutritional yeast, and plant-based milk. Blend until smooth and creamy. Mix the sauce with the cooked pasta. Spread the cheesy pasta over the vegan crust. Bake until hot and enjoy.

    Macaroni And Cheese Pizza Recipe: Ultimate Comfort Food Fusion

    Credit: www.scatteredthoughtsofacraftymom.com

    Frequently Asked Questions

    What Ingredients Are Needed For Macaroni And Cheese Pizza?

    You will need macaroni, cheese, pizza dough, milk, butter, and flour. Optionally, you can add toppings like bacon or breadcrumbs.

    How Do You Cook The Macaroni For The Pizza?

    Boil the macaroni according to the package instructions. Drain and set aside to be used as topping.

    Can I Use Store-bought Pizza Dough?

    Yes, store-bought pizza dough is convenient and works well for this recipe. Ensure it is thawed and ready to use.

    What Type Of Cheese Works Best?

    Cheddar and mozzarella cheese are ideal for macaroni and cheese pizza. They melt well and provide a delicious flavor.

    Conclusion

    Macaroni and cheese pizza is a delicious twist on classic dishes. It’s easy to make and loved by all ages. Perfect for family dinners or casual gatherings. The creamy cheese blends perfectly with crispy pizza crust. Try this recipe today and enjoy a tasty, comforting meal.

    Your taste buds will thank you! Enjoy the simple joy of this unique pizza. Happy cooking!

    How Much Caffeine in a Latte: Uncover the Surprising Truth

    A typical latte contains about 63-126 milligrams of caffeine. The exact amount depends on factors like coffee type and serving size.

    Are you a latte lover? Ever wondered about its caffeine content? Knowing how much caffeine is in your latte can help you manage your daily intake. Many people enjoy lattes for their creamy texture and rich flavor, but caffeine levels can vary.

    This is important for those sensitive to caffeine or trying to limit their consumption. Understanding the caffeine content in a latte can help you make better choices for your health and lifestyle. So, let’s dive into the details and see what makes your favorite latte tick!

    How Much Caffeine in a Latte: Uncover the Surprising Truth

    Credit: www.healthline.com

    Introduction To Lattes And Caffeine

    Welcome to our detailed guide on lattes and caffeine. Many coffee lovers enjoy lattes. They are a popular choice at coffee shops worldwide. But how much caffeine does a latte contain? In this blog post, we will explore this question.

    What Is A Latte?

    A latte is a coffee drink. It is made with espresso and steamed milk. The drink is usually topped with a small amount of milk foam. Lattes are known for their creamy texture. They have a smooth taste, making them a favorite for many.

    Common Ingredients

    The main ingredients in a latte are espresso and milk. Espresso is a strong coffee made by forcing hot water through coffee grounds. Steamed milk is milk that has been heated and frothed. This process creates a smooth and velvety texture. Some lattes include flavor syrups like vanilla or caramel. These add a sweet taste to the drink.

    How Much Caffeine in a Latte: Uncover the Surprising Truth

    Credit: www.reddit.com

    Caffeine Content In Coffee

    Understanding the caffeine content in your latte can be crucial. Caffeine levels vary based on the type of coffee beans and brewing methods. Let’s explore these factors to help you make informed choices.

    Types Of Coffee Beans

    Different coffee beans contain different amounts of caffeine. Arabica beans have less caffeine than Robusta beans. Robusta beans are often used for a stronger kick. They contain almost twice the caffeine of Arabica beans. This difference impacts the overall caffeine content in your latte.

    Brewing Methods

    Brewing methods also affect caffeine content. Espresso-based drinks like lattes have concentrated caffeine. A single shot of espresso contains about 63 mg of caffeine. The more shots in your latte, the higher the caffeine content. Drip coffee, on the other hand, extracts caffeine differently. It tends to have more caffeine per ounce than espresso. Understanding these methods helps you control your caffeine intake.

    Comparing Caffeine Levels

    Comparing caffeine levels in different coffee drinks can be eye-opening. Knowing the caffeine content helps you make better choices. Let’s explore how espresso, drip coffee, and lattes stack up.

    Espresso Vs. Drip Coffee

    Espresso is known for its strong flavor. A single shot of espresso contains about 63 milligrams of caffeine. In contrast, an 8-ounce cup of drip coffee has around 95 milligrams. While espresso packs a punch, drip coffee provides more caffeine in a single serving.

    Latte Vs. Other Coffee Drinks

    A latte combines espresso with steamed milk. A standard latte has one or two shots of espresso. This means a latte has 63 to 126 milligrams of caffeine. Compare this to a cappuccino, which also has one or two shots of espresso but less milk. The caffeine content remains the same, but the texture differs.

    An Americano, another popular coffee drink, has espresso and hot water. It contains the same amount of caffeine as a latte but with a stronger taste. Knowing these differences helps you choose the right drink for your caffeine needs.

    Factors Affecting Caffeine In A Latte

    The amount of caffeine in a latte can vary. Several factors influence these variations. Understanding these factors helps you know how much caffeine you consume. Here are the main factors that affect caffeine content in a latte:

    Milk Ratio

    The ratio of milk to espresso affects the caffeine content. A standard latte has more milk. This can dilute the strength of the espresso. In contrast, a latte with less milk will have a stronger coffee flavor. It will also have more caffeine per sip.

    Consider the following table:

    Milk Ratio Caffeine Content
    1:1 (Milk:Espresso) High
    2:1 (Milk:Espresso) Moderate
    3:1 (Milk:Espresso) Low

    Shot Count

    The number of espresso shots is another crucial factor. More shots mean more caffeine. A single-shot latte has less caffeine than a double-shot latte. Espresso shots can be customized based on your preference.

    • Single Shot: Approximately 64 mg of caffeine.
    • Double Shot: Approximately 128 mg of caffeine.
    • Triple Shot: Approximately 192 mg of caffeine.

    Knowing the shot count helps you manage your caffeine intake. Always check the number of shots in your latte.

    Caffeine’s Impact On The Body

    Caffeine’s impact on the body varies from person to person. It depends on factors like age, weight, and tolerance. Understanding how caffeine affects the body can help you make informed choices about your latte consumption.

    Immediate Effects

    Drinking a latte gives you a quick energy boost. Caffeine stimulates the central nervous system. You may feel more alert and focused. Your heart rate might increase slightly. Some people experience a rise in blood pressure. These effects can start within 15 minutes of consumption. They usually peak after about an hour.

    Long-term Effects

    Regular caffeine consumption can lead to tolerance. Your body may require more caffeine to achieve the same effects. Long-term use can affect sleep patterns. You may find it harder to fall asleep or stay asleep. Some studies suggest caffeine can have positive effects, like reducing the risk of certain diseases. However, excessive intake might lead to negative health outcomes. It’s important to monitor your caffeine consumption to maintain a healthy balance.

    Balancing Your Caffeine Intake

    Understanding how much caffeine is in your latte is crucial. It helps you manage your daily intake effectively. Caffeine can boost your energy and focus. But too much can lead to health issues. Let’s explore how you can balance your caffeine intake.

    Recommended Daily Limits

    The FDA suggests limiting caffeine to 400 mg per day. This is about four 8-ounce cups of coffee. A standard latte usually has 80-100 mg of caffeine. Here’s a quick breakdown:

    Drink Type Caffeine Content (mg)
    Regular Coffee (8 oz) 95
    Espresso (1 oz) 63
    Latte (8 oz) 80-100

    Stick to the recommended limits for a healthy lifestyle. Pay attention to other sources of caffeine too. This includes tea, energy drinks, and even some foods.

    Signs Of Overconsumption

    Too much caffeine can cause various symptoms. Here are some common signs:

    • Restlessness
    • Insomnia
    • Headaches
    • Rapid heartbeat
    • Jitters

    If you experience these, reduce your intake. Switch to decaf options. Or enjoy smaller servings. Your body will thank you.

    Decaf Options And Alternatives

    If you love lattes but need to cut back on caffeine, you have options. Decaf lattes and other alternatives can still provide a delightful experience. Let’s explore some popular choices that won’t keep you up all night.

    Decaf Lattes

    Decaf lattes use decaffeinated coffee beans. These beans undergo a process to remove most of the caffeine. The flavor remains, but the jittery effects do not. This makes decaf lattes a perfect choice for late afternoons or evenings. You can enjoy the rich taste without worrying about sleepless nights.

    Herbal Teas And Other Drinks

    Herbal teas offer a caffeine-free option. Chamomile, peppermint, and rooibos are popular choices. They provide unique flavors and health benefits. Herbal teas can be soothing and relaxing. Another option is golden milk. Made with turmeric, milk, and spices, it is warm and comforting. These alternatives give you a variety of choices without caffeine.

    How Much Caffeine in a Latte: Uncover the Surprising Truth

    Credit: www.baristadelcaffe.co.uk

    Frequently Asked Questions

    How Much Caffeine Is In A Typical Latte?

    A typical 8-ounce latte contains about 63-126 mg of caffeine. The exact amount depends on the number of espresso shots used.

    Does A Latte Have More Caffeine Than Coffee?

    No, a latte generally has less caffeine than a regular brewed coffee. A standard 8-ounce brewed coffee has about 95 mg of caffeine.

    Is The Caffeine Content In Lattes Consistent?

    No, the caffeine content in lattes can vary. It depends on the number of espresso shots and the type of coffee beans used.

    Can I Reduce The Caffeine In My Latte?

    Yes, you can reduce the caffeine by requesting fewer espresso shots. You can also opt for decaffeinated espresso.

    Conclusion

    To sum up, understanding the caffeine content in your latte helps. It allows better control over your caffeine intake. This knowledge can lead to healthier choices. Remember, moderation is key. Too much caffeine can cause unwanted effects. Always check the type and size of your latte.

    Different types have different caffeine levels. Keep enjoying your lattes, but stay informed. This way, you can savor your drink without worry.